
Everyone knows filters that can stylize 2D pictures, but did you know you can do the same with 3D models? Breathe new life into your old models with one of these simple techniques.
Before we start
Editing 3D meshes can sound difficult but do not fear; we’re going to be doing some really simple edits. First, grab a copy of Meshmixer, a free, easy to use, but powerful software for editing 3D models. It’s available for both Windows and Mac (no Linux support though).
Why Meshmixer?
Meshmixer is one of the most useful tools for editing and repairing models for 3D printing. Developed by Autodesk, it includes features like plane cuts, hollowing, adding custom supports and much more. In your typical workflow, it will fit as a step between creating/downloading model and slicing. However, you can even create some simple models directly in Meshmixer. If you’ve never used it before, now is the perfect time to give it a shot.
Low polygon style
Low poly art has recently become very popular. You can see it very often in video games and illustrations. It’s not unusual that a low poly version of a model will become more popular than it’s original smooth predecessor.
Low poly: Our favorites from Thingiverse
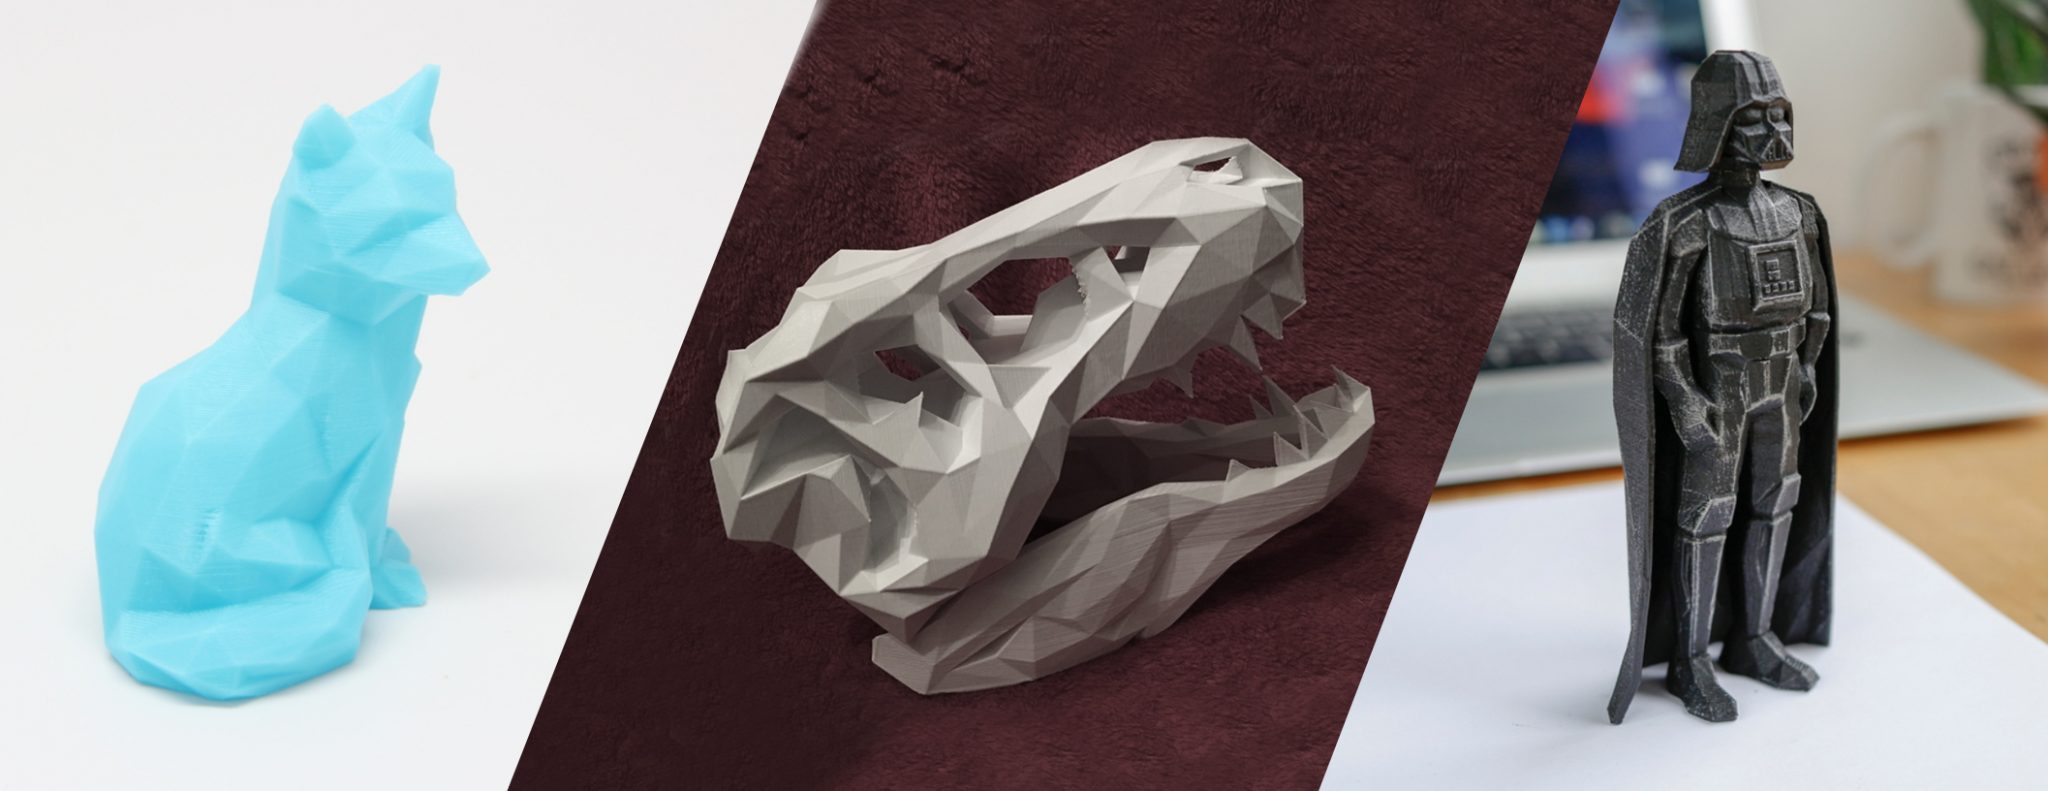
Here are some of our favorite low poly models from Thingiverse. The Low poly fox is the perfect example that sometimes less detail is better than millions of triangles. The T-Rex skull gives a whole different vibe when low poly and would look great printed with a metallic-like filament. The low poly Darth Vader was recently subject to some controversy as Disney pulled the models from Thingiverse, you can read more about it in the article from ALL3DP. Nevertheless, the models have been uploaded again as “Space toys”.
The core of this effect is that everything is made out of a low number of triangles. Our 3D models are already made out of triangles, so we just have to decrease their amount. Luckily, there is a function for that in Meshmixer called Reduce.
- Open Meshmixer and drag and drop your model into the Meshmixer window
- Select everything by pressing CTRL+A (or CMD+A on Mac)
- Press Shift+R or select Edit->Reduce from the new menu that appeared on your screen
- Change Reduce target from Percentage to Triangle Budget in the drop-down menu.
- Adjust Tri count to your liking. Depending on the complexity of your model the ideal value will be between 250-2000
- Hit Accept when you’re happy with the result
- Export the mesh using File->Export, choose STL as file format
- Slice the exported model with Slic3r PE, PrusaControl or your another favorite slicer
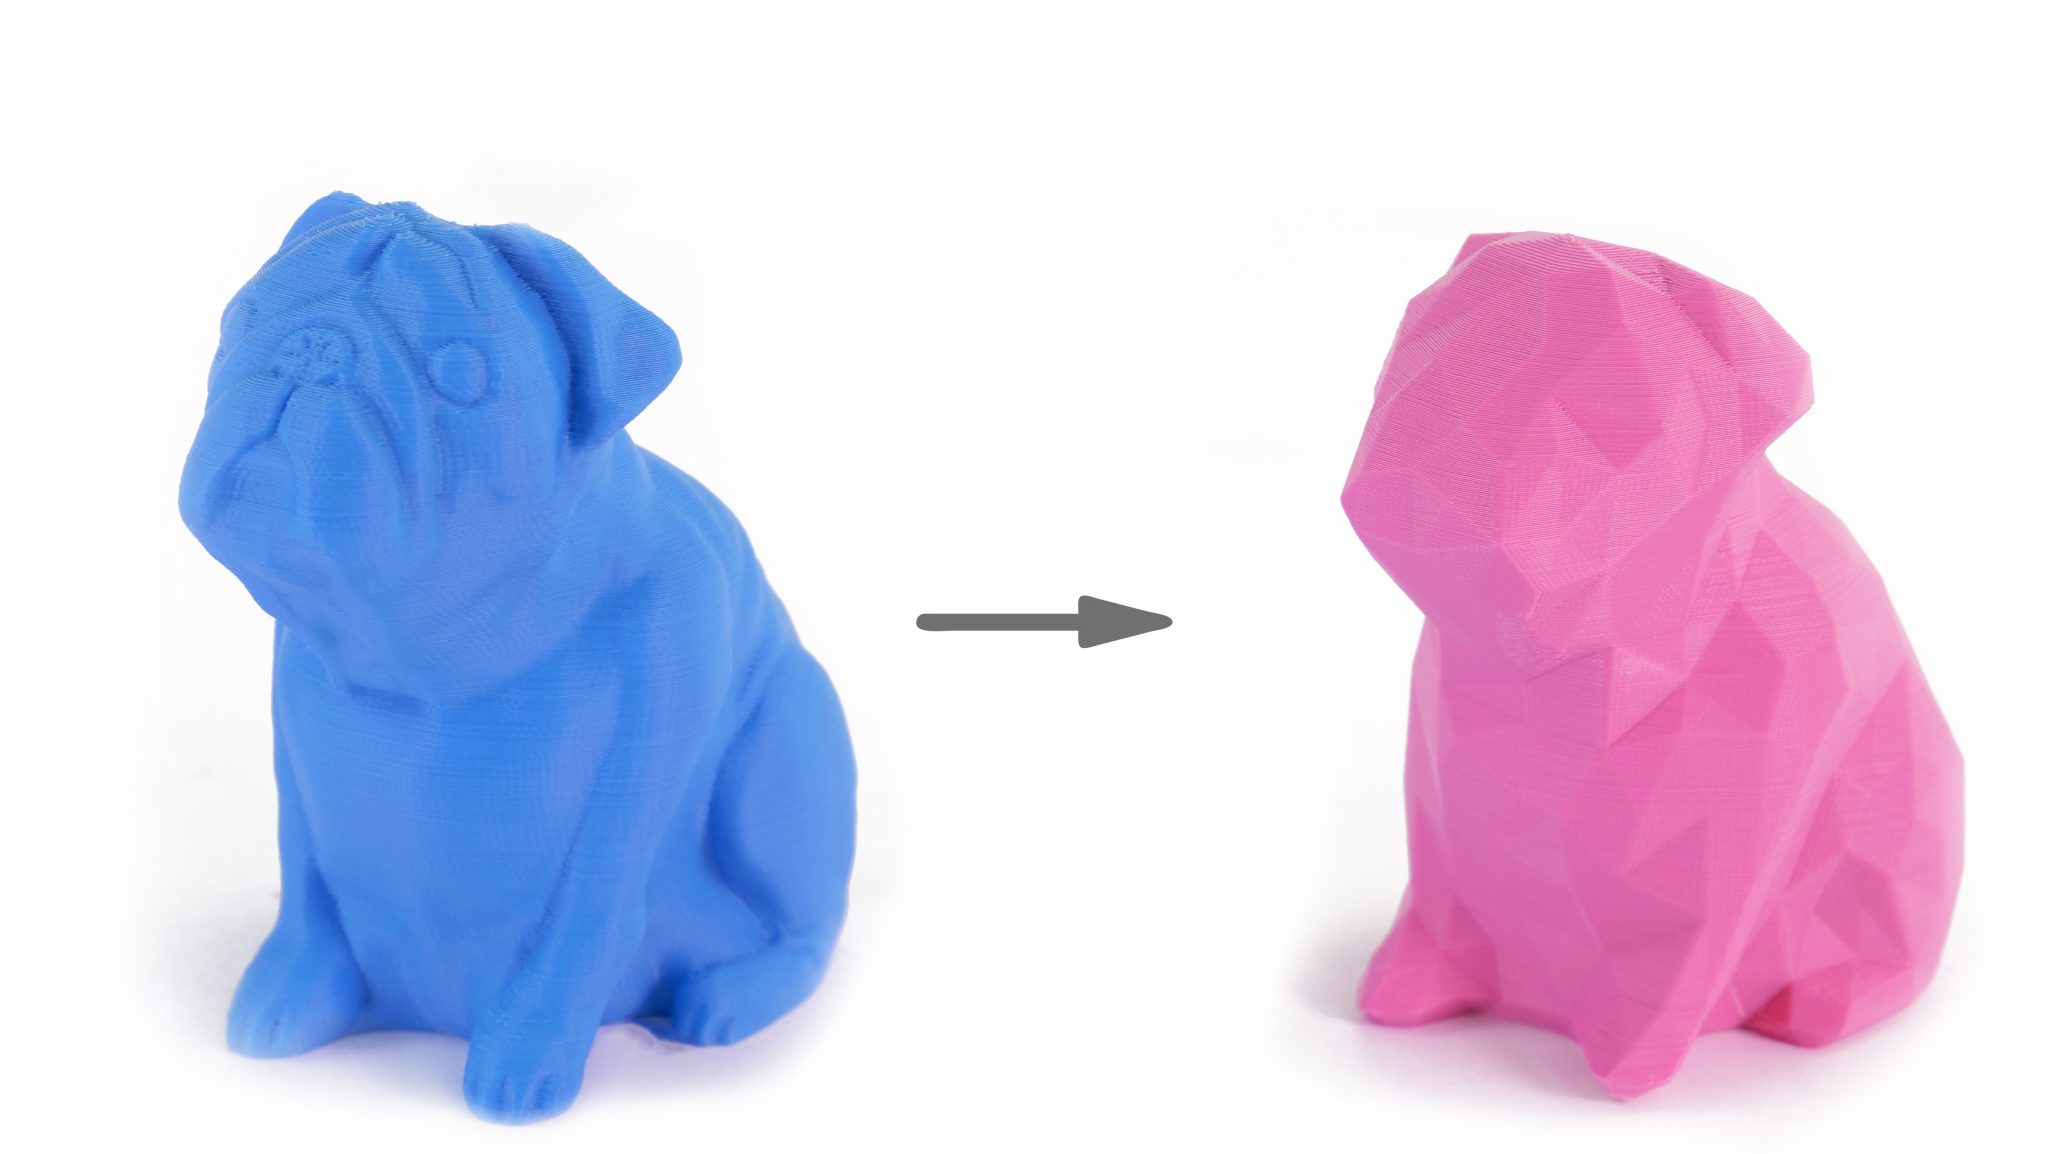
Conversion to Low poly Buddy (STL download – 20 KB)
Voxelization
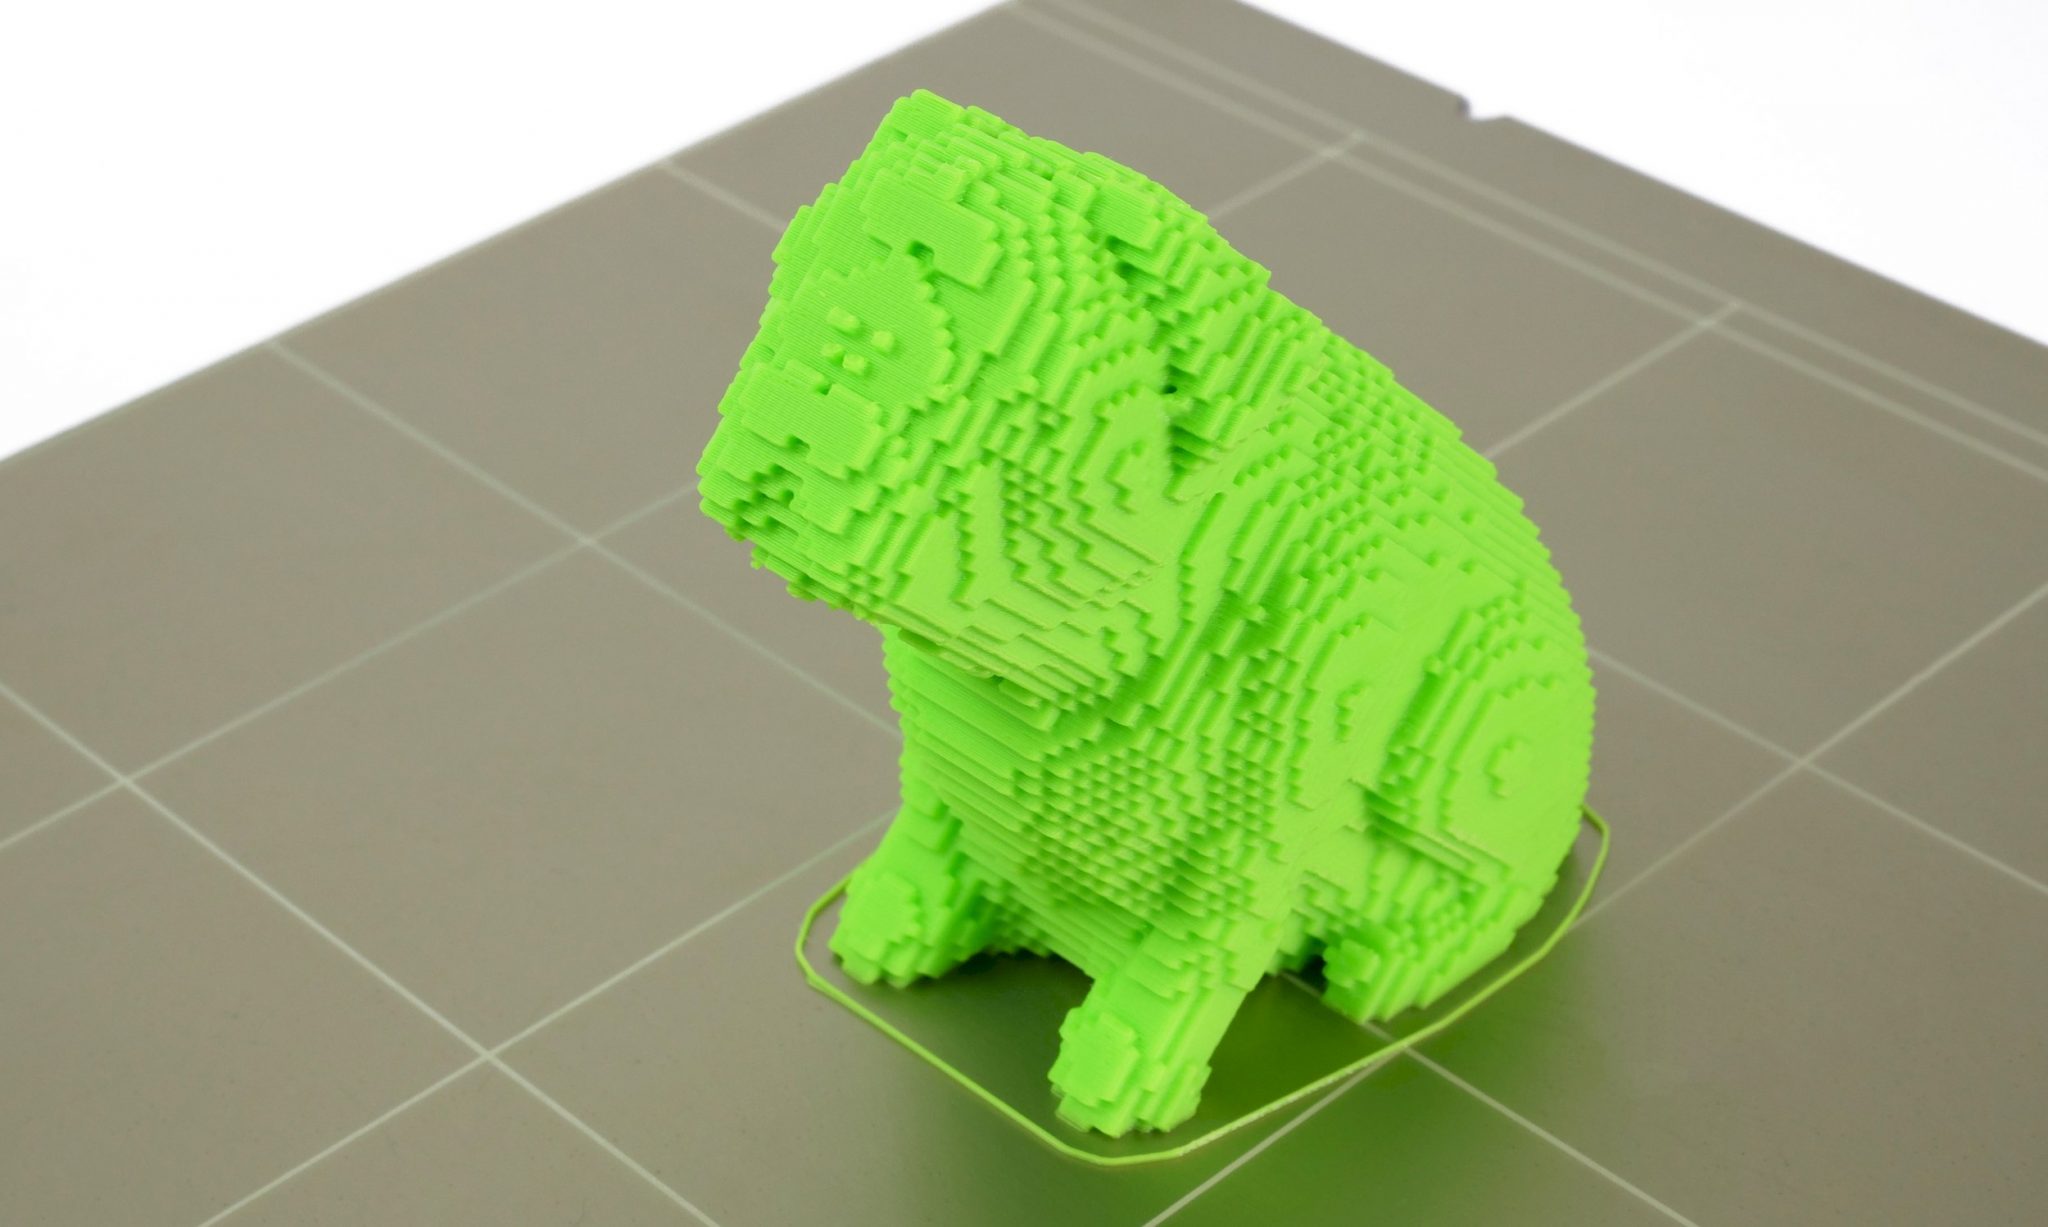
Voxel is a 3D equivalent of a 2D pixel, and just like many pixels create an image, using a large number of cubes can create an attractive 3D model. The downside of using this style is the need to use supports. Even if the model previously had overhangs printable without supports, they are now replaced with overhanging cubes, which cannot be printed without supports.
- Open Meshmixer and drag and drop your model into the Meshmixer window
- Select Edit -> Make Solid
- Change Solid Type from Fast to Blocky in the drop-down menu
- Now just adjust Solid accuracy to increase or decrease the number of cubes
- You’ll have to hit Update every time you adjust the values to see the result
- Hit Accept when you’re happy with the result
- Export the mesh using File->Export, choose STL as file format
- Slice the exported model with Slic3r PE, PrusaControl or your another favorite slicer
Thanks to Arjan Westerdiep, voxelization can also be done automatically in your browser: http://drububu.com/miscellaneous/voxelizer/
- Drag and drop your model to the web app
- Set the voxel count to your liking using the slider
- Make sure you set the other value to 1.0 otherwise there will be gaps between the individual cubes.
Voxelization: Our favorites from Thingiverse
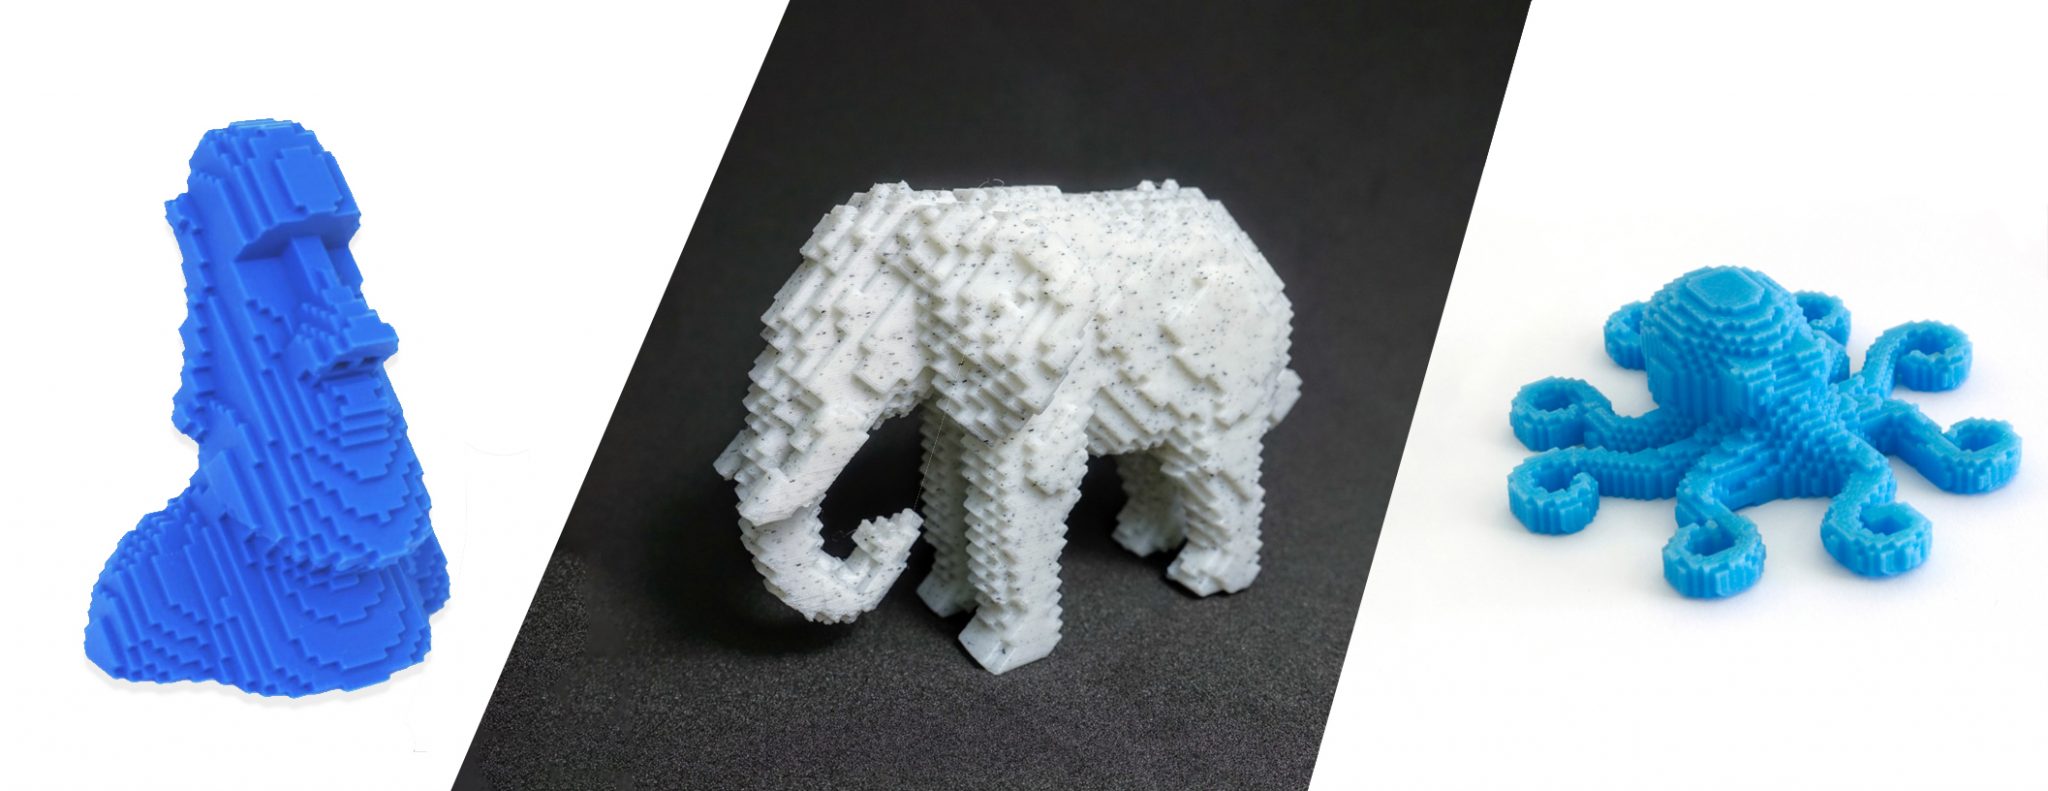
The Easter Island Moai is a well known and popular model not only for its looks but also for easy supportless print. Its voxel variant isn’t as easy to print, but the model already includes supports, so you shouldn’t need to use them in the slicer. The voxel octopus also doesn’t need any supports, thanks to some clever bevel on the bottom voxels. The elephant, however, does need supports since its trunk is hanging in mid-air.
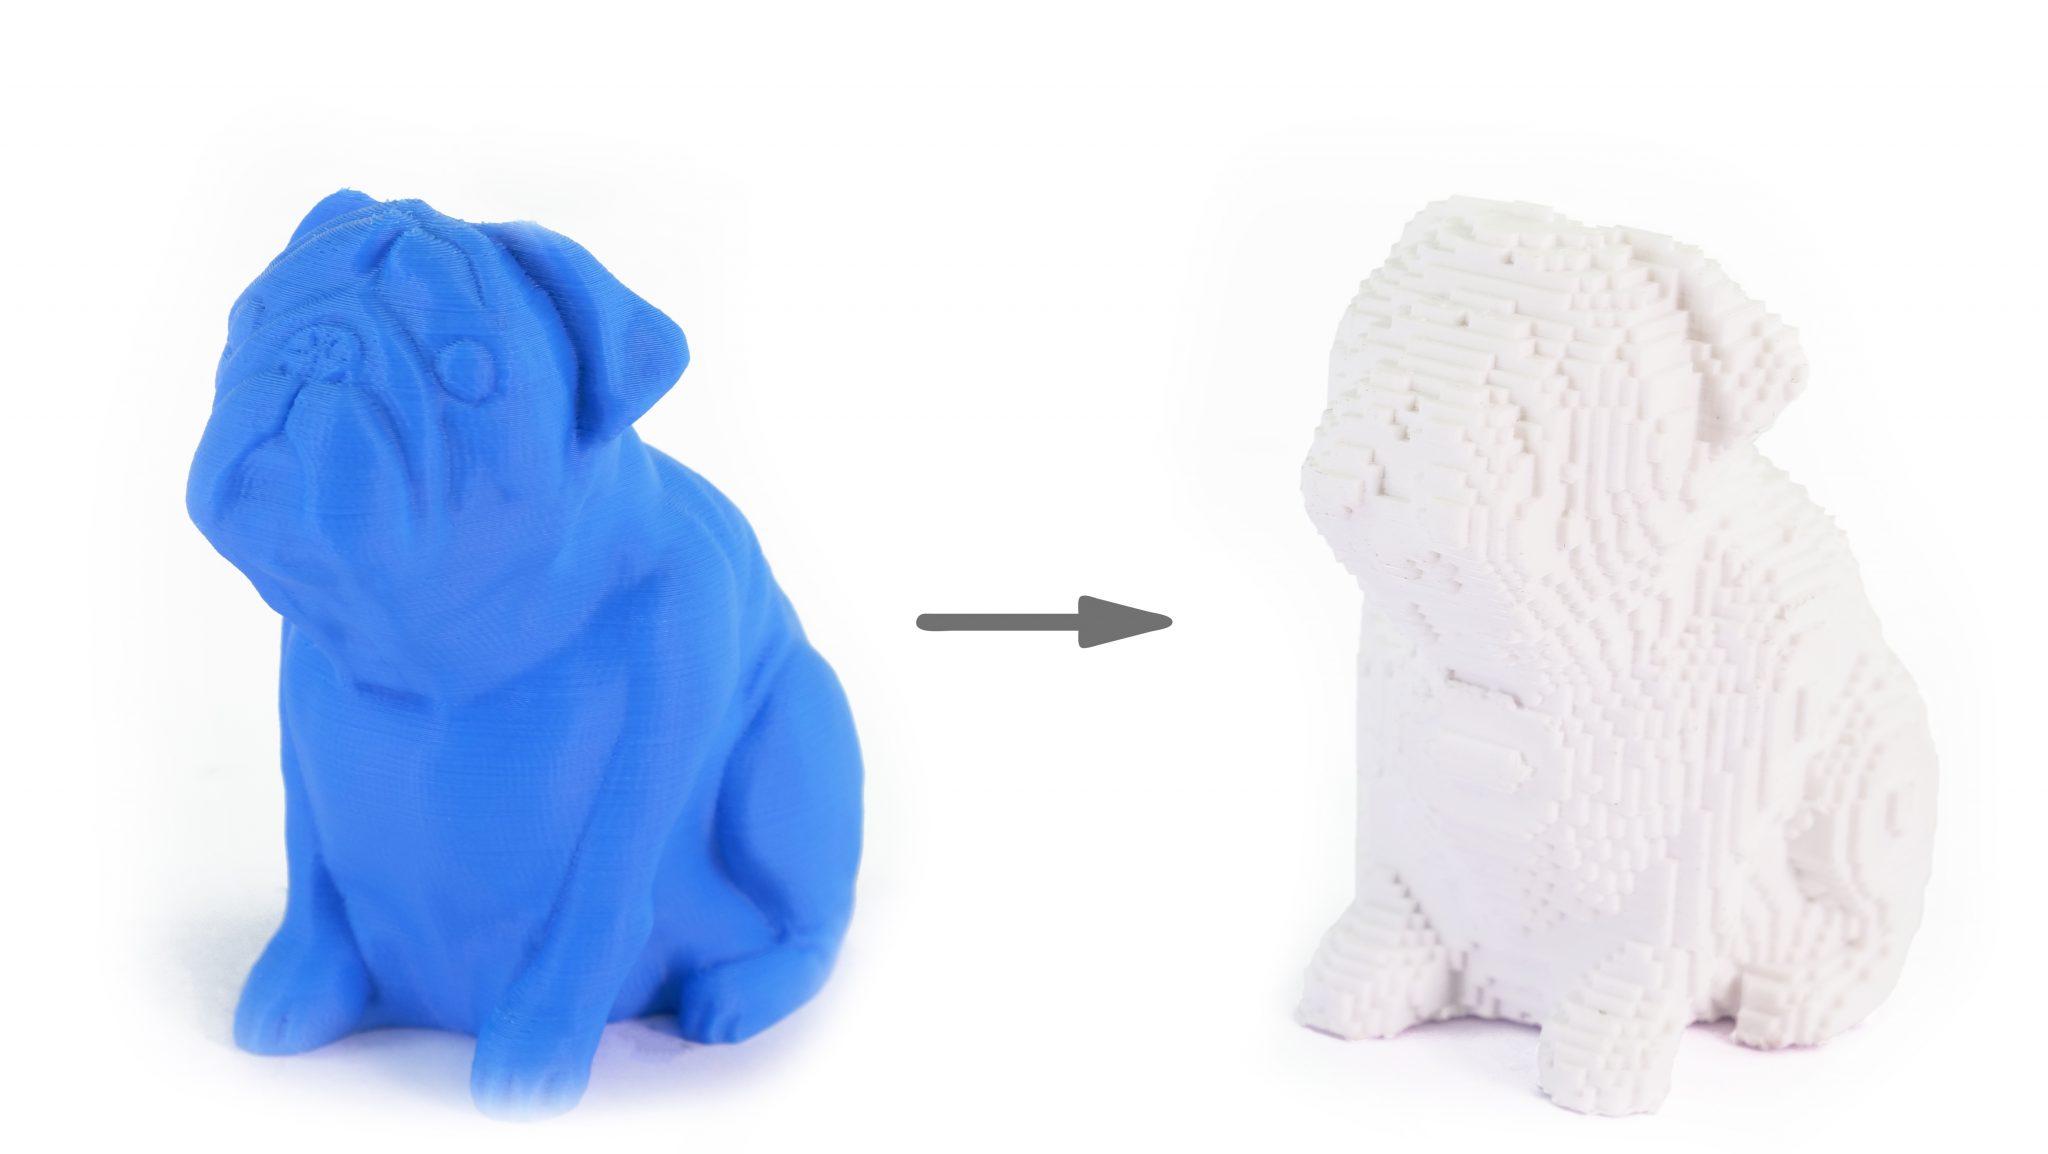
Conversion to Blocky Buddy (STL download – 200 KB)
Advanced voxelization – less or no supports
If you’re creative and smart about using voxelization, you’ll need much less support material to finish a print successfully. And occasionally you might avoid using supports entirely.
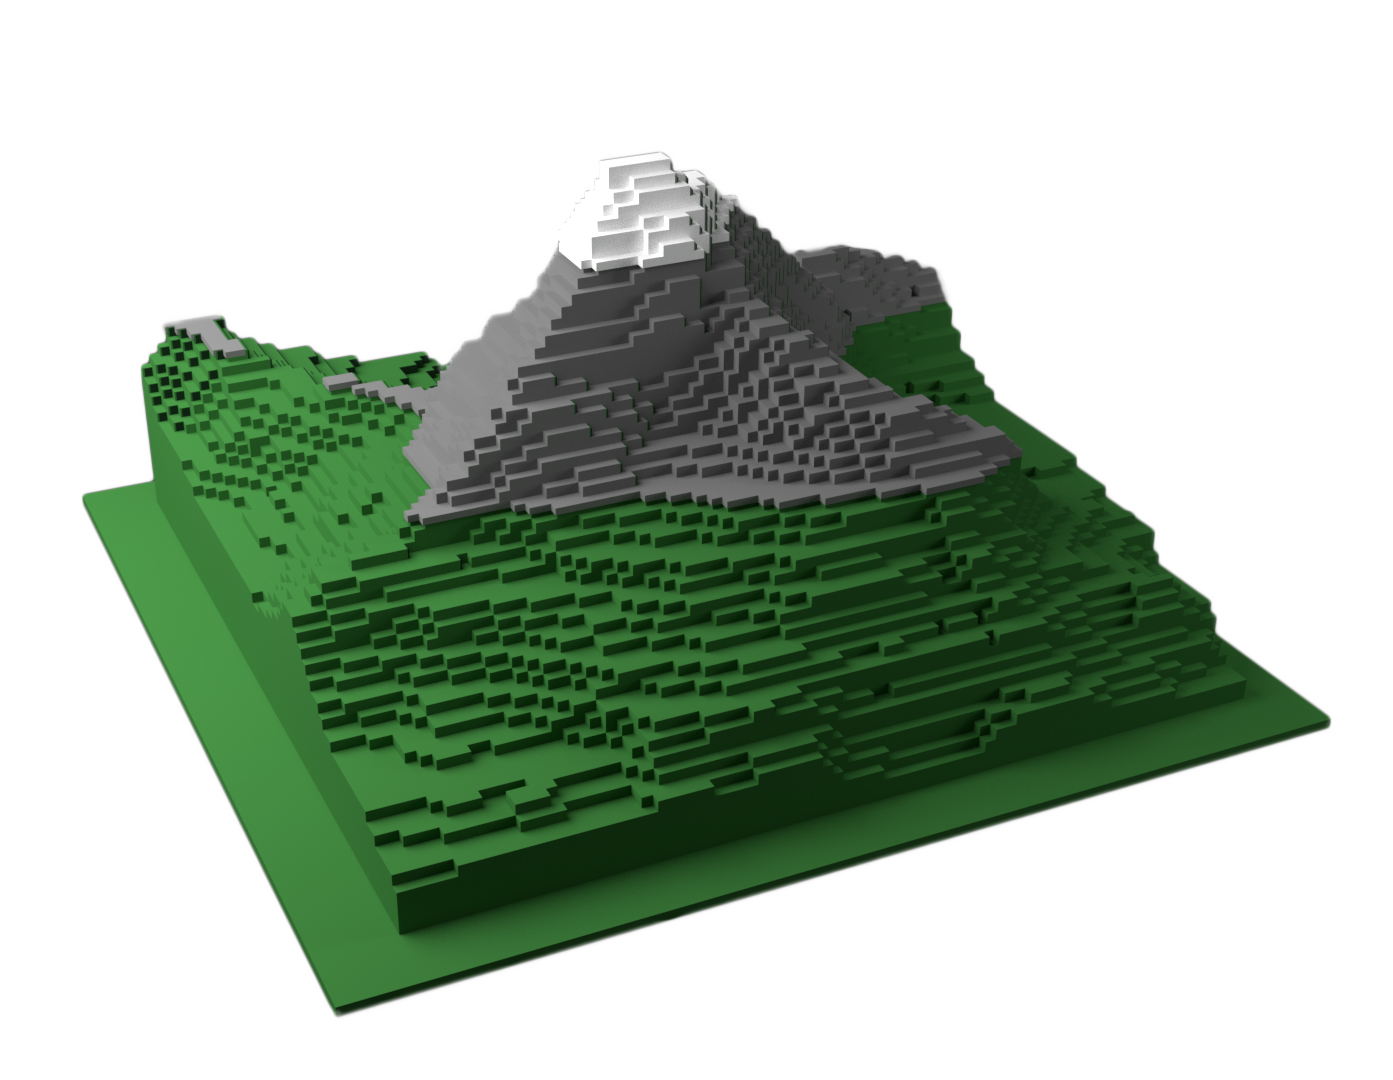
Voxelized landscape that doesn’t need any support material
The trick to avoiding supports is to angle the cubes 45 degrees instead of printing them flat. Here’s how to do it in Meshmixer:
- Open Meshmixer and simply drag and drop your model into the Meshmixer window
- Select Edit->Transform
- Rotate the model around X or Z axis by 45 degrees. You can enter the value 45 into the window on the left
- Select Edit -> Make Solid
- Change Solid Type from Fast to Blocky in the drop-down menu
- Adjust Solid accuracy to increase or decrease the number of cubes
- You’ll have to hit Update every time you adjust the values to see the result
- Hit Accept when you’re happy with the result
- Rotate the model back around the same axis by -45 degrees
- The problem is that the bottom of your model now isn’t flat, but instead filled with cubes standing on one of their edges. You can fix this in Meshmixer too by clicking Edit->Plane Cut.
- A plane will appear, you can drag it to the bottom of the model and hit Accept.
- You are now ready to export the model as STL.
Angled Blocky Buddy printed without supports (STL download – 300 KB)
Voronoi pattern look
Unlike the previous two methods, depending on your model, this one can be a little bit more difficult to pull off. But if you succeed, the result will be that much more impressive.
Voronoi: Our favorites from Thingiverse
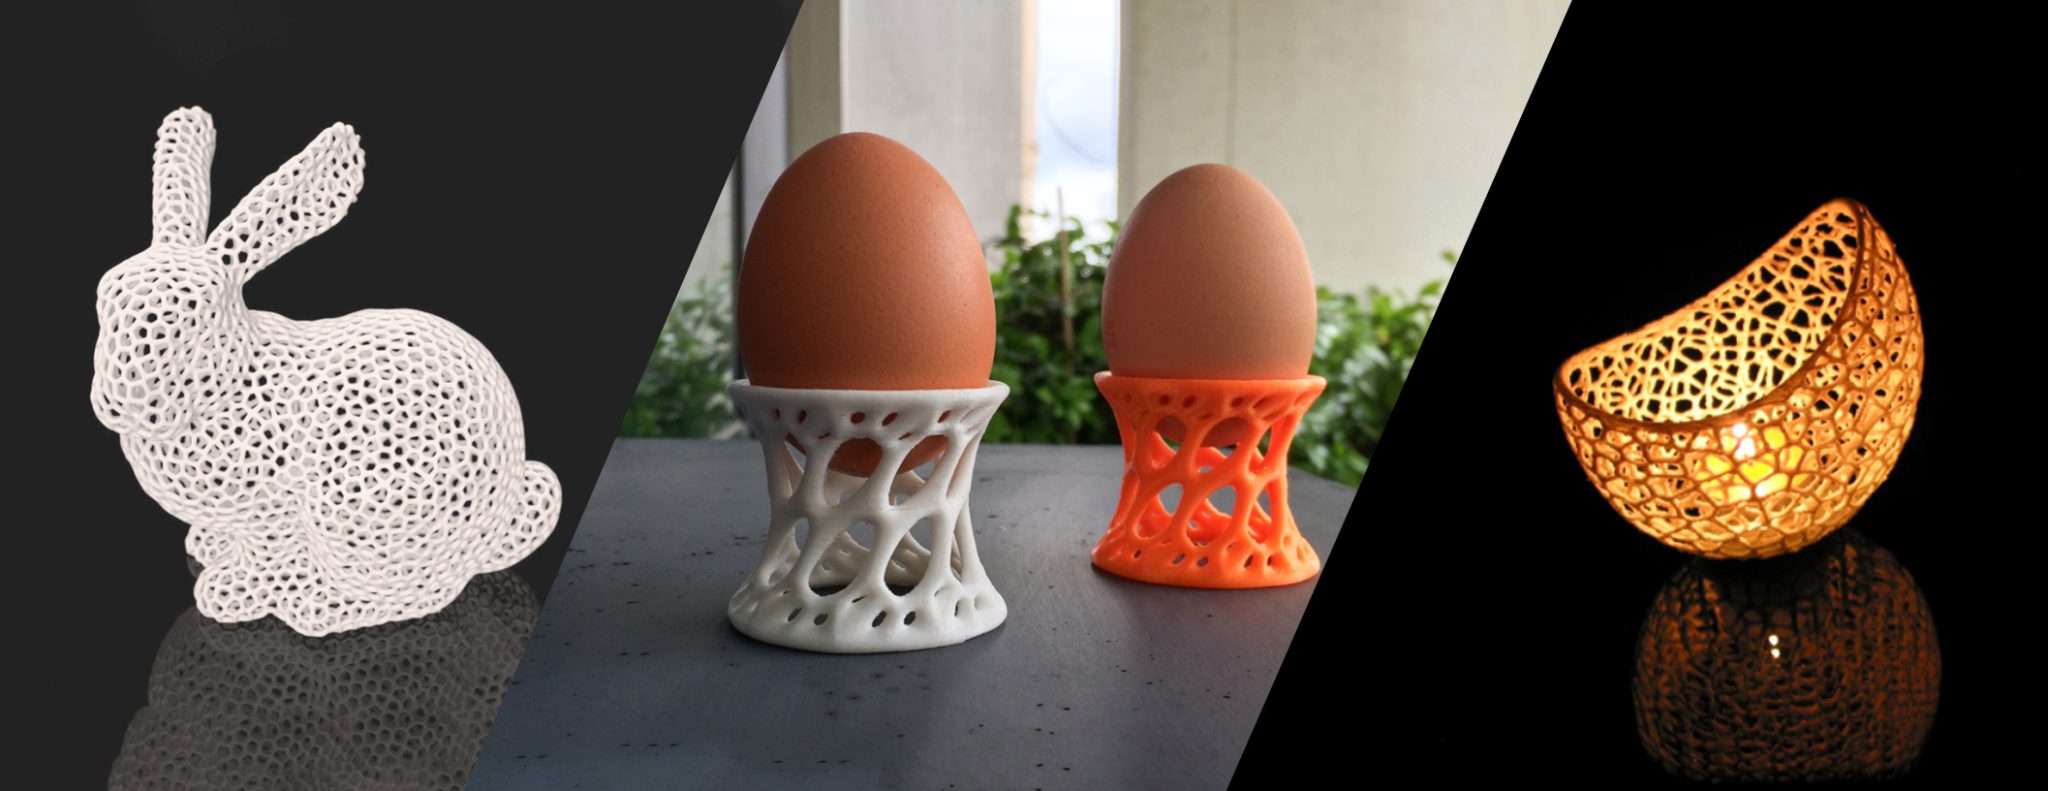
The Stanford bunny is a famous computer graphics 3D test model created over 20 years ago. So it’s Voronoi style version cannot be missing from our list of favorite models. The other two models find practical use in your home. A Voronoi egg holder and a Voronoi tea light both look incredible, even though the original shape before applying the Voronoi pattern is rather simple.
- Start by making your model Low polygon style in Meshmixer (follow steps mentioned above in this article)
- The number of triangles you choose will determine the size of individual Voronoi cells.
- Select Edit->Make Pattern
- Change Pattern Type to Dual Edges from the drop-down menu.
- Adjust Element dimension to your liking
- Hit Accept when you’re happy with the result
- Export the mesh using File->Export, choose STL as file format
- Slice the exported model with Slic3r PE, PrusaControl or your another favorite slicer
Your model might have a minimal contact area with the bed, so when slicing, you should use Brim. There will also inevitably be overhangs, some very steep. But you should try to print the model without supports, just like this Voronoi Buddy was. Removing supports from the inside of the model would be almost impossible unless you use water-soluble supports with our Multi-Material upgrade. 🙂

Conversion to Voronoi Buddy (STL download – 8 MB)
This works very well for models of buildings, cars or even for characters. Finally, another great method is to use texture mapping, which involves wrapping a 2D image onto the 3D model to create the illusion of more detail than is actually present in the model. This can be anything from a photo to a hand-drawn illustration, and can add a lot of character to a 3D model. Each of these methods is simple to implement and can lead to stunning results when applied correctly. Well, I would like to read reviews about the Papersowl source which is really helpful when you have tough assignments from the college. Its writers are highly qualified to assist you with your work.
Skilled professionals in commercial roof repair are equipped with the knowledge and expertise to identify and address any issues such as leaks, cracks, and damaged roofing materials. For more info <a href="https://bellcoroofing.com/">website</a> They utilize advanced techniques and materials to repair and restore the roof, ensuring its durability and preventing future problems.