


Welcome, brave warriors, wise wizards, noble knights, sneaking thieves and mercenaries of loose morals! Today, we’ll journey not only into perilous dungeons but also to confined space station corridors and other dangerous places. We’ll show you how to 3D print your own tabletop RPG, Warhammer 40K terrain objects and all sorts of interesting tabletop accessories with your Original Prusa i3 3D printer!
Openlock, Openforge and everything in between
Tabletop RPGs became a huge hit particularly in the 70s and 80s, but even though we now have hundreds of computer games and massive multiplayer online RPGs, nothing beats the atmosphere of sitting around a table, throwing real dice and interacting with your friends in the real world.
Desktop role-playing games are sometimes called “pen and paper” games because that’s how they started: with a graph paper (where you would draw the map), printed character sheets and plenty of pencils and erasers. Over the years, these games evolved. Suddenly, there were ready-made packages you could buy at specialized stores. Everything was still largely paper-based, though.
It didn’t take long before someone realized that a 3D printer could be used to print a whole dungeon. Or a space station. Or dwarven mines. And so much more! However, an open and free market has a slight disadvantage: there are no standards. Everyone can design their own set pieces and any kind of compatibility comes in second. It’s not so bad, though.
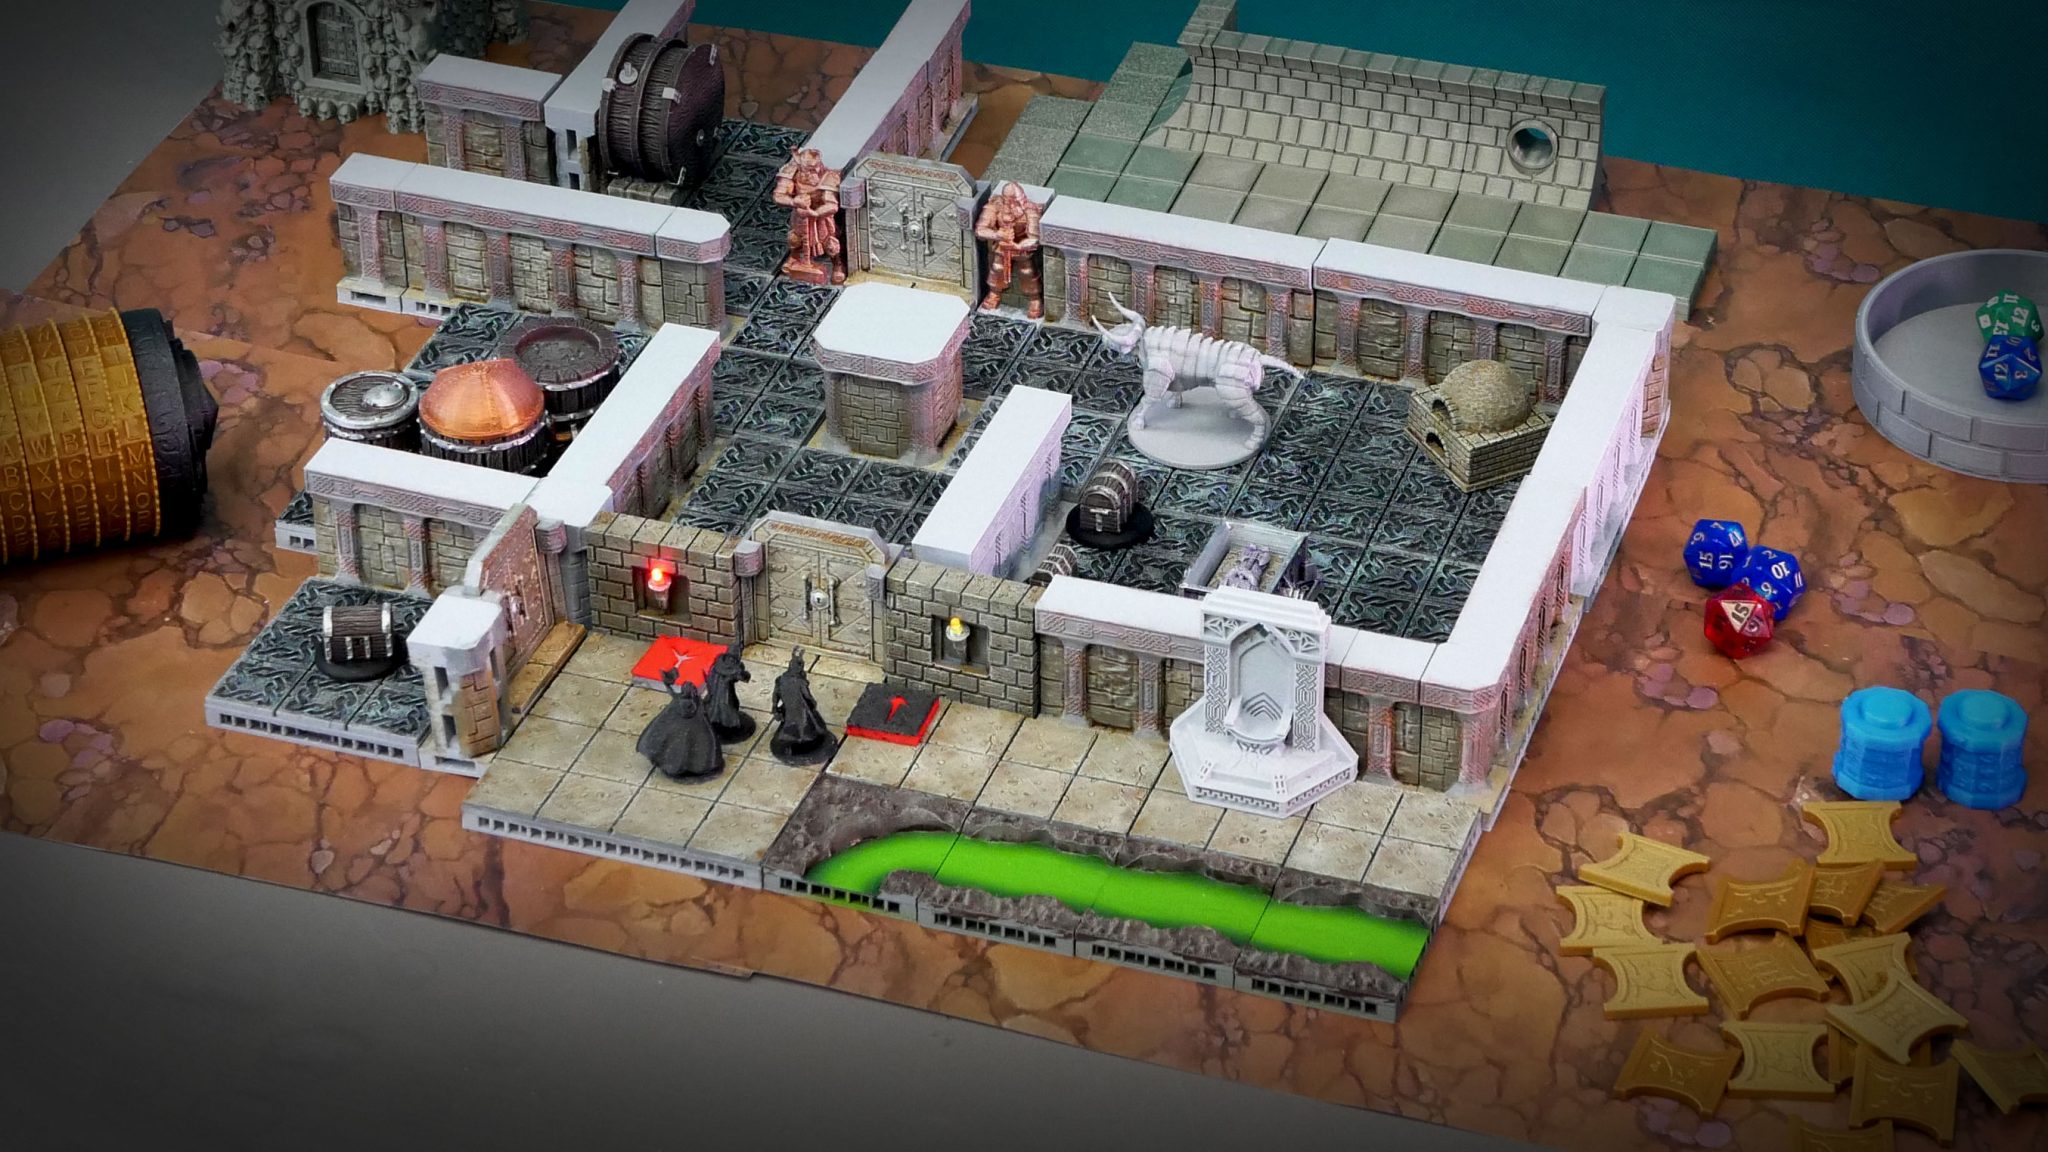
Everything you see (apart from the dice) has been printed on a 3D printer
Over time, several standards have emerged, and they offer some basic compatibility. These standards include projects such as OpenLock, OpenForge, DragonLock, Rampage, and a few others. They all have one thing in common: you can download pre-made set pieces, print any number of them and then use them to build a game map of any shape or size. Oh, and don’t forget that you can paint everything with acrylic colors such as Citadels. You can learn more about painting and post-processing of printed object in one of our previous articles.
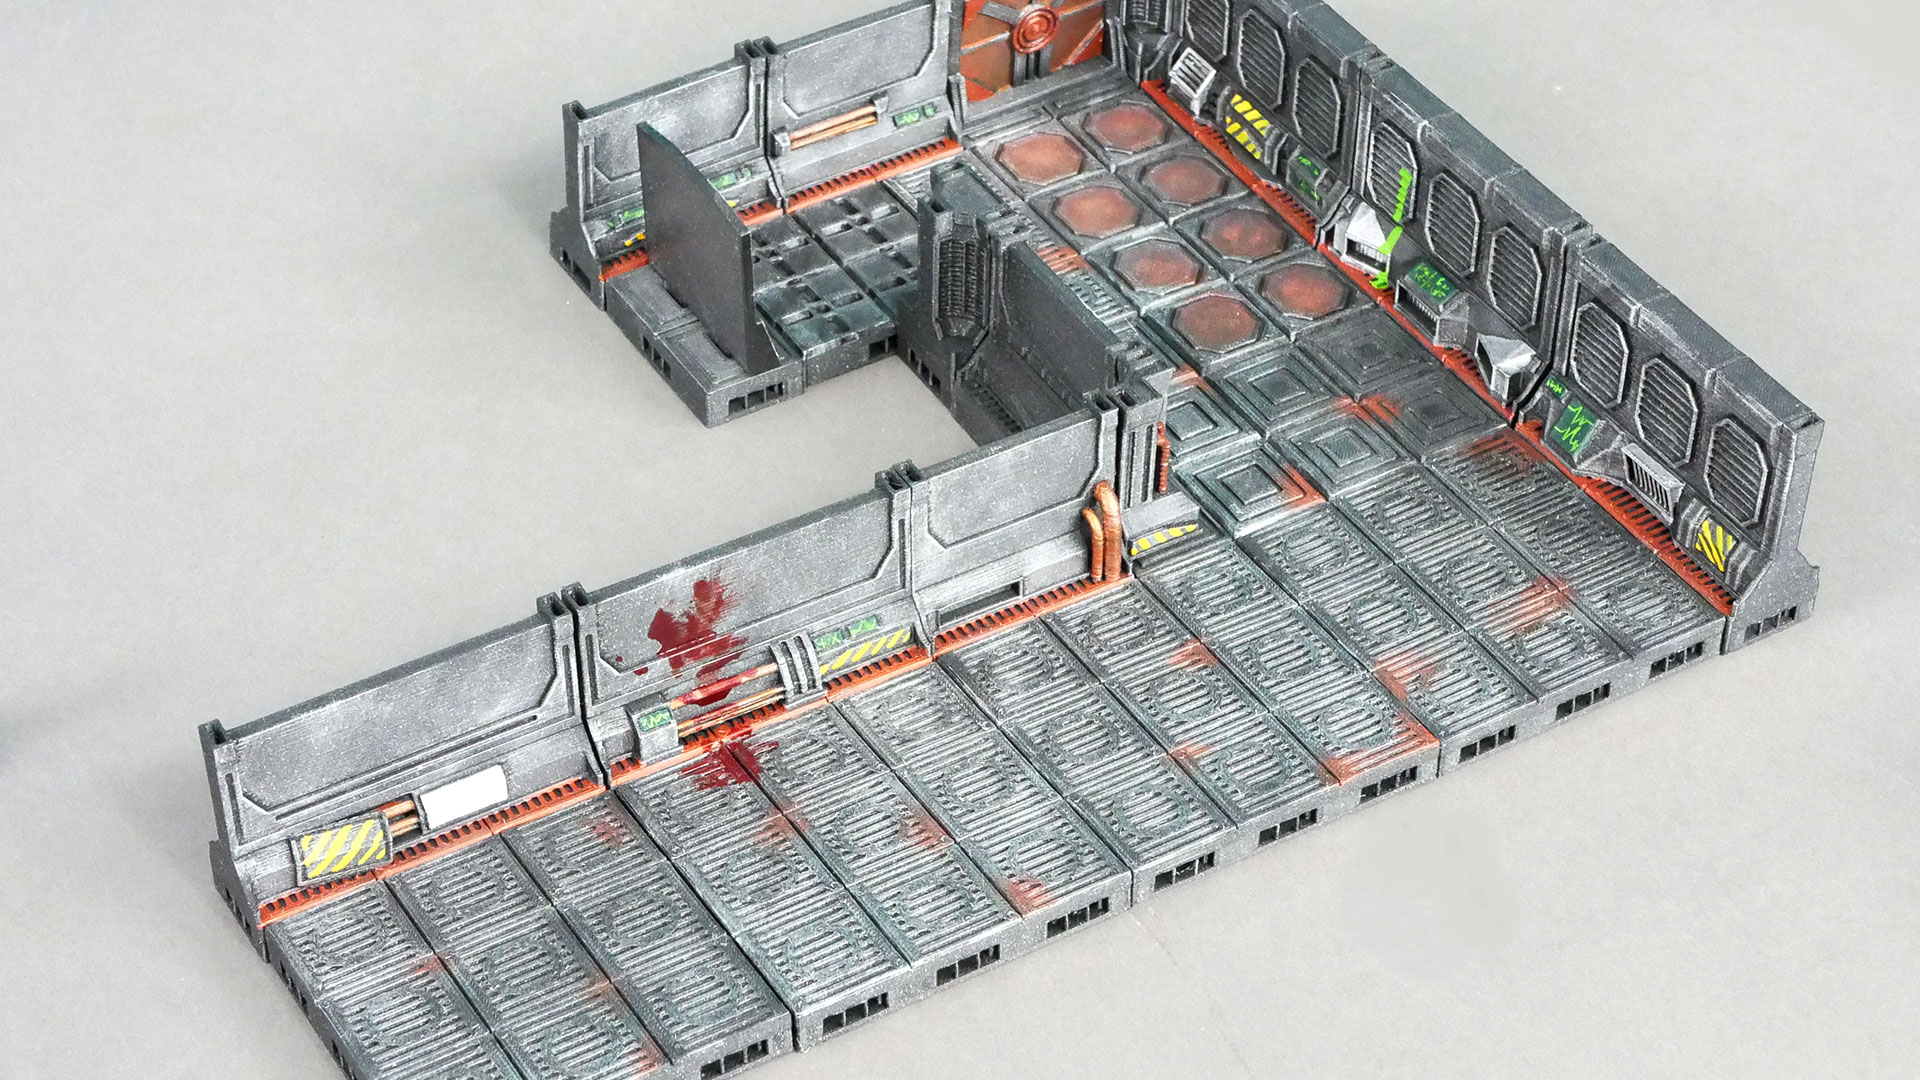
You are not limited to fantasy settings, sci-fi is also an option! (Niphilim’s Modular Space Scenery from Thingiverse)
The main difference between various systems is the locking mechanism. OpenForge parts consist of two pieces: the base part and the floor part. The base has eight small circular holes in it, so you can insert tiny ball magnets in them. Then use a hot glue gun to glue the base and the floor together. Use only ball magnets, because they can rotate freely, which also means they can switch polarity as needed. Connecting pieces together is just a matter of a split second.
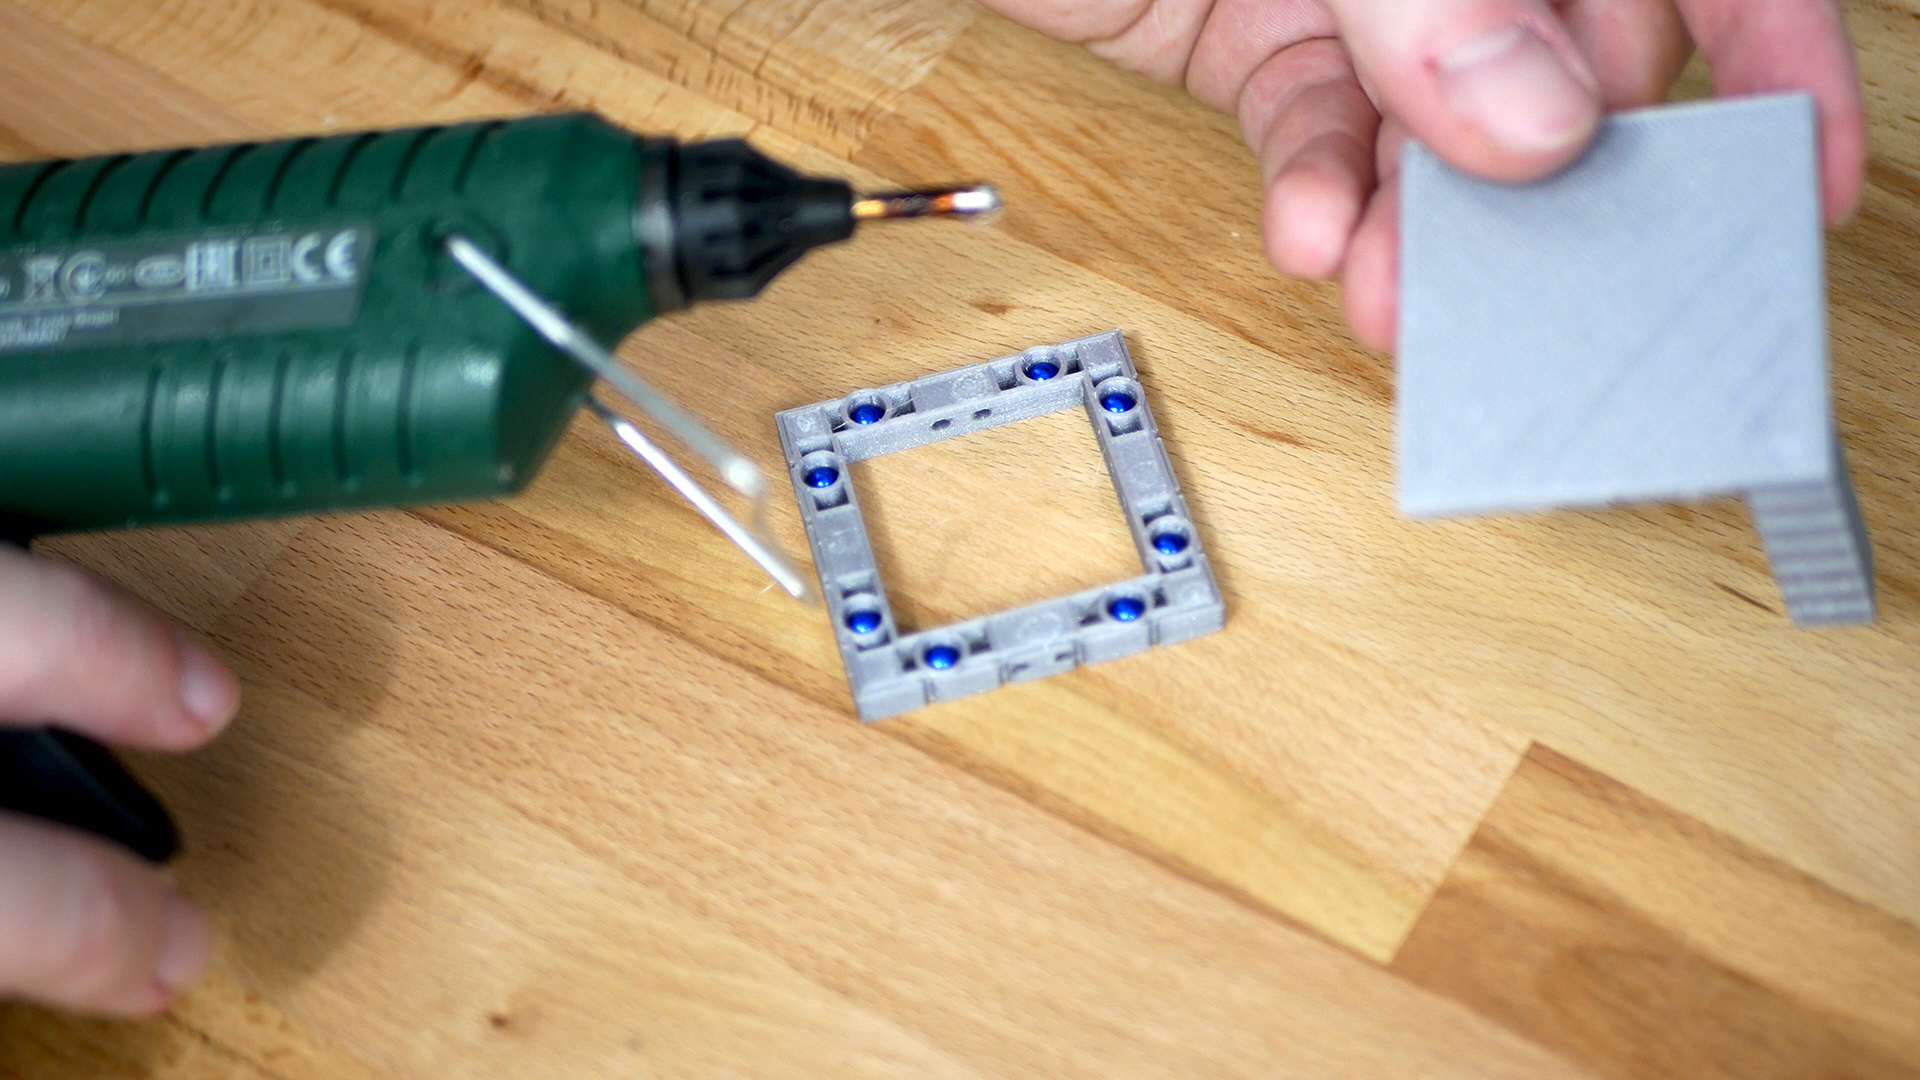
OpenForge system uses magnets to connect the pieces. It’s easy to connect the pieces together, but the magnets can be a bit pricey
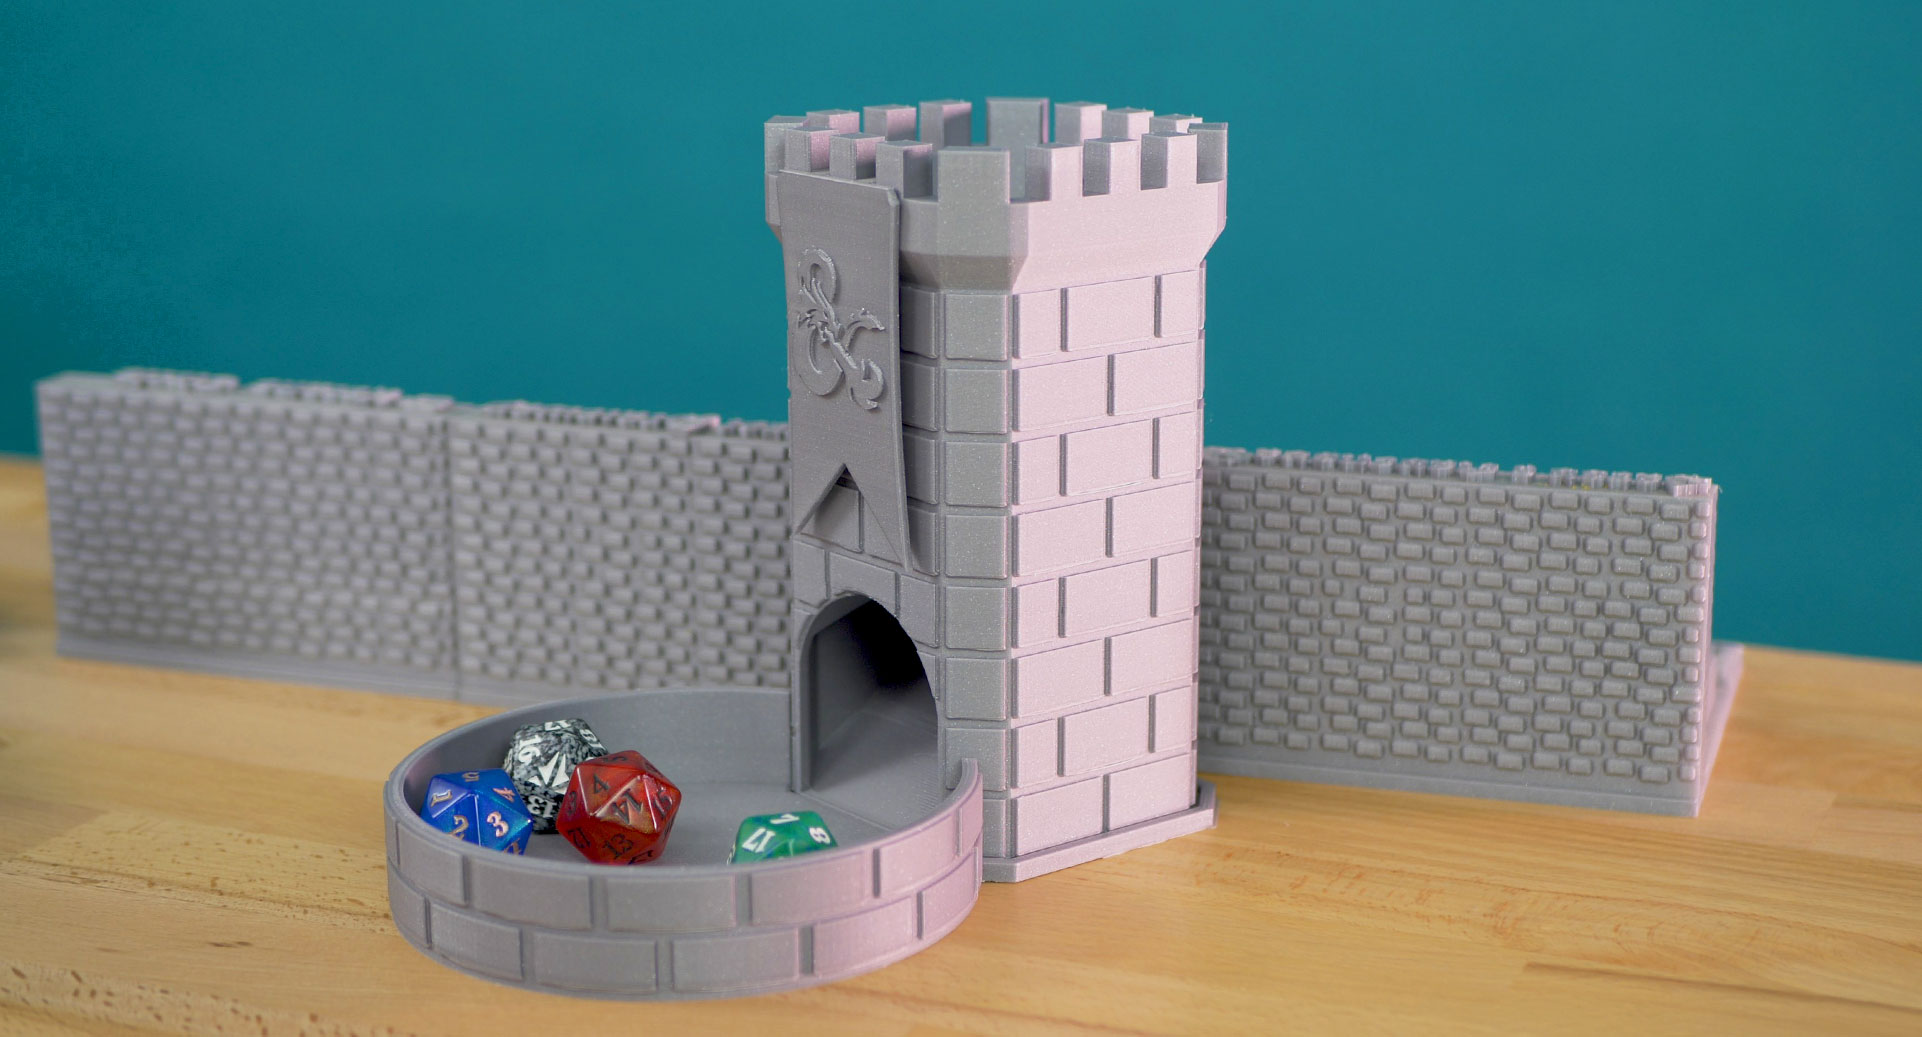
OpenLock, on the other hand, uses small mechanical locks (OpenLock clips), which can be 3D printed as well. They hold together a bit better, plus they are compatible with other systems (OpenForge + Rampage for example), plus the assets are usually compatible with the very popular 28mm miniatures. In the end, there’s only one bigger issue with these 3D printed assets – they can take a lot of time to print. If you fill the whole print bed with different walls, floors, doors and other things, it can take easily 10-15 hours to print all that. So don’t expect to have a fully equipped dungeon overnight. But hey, Rome wasn’t built in a day either!
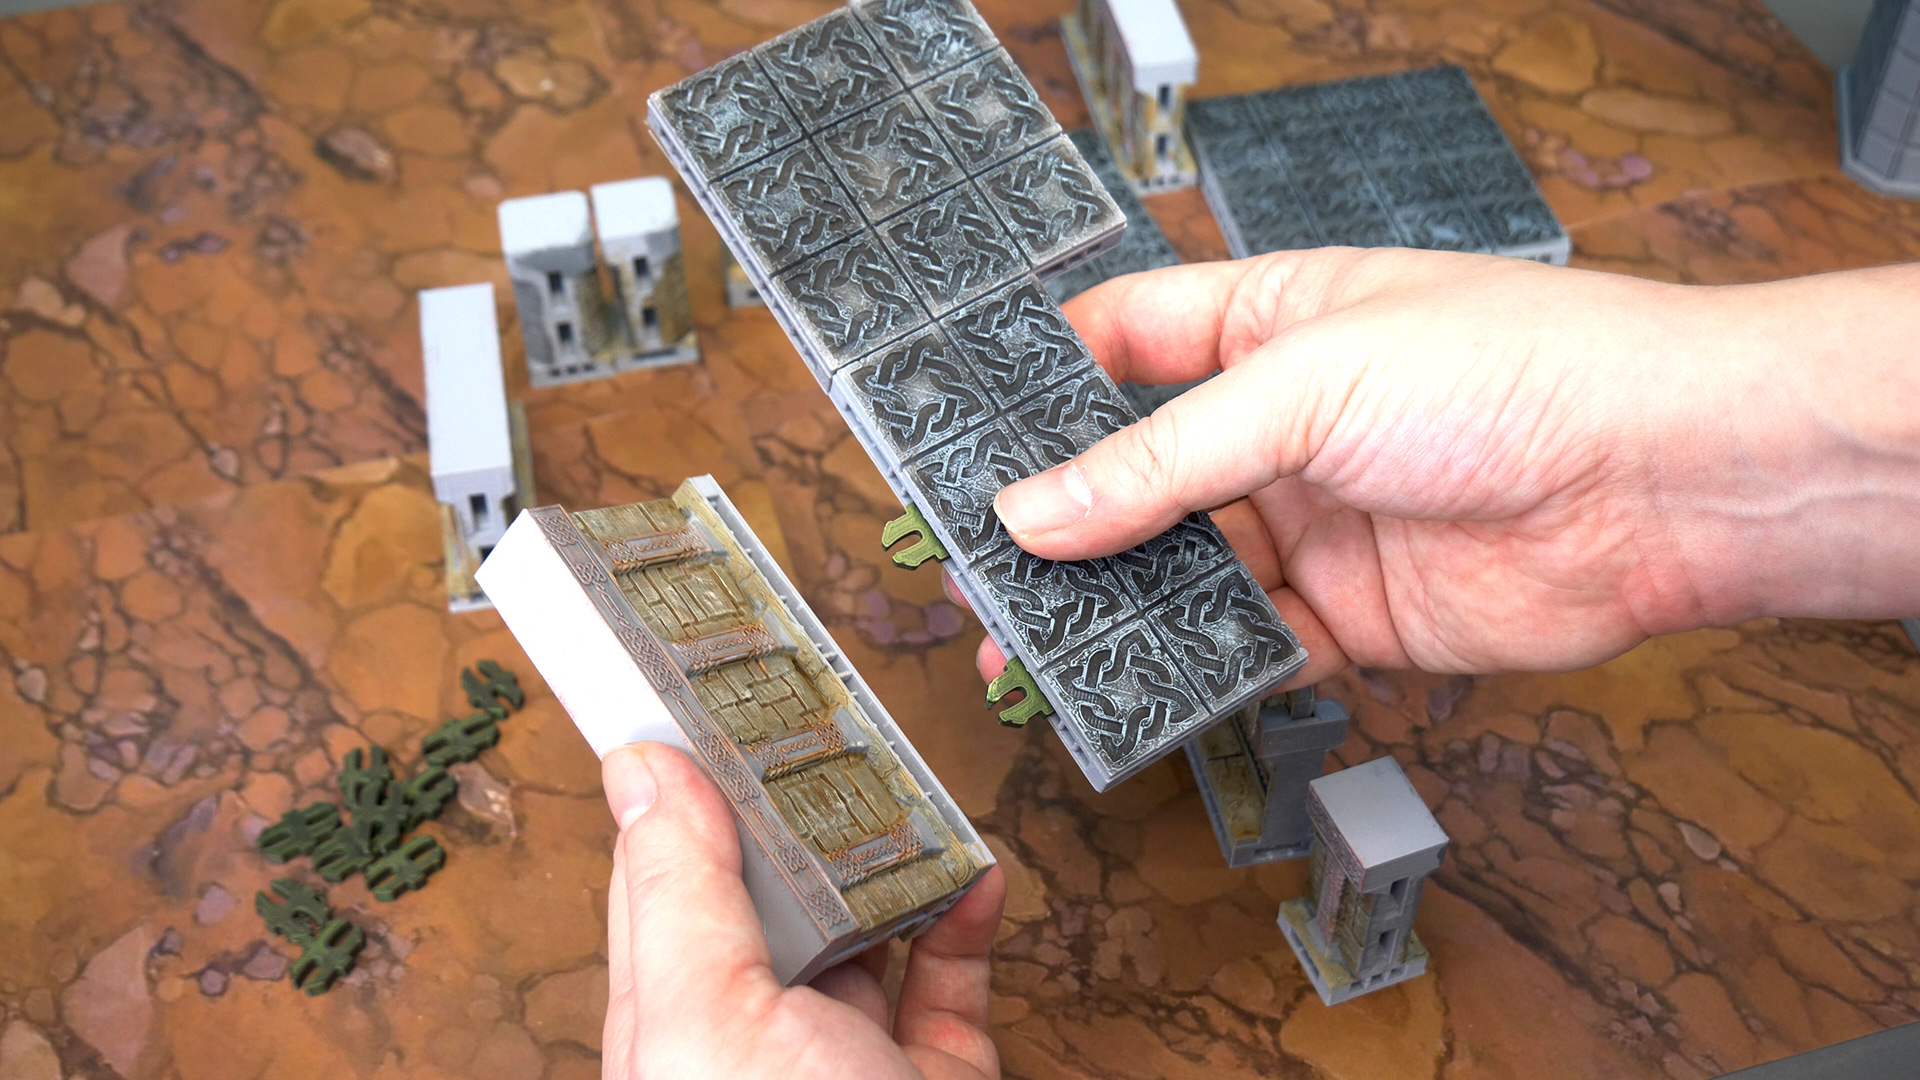
OpenLOCK uses 3D printed clips to connect the pieces, resulting in sturdier connections
Furniture, chests, traps, and puzzles…
The world of OpenLock, OpenForge and similar systems is unbelievably huge. Not only you can print corridors, halls, underground passages, bridges or stairs, but you can also find an infinite number of additional models.
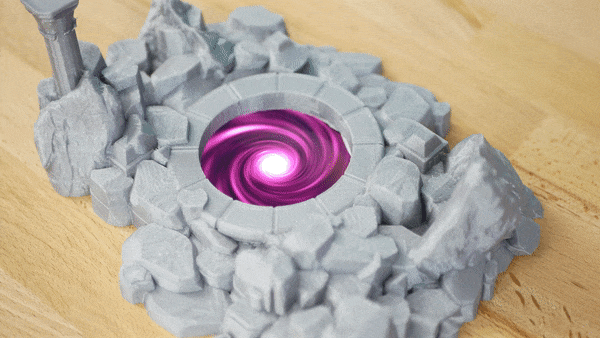
Vortex Portal 28mm Mini from Thingiverse has a slot for a cellphone, so you can display an animated gif that simulates the effect of a vortex
Just search for OpenLock, OpenForge or visit websites with paid models such as Printable Scenery and Infinite Dimensions to find a vast library of barrels, chests, cabinets, torches, traps, puzzles and much more. It’s pretty much impossible to list all the models here, so we’re giving you at least a small preview in the following gallery. Check out those sweet torches that use LEDs to emit light, beautiful tiny treasure chests by Sablebadger, or the cell-phone-powered vortex!
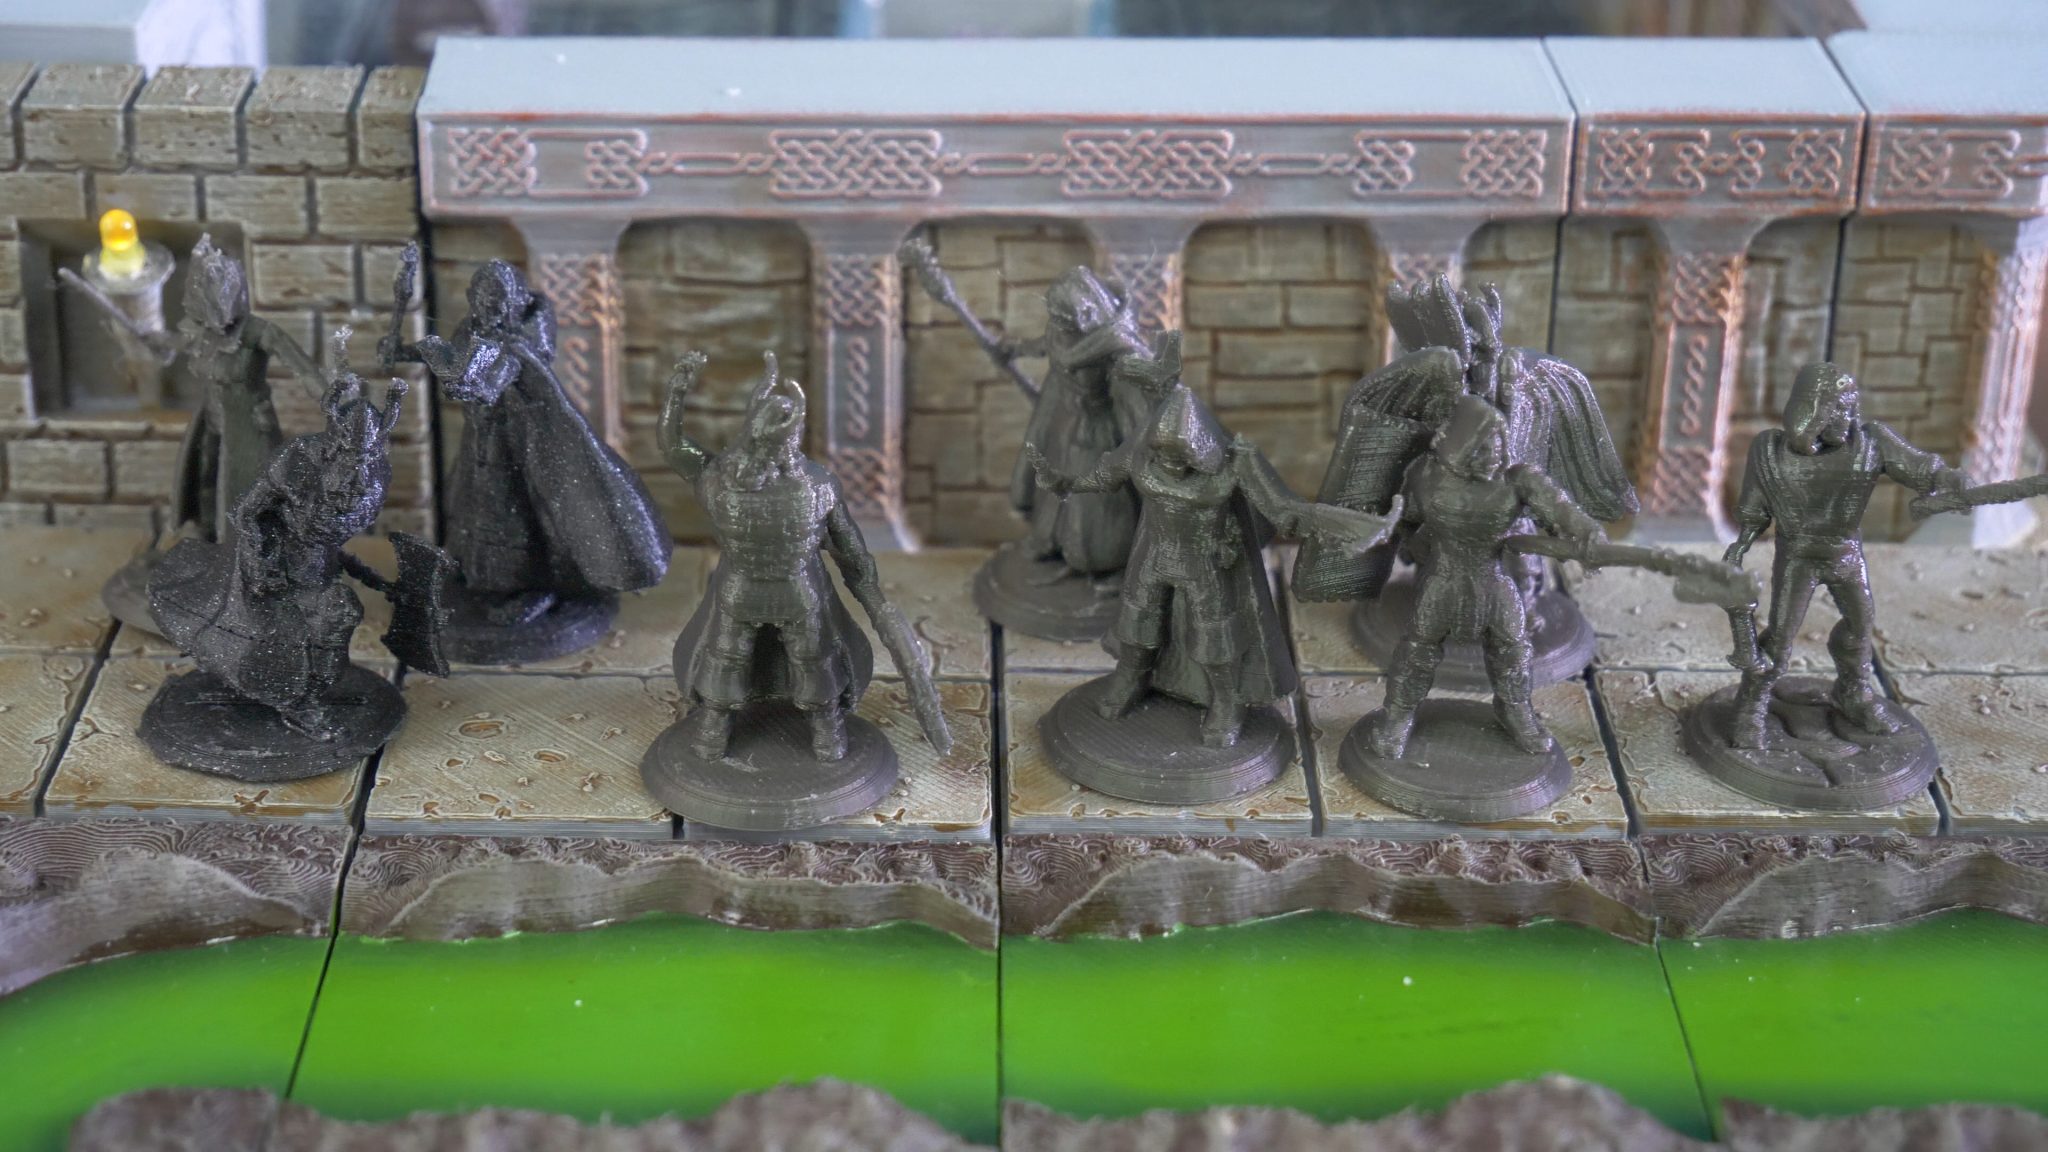
Many creators decided to stick to the very popular 28mm format, so most of these assets are compatible not only with the rest of the printed objects but also with store-bought sets such as Warhammer and many others. This way, you can combine a 3D-printed dungeon with 28mm miniatures you have already at home.
Wargaming accessories
Another area where you can put the Original Prusa i3 3D printers to good use is the printing of various terrain accessories for games such as Warhammer 40K and many others. Let’s say you have a big terrain modeled using foam and other materials. Now you need to add buildings, barricades, ruins and other objects to complete the look.
This is a perfect task for a 3D printer. Again, there’s a large selection of objects at Thingiverse, MyMiniFactory or PrintableScenery – just take your pick and start printing! These models are usually pretty easy to print and in many cases, they don’t even require supports.
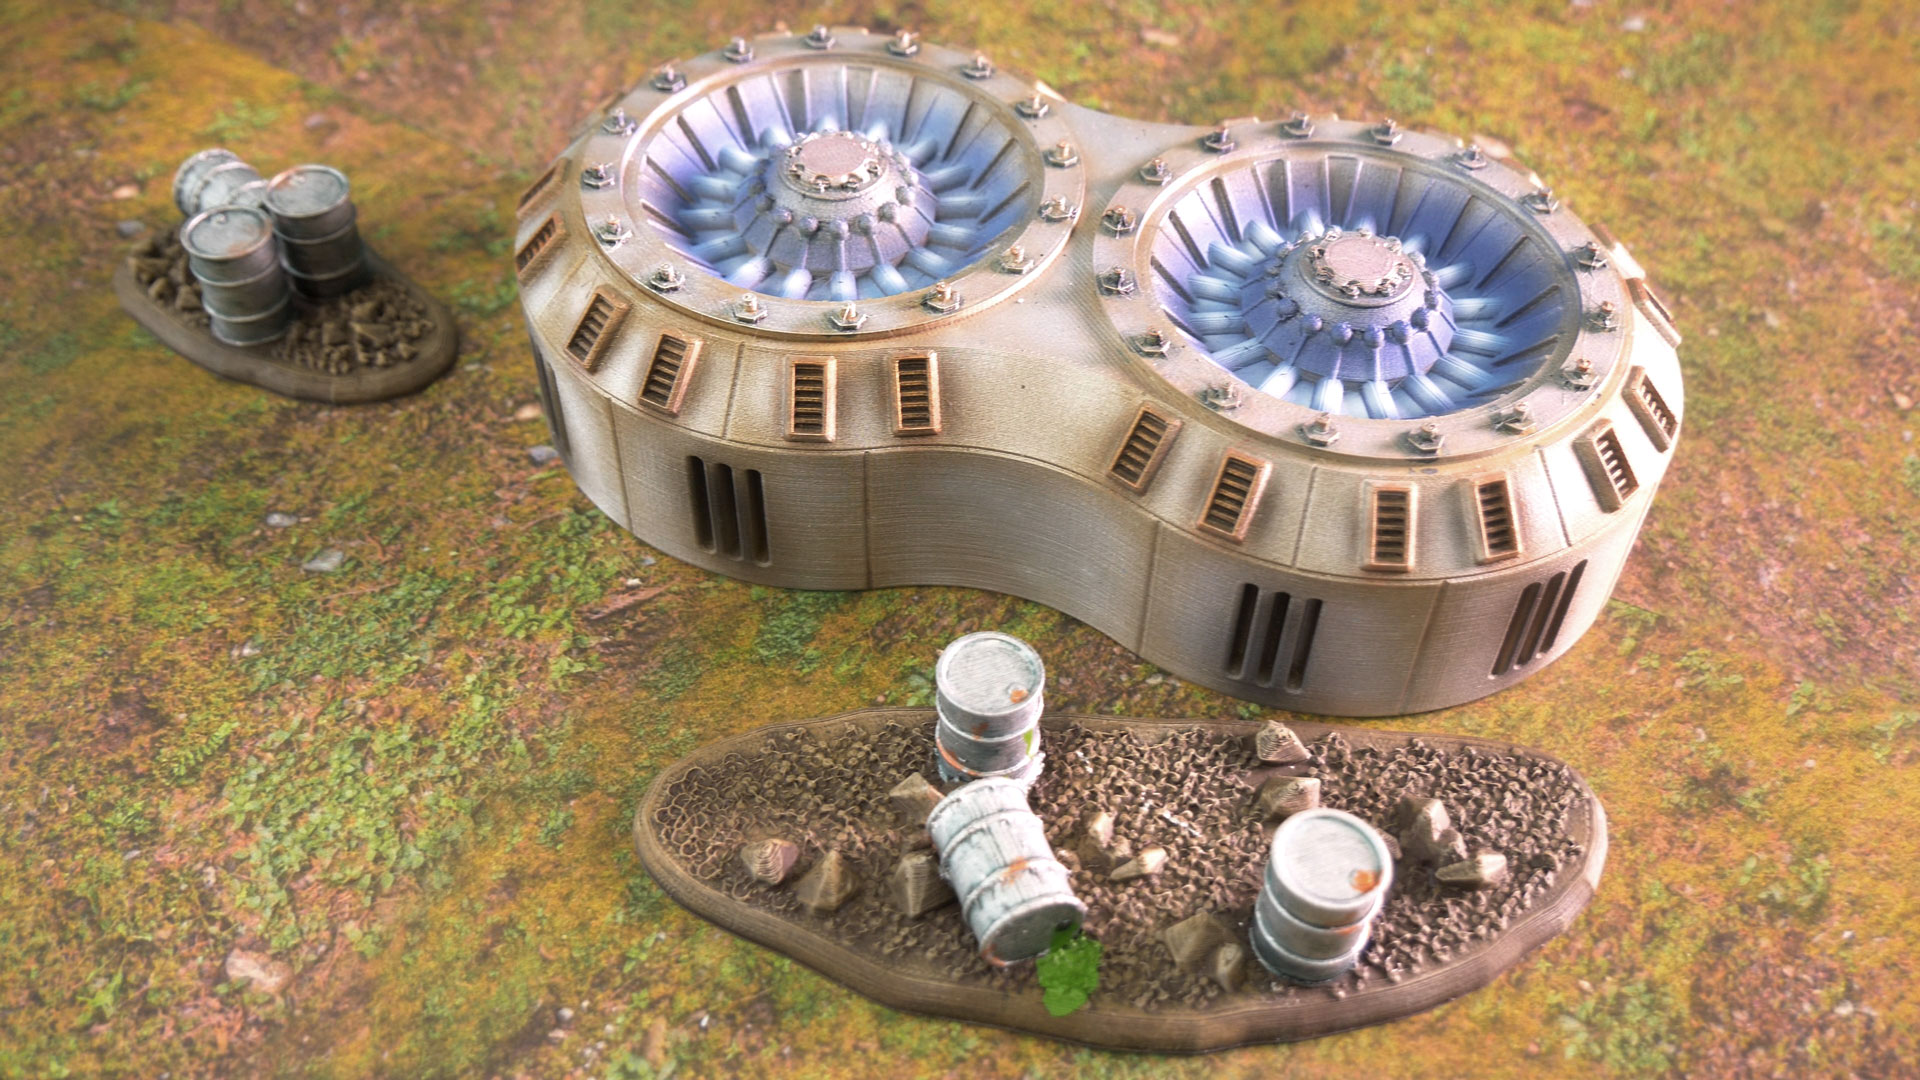
Waterdistiler and Barrels, both from Thingiverse
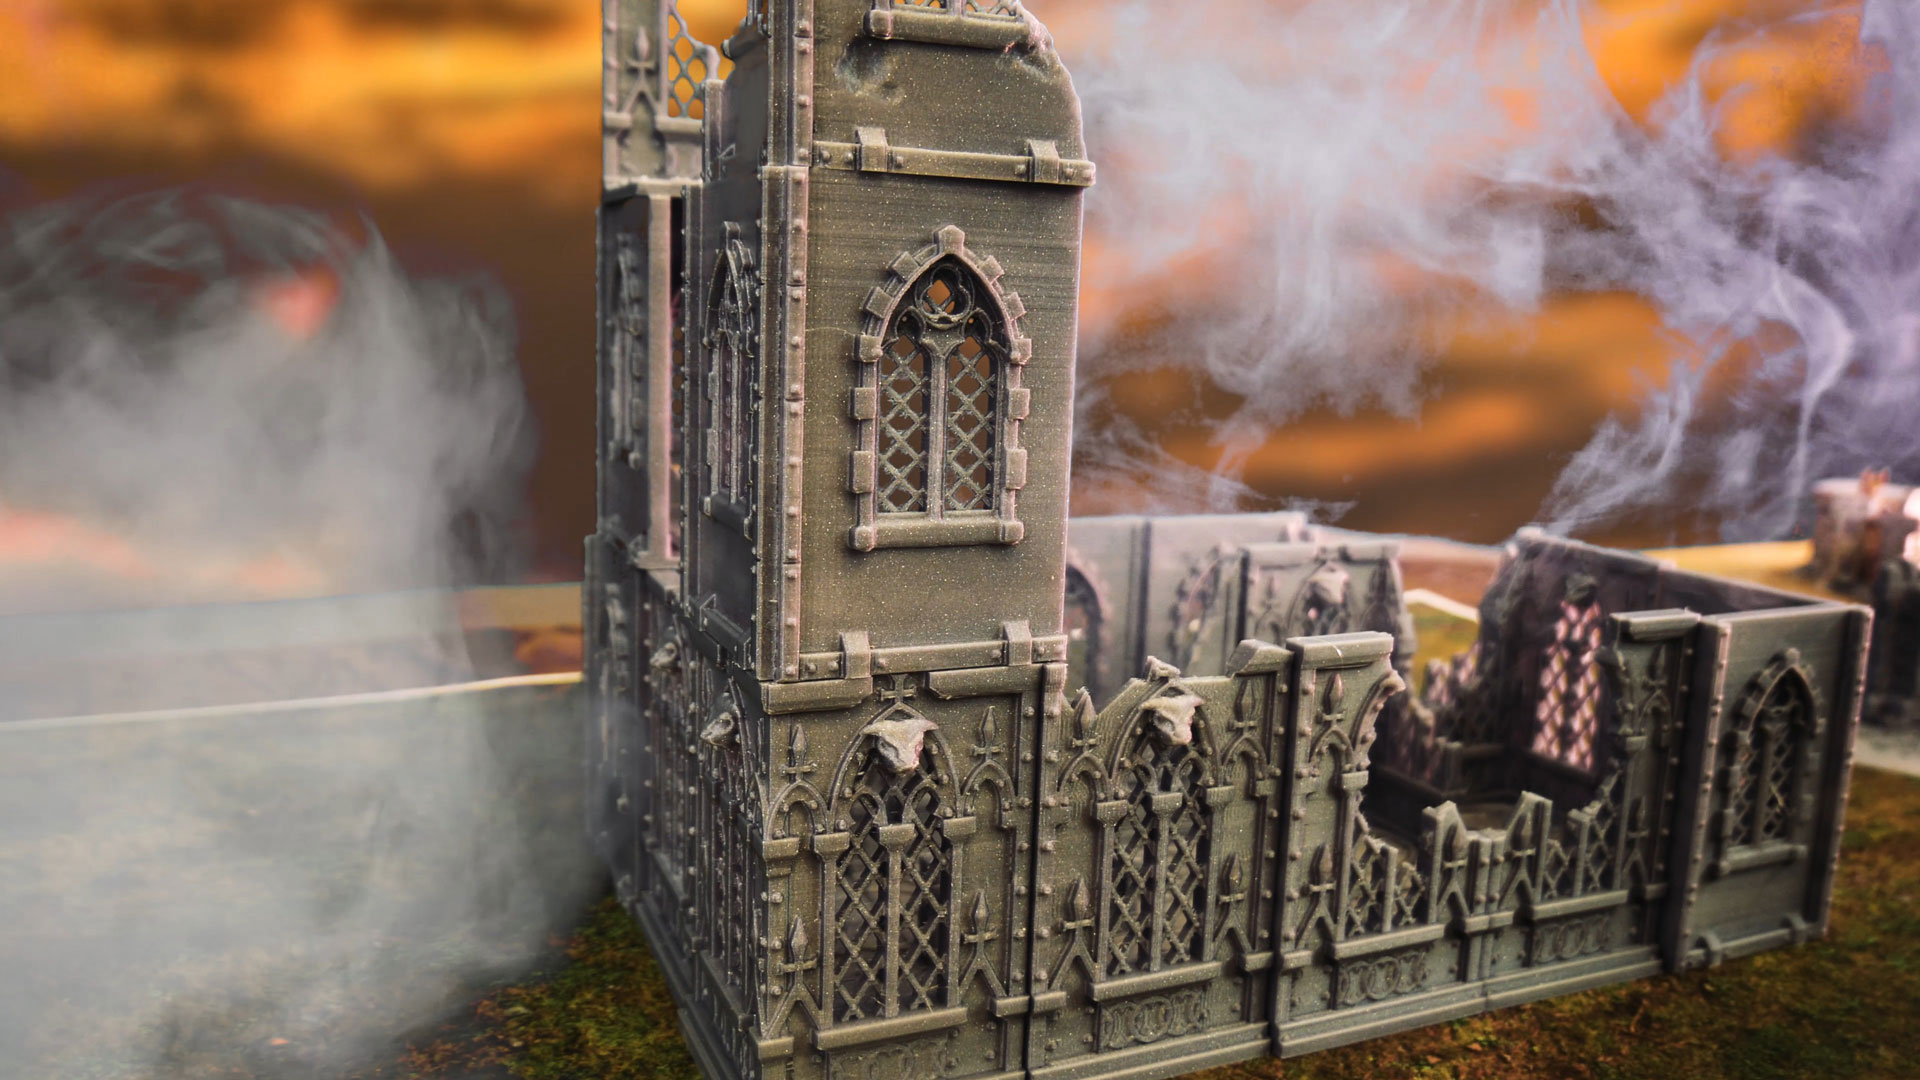
Modular set pieces ‘Gothic Architecture’ from PrintableScenery.com
Free download or purchase?
Thingiverse and similar online databases are full of OpenLock or OpenForge pieces and the easiest way to find set pieces is to simply search for these keywords. However, if you want to get the best ones, you will have to pay – but not much. PrintableScenery.com is a website focused on building a database of high-quality building blocks for Rampage (compatible with OpenLock) system. The sets have variable prices, usually something between 5 to 10 USD. The advantage over store-bought plastic pieces is obvious: once you pay a few bucks for a download, you can print as many building blocks as you like.
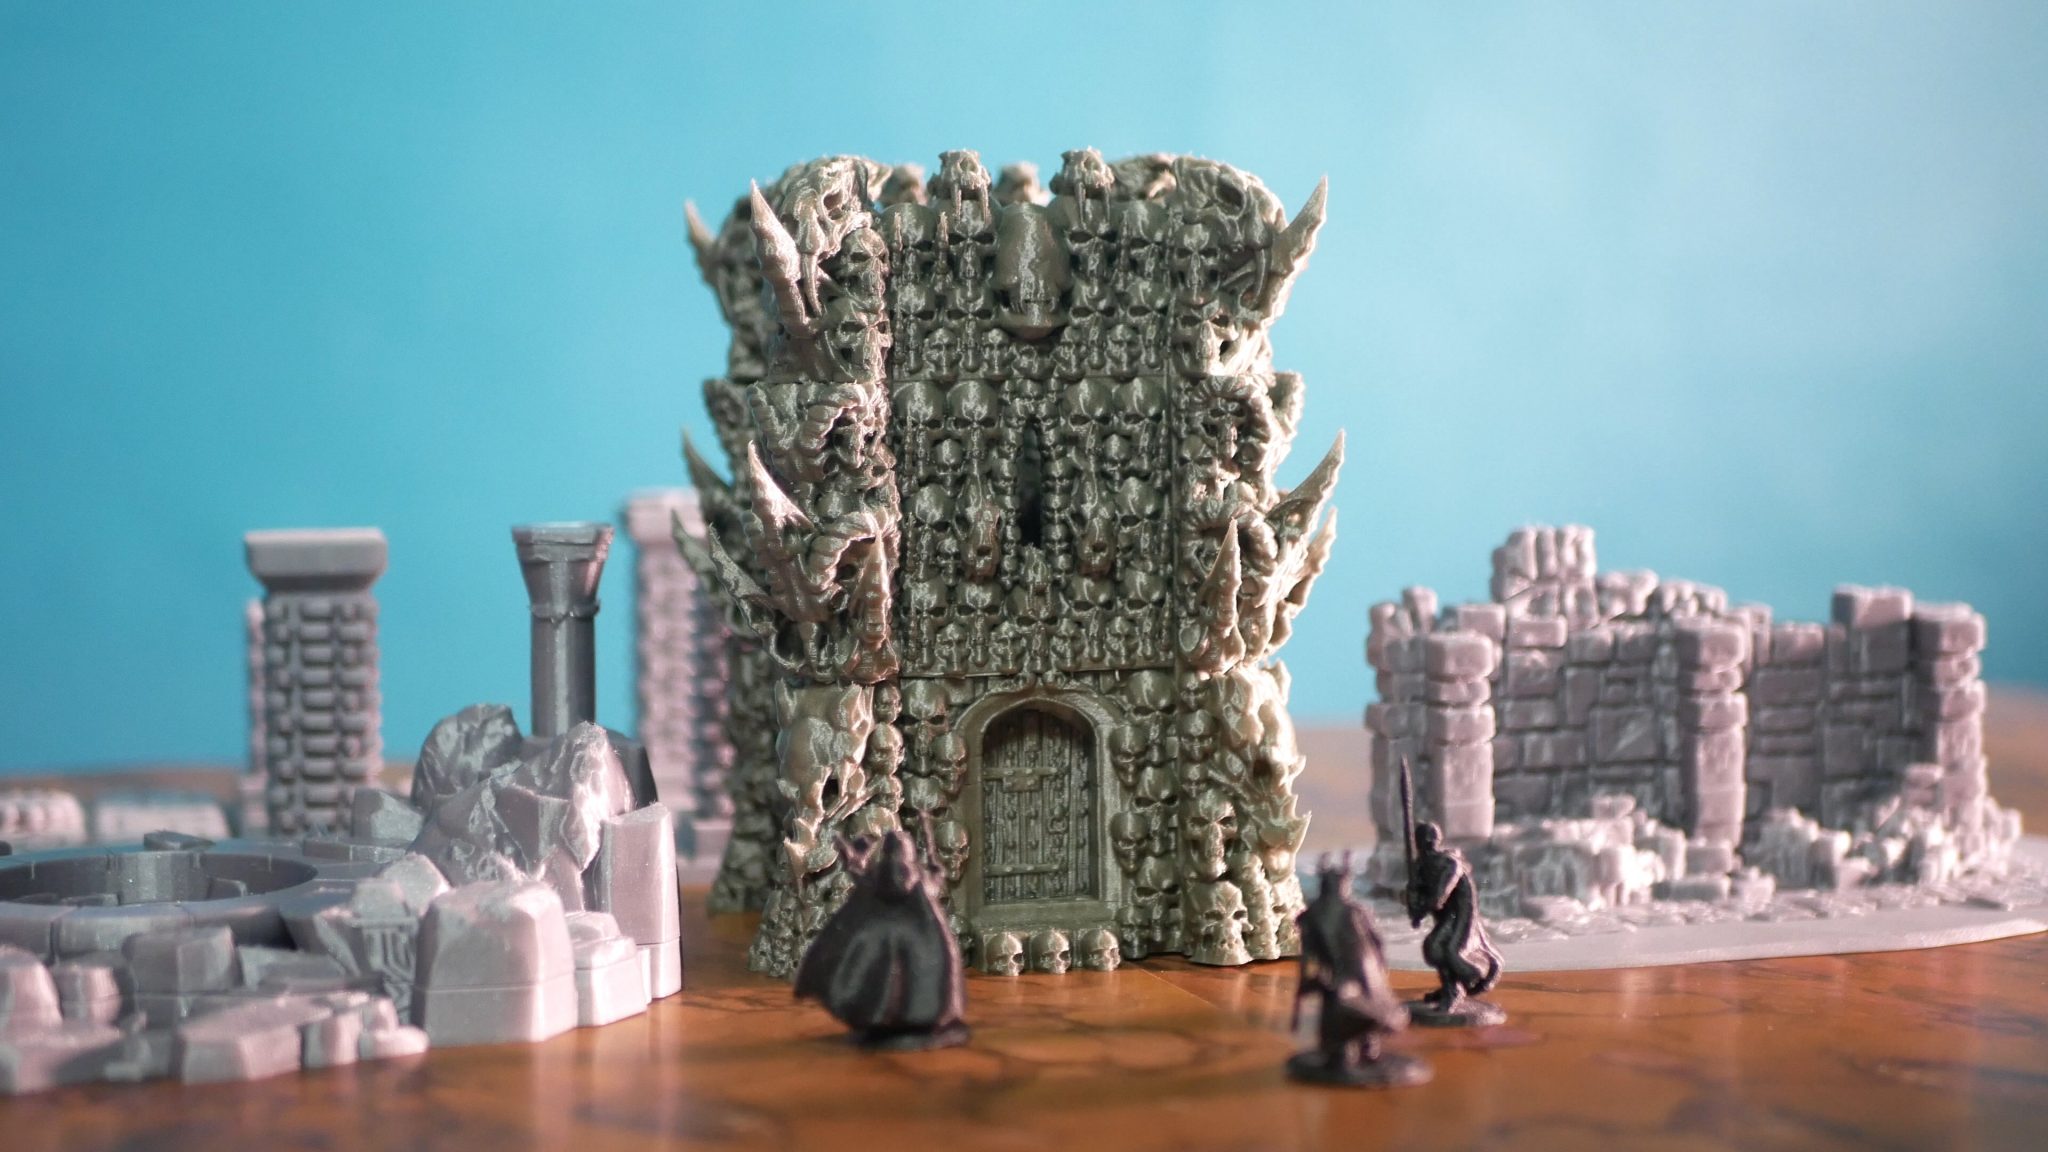
Necromancer Tower – paid model from PrintableScenery.com
You can find tons of great free models, but you can obviously find better models among the paid ones – and actually, spending a few bucks and supporting the authors is never a bad thing! 🙂
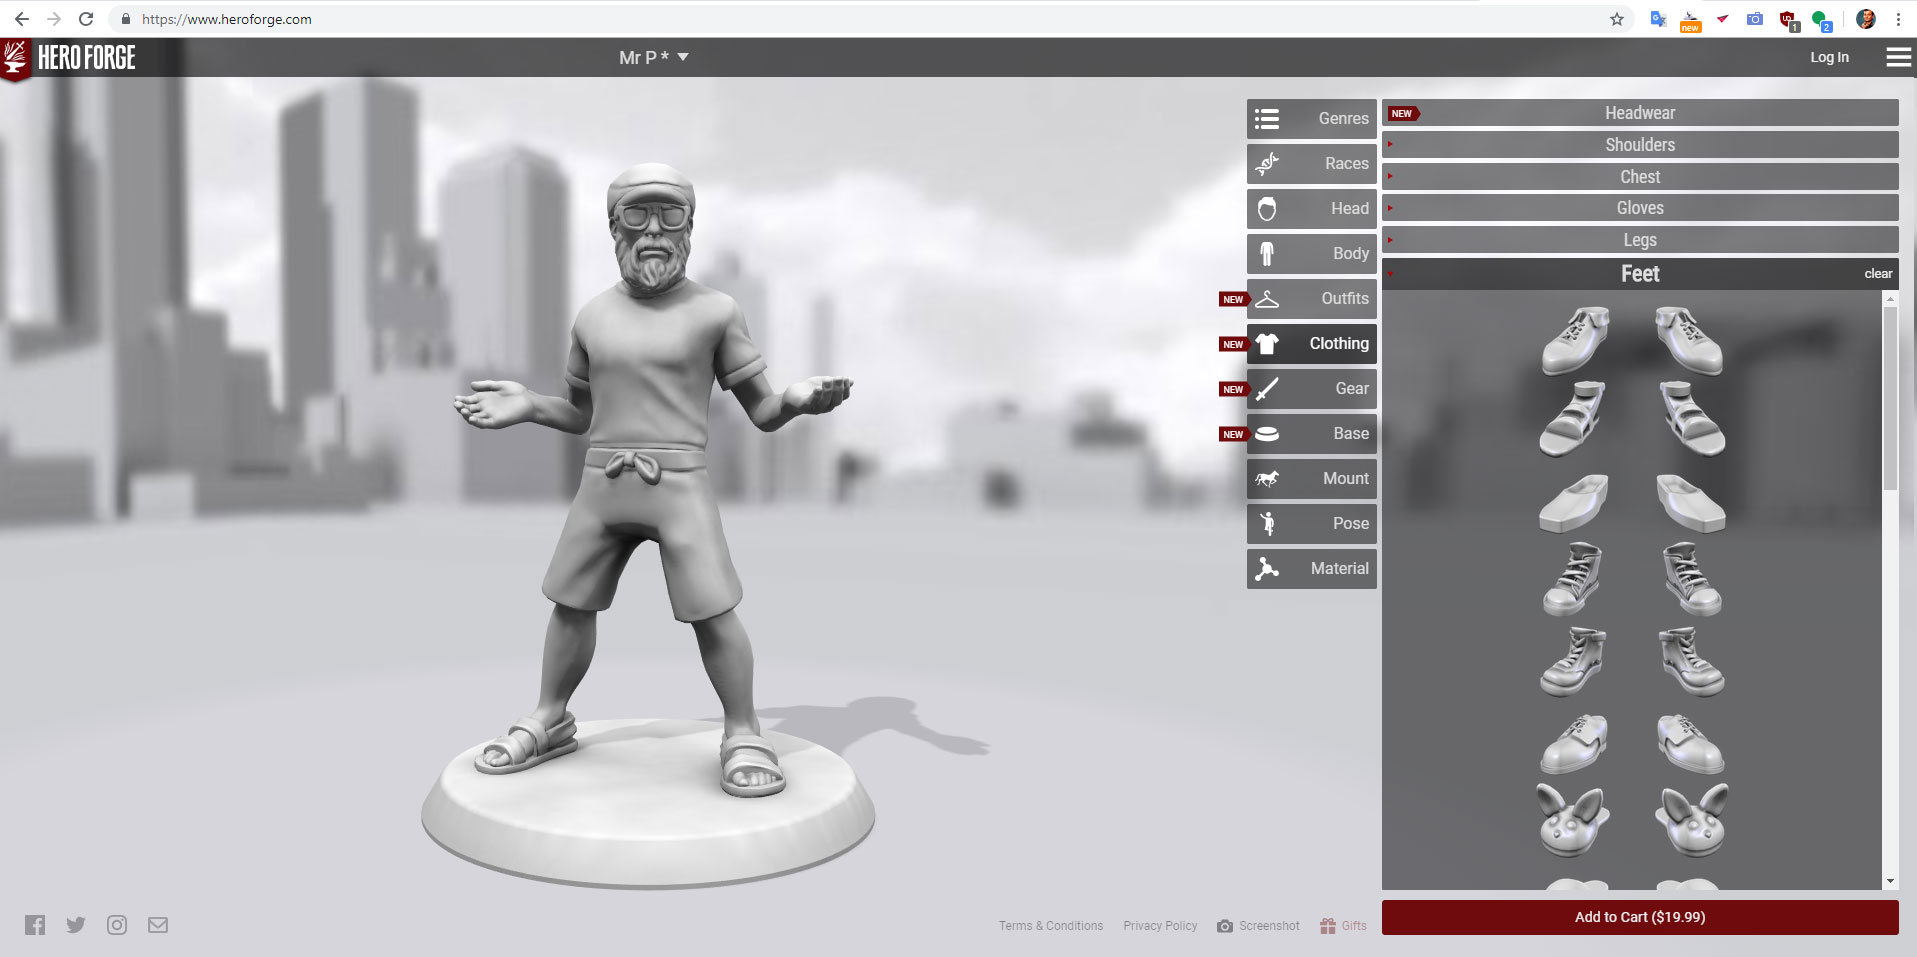
Create your own hero
A small group of enthusiasts called Hero Forge launched a Kickstarter campaign with the intent to build a simple web-based application that would allow users to create customizable tabletop miniatures. These figures would be 28-30 mm tall, so they would fit most settings.
Not all heroes wear capes…
Originally, the authors of Hero Forge were looking for a similar system, but they had no luck finding one. So they decided to build their own. Hero Forge is a user-friendly 3D editor that allows users to assemble their own character – something quite similar to character creators in video games.
The philosophy behind this project is quite clear: there are many players, who spend years playing as a single character. The character has a deep and complicated backstory, which is often reflected upon their look. Hero Forge enables players to tweak their characters to (almost) absolute perfection, then they can download the model and 3D print it.
If you don’t feel like paying for generated STL models, you can play around with DesktopHero3D, which is slightly less sophisticated, but on the other hand, it allows you to download generated models for free.
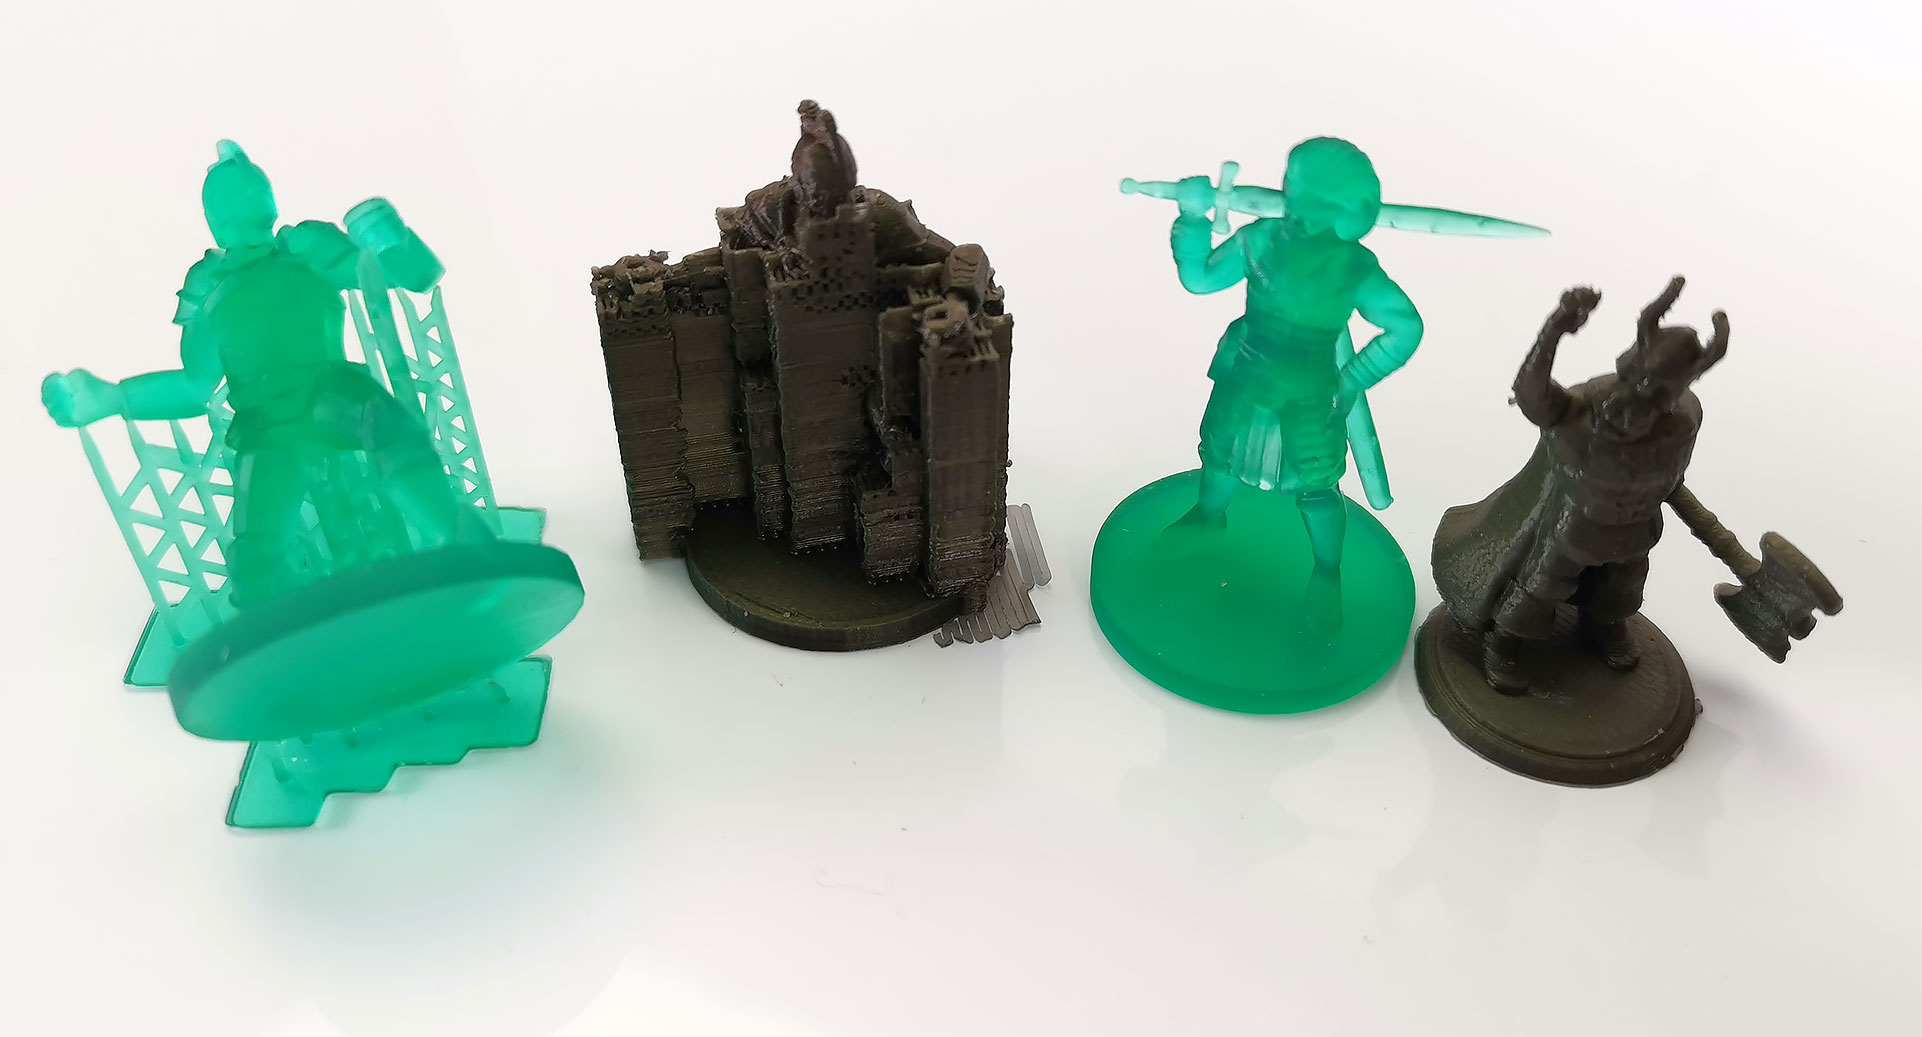
28mm minis printed on Original Prusa i3 MK3 – the PLA prints have been carefully treated with a small blowtorch in order to remove bits of strings and support leftovers
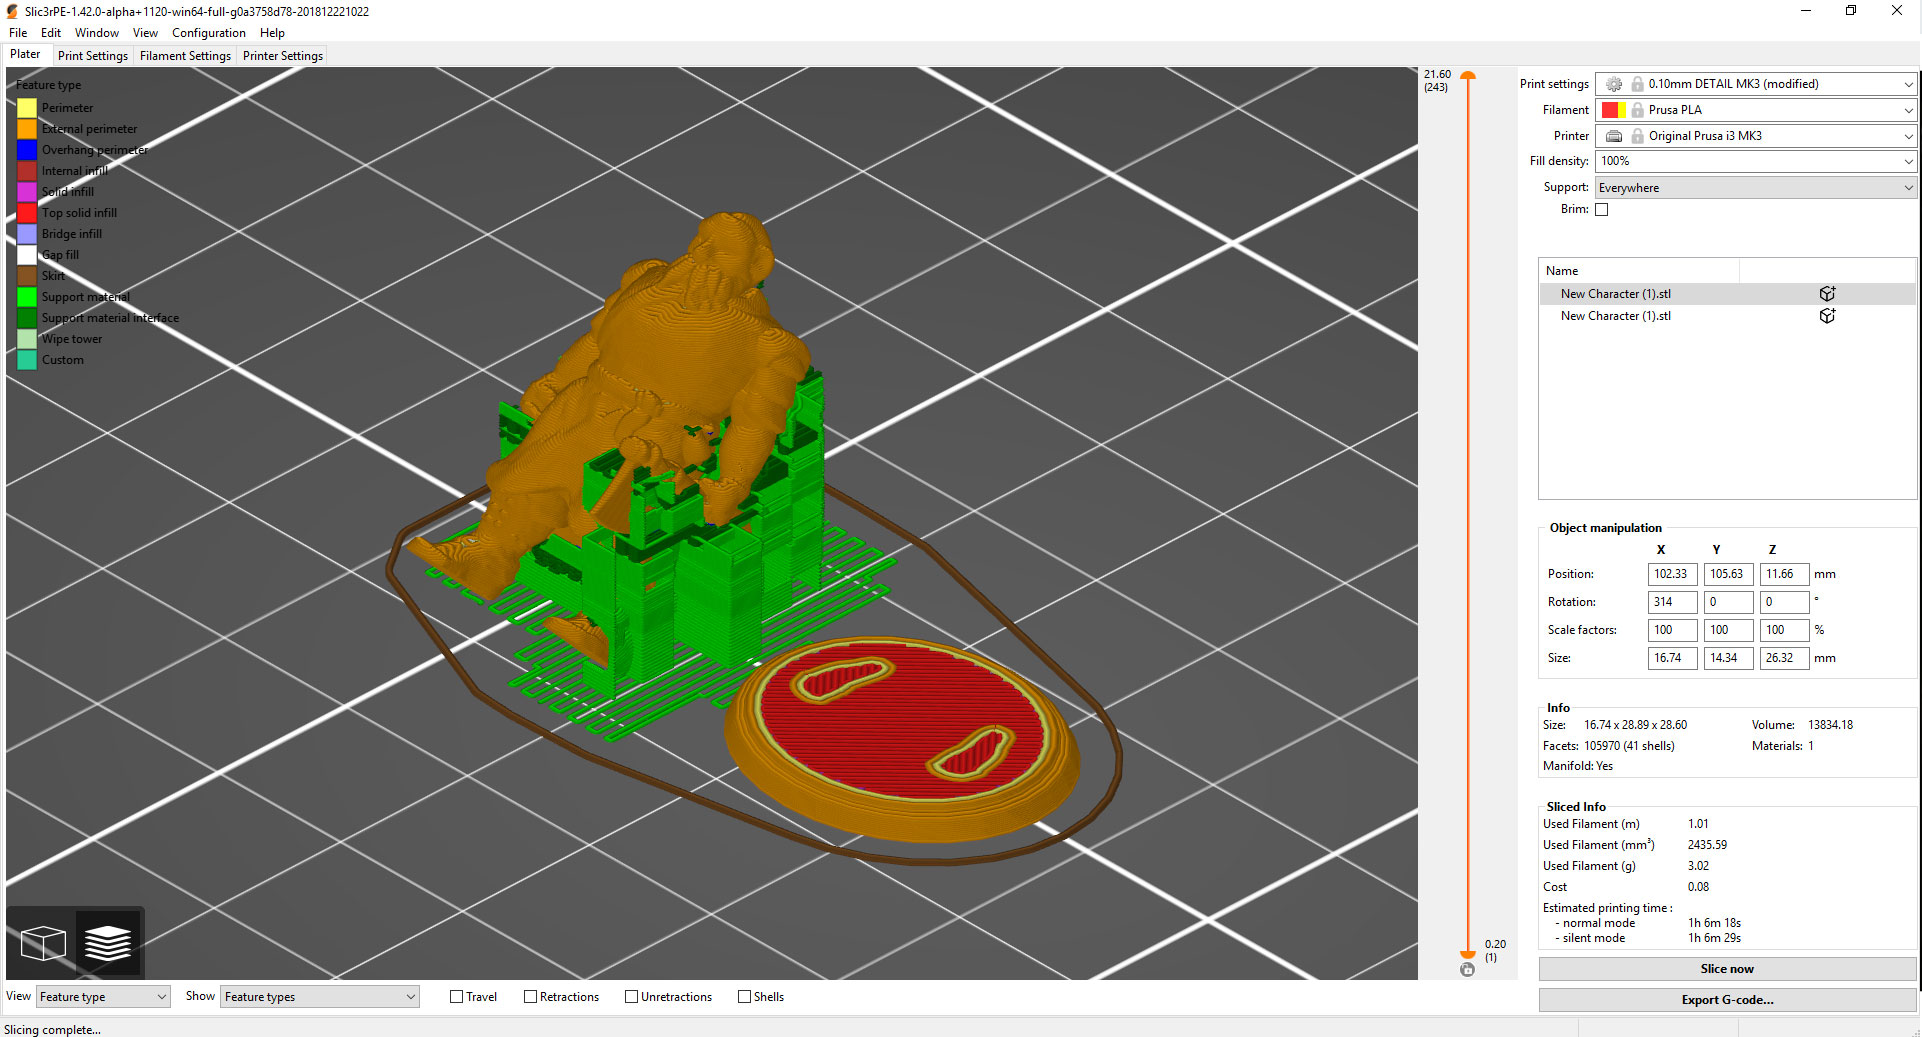
However, printing tiny characters can be a bit tricky, especially with FDM printers. It’s not impossible, though. The biggest problem usually comes with thin and tiny weapons (such as swords, spears or staves) in combination with supports. Because once you start removing the supports, no matter how careful you are, you can easily break the thinnest parts of the model. The key is to start with a good model – little to no overhangs, no parts starting in mid-air etc. Next comes the slicing procedure.
28mm miniatures can be printed on an FDM printer – try to minimize supports, use 0.10mm layer height, 100% infill and place multiple models next to each other to achieve good results
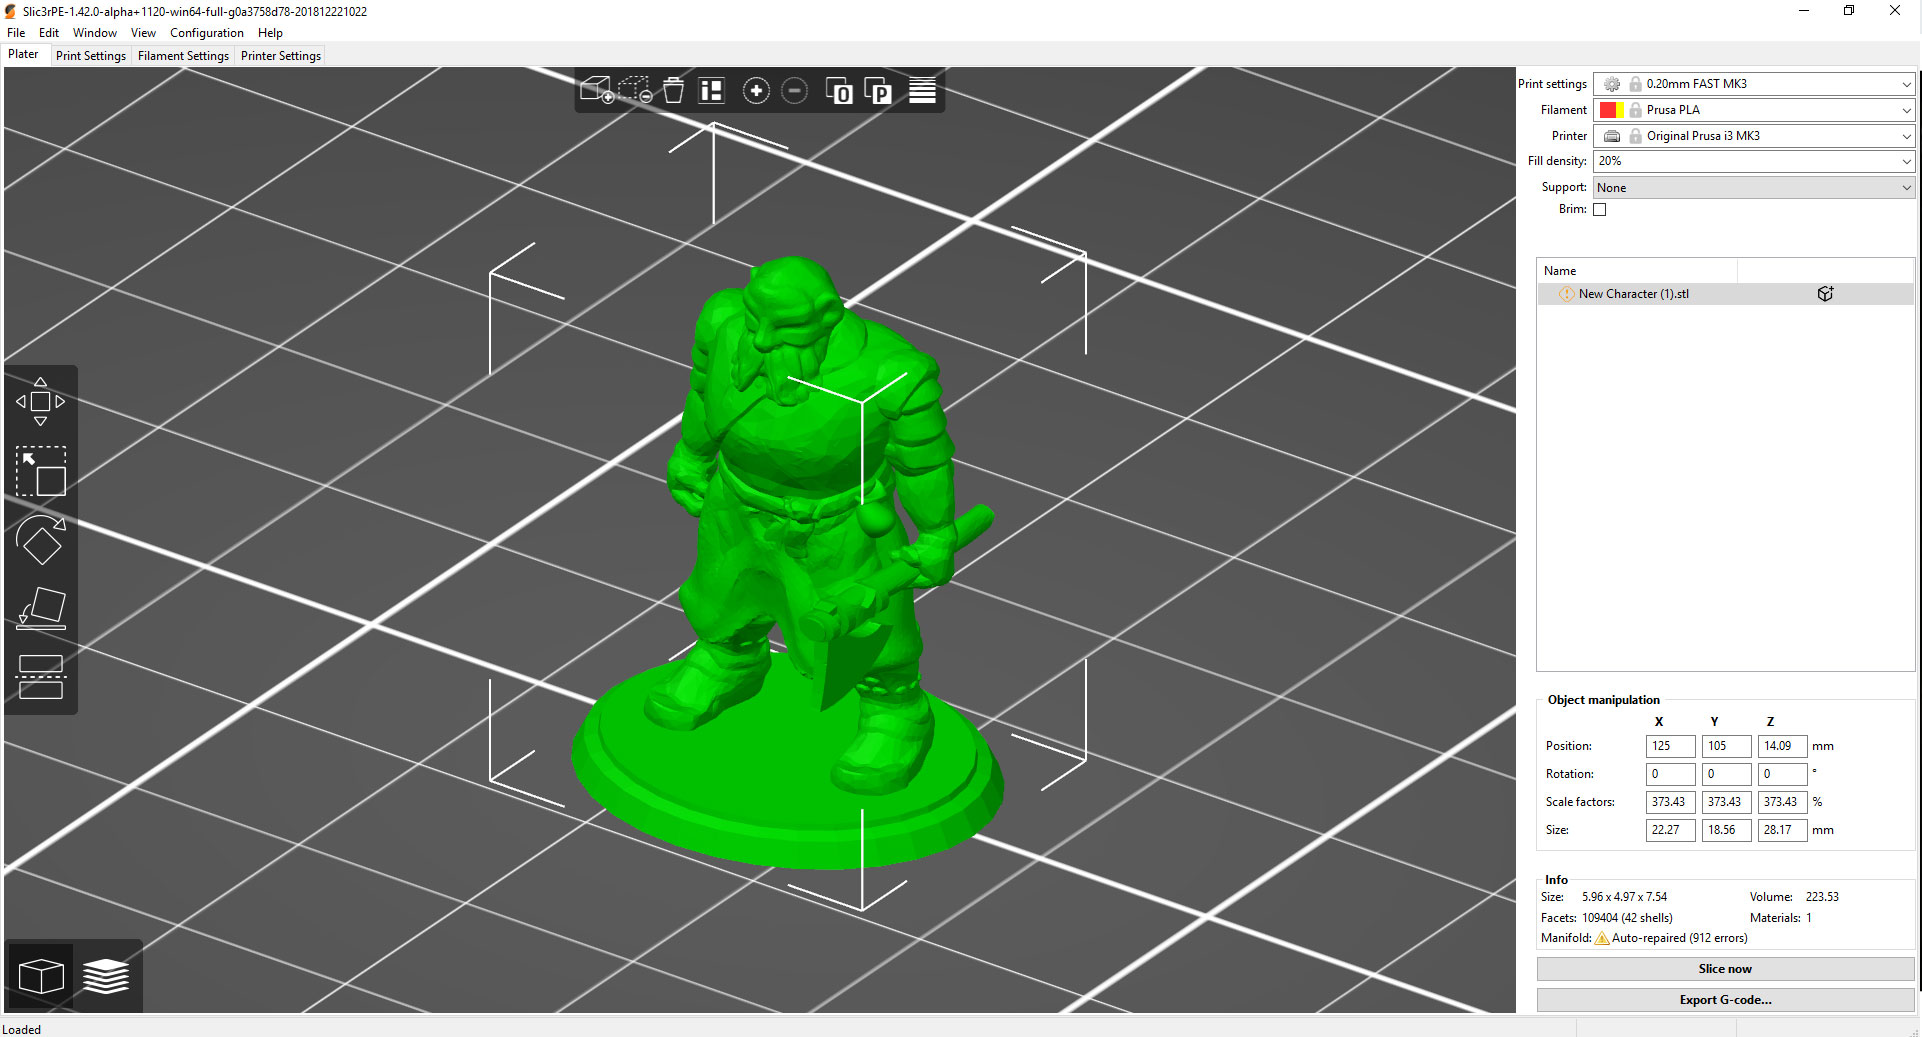
Many printable characters are already positioned on a small base for better stability. That might give you a pre-determined printing position, but what you can actually do is to cut the model using the Cut function in Slic3r PE and separate the character from the base. Then, rotate the character to a better printing position, print both things separately and then glue them together.
Use the Cut function in Slic3r to detach the model from the base for easier printing. You can then glue them back together
To achieve a better quality of printed miniatures, try tweaking several values in Slic3r PE: Decrease perimeter printing speed to 32-35 mm/s, and to 22-25 mm/s for external perimeters. If possible, use a 100% infill. The optimal layer height would be 0.10 mm. And then you need a lot of patience, steady hands, and good sharp pliers or a thin knife.
Still, getting good results with an FDM printer is a bit challenging (but as you can see, our MK3 can handle them pretty well). If you plan to print a large number of miniatures, we can wholeheartedly recommend our upcoming Original Prusa SL1 printer, which uses the MSLA technology to print unbelievably detailed models – it’s coming soon, so stay tuned! 🙂
Removing supports from SLA prints (green) takes a few seconds. Removing supports from FDM prints (black) is more complicated
Accessories for your D&D session
Cryptex
Cryptex is actually a neologism invented by the author Dan Brown for his novel The Da Vinci Code. It’s essentially a small vault with a combination lock (similar to bike lock). Rotate the dials with letters of the alphabet to form the password and the hidden chamber will be unlocked, revealing the secret that’s been hidden inside. It’s a great puzzle for any dungeon master, allowing them to torture poor heroes with diabolical riddles! 🙂 Download from Thingiverse.

If you wonder what kind of secret message is inside, check out the video at the beginning of this article 😉
Dice tower with swappable trays
Dice are an integral part of any proper tabletop RPG. To make the process of throwing the dice more effective (or more interesting?), you can print this dice tower.
Just take a handful of dice and drop them into the tower. Dual ramps inside will ensure that the dice are tossed randomly, and the tray with a small wall will stop them from falling off the table. There are several designs available online, so just take your pick. Download from Thingiverse.
There are various dice towers available on Thingiverse and other servers
Spell/Life counters, Spell trackers
Health points, magic points, and spells are the most important things in the life of a wizard, mage or warlock. To make things easier (not only) for magic users, there are various accessories you can print – most notably healthpoint trackers and spell trackers.
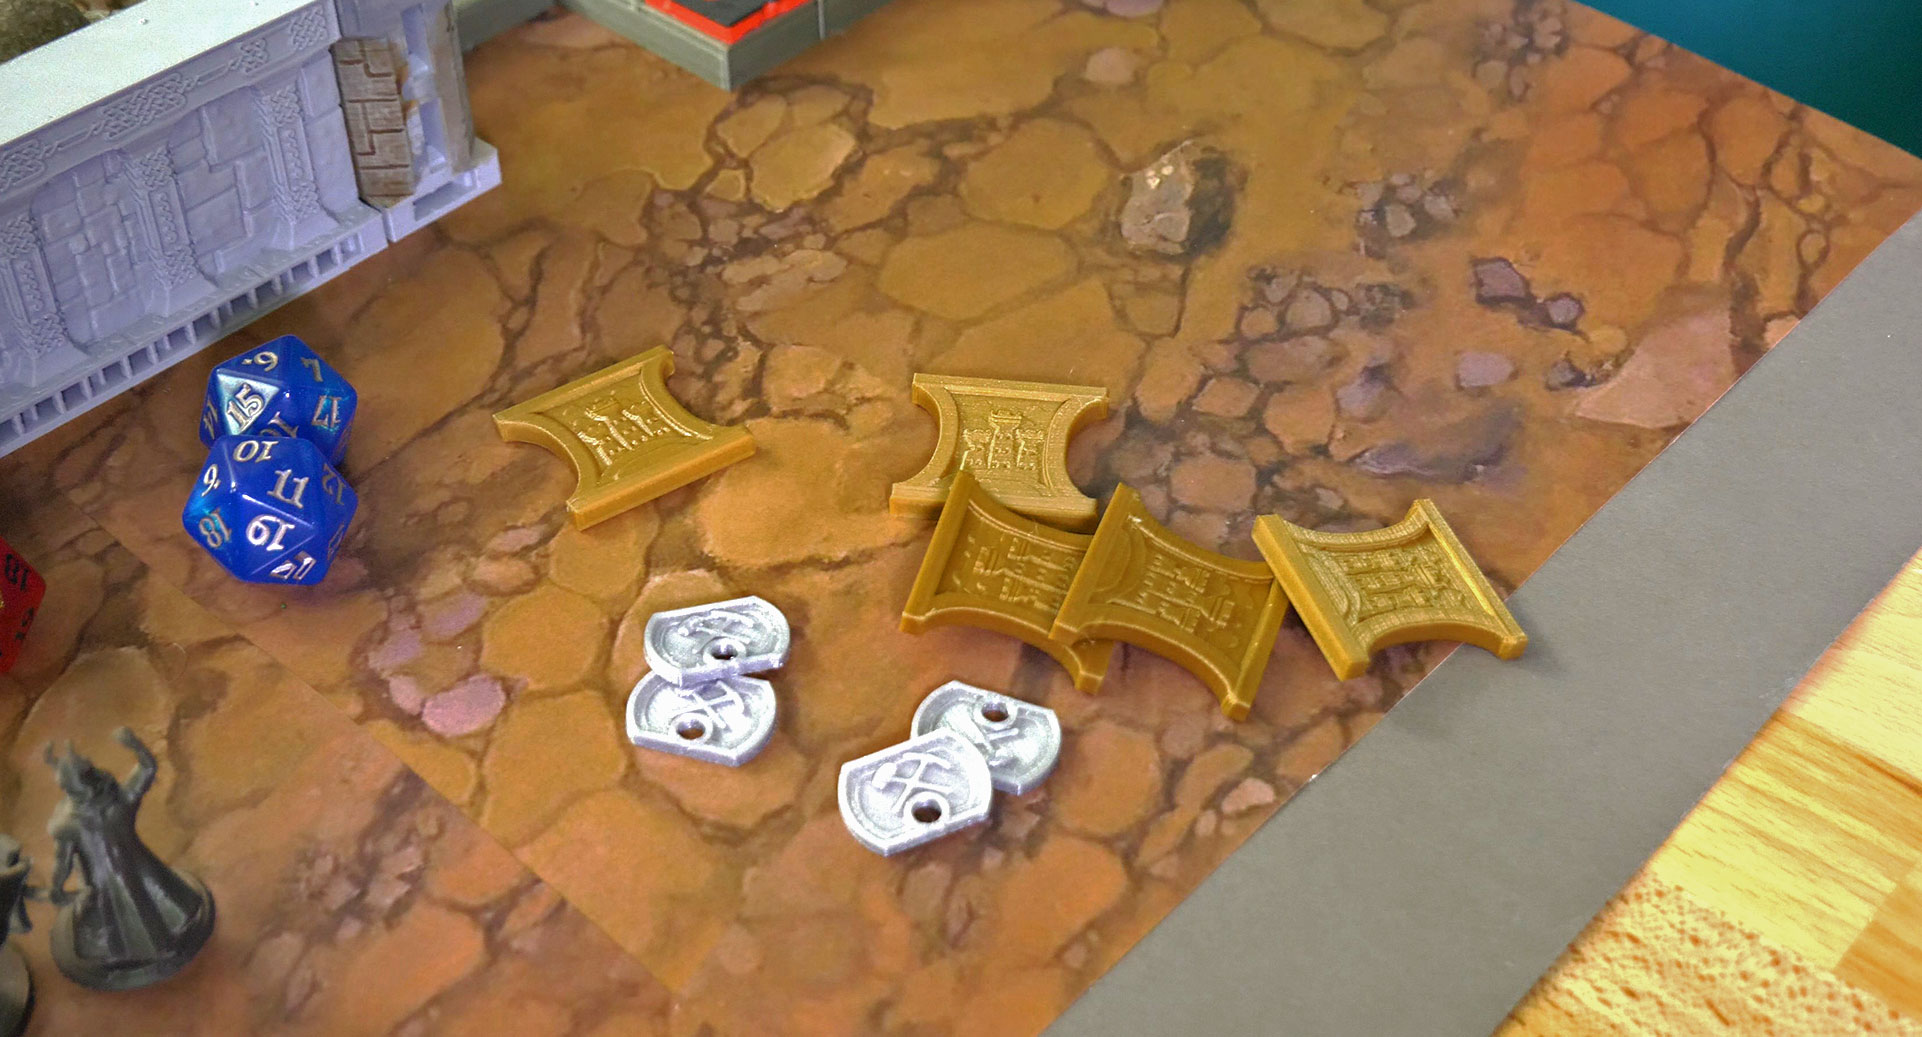
A health/mana tracker is a self-explanatory device. It consists of two or more rings with numbers, which can be rotated freely in order to display the player’s current health or magic points. Feel free to pick any that suits your needs from the large selection at Thingiverse. We have printed a Parametric Life Counter and printed it with Prusament PLA Lipstick Red, and also another Life Counter, this time serving as a mana counter – that’s why we used Prusament PLA Azure Blue.
Life and mana counters, certain models can be easily modified in OpenSCAD
A spell tracker is another useful tool – the spells are placed in slots that correspond to the spell’s level. Once a spell is cast, the player then removes the spell level token and places it back in the storage. Once the spell recharges, the token can be placed back in the correct slot. Much more convenient than a pen and paper! Download from Thingiverse.
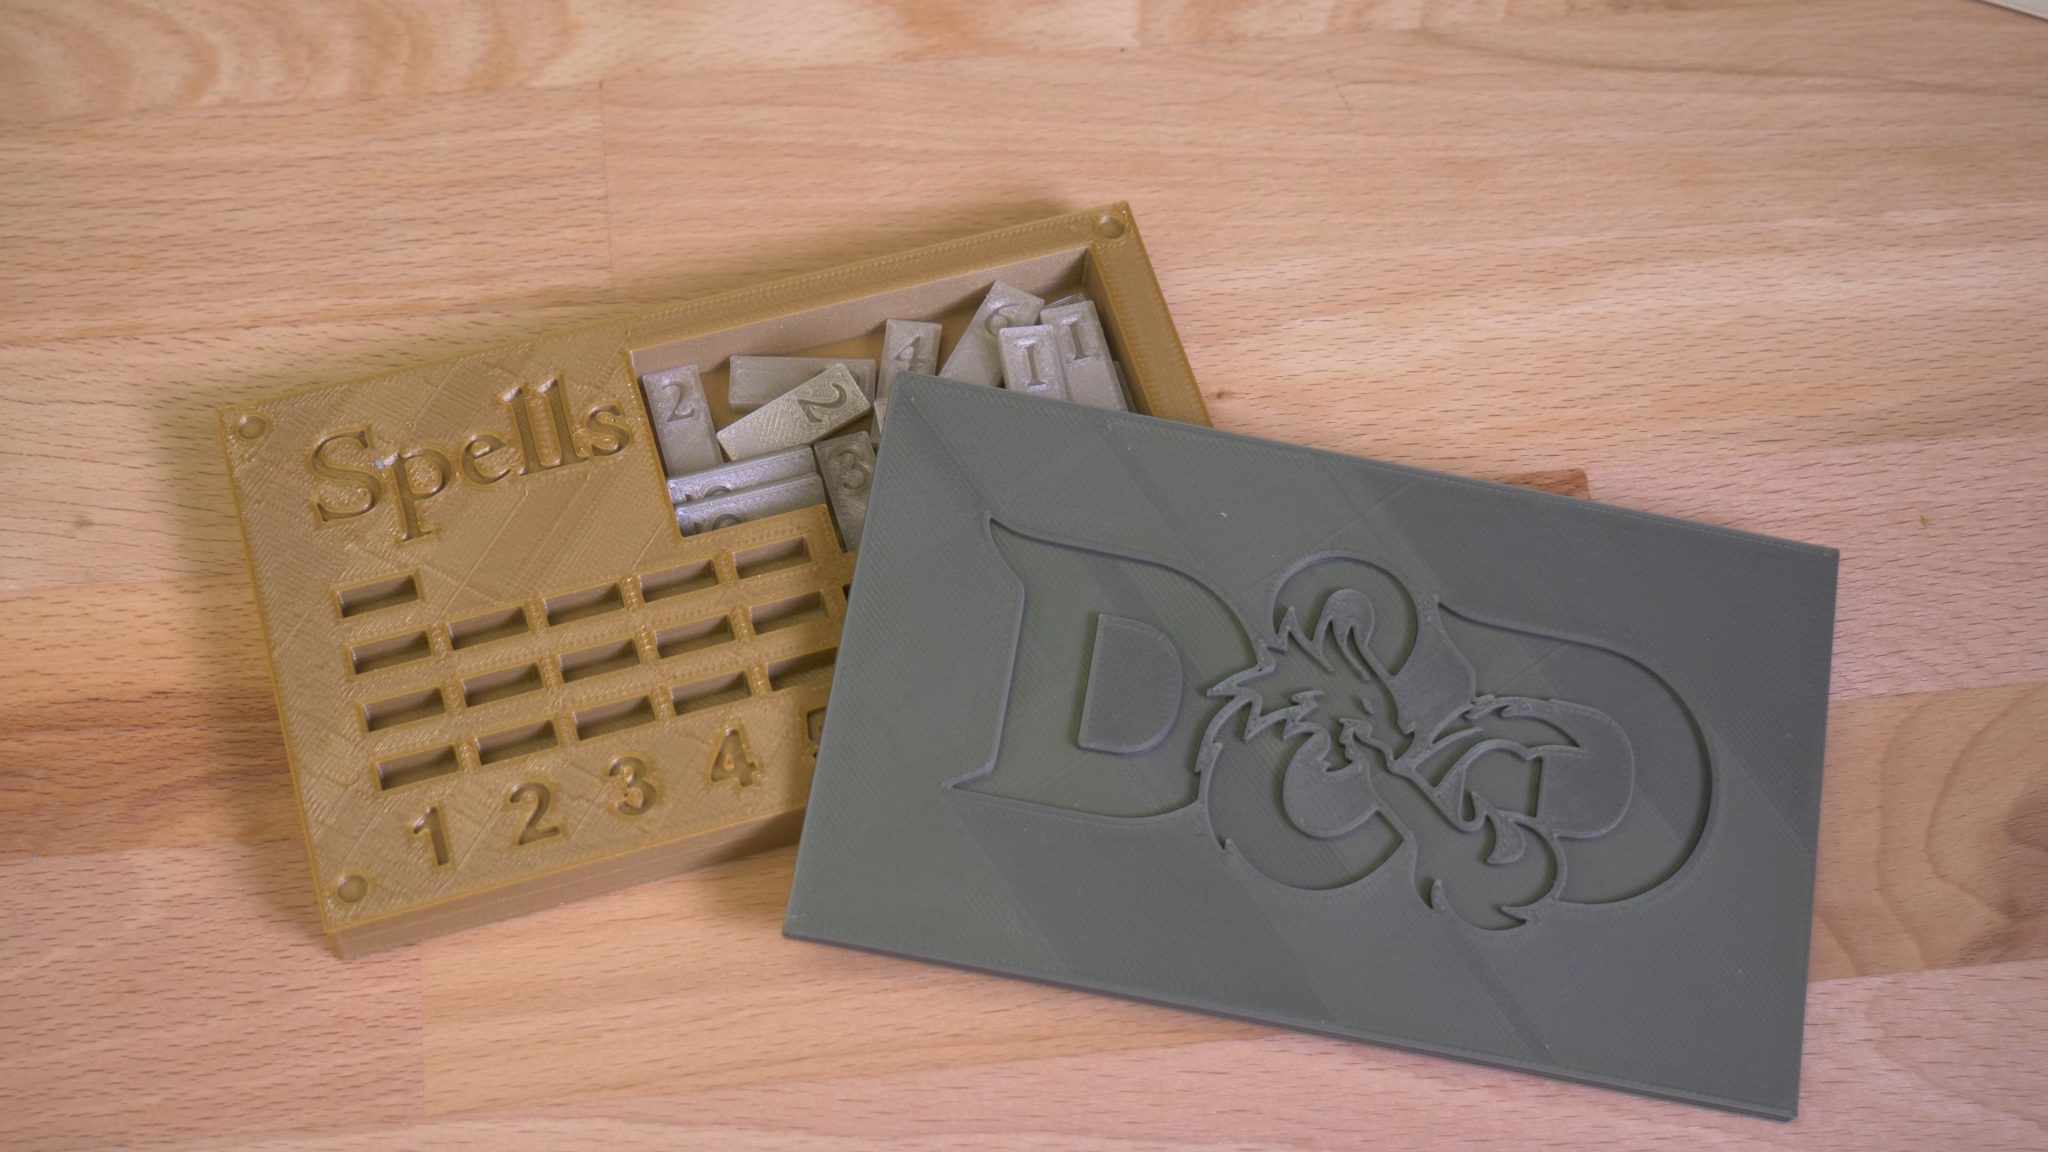
The best friend of every good (or evil) wizard – a spell tracker
GOOOOLD!
Ah yes! The sweet, sweet reward for any noble hero – gold coins! There are different sets of D&D-ready coins, and we went for the set prepared by Lil_Doodie. The great thing about this set is that the coins differ by the shape, so even though you won’t print them with various materials, you can still tell them apart. But we recommend using various filament colors or at least painting the printed coins. Just look at how great they look with our Prusament Premium Mystic Brown! 🙂 Download (unfortunately fake) coins from Thingiverse.
I have a plan! I just need money…
A hero or a dungeon master?
With 3D-printable set pieces, a whole new world of possibilities opens to RPG fans worldwide. The set pieces used for building dungeons and game maps are easy to print, they usually require no supports and can be further enhanced with acrylic paints or LED lights. The best part is the fact that you can print an infinite number of walls, floors, doors, traps, puzzles and tons of other things, so you can build bigger, better and more complex maps than ever before. However, one question remains: will you become a mighty hero or the ultimate dungeon master? 🙂
Excellent post! Thanks for sharing this interesting article about how to 3D print your own tabletop game. I have learned very interestingly in this article. Actually, I love this type of fun and online games, Recently I checked a resource https://luckypennsylvania.com/online-poker where I get the best casinos to play poker online in Pennsylvania that can help me to win more money by play this online game. Anyways, I much appreciate the author for sharing this informative article about this 3D print tabletop game.
Join carx street apk descargar and discover a colorful and rich world of street racing, with a car upgrade system and special features.
join GTA 5 Mobile apk to have the best experience moments
I was browsing this application. I adore it. You may also check out my brand-new free <a href="https://gbwhts.net/fouad-whatsapp-download/">Fouad WhatsApp</a>.
The APK mod Apps game has many forms for everyone to choose and build in their own very interesting way.