


A couple of months ago, our brand new 3D printer, the Original Prusa SL1, hit the market. It’s based on the MSLA technology, which allows it to reach an incredible level of detail on the printed objects. It has a wide range of use, and this time we decided to focus on model railways – these small replicas (H0) are often full of microscopic details: a suitable challenge for our SL1. However, the SL1 can do much more than just trains – pretty much everything in the surroundings requires a ton of details: cars, pedestrians, parts of scenery…
And, of course, large models can be printed on our FFF machines, such as the Original Prusa i3 MK3S, and combined with more detailed models from the SL1.
The best showcase is usually a real-life scenario, so let us show you a project that we’ve been working on for quite some time already. There’s a lot to show, so expect several articles, in which we will show you how to make your own railway model: from the landscape basics to highly-detailed trains. We will be using a combination of easily accessible parts from Amazon, eBay, etc. and 3D printed models to create a realistic-looking result while keeping the costs reasonably low. In this article, we will show you how to create a small diorama with the basic landscape. Thanks to the use of 3D printing, this can be a good starting point if you would like to make a bigger model and don’t have any experience yet.
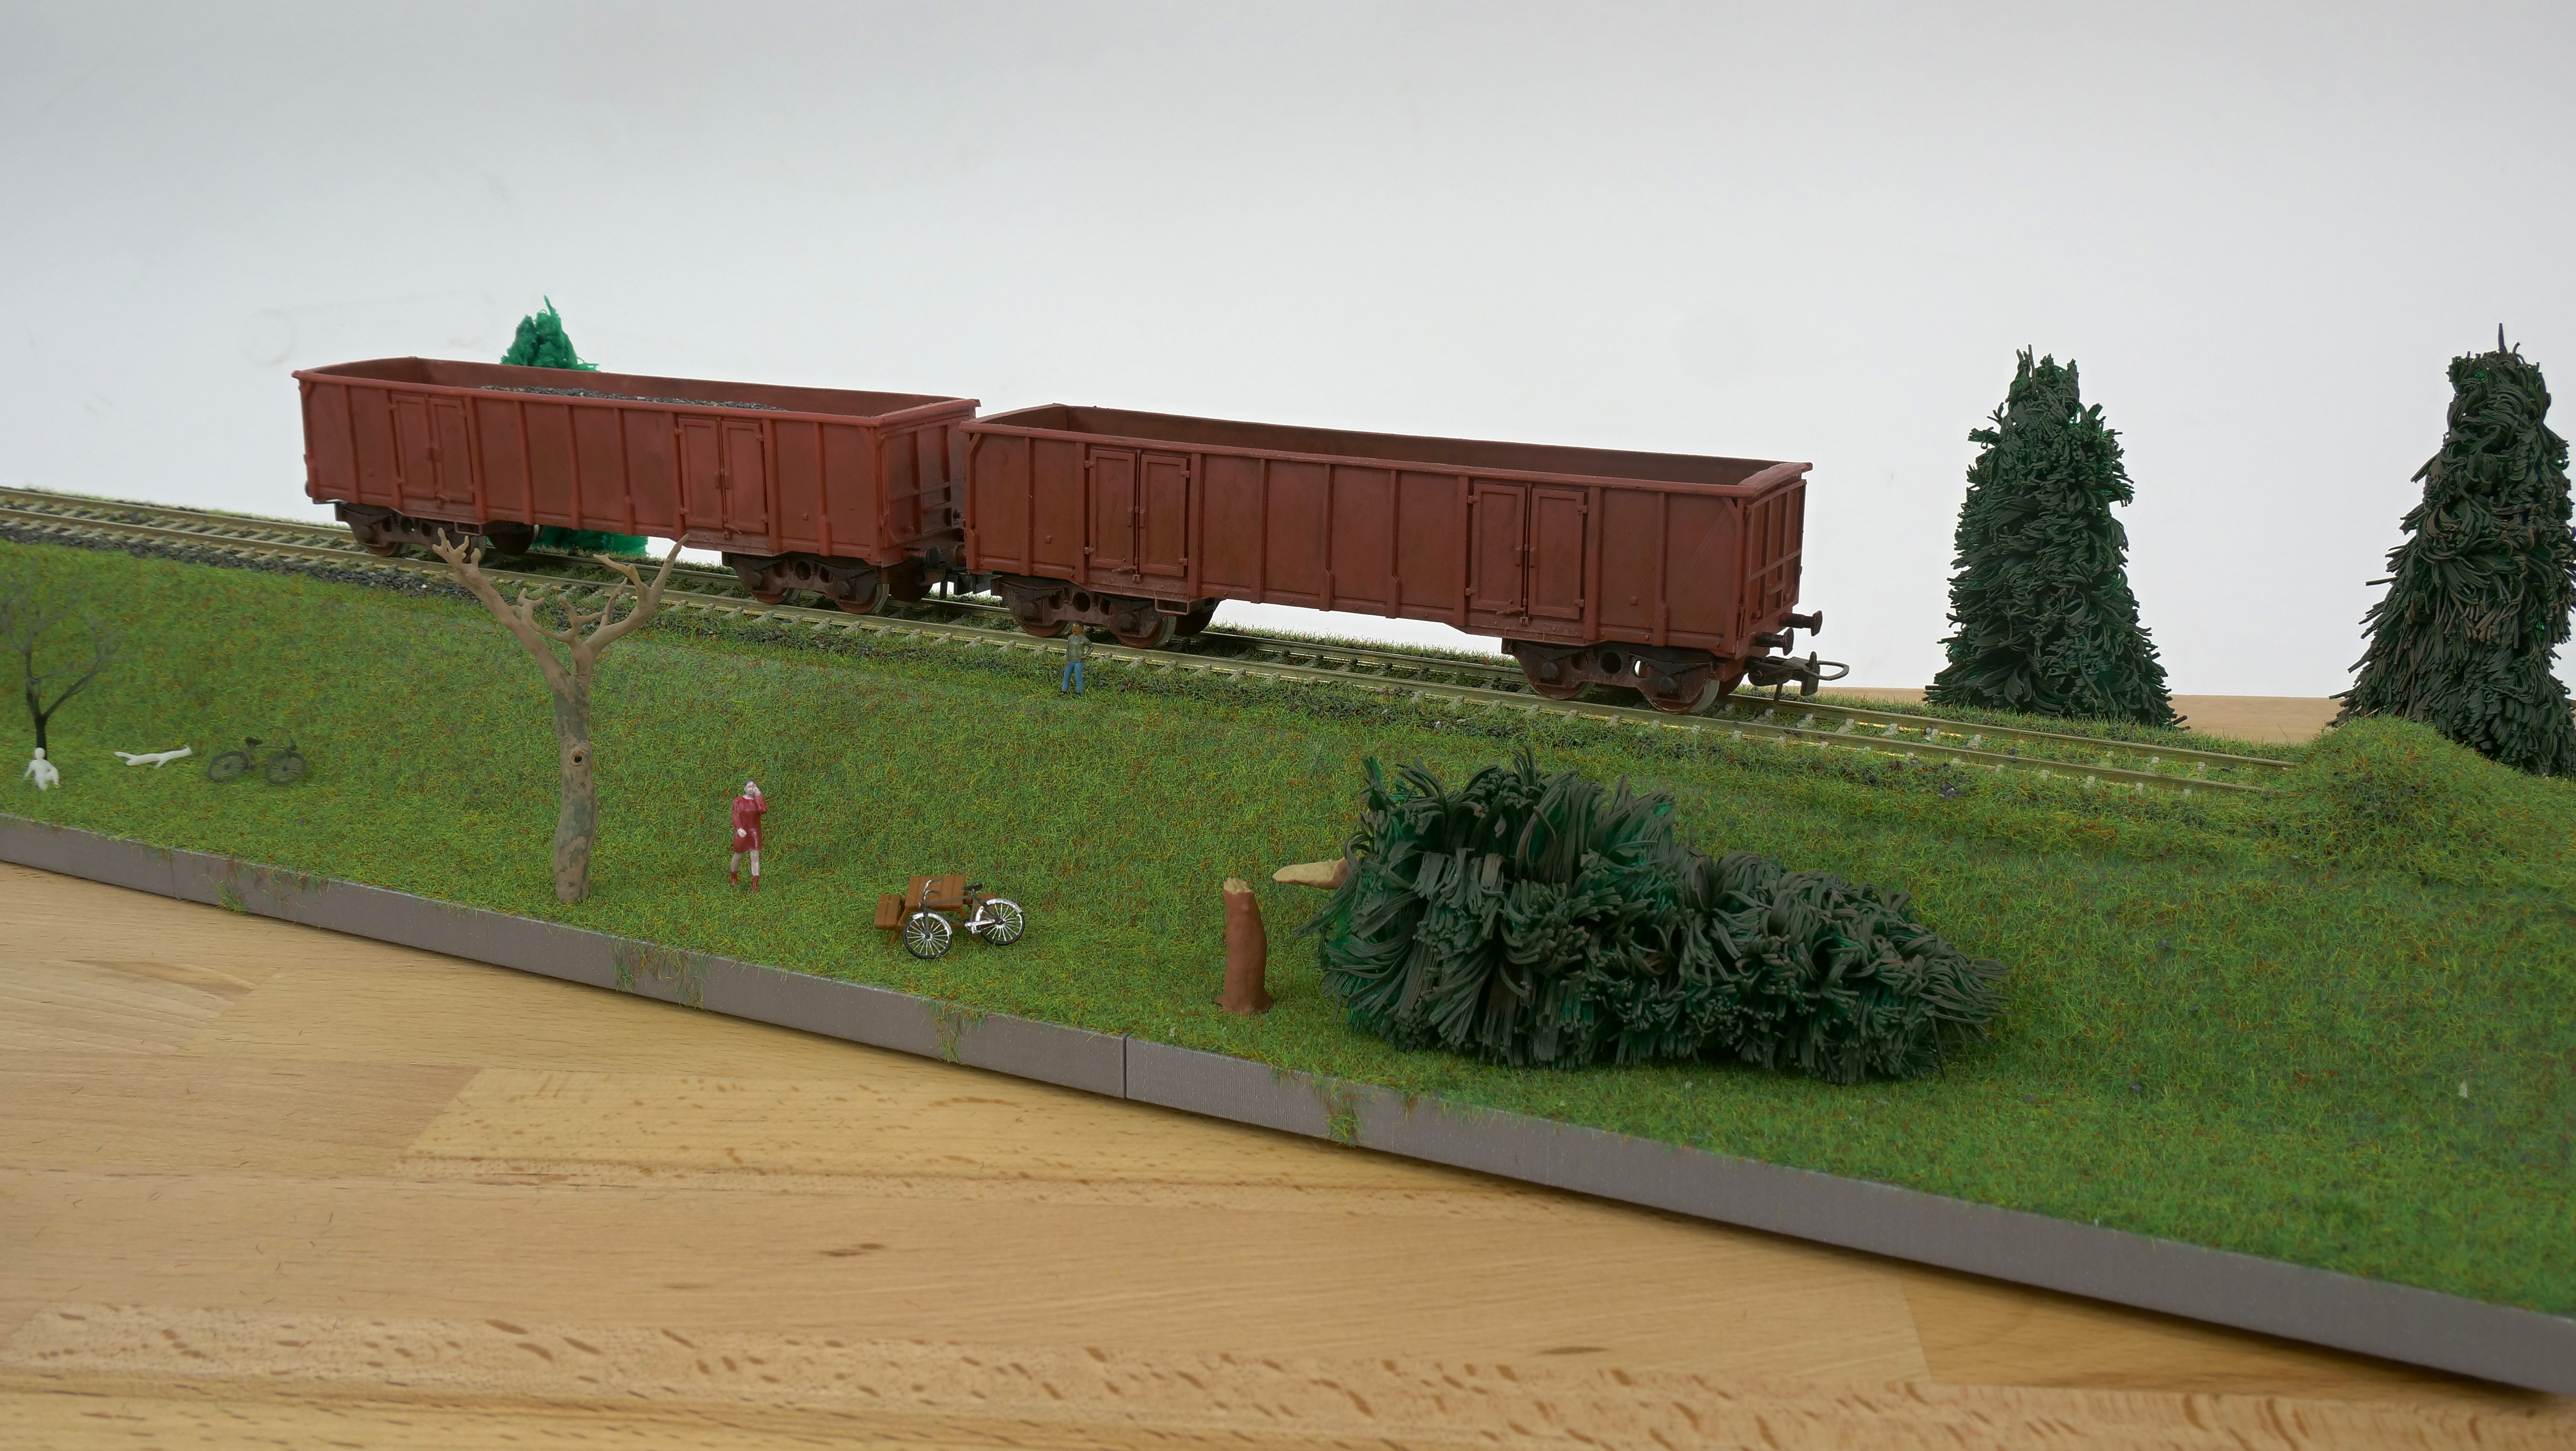
We prepared a small model made out of 5 pieces representing a railway embankment (see the list of the required parts below) and ballast with one track. All these parts were printed on the Original Prusa i3 MK3S printer and glued together using superglue. Then, we glued the H0 tracks on the printed part. There are a couple of ways how to secure them, however, the best one is to use superglue and fix the tracks in several spots, or to use small screws. Once the tracks are in place, we are ready to start building the surroundings. We will start by adding gravel to create the track ballast. For the best look of the final model, it is necessary to follow the next steps.
- Choose a good type (scale) and color of gravel for this procedure. If the stones are too big, the result will be poor
- Gravel has to be spread evenly along the whole train track. For easier application, we have prepared this model that will save you some valuable time. This application still needs some tuning with a brush to make it as realistic as possible, though.
- Once the ballast is in place, it is necessary to fix it in place. A combination of water and water-based liquid paper glue in a 1:1 ratio with a few drops of soap is the best option. Gently drip small amounts of this emulsion on the gravel – use a syringe or dropper.
Cheap DIY grass applicator with great results
Once the gravel is dry, you can move onto the next step, which is the application of grass on the model – it’s an important part of making the landscape look realistic. There are two options for applying grass: the first is a simple one – pour a grass mixture on the model terrain covered with a layer of glue. The second option is much better looking: it’s based on using an electric field which causes the grass blades to stand vertically. This option brings much more realistic results, but there’s one big disadvantage: you will need to buy a grass applicator. Reasonably good models operate usually on a 9V battery and cost more than 100 USD. However, there is a DIY option, which requires just a few printed parts from PLA material and several electrical parts for less than 30 USD.
List of required parts:
3) Power jack
4) Push Button
5) Static grass
6) Wires, connectors, crocodile clip are accessible in your local hardware store
7) Printed parts of the grass applicator, gravel applicator and embankment can be downloaded from Prusaprinters.org.
Before you start the assembly itself, make sure that you have all the parts necessary for the assembly as shown in the photo.
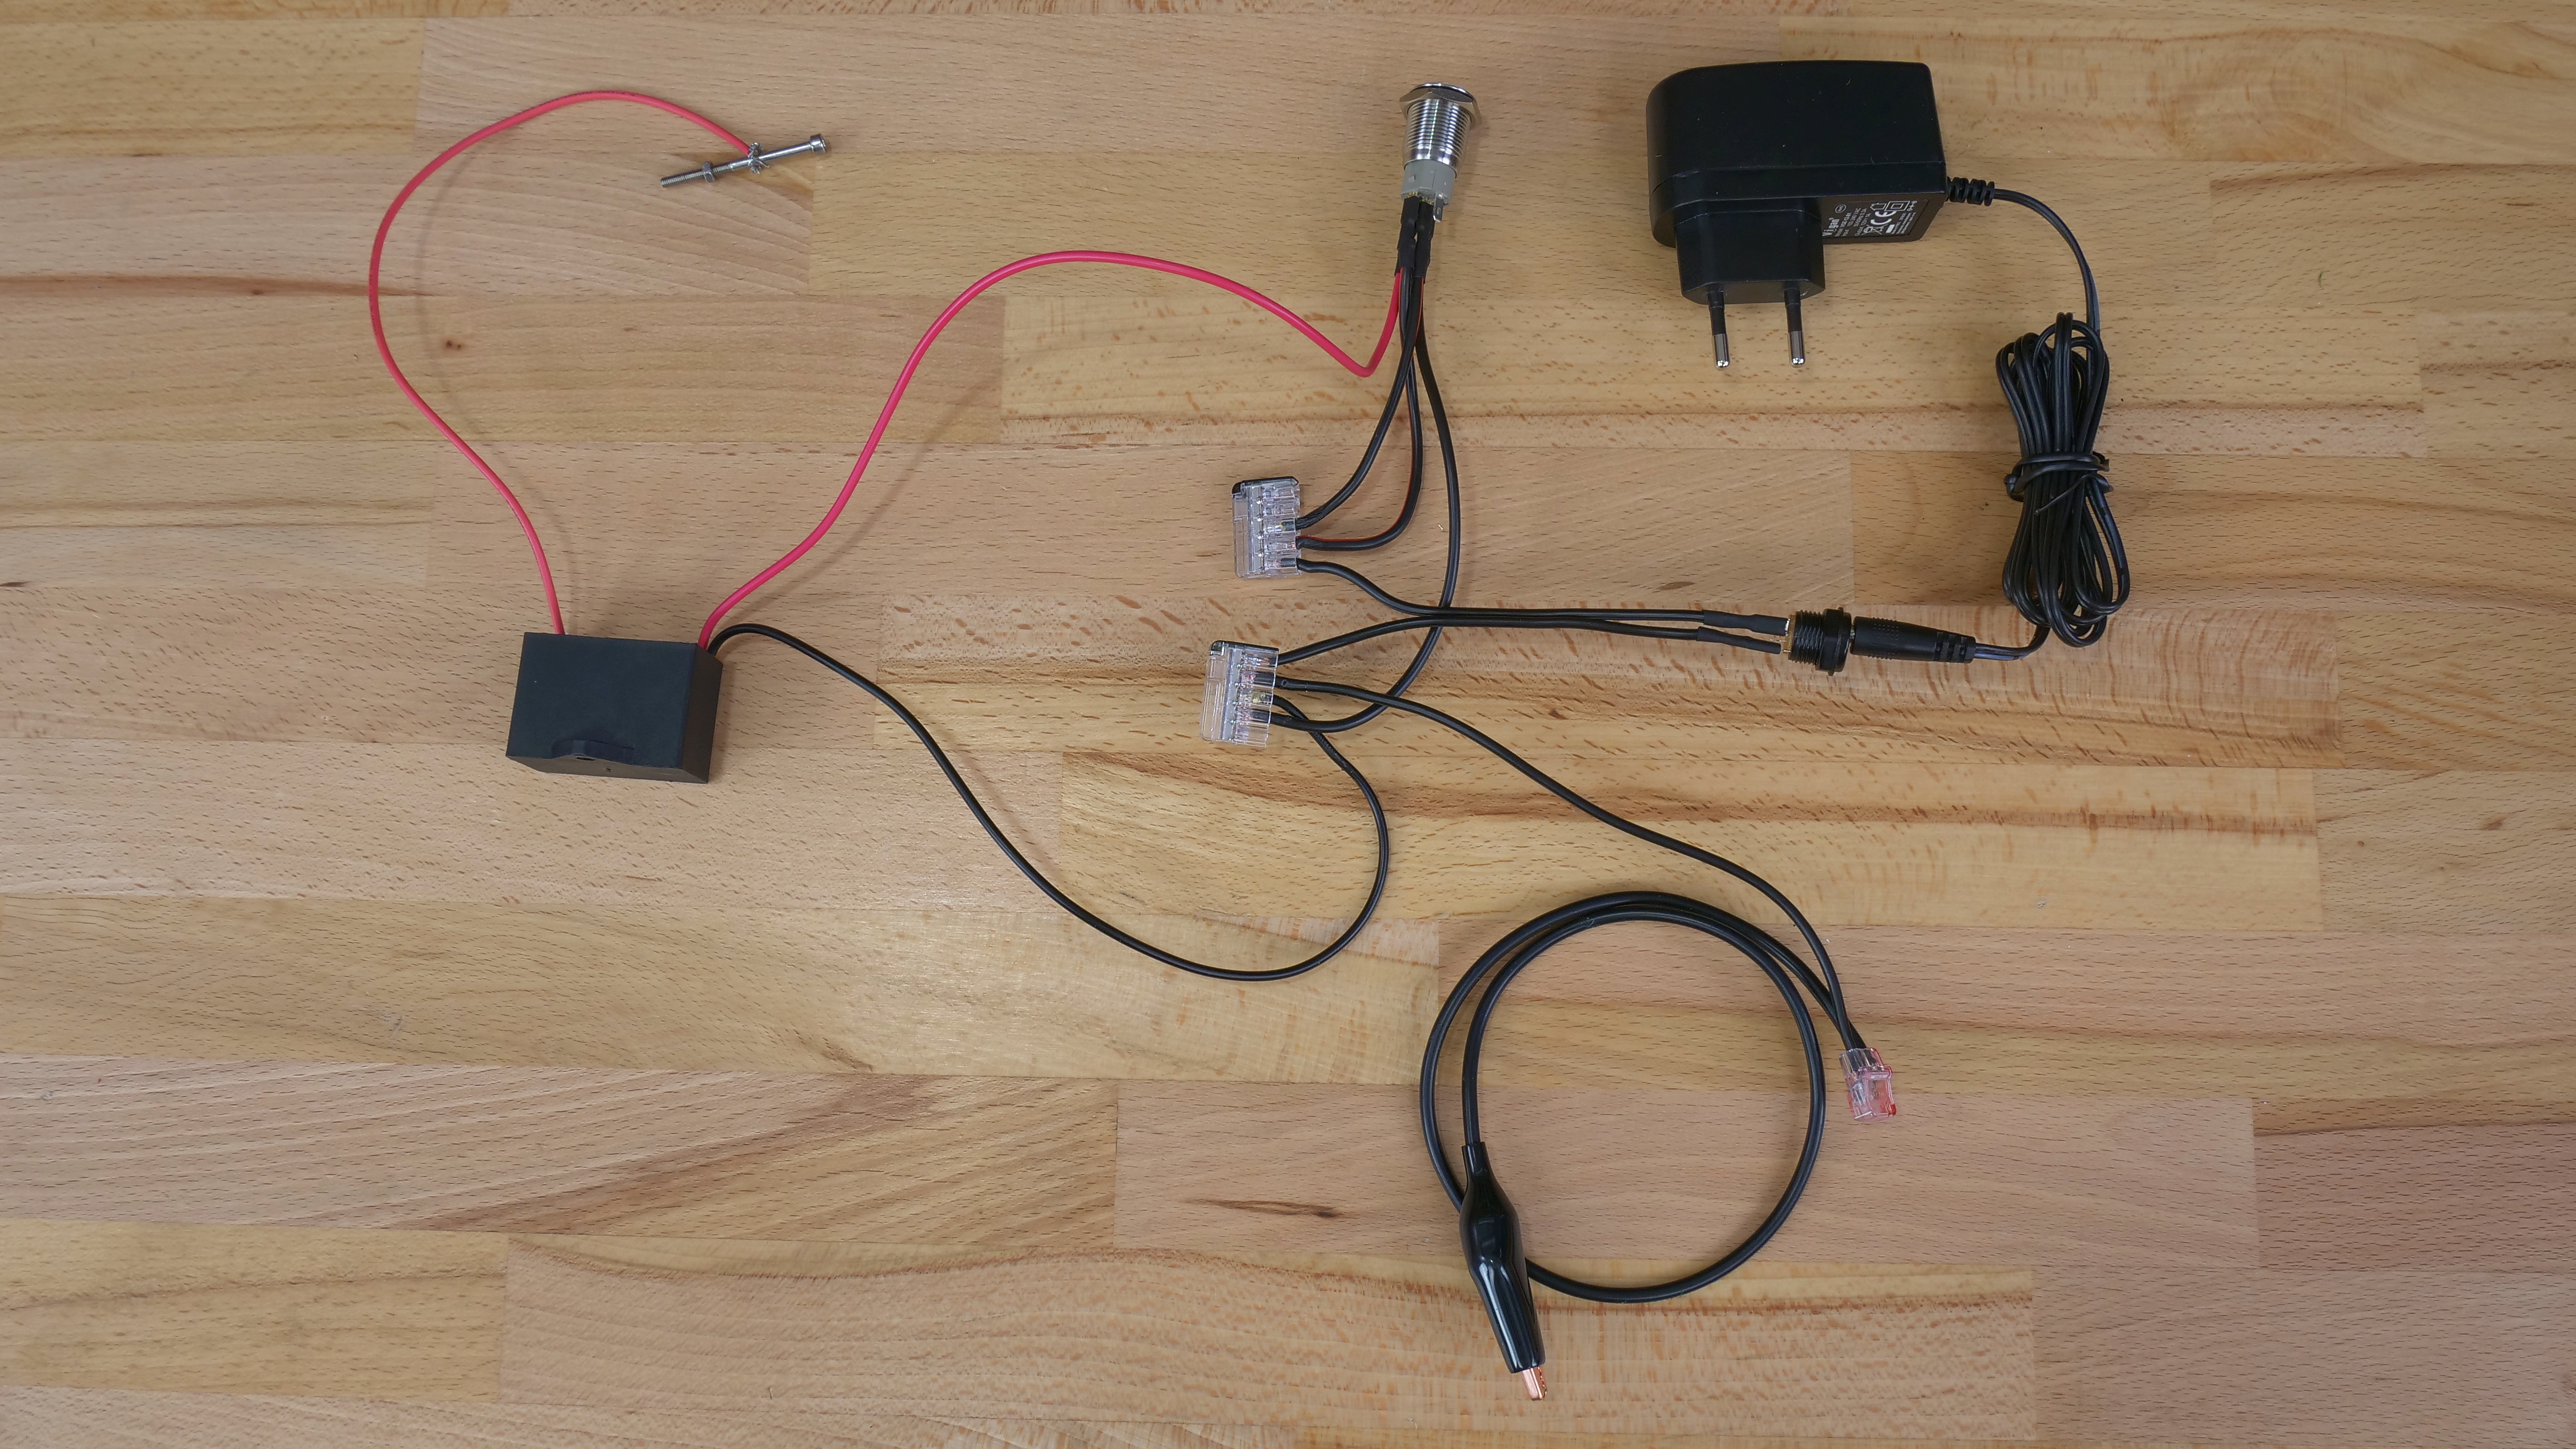
First of all, prepare the necessary cables. It is better to have longer ones – you can always shorten them later, if necessary. You will need 3 red wires, approx. 20cm (8 inches) length, and 2 black wires, approx. 20-30cm (8-12 inches) length. If you are not familiar with soldering, you can use connectors that can be attached to the switch and power jack. Wago connectors are a great choice for connecting the cables together. If you decided to use the connector method (without soldering), check the photo below. A word of warning: some Wago connectors may be too large and won’t fit the body of the device – we recommend buying smaller ones.
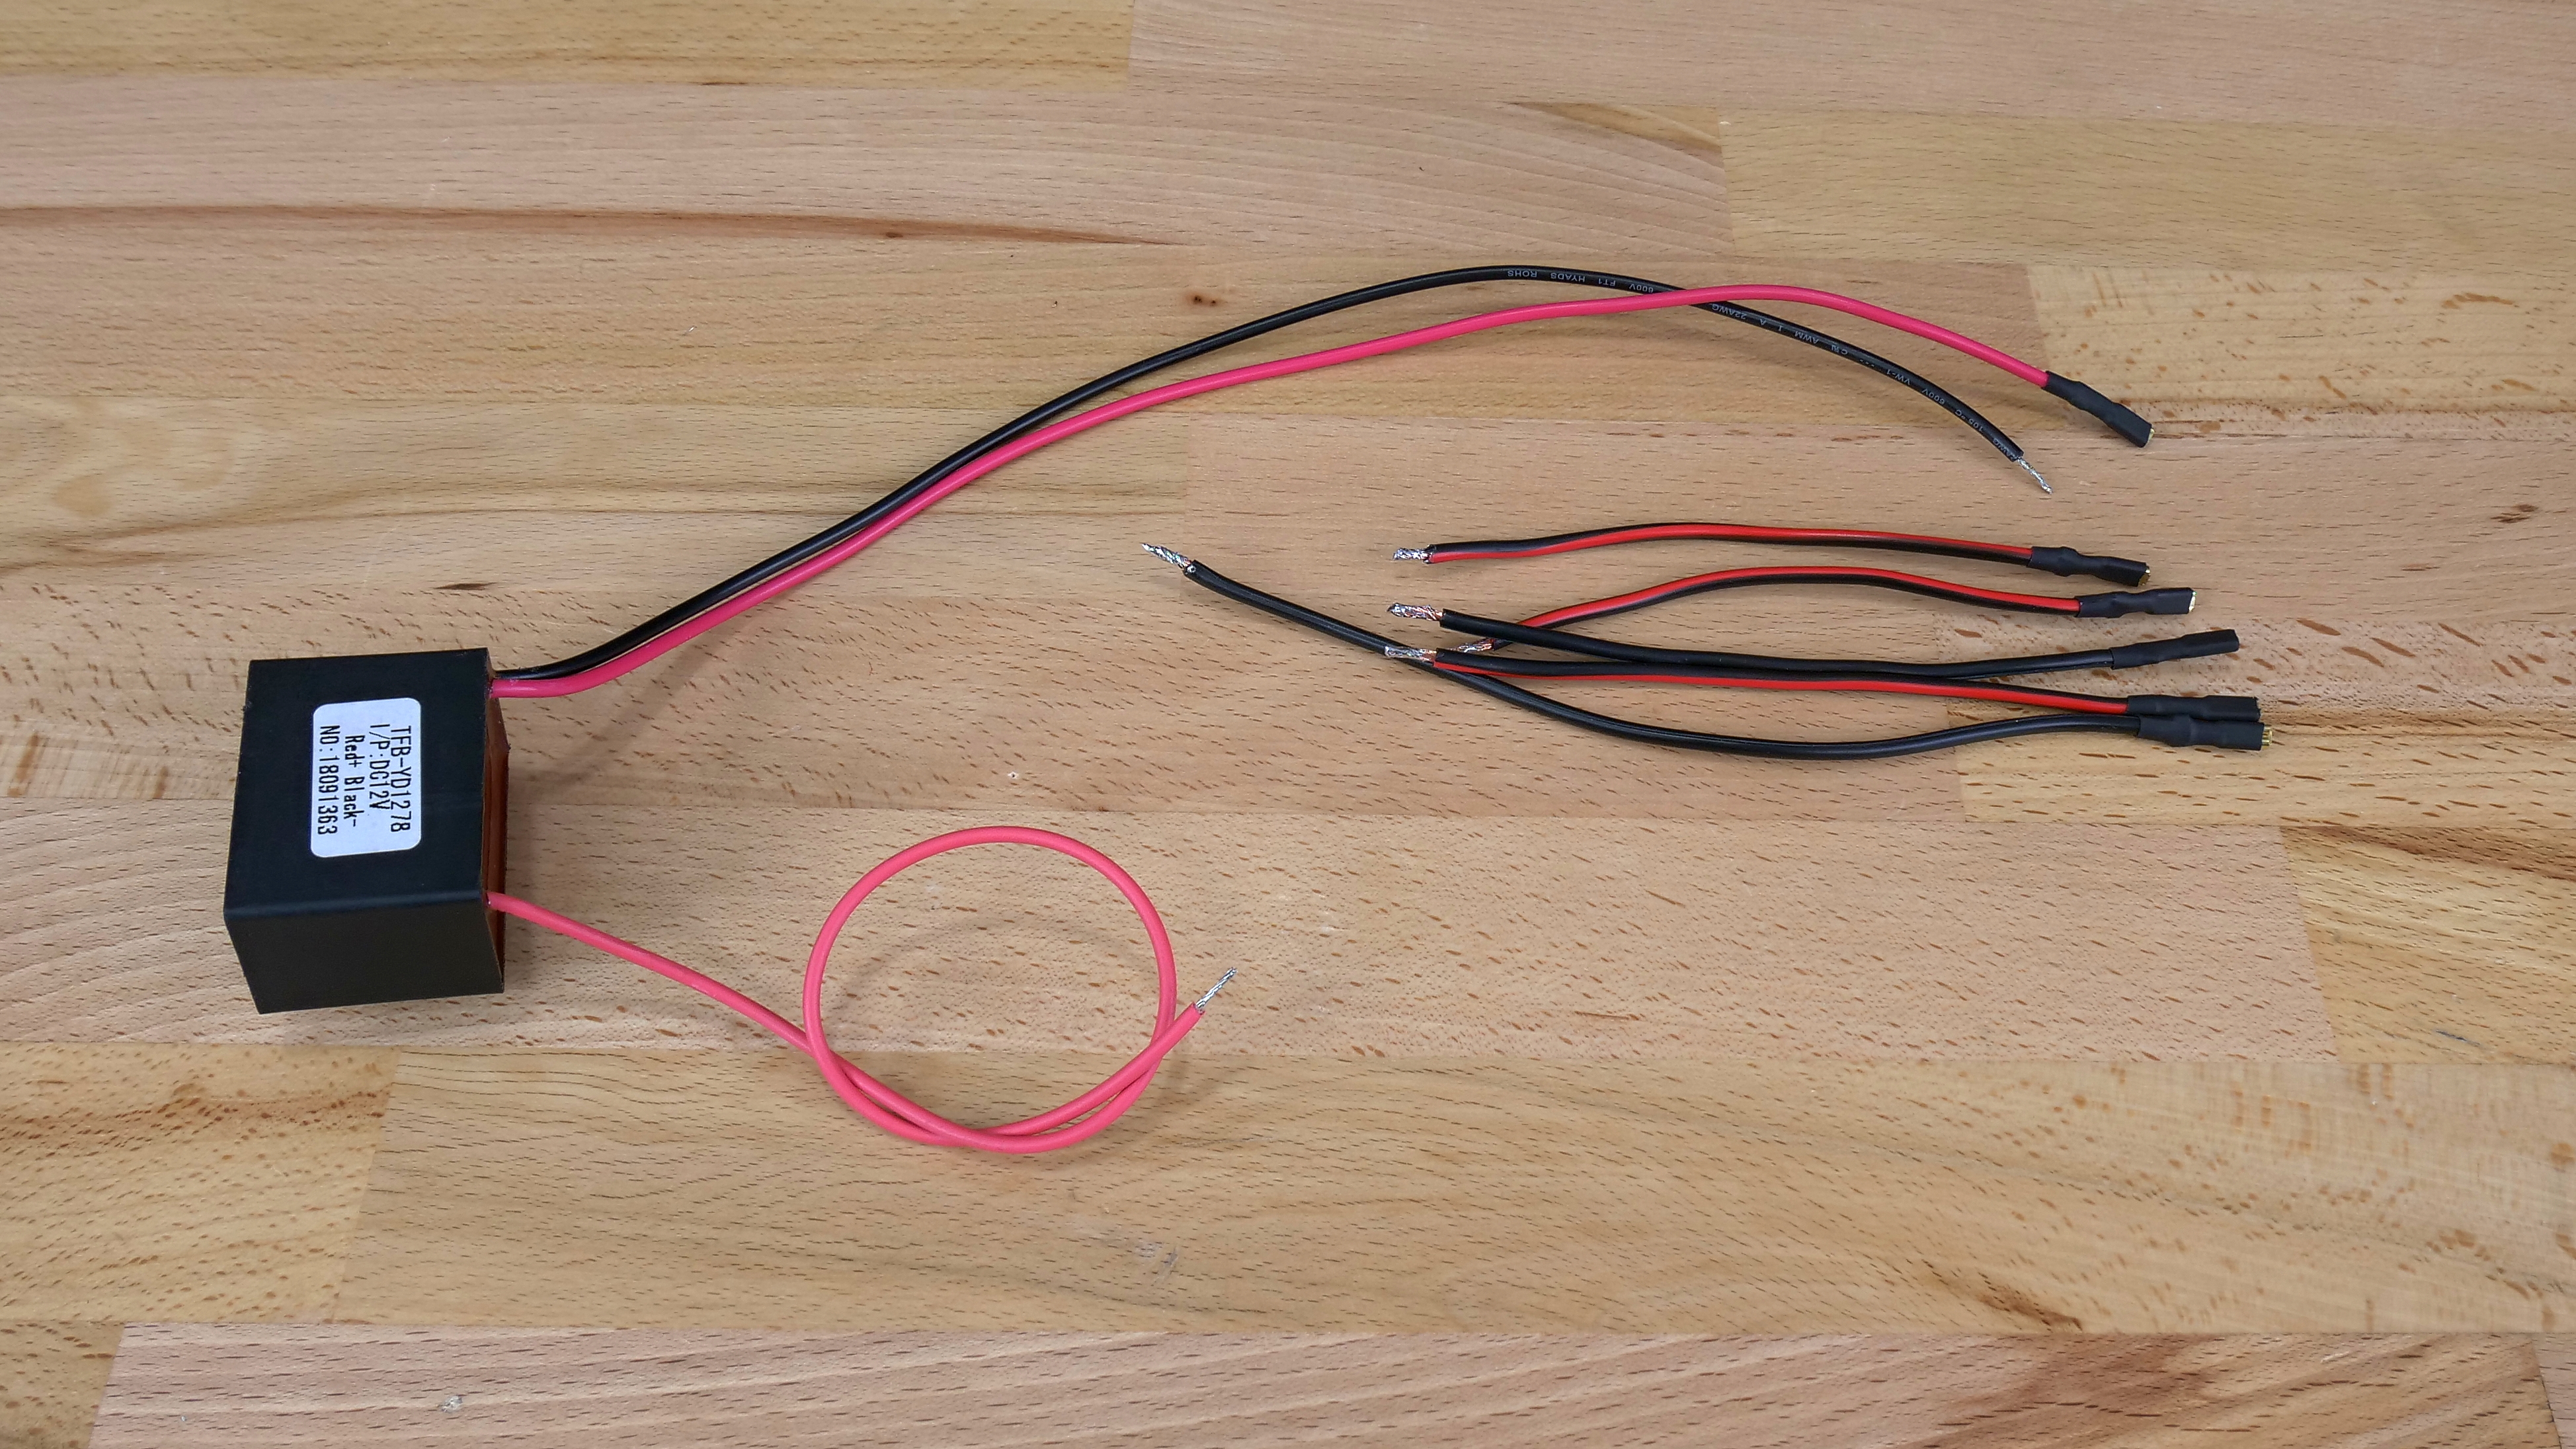
Take the wide plastic part and insert a 3mm bolt (40mm long should be fine) inside the hole. Take the single red wire from the high voltage generator and attach it to the bolt using a nut and a washer.
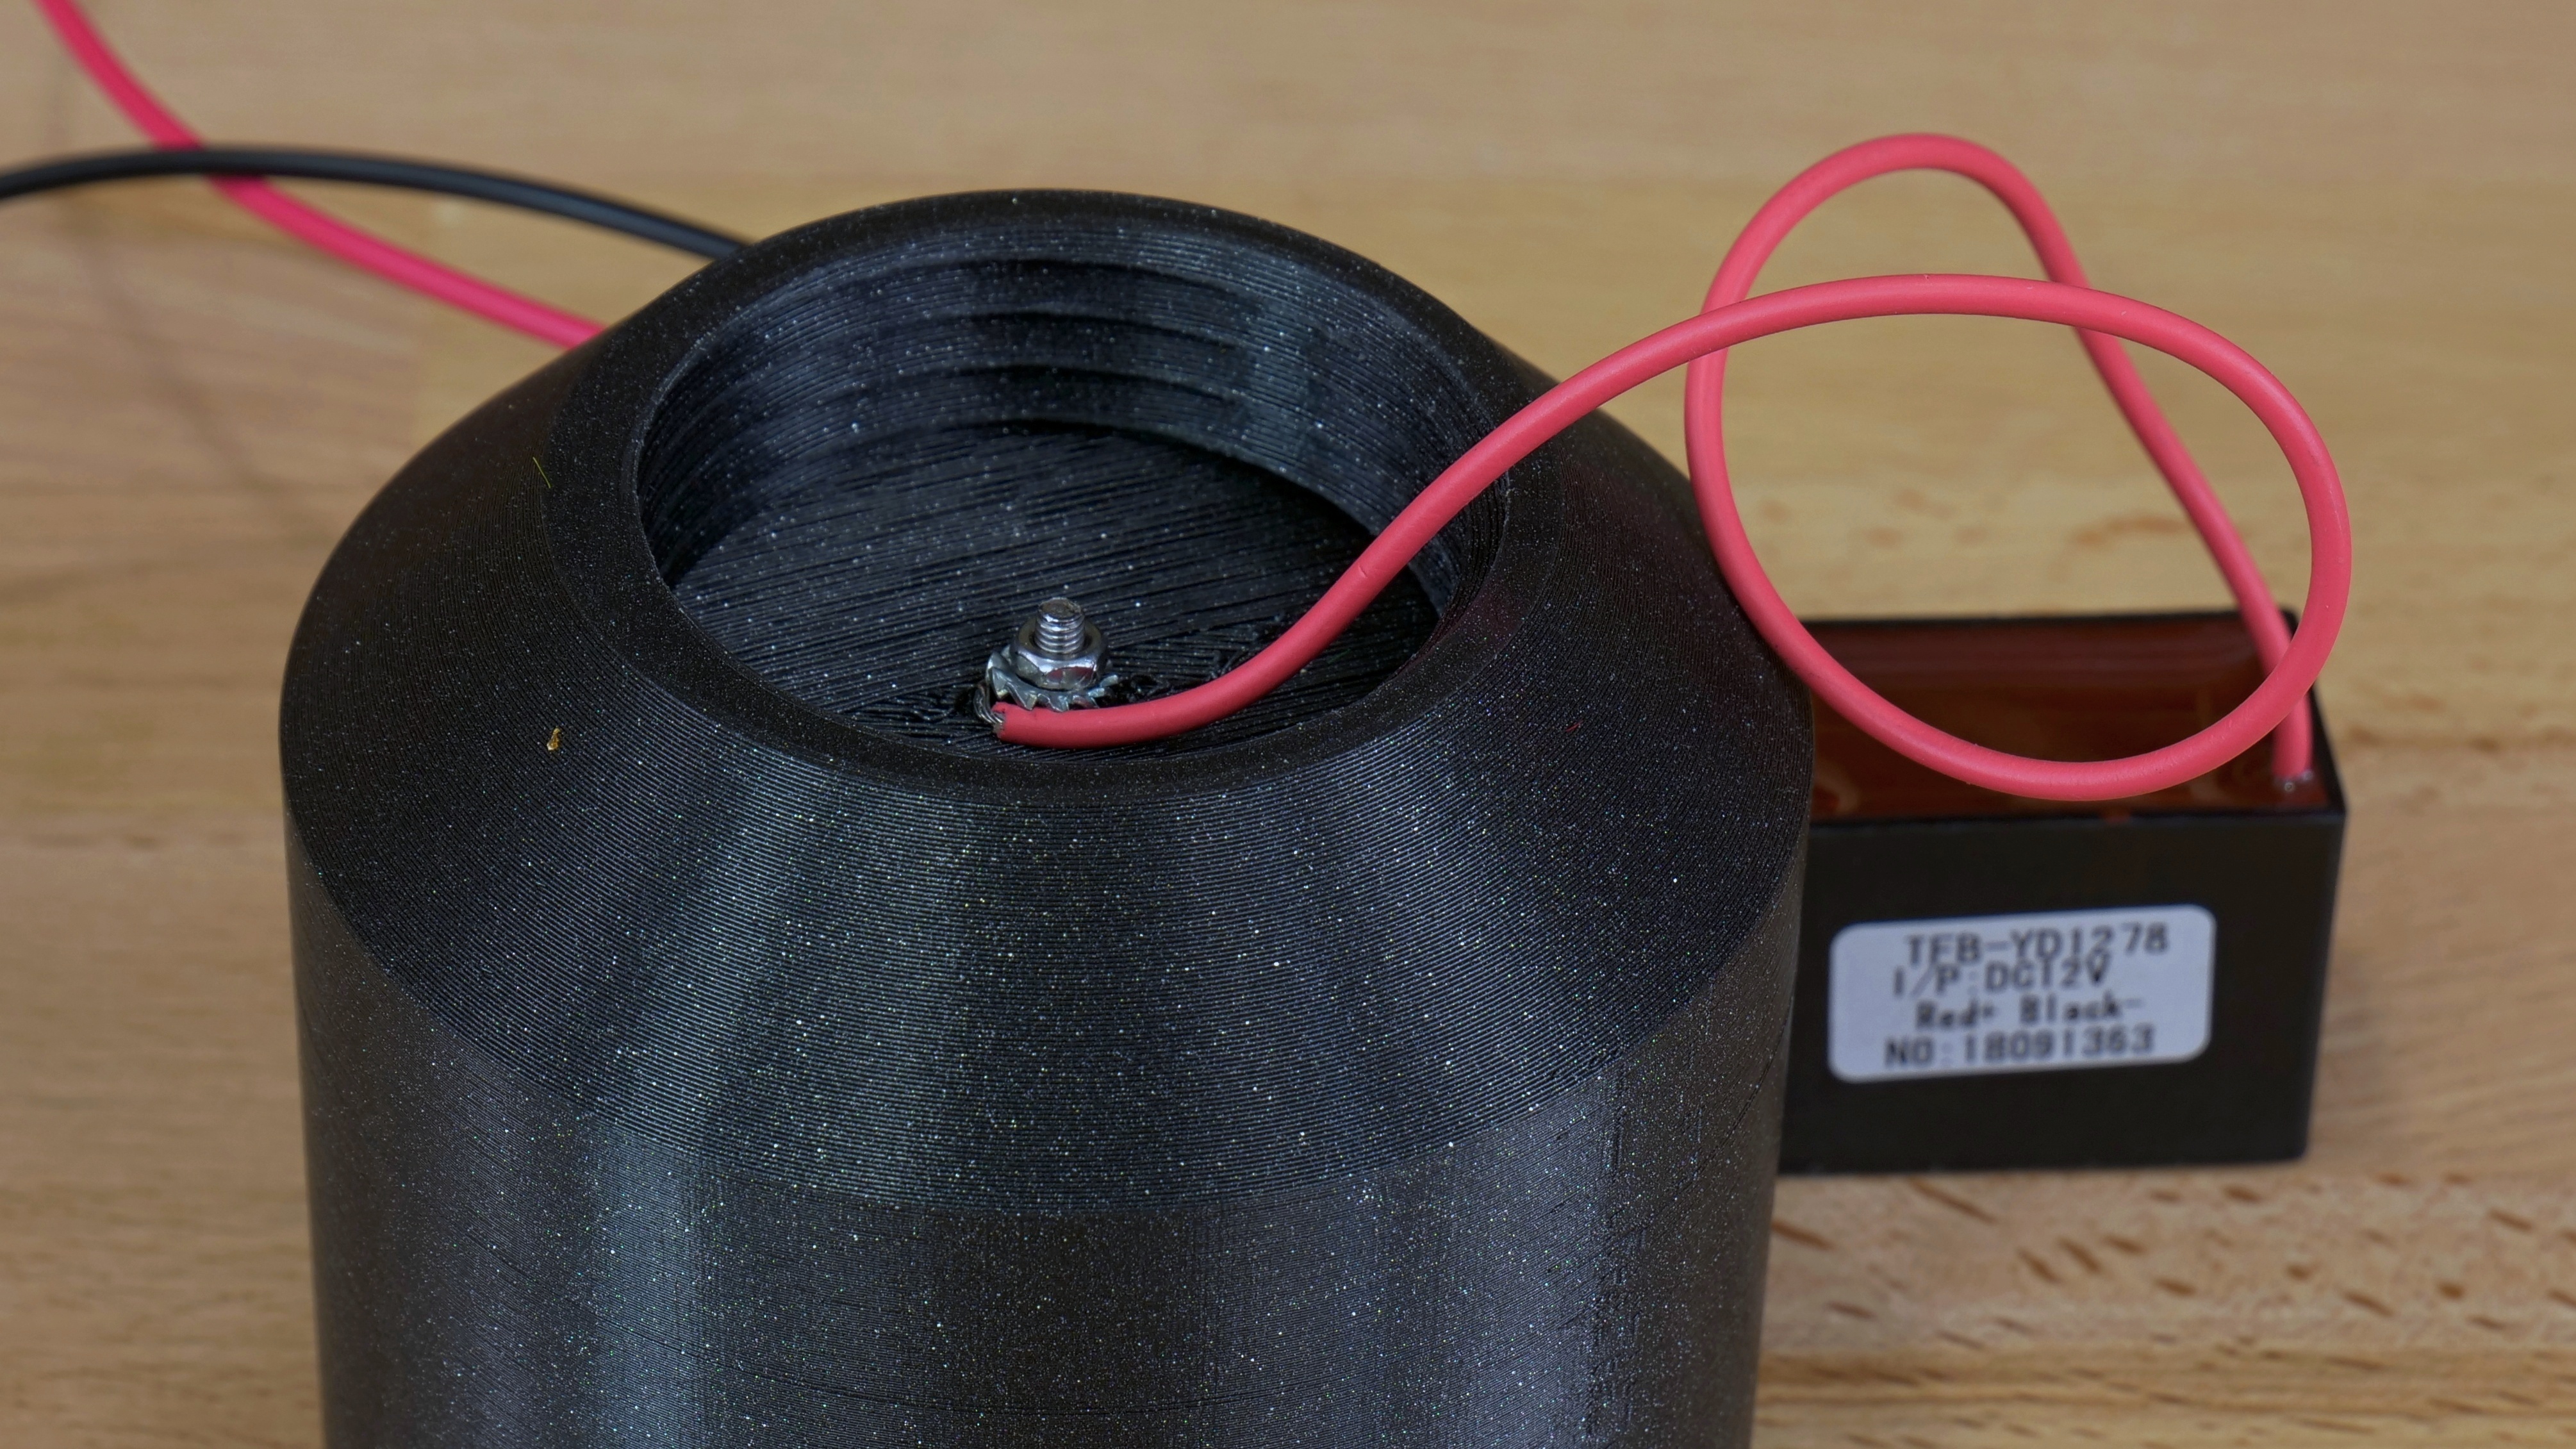
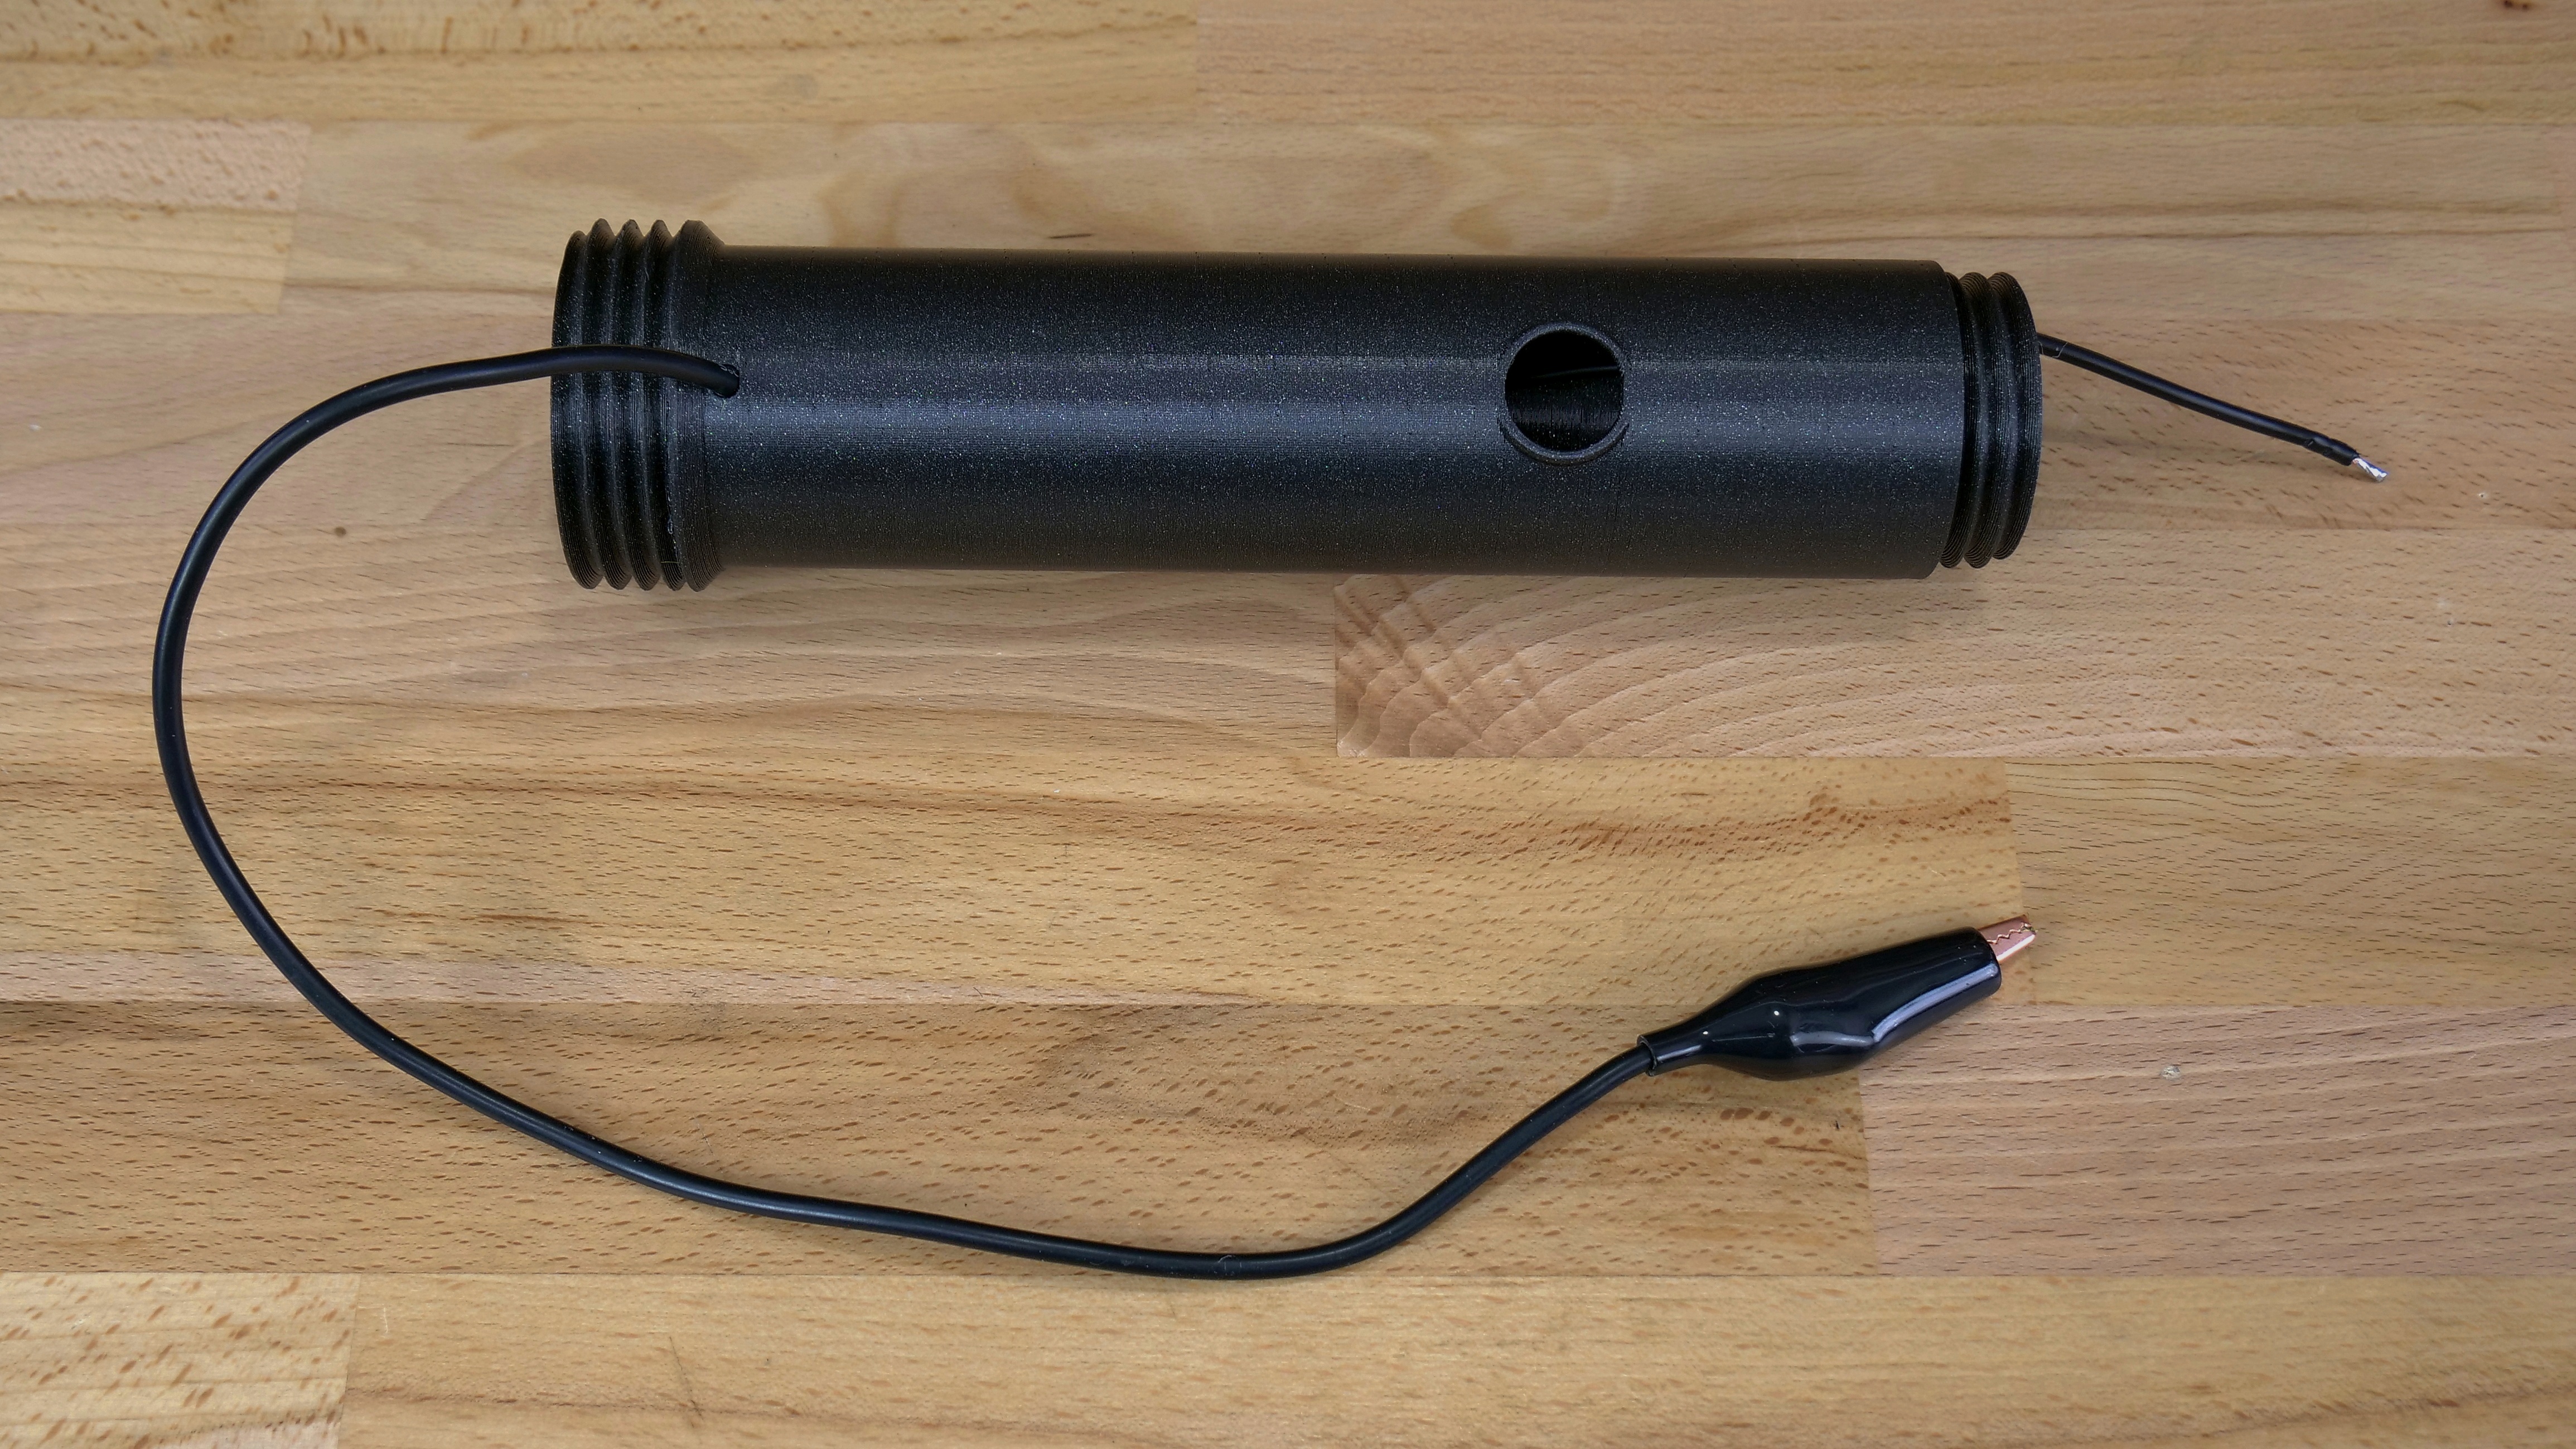
Now prepare the narrow cylindrical part and a crocodile clip. Insert the wire into the small hole on the side and pull the cable through the whole cylinder.
Now for the last plastic part. Attach the power supply connector. Once it’s in place, prepare the cables together with Wago connectors as seen in the photo below.

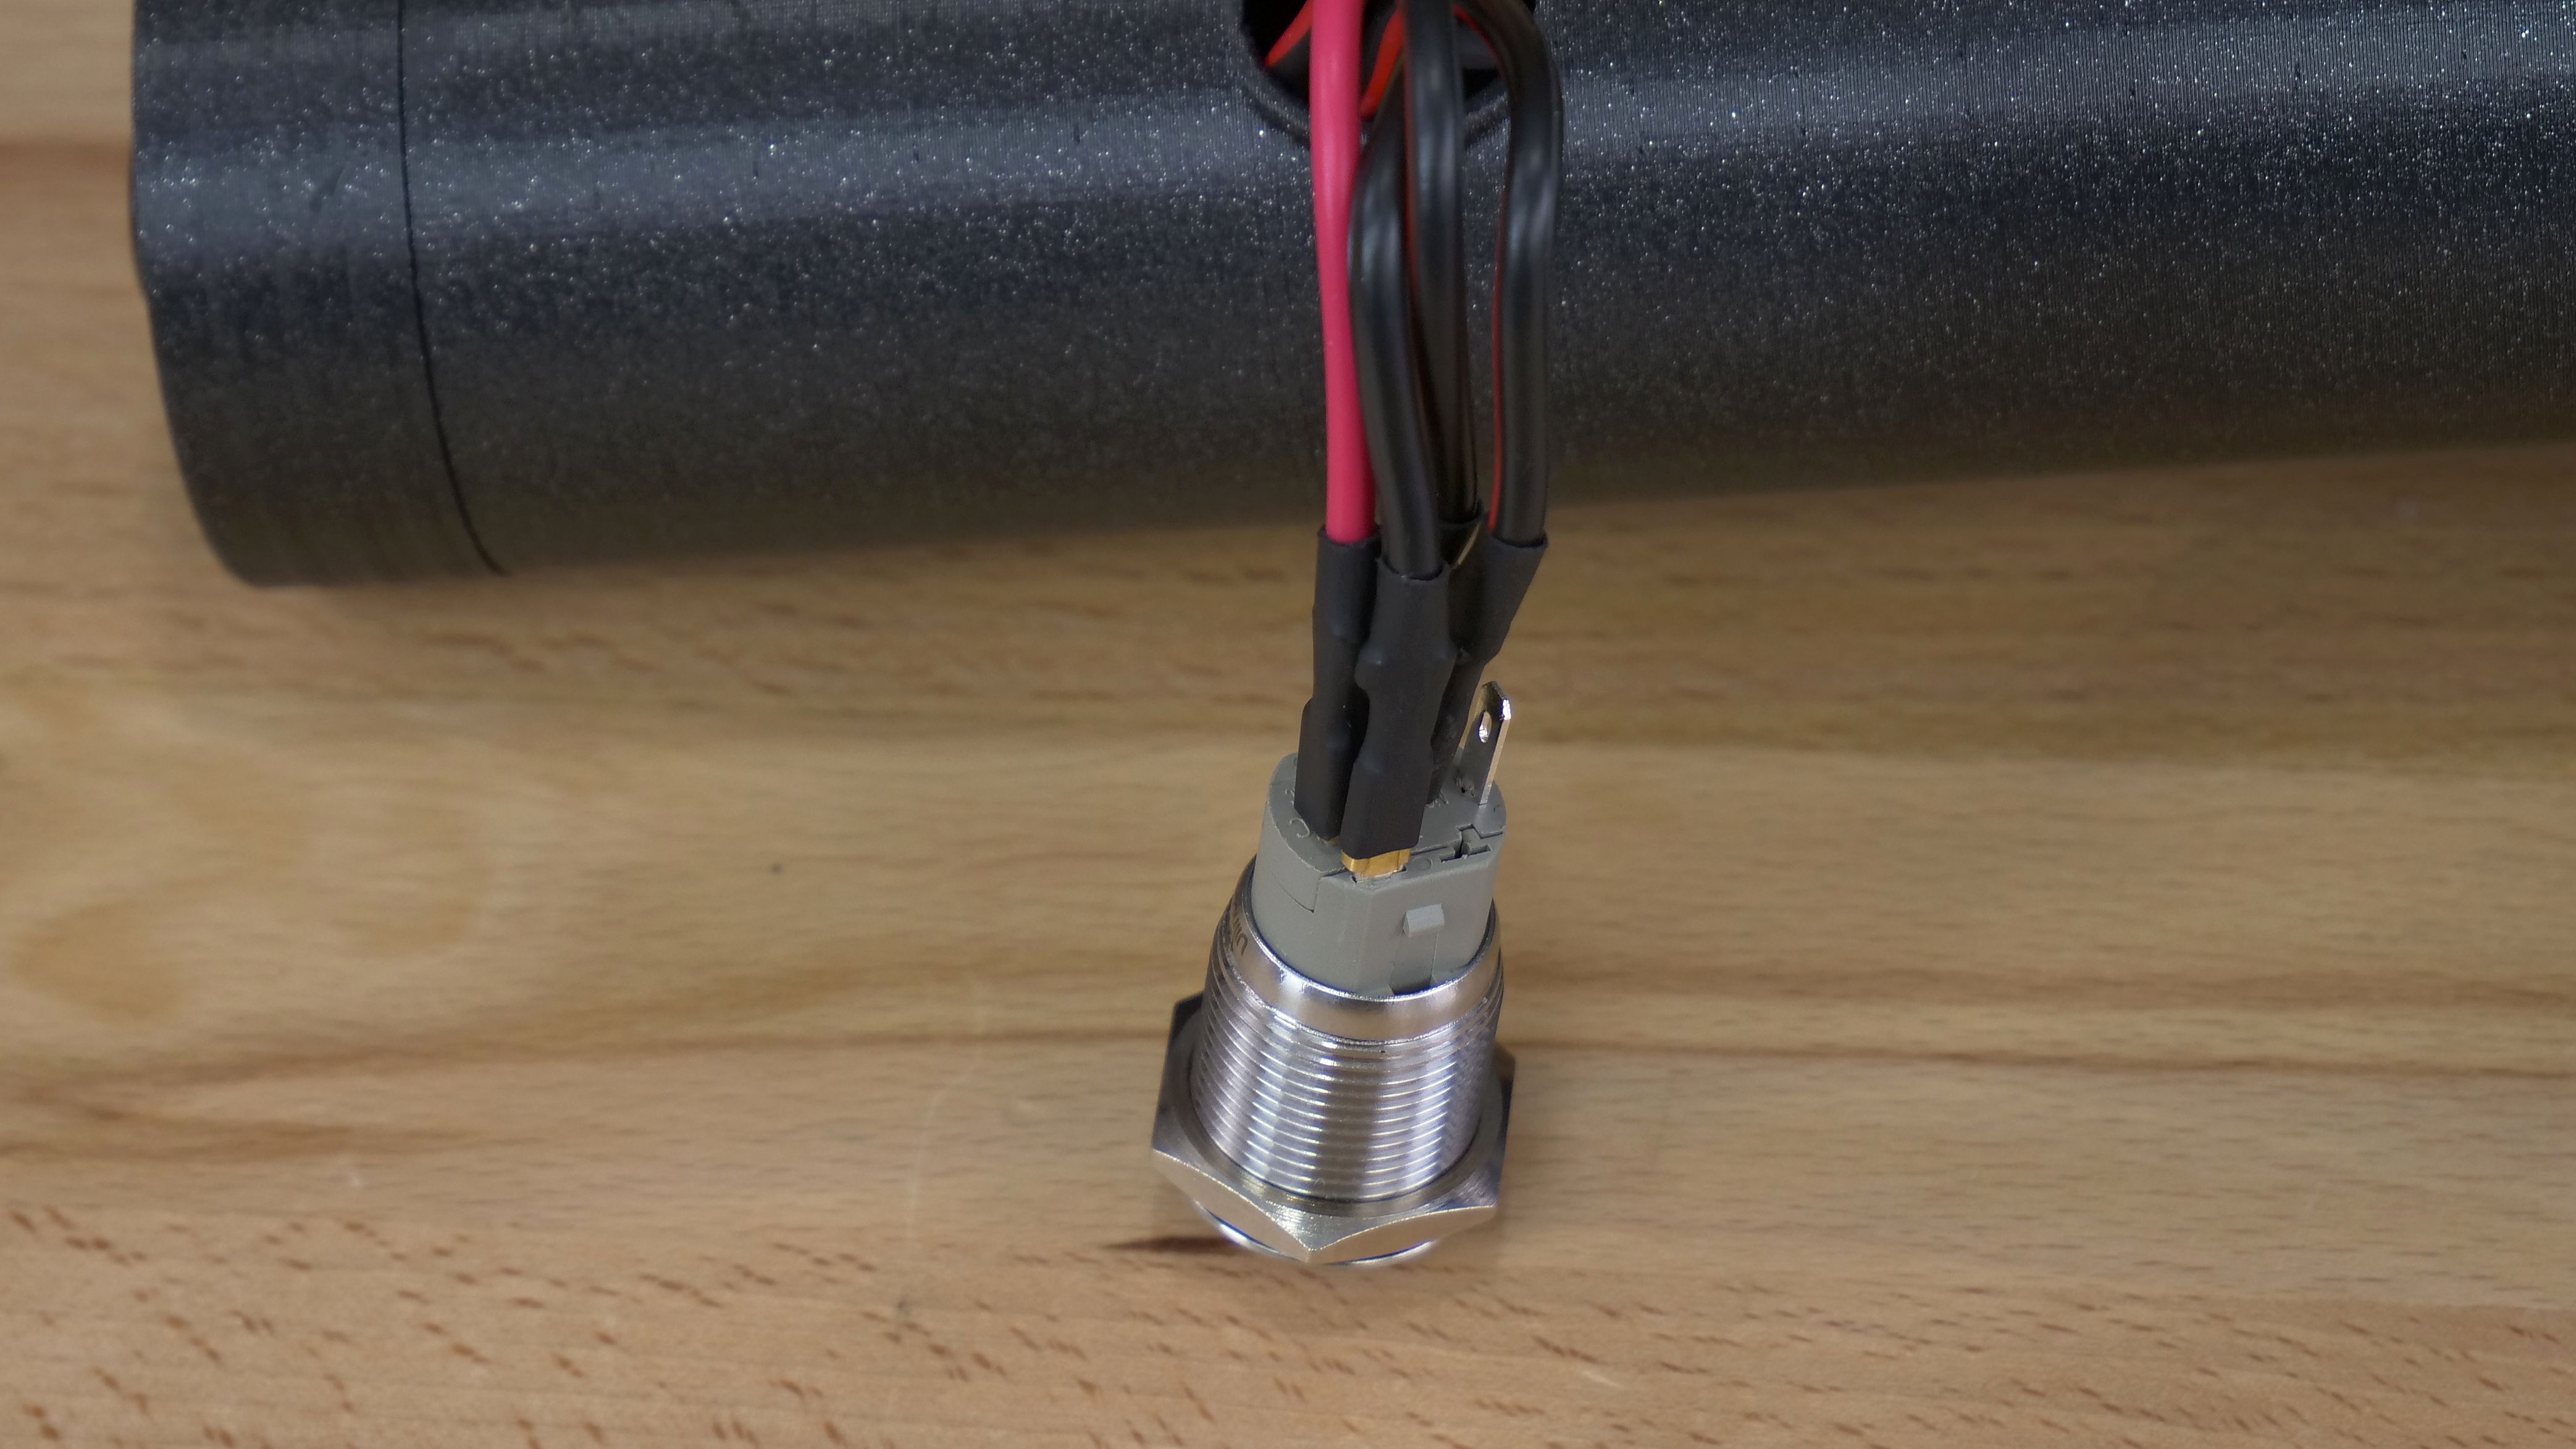
Take the high voltage generator and insert two cables into the bottom side of the cylinder. The red wire has to go through the large hole on the side of the cylinder, while the black one has to go outside on the top. Then, carefully insert the generator into the bottom side and screw in the extended part onto the cylindrical part.
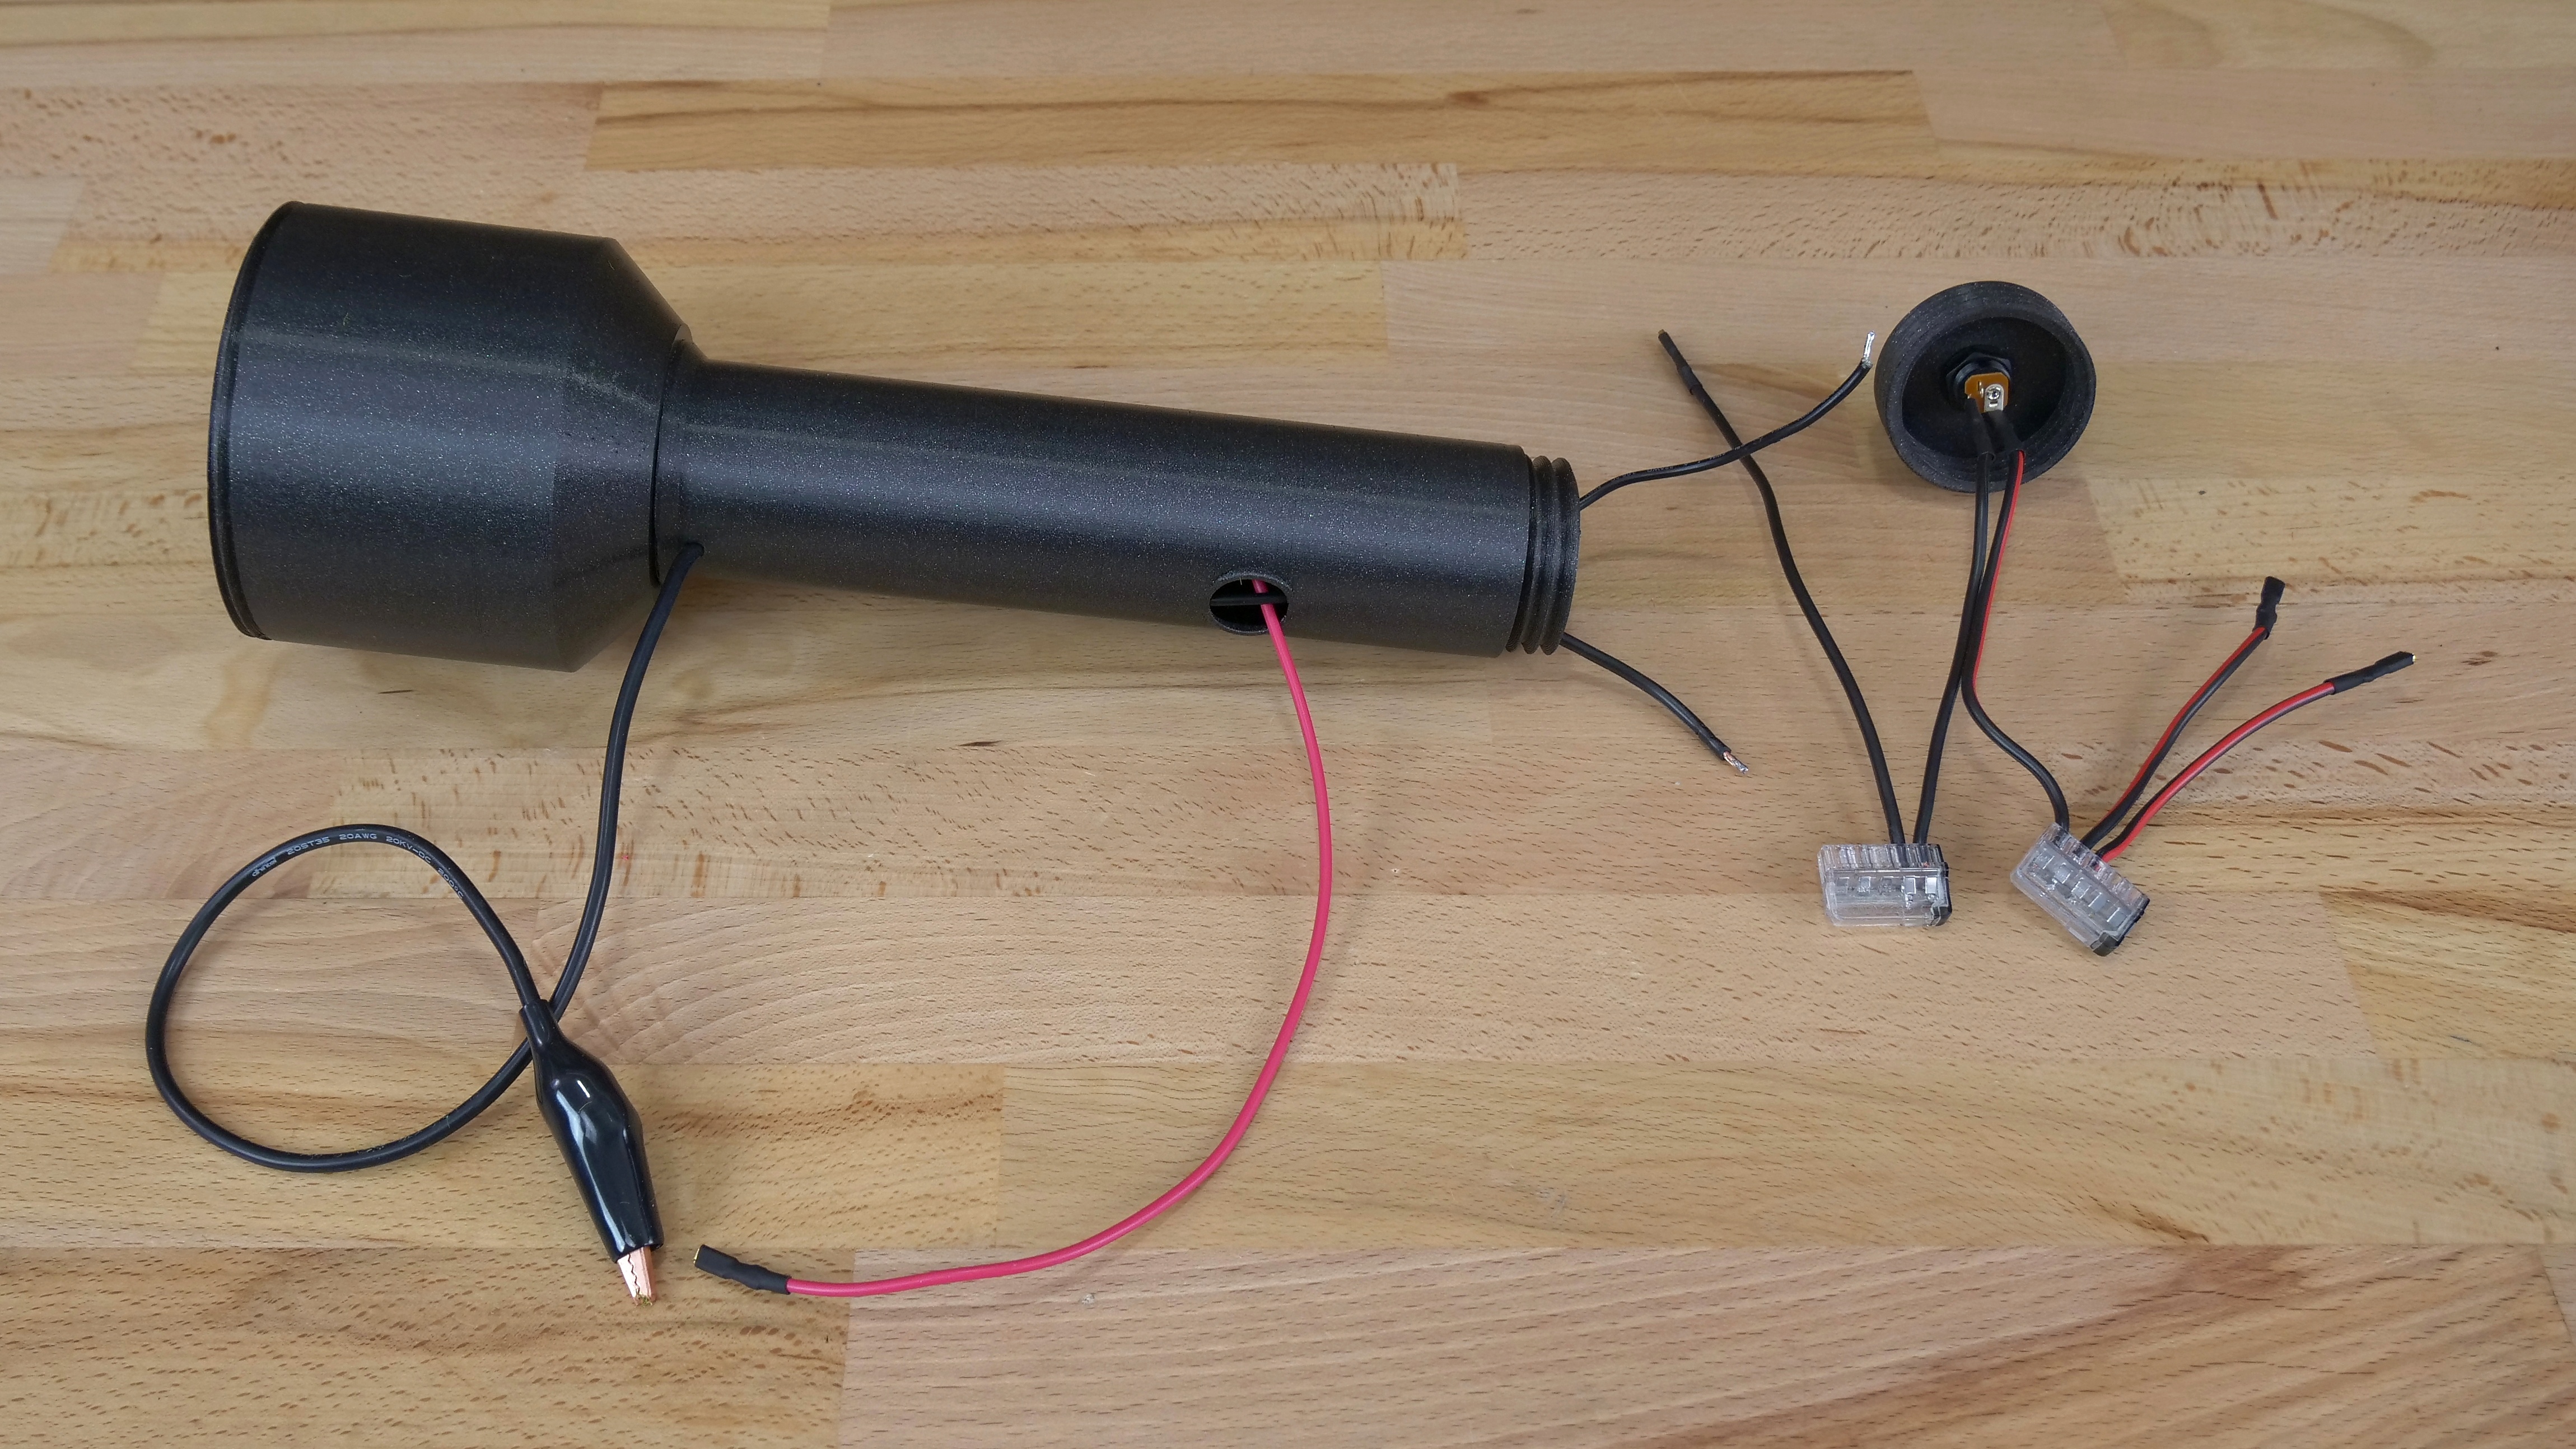
Now you can insert two black wires into the Wago connector which has only two wires inserted. Double-check the connection – this part is vital for the correct functionality of the applicator.

Next, take the remaining free ends of the wires (there should be 3 of them, two red and one black) and pull them through the small hole from the inside. Now you should see 4 free cables sticking out of the small hole. Make sure that all of the wires are correctly inserted from the top, and attach the top plastic part with the power source plug to the cylinder.
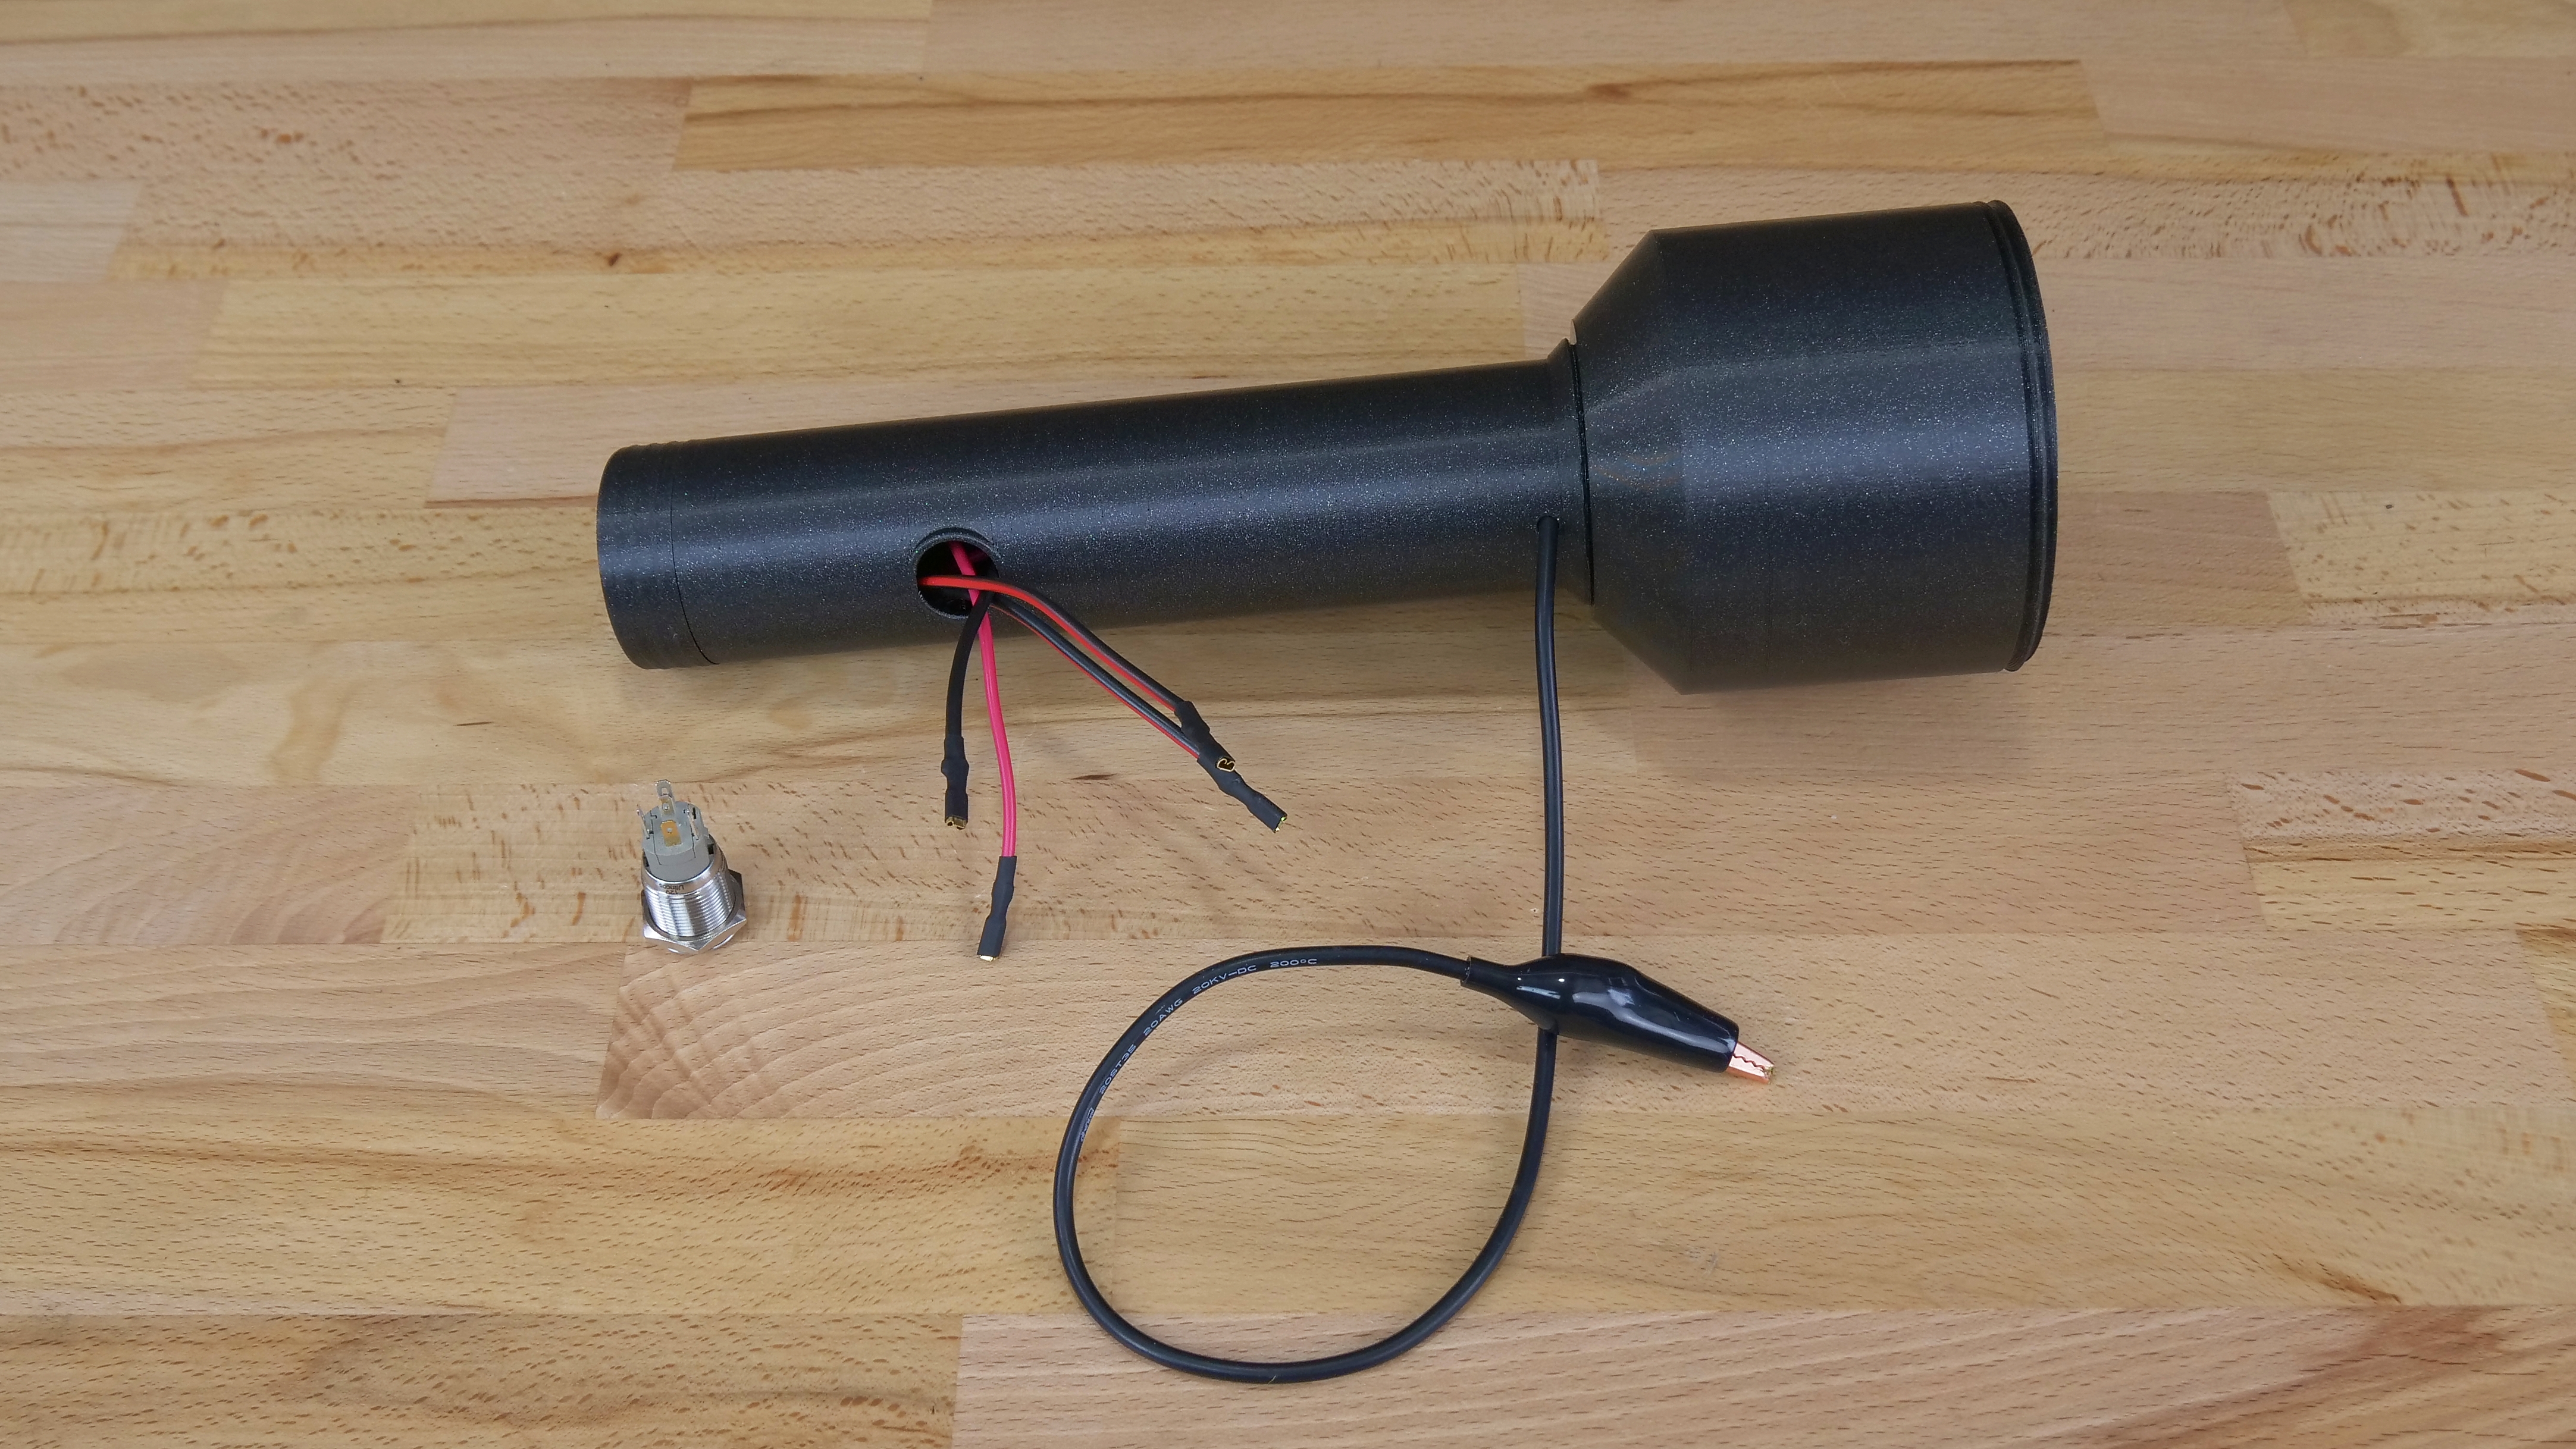
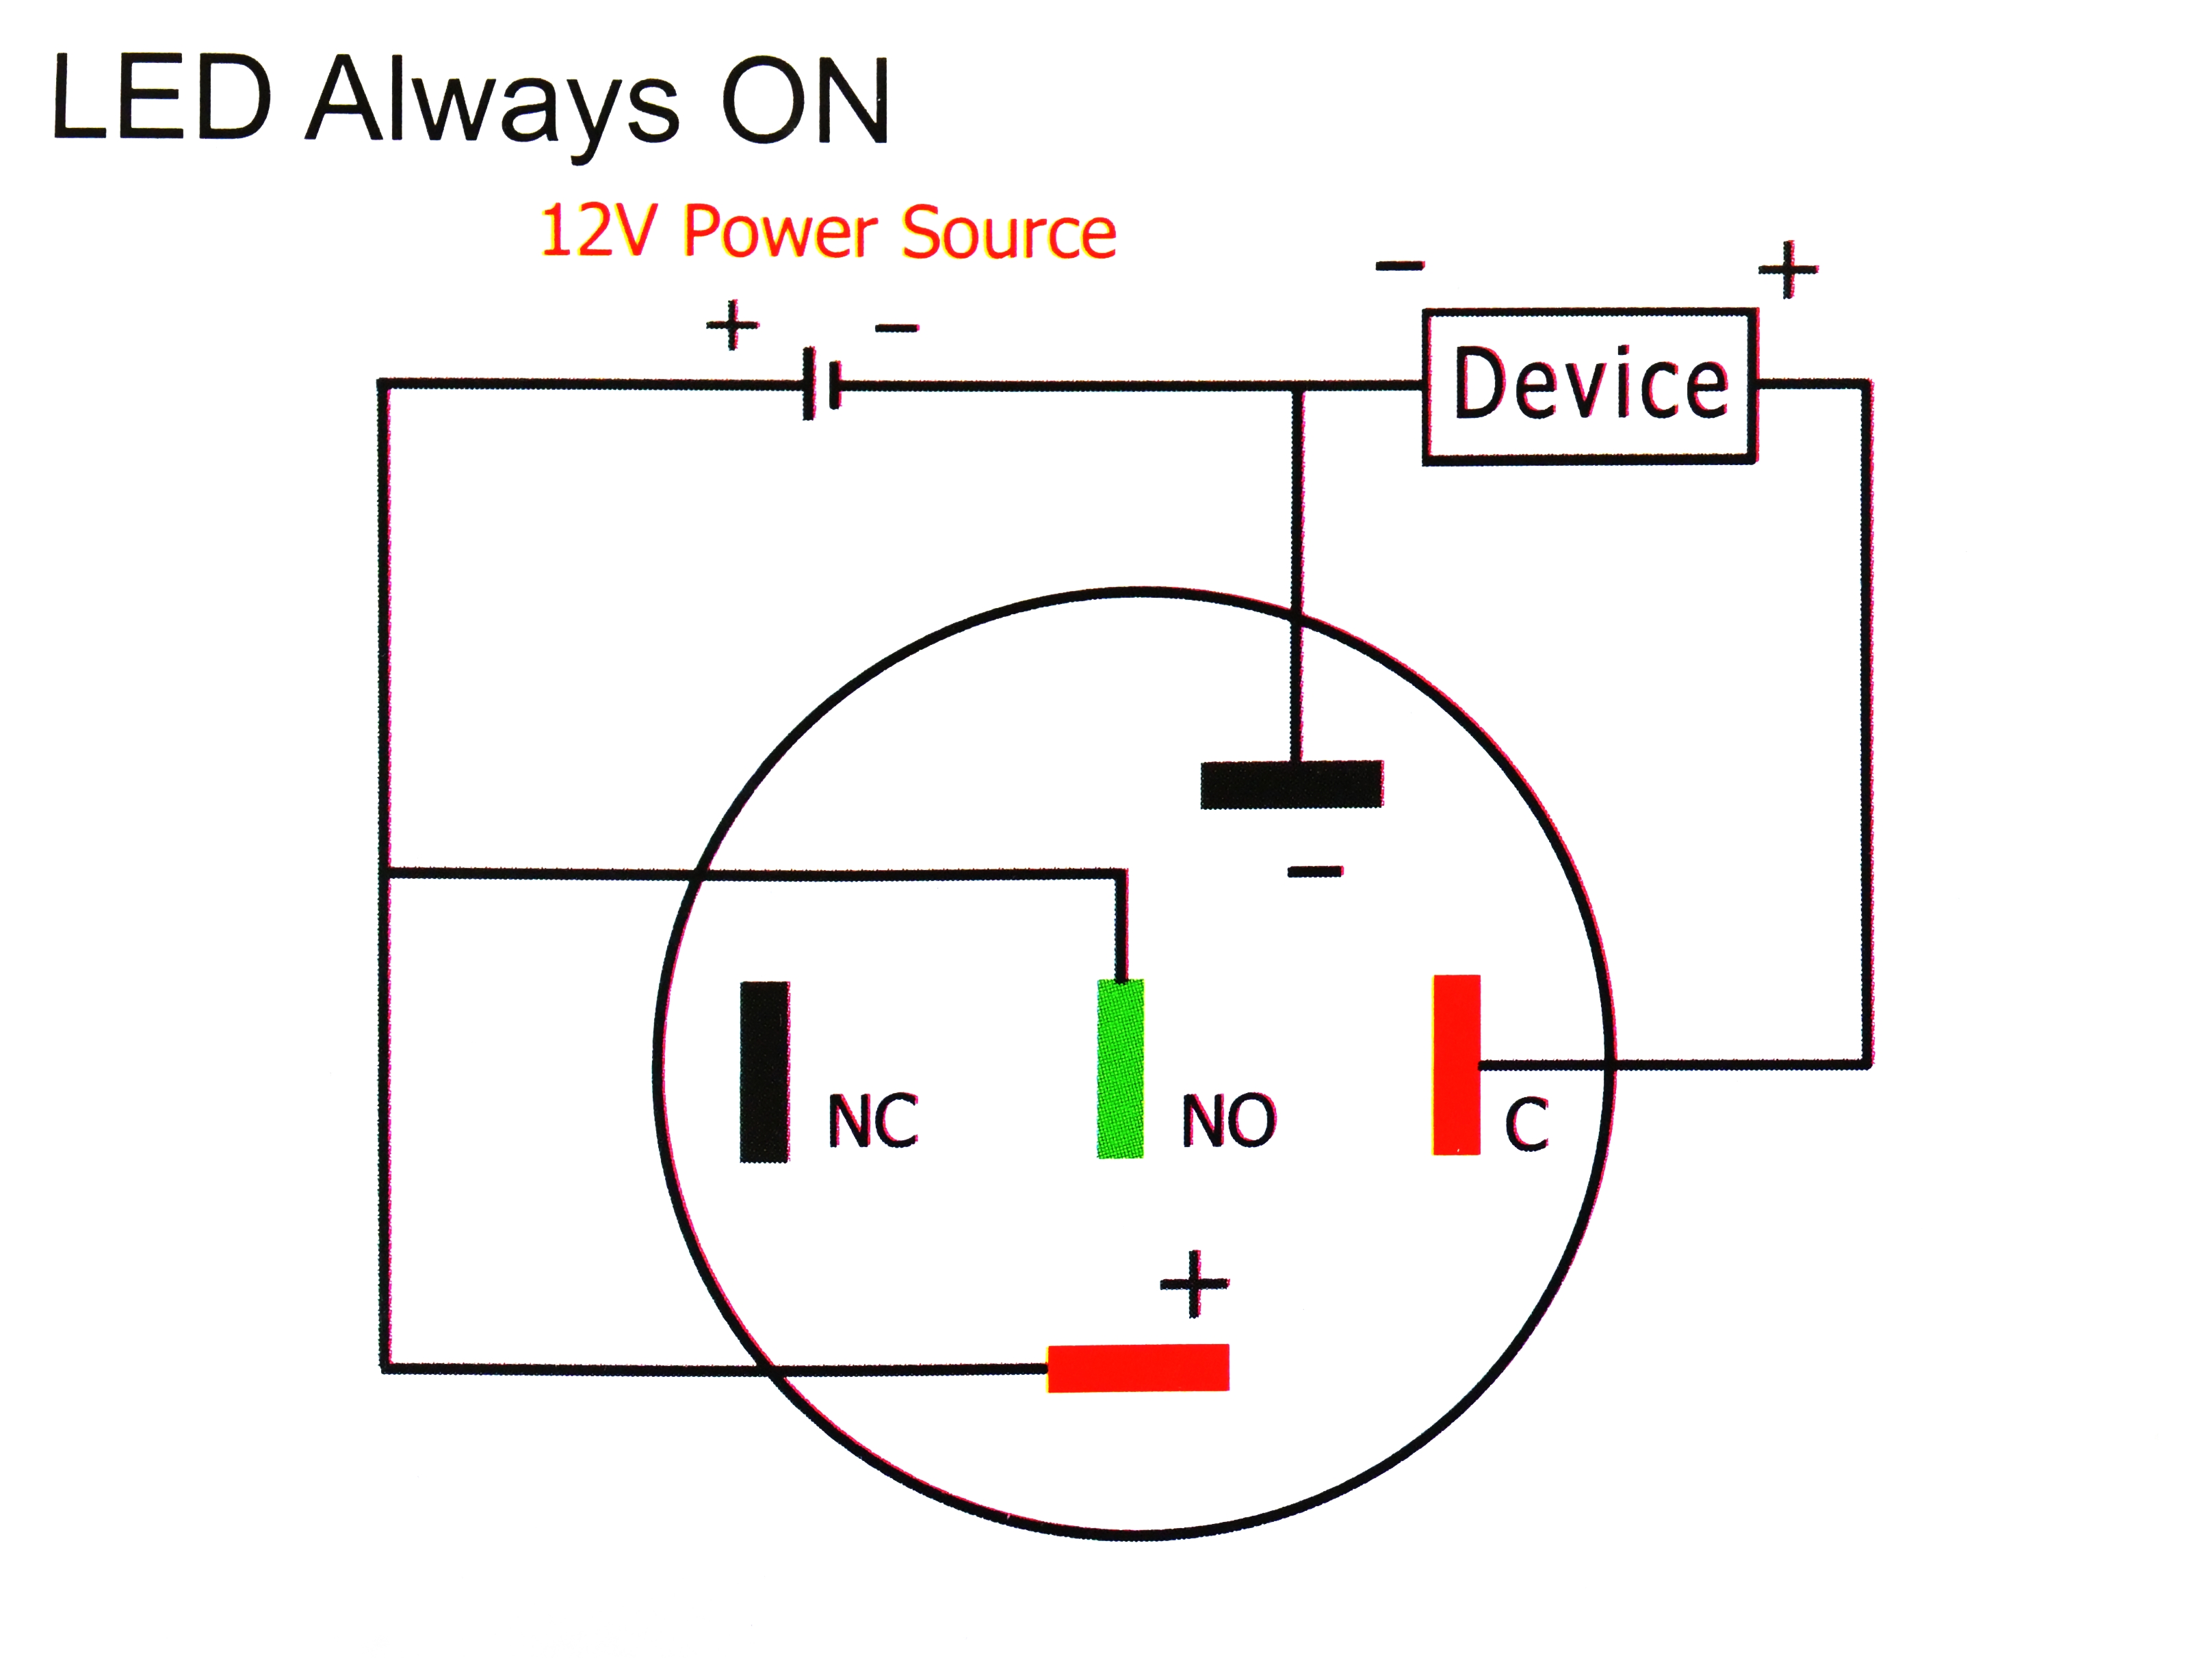
Now it is time to connect the power button. It’s absolutely essential to get this right: make sure that all cables are correctly connected according to the wiring diagram pictured below. Then, insert the switch into the plastic part and secure it with a few drops of superglue.
The assembly is now complete! Fill the container with a grass mixture and secure the strainer on the bottom. Connect the power supply into the top connector, and once you plug it into a power source, the light on the switch should turn on. The LED indicates that the grass applicator is being powered. Once you push the button, you can start to apply the grass on the terrain.
And BTW – thanks SciFiantasy for the inspiration!
High voltage inside! The ion generator works with 10-15kV voltage. It does not pose any danger for a healthy adult (only weak current flows inside), however, people with pacemakers or other health issues should consider using this device.
How to use the grass applicator
Prepare a mix of glue, water, and soap and apply it evenly on the surface, where the grass is supposed to be.
Next, drive a screw into the printed part and make sure it’s in direct contact with the layer of glue, so there’s an electric field between the applicator and surface on the terrain. Fill up the grass applicator with a grass mixture and secure it with the 3D-printed strainer. Keep the strainer pointed up, so the mixture won’t fall out, then connect the crocodile clip to the screw.
Plug in the power supply and connect the cable to the applicator. The LED on the switch should light up. Do not touch any wire or the crocodile clip, since there is high voltage inside the applicator. Now turn the applicator upside down and shake it gently to add grass onto the surface. Keep the applicator around 5-10 cm (2-4 inches) from the surface. Keep applying static grass until you are satisfied with the result.
Keep in mind you should cover all the areas you want to keep clean before you start applying grass. These include places for trees, buildings, etc. A good practice is to cover the track ballast as well, so it remains clean. To achieve a more authentic look of the terrain, consider applying green or brown base color on the model. You can also create bumps and uneven terrain by applying larger drops of glue before you add grass.

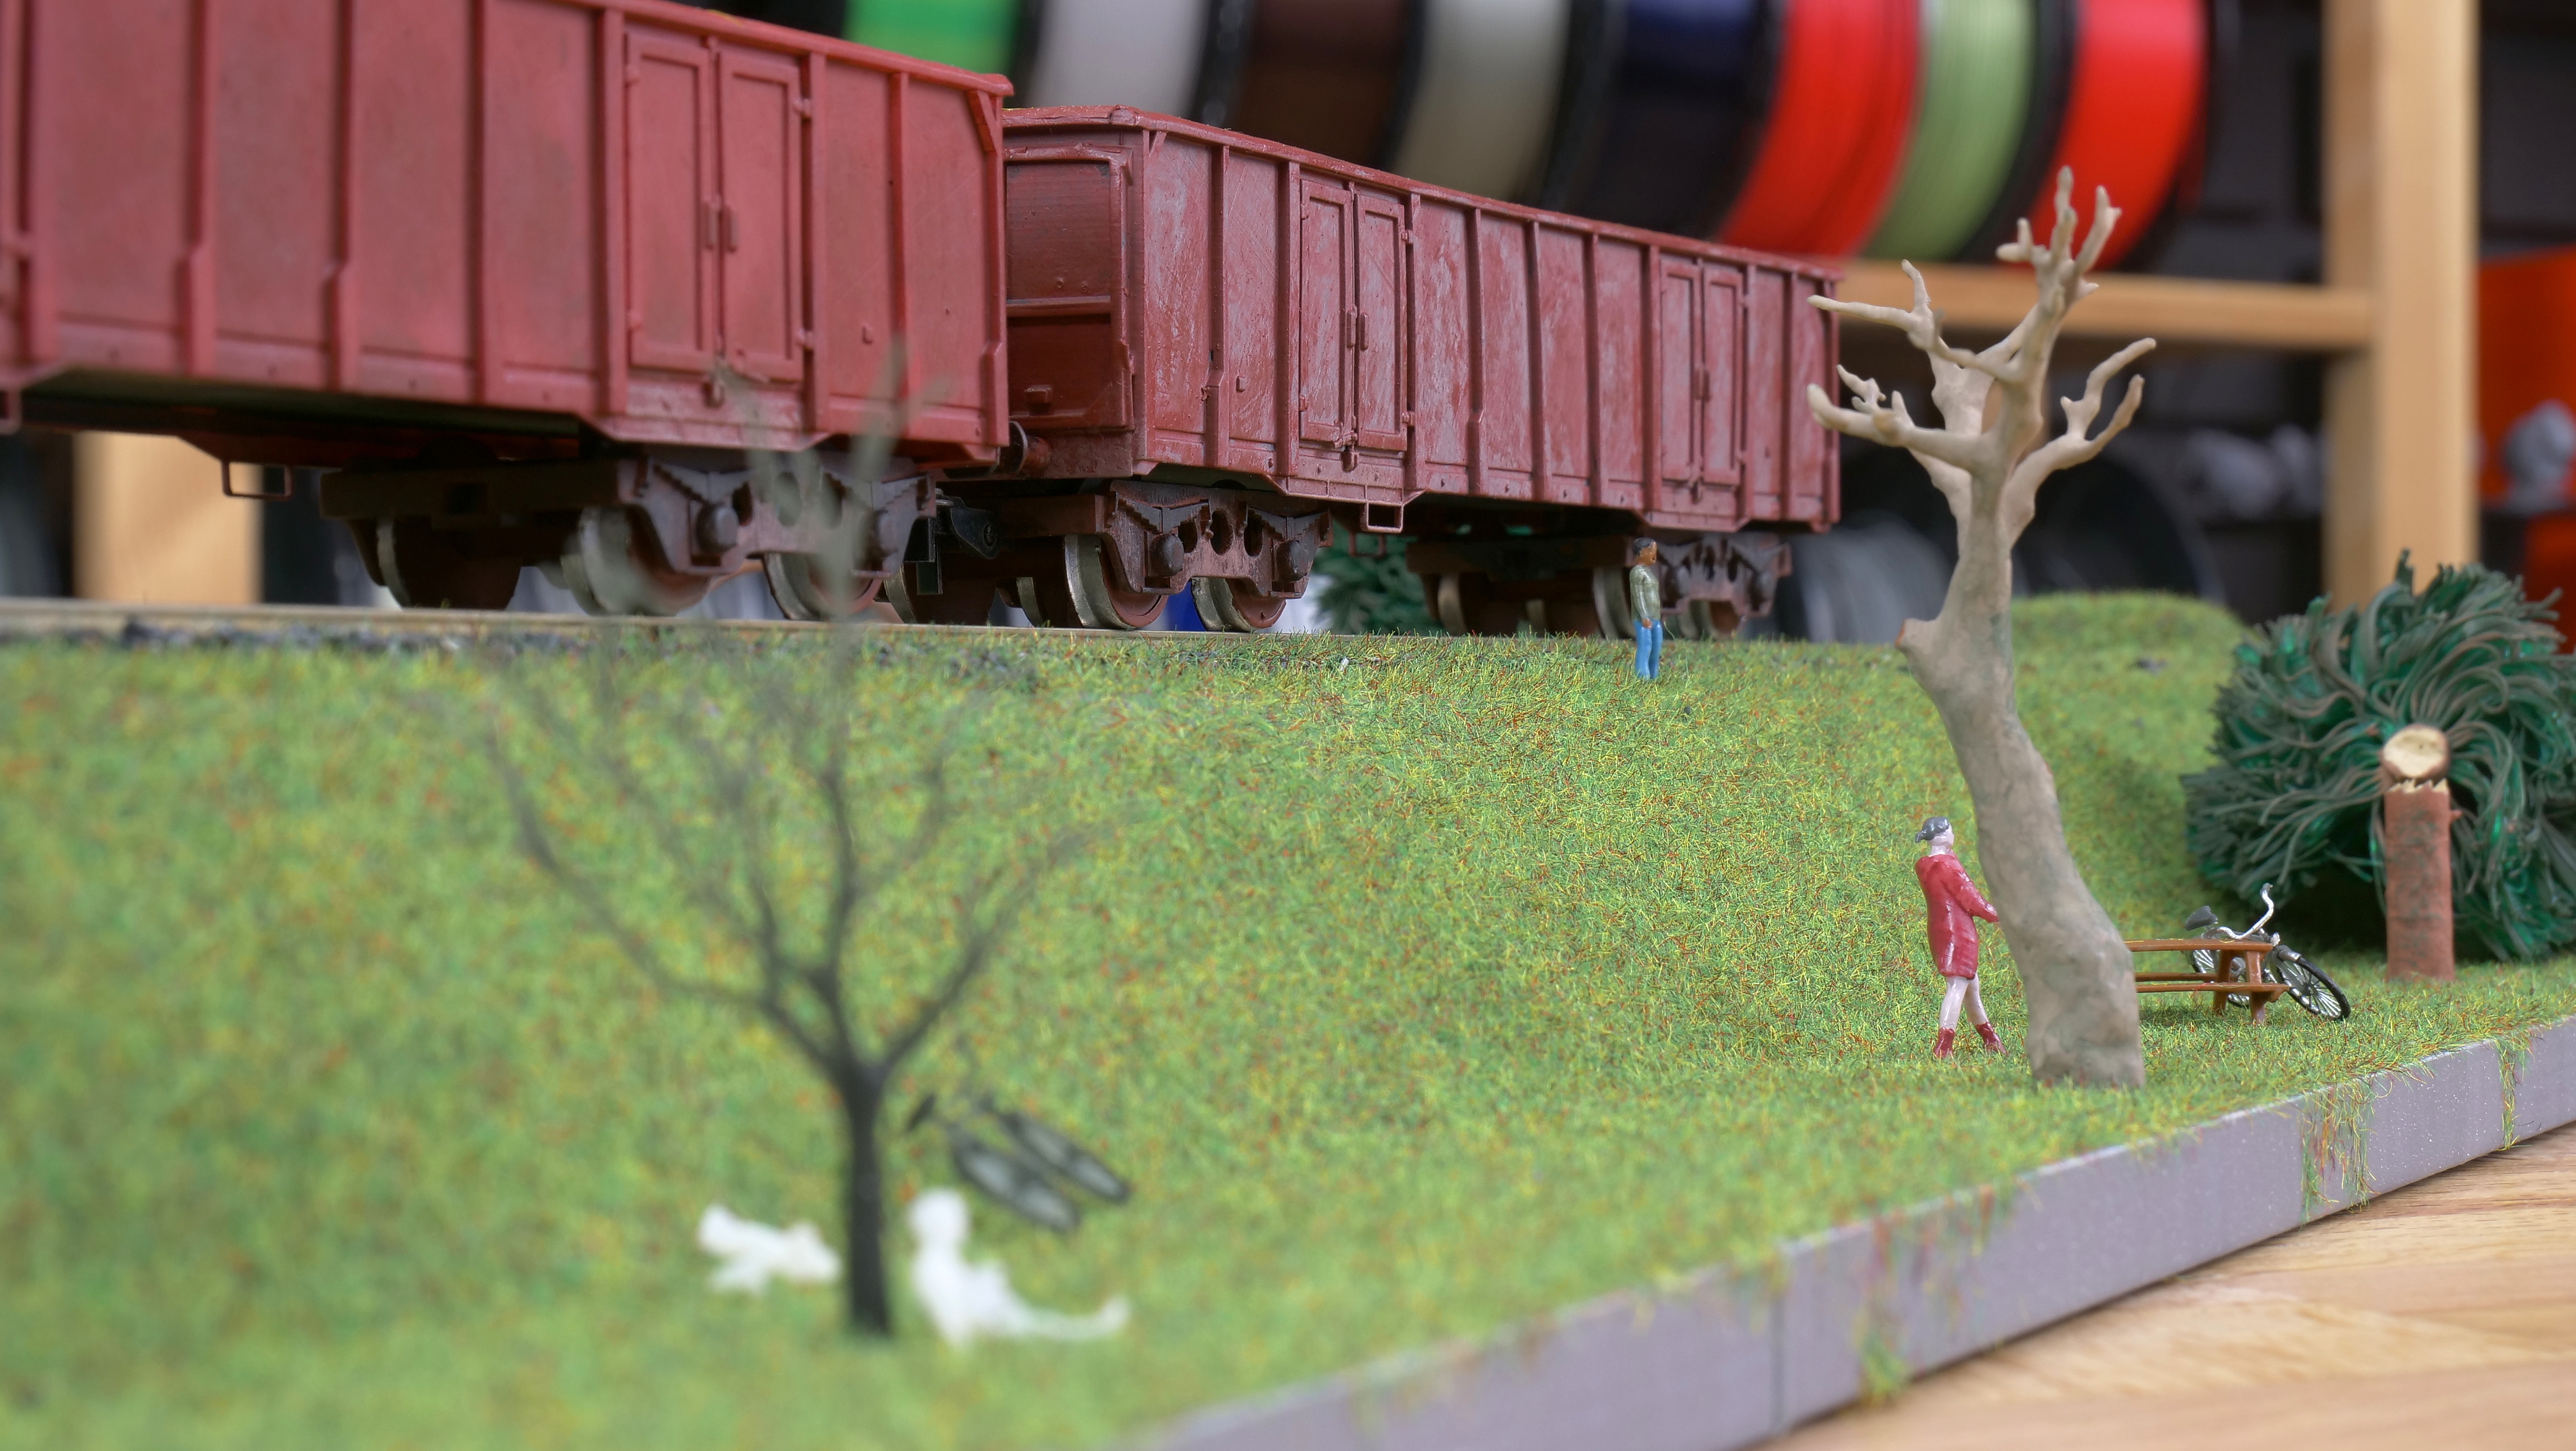
In the end, we will place the trees, buildings, people, and other necessary details to make the model realistic as much as possible. It is only up to you and your fantasy what you want to put on your model. The best way is to create your own models, simple elements, everyday items, almost everything can be used to make your project unique. We prepared two types of trees – basic spruce, which can be easily printed on the Original Prusa i3 MK3 printer. Once the print ends, remove the cylinder and use a heat gun to arrange the branches. The second tree is an old deciduous tree (can be used as beech or an old apple tree). The second tree needs to be printed on the MSLA printer due to very detailed parts.
The model railway will not be complete without a train. On our diorama, we have two cargo wagons (“Eas” type frequently used in the Czech Republic) printed on the Original Prusa SL1. You can already see the stunning detail on our models, however, it is not a finished project yet. Stay tuned for more details in the following articles.
If you are still not sure which models of buildings, details of scenery or trains are the best ones, no worries! In the next article, we will show you a wide range of great-looking models for the construction of a model railway, using both FFF and MSLA technologies. We will take you through the creation of trees, buildings, rocks, and we will show you how to put LEDs inside objects or how to print models of trains. Stay tuned!
Thanks for the content! enjoyable read!
For my research at htps://masterra.com it’s been the most useful