


3D modeling, just like anything else, is about using the right tool for the job. Want to design a mechanical part with well-defined dimensions and sharp corners? CAD software such as Fusion360 or TinkerCAD will suit you well. Need to model a car or a robot based on a reference photo? Traditional polygon modeling in Maya or Blender is the go-to solution.
But how would you go about modeling your favorite movie character? What about an animal, monster or a D&D miniature? Or even something as simple as adding a dent to model to make it look worn out? Modeling something like that in CAD software would be a total nightmare and traditional polygon modeling is just slightly less awkward tool for something like that. Luckily for us, there is another modeling technique especially suited for modeling organic shapes and it’s called sculpting.
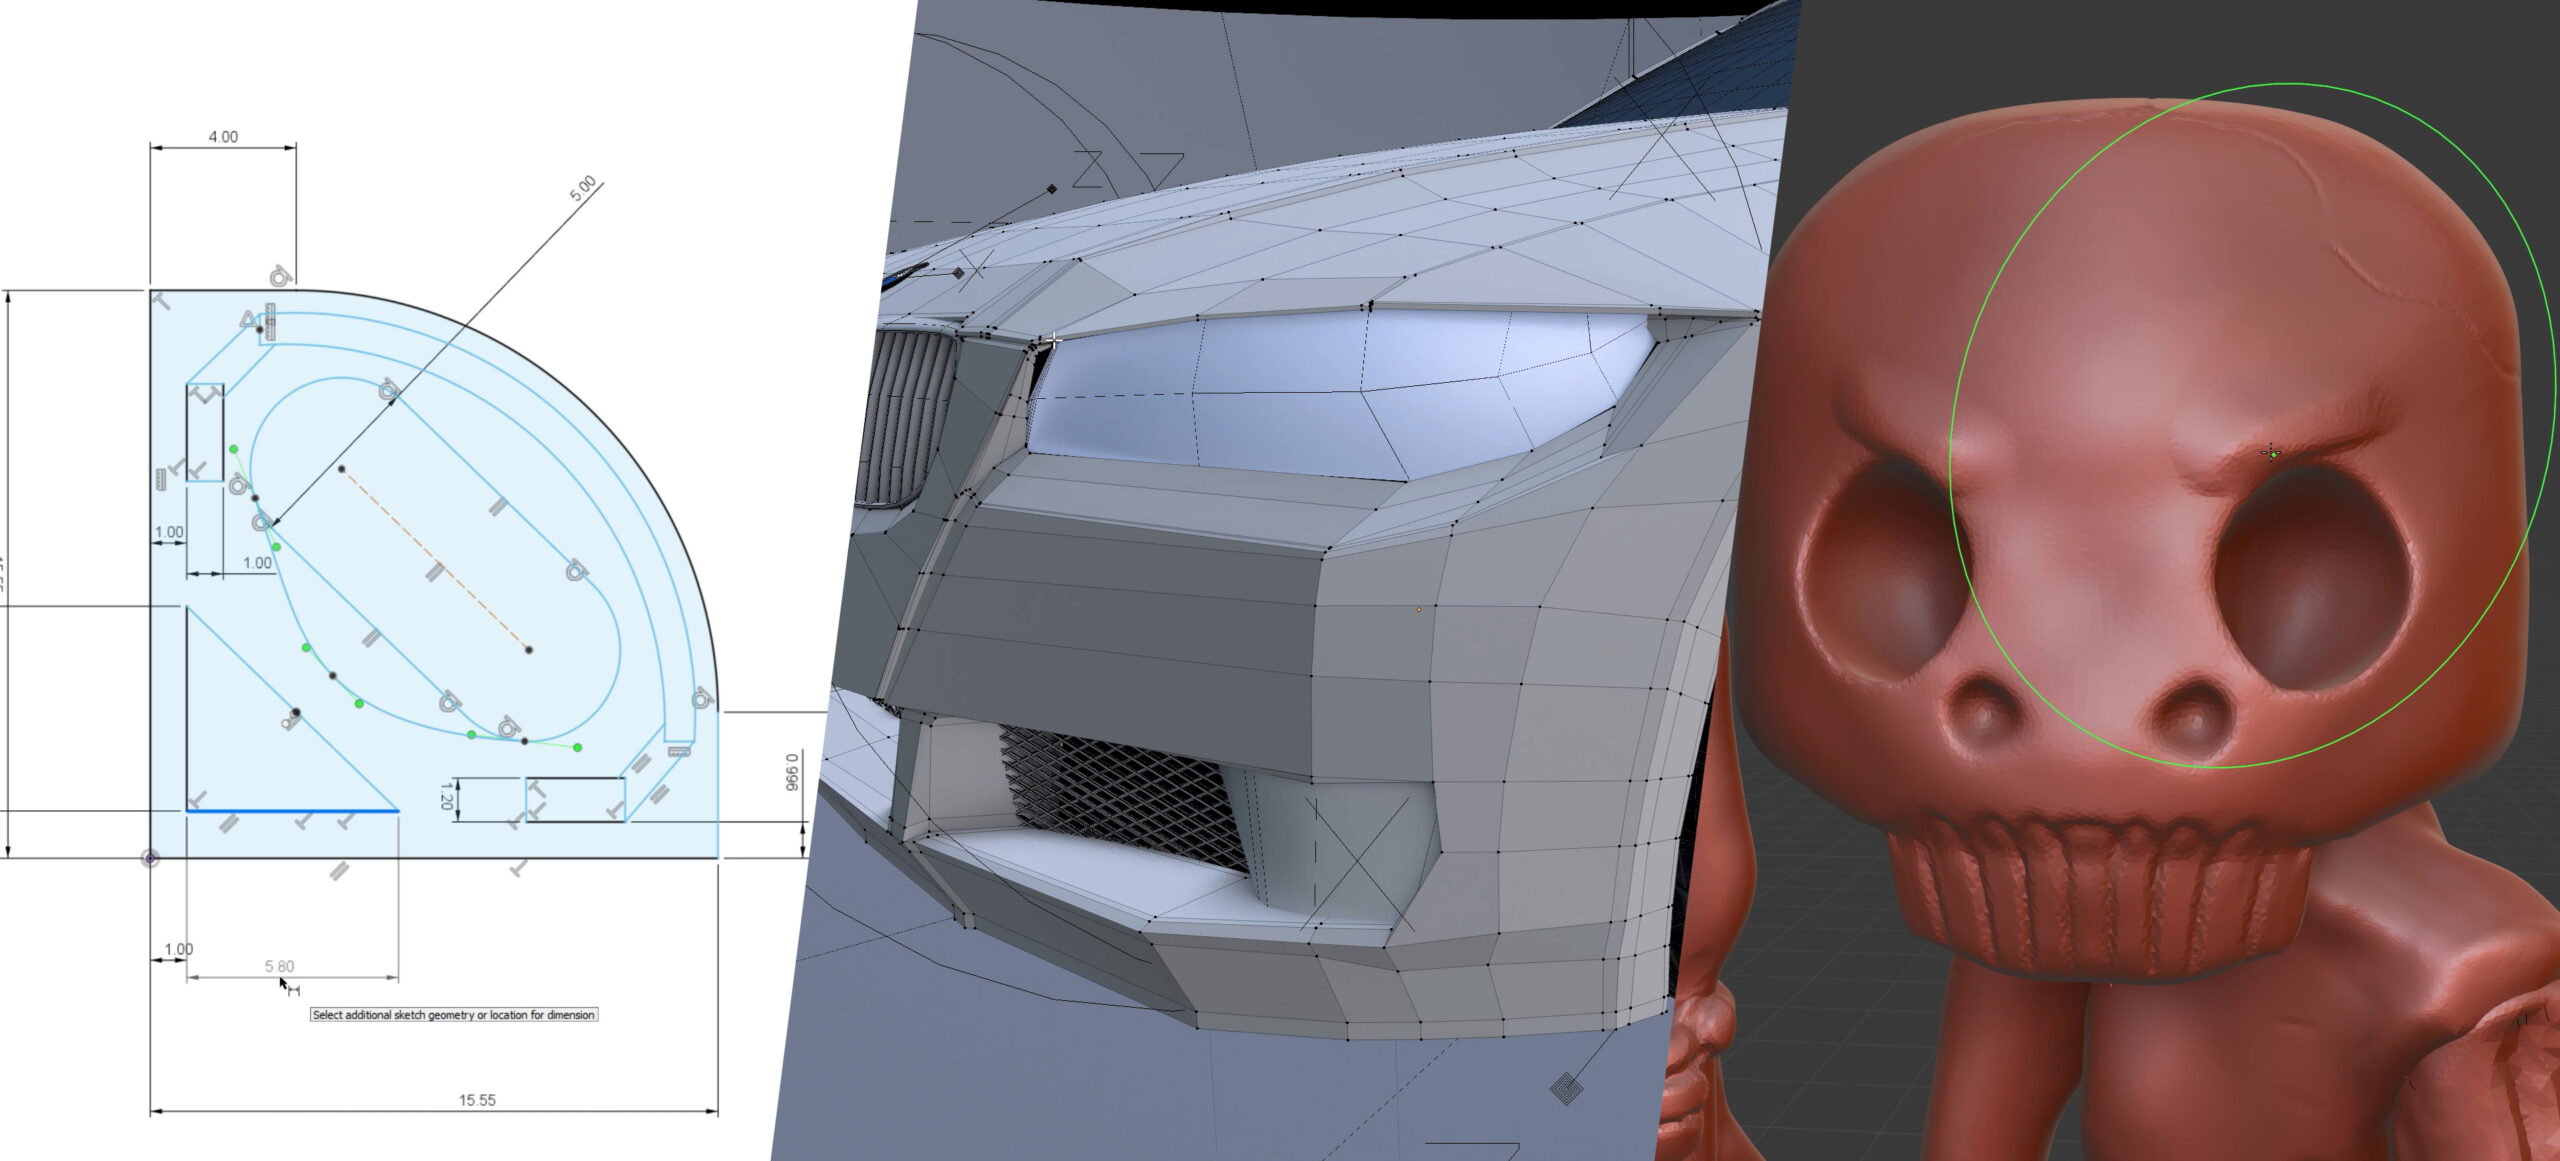 CAD modeling (left), traditional polygon modeling (middle) and sculpting (right)
3D sculpting is a digital equivalent to traditional clay sculpting. You start with a piece of (digital) clay that you can push, pull, smooth, grab, pinch or otherwise manipulate. That’s cool and all, but it seems pretty difficult to learn, right? Well, there are several great, beginner-friendly use-cases for sculpting aside from making models from scratch.
Repairing 3D scans
Even if you have no experience with sculpting whatsoever, using just the basic tools, you can easily modify and enhance 3D scans! Especially the smooth tool works like magic. We have two photogrammetry tutorials where you scan an object just by taking pictures of it with your phone, check it out if that’s something you’re interested in:
- Photogrammetry 2
Using Meshroom – easy to use, but needs an Nvidia GPU to run well - Photogrammetry
Using COLMAP – doesn’t need Nvidia GPU, but more complex to set-up
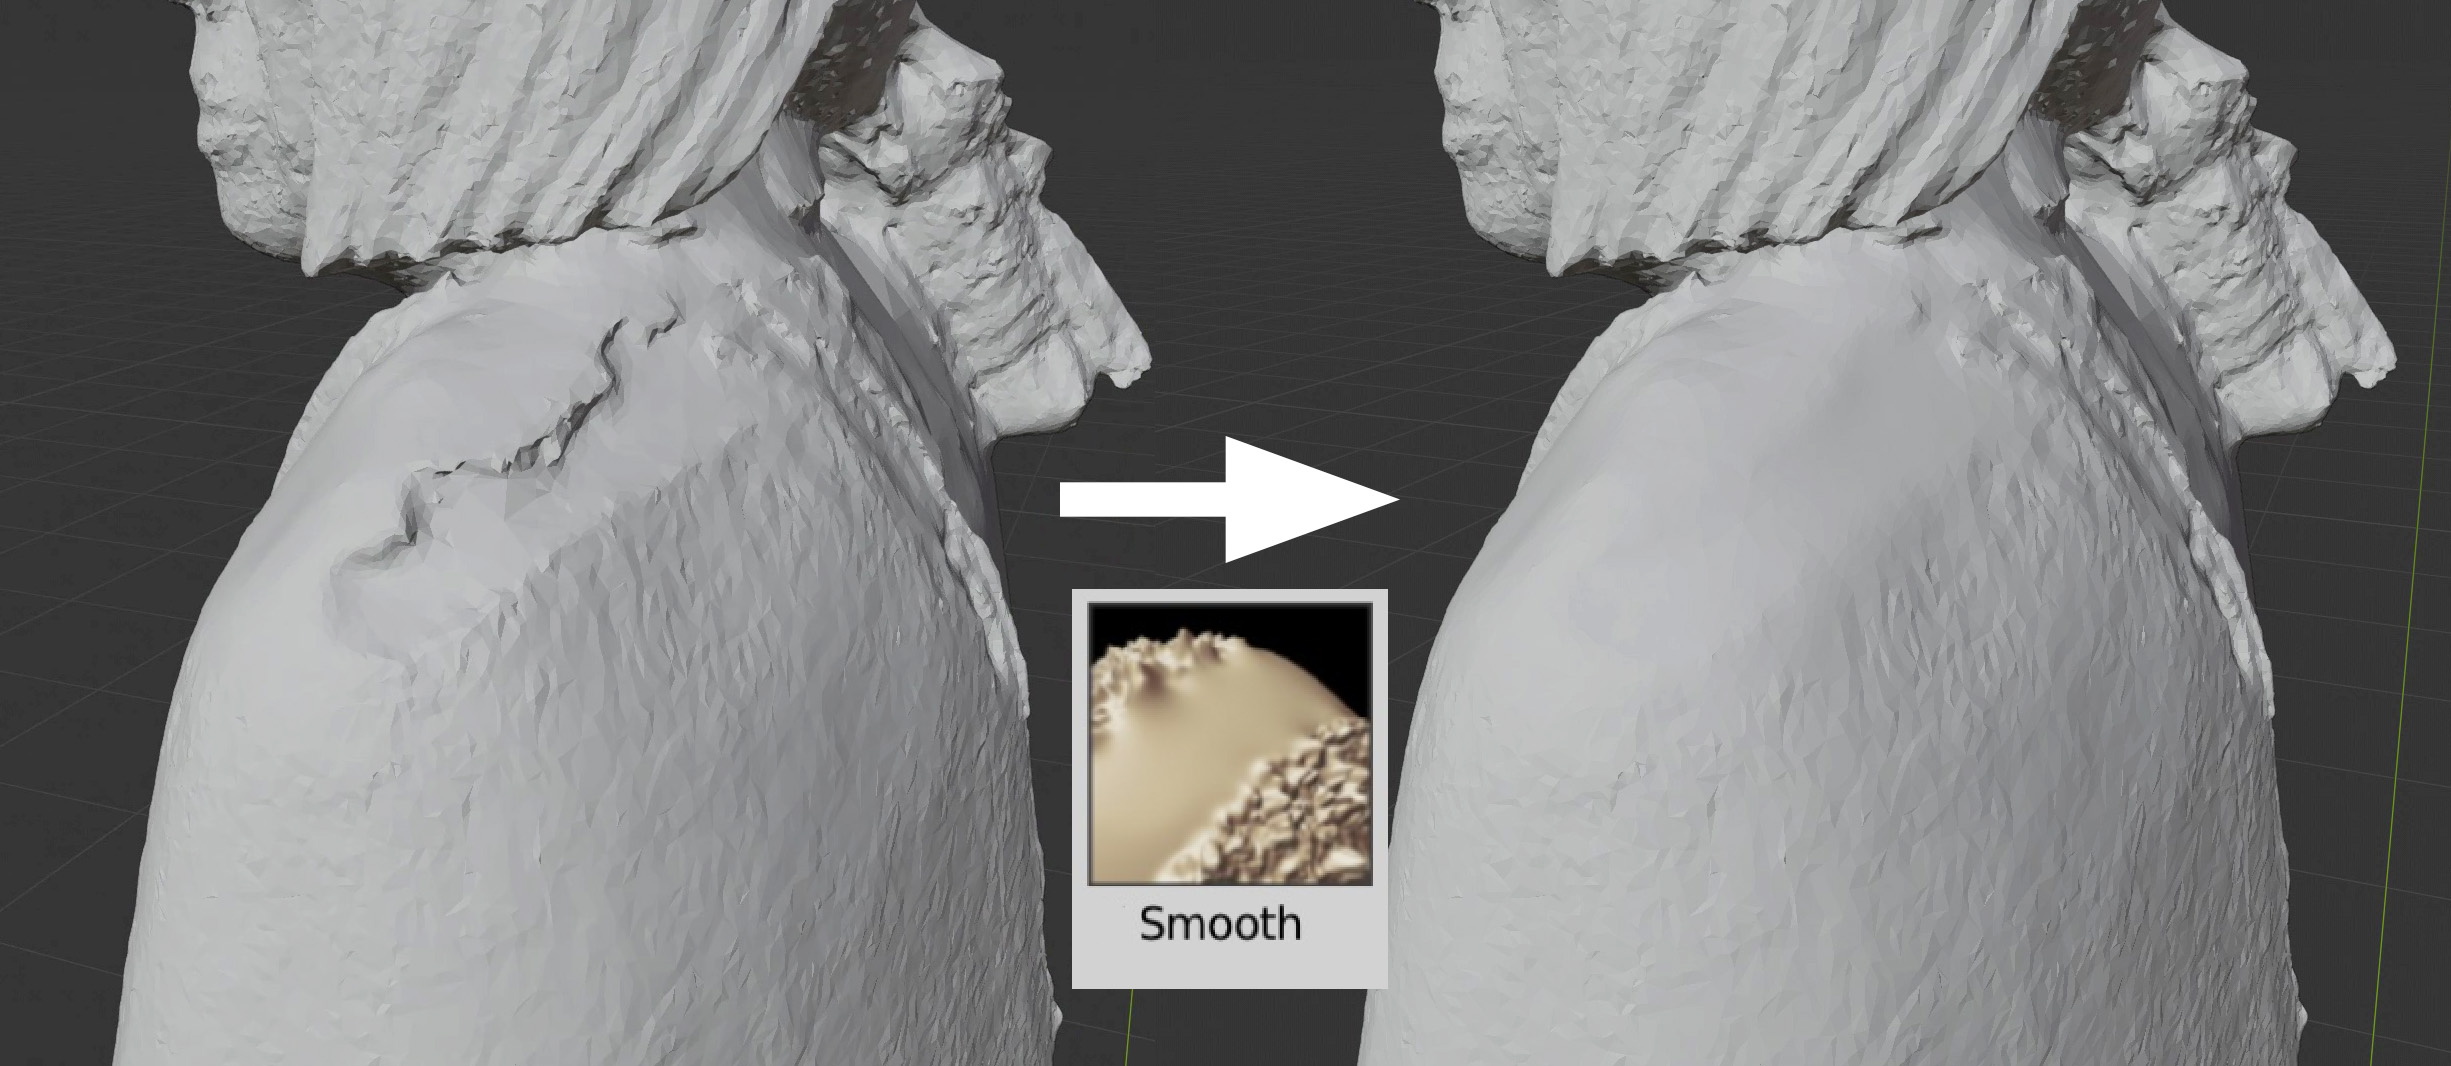 Repairing the shoulder of a 3D scanned statue with the Smooth brush
Adding dents to models
And another use-case that you can try is modifying models created with other techniques. For example, you can add scratches or dents into a robot body that’s supposed to look worn out.
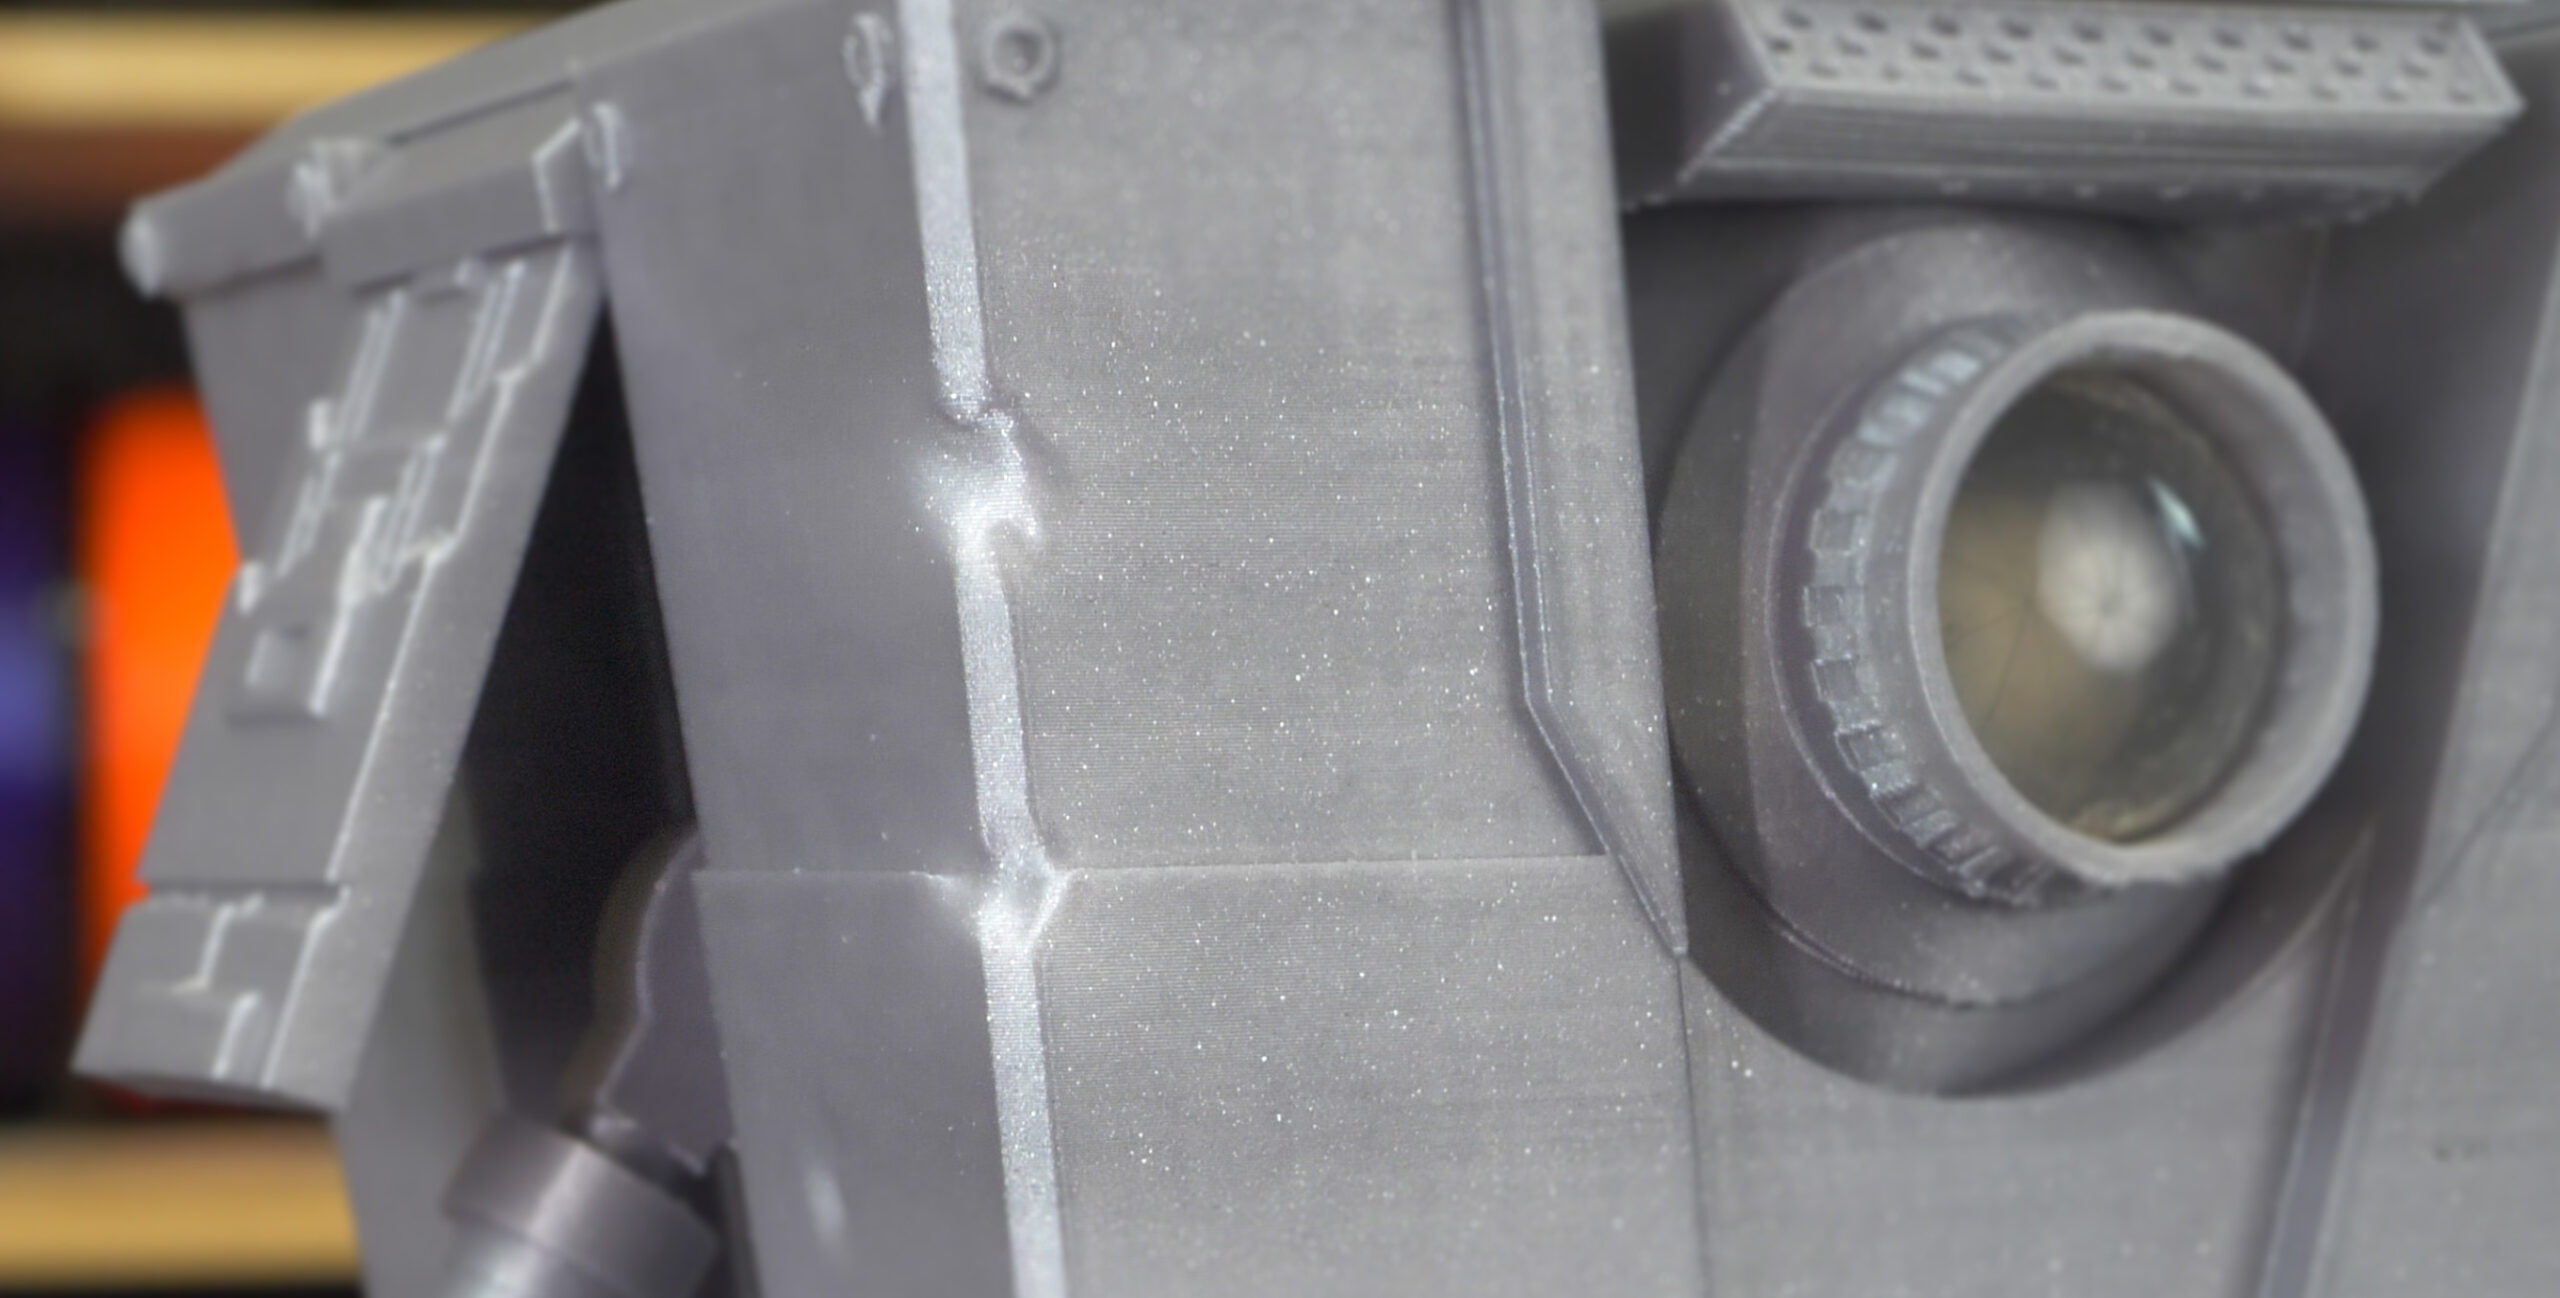 Dents created with the Clay brush to make the Claptrap model look worn out
Sculpting software
The question you probably have right now is what sculpting software you should use. There are quite a few options and we’re going to quickly go over the most popular ones.
First, we have to mention Zbrush. It’s the industry standard when it comes to sculpting. However, for a hobbyist or a beginner user, it’s pretty expensive and fairly complex (though there is a 30 day free trial). And the thing is, the basic tools in all sculpting apps behave basically the same. Even the keyboard shortcuts and brush names are often identical. So you don’t have to worry about wasting time learning the wrong software. Whichever you choose, you can easily switch to a different one later on.
With that out of the way, we have to show our love for Blender. It’s free, open-source and has an excellent, easy to learn sculpting workspace. Make sure you’re using version 2.8 or newer because, among other things, the UI is now much more user-friendly.
UPDATE: Pixologic, the creators of Zbrush, released a new software called ZBrushCoreMini. It’s free and includes the most commonly used basic sculpting tools. So that’s another free tool that you can try.
Now if you want something really simple, you can try SculptGL. It’s a web-based app so you can launch it right now without installing anything. Then there’s Sculptris, which is basically a really simplified Zbrush available for free, but it’s not being actively developed anymore. And you can sculpt even in Meshmixer, which we’ve used in some of our previous tutorials.
Sculpting brushes
Whichever you choose, the basics are the same. You have several brushes to choose from such as:
- clay brush – add or remove clay
- smooth – removes detail and smooth the surface
- grab/move – quickly change the proportions of a model
- crease – creates sharp indents or ridges, while pinching the vertices together
Typically by holding down a modifier key, like the Ctrl or Alt key, you reverse the behavior of a brush. For example, in Blender by holding down the Ctrl key you remove clay instead of adding it.
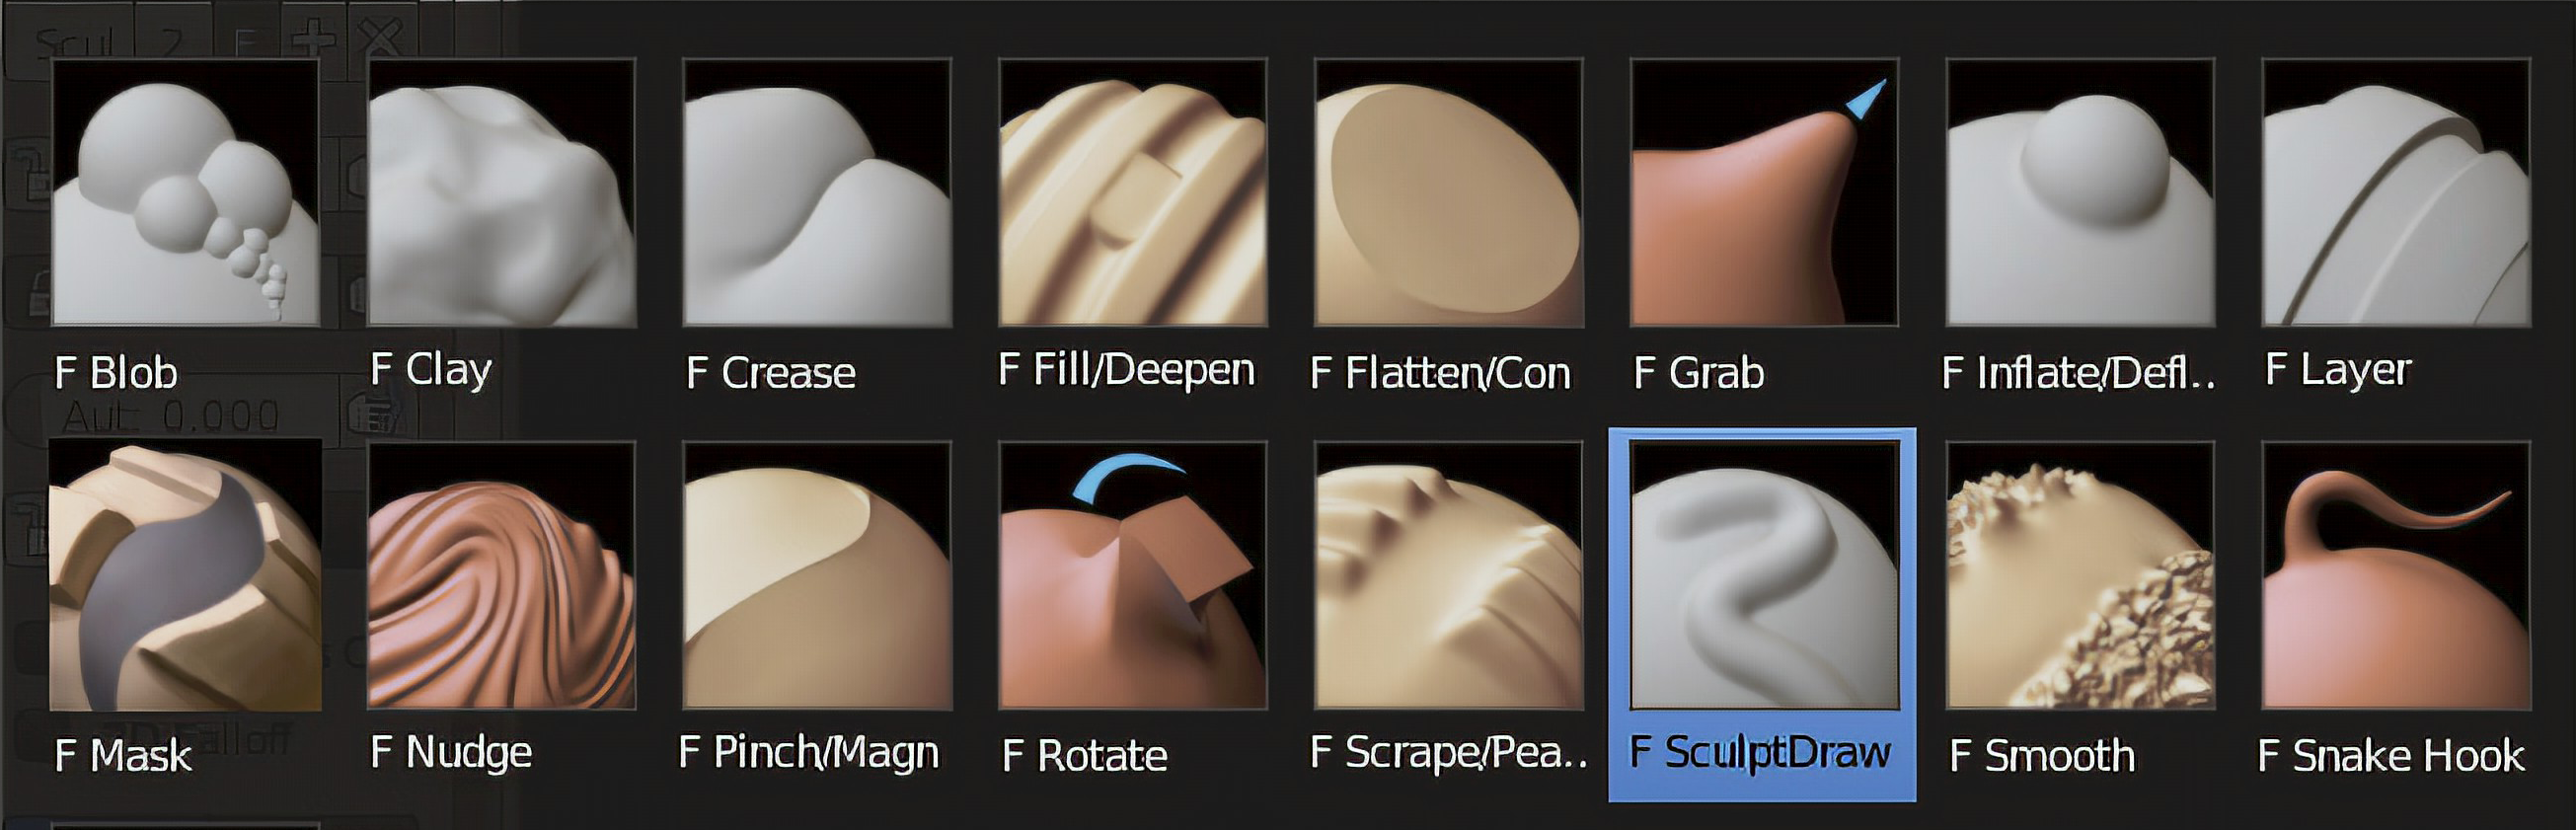 Some of the various brushes available in Blender
Furthermore, a few key functions make your life easier when sculpting:
- masking – lets you freeze a part of a model so that you don’t accidentally modify it while sculpting in its proximity
- dynamic topology (dyntopo) – adds and removes details (vertices) on-the-fly. This makes it possible to sculpt complex shapes out of a simple mesh.
Sculpting is almost entirely artistic
Modeling also has a technical side. If your model has too many polygons or bad topology, it will be hard to use in a game or in animation. But that’s another great thing about sculpting. It’s almost entirely artistic. As soon as you learn the basic brushes, the only thing you focus on is the model itself. You’re not distracted by worrying about the technical aspects.
Sculpting tips for 3D printing
When it comes to 3D printing though, there are 2 things to keep in mind during sculpting. You can minimize support usage by cleverly working around the overhang angle. You can see in the image below, that the pose of this model is chosen deliberately to be printable completely without supports.
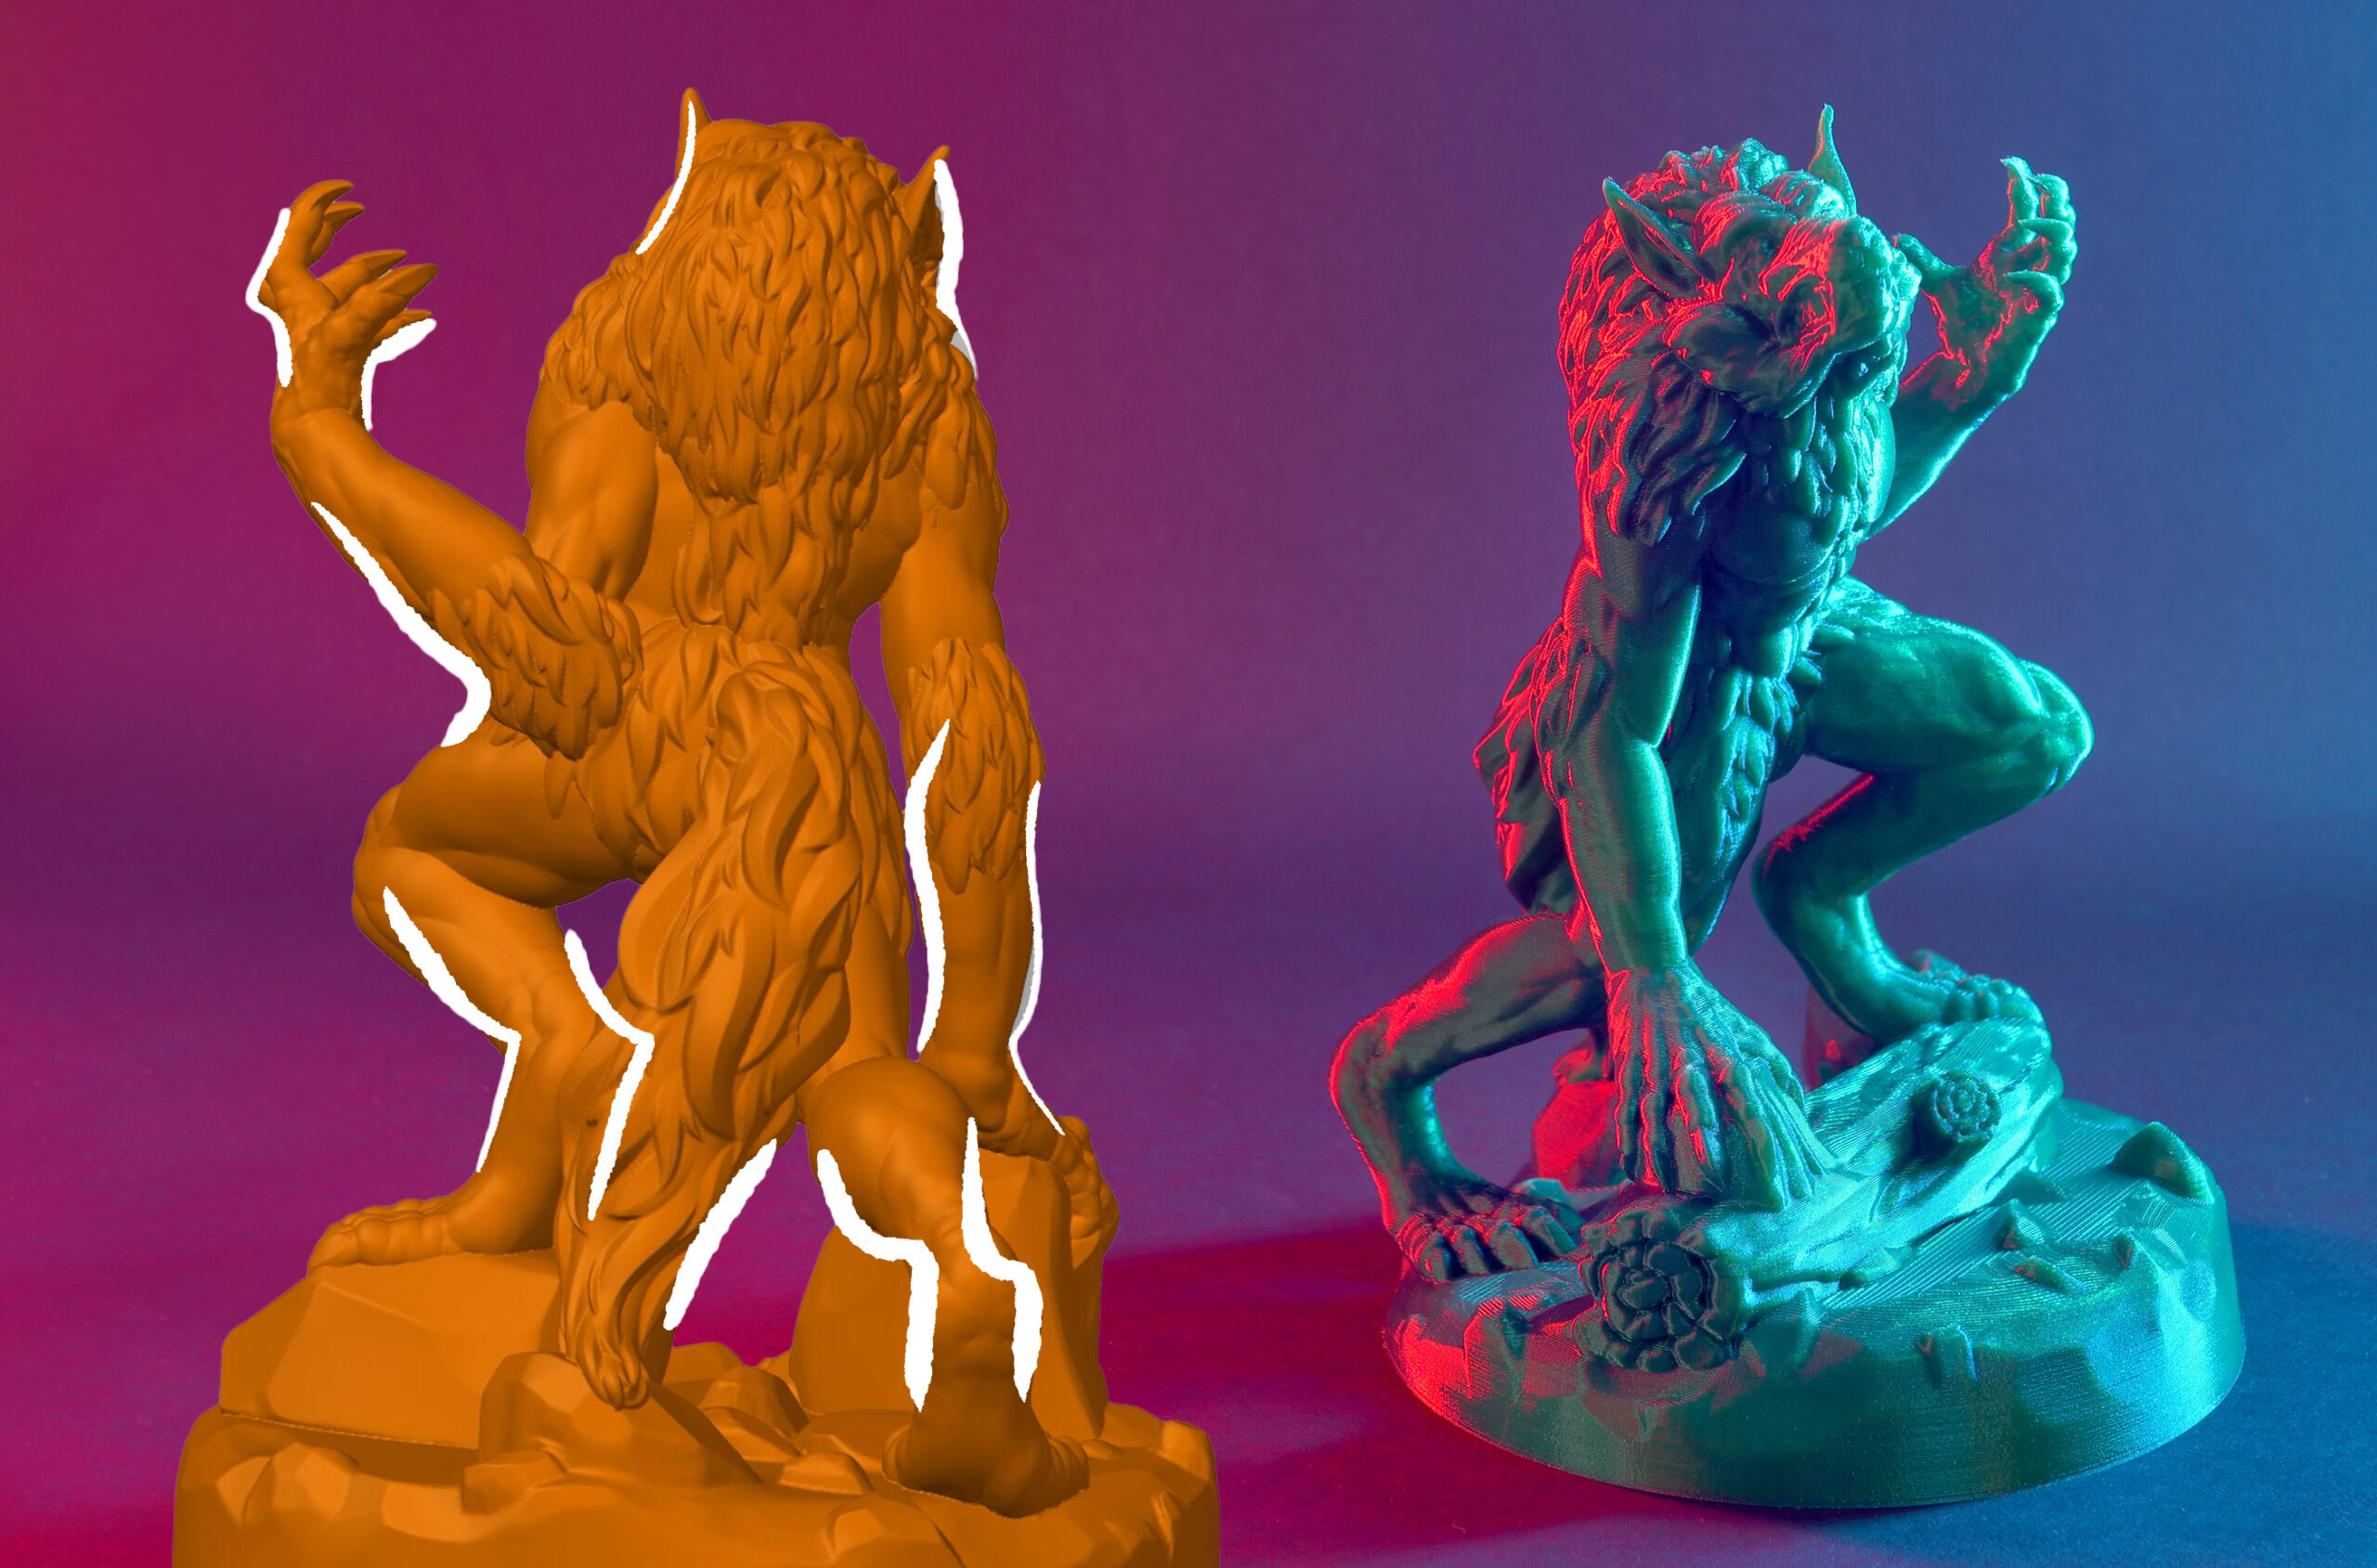 Werewolf model designed in a way to be printed without supports (RocketPigGames)
The other trick is to keep parts of the model as separate meshes. That way, you can not only reduce supports but also print them with different colors. And if you plan to paint the model, you’ll save so much time by not having to mask everything but the part you’re working on.
If you just want to 3D print the model, you don’t have to modify the model at all or just reduce the polygon count with a simple decimate modifier. And if you also want to use the model for other applications, such as animation, you can fix that once you’re done sculpting with retopologization.
Two more important notes.
Reference photos or sketches
If you want to sculpt something specific, it’s extremely helpful to have a reference photo or a sketch.
I’m terrible at sketching too. But every minute you spent refining your sketch will save you so much time later on. And if you make it a habit to start with a sketch, you’re actually going to improve at that too pretty quickly.
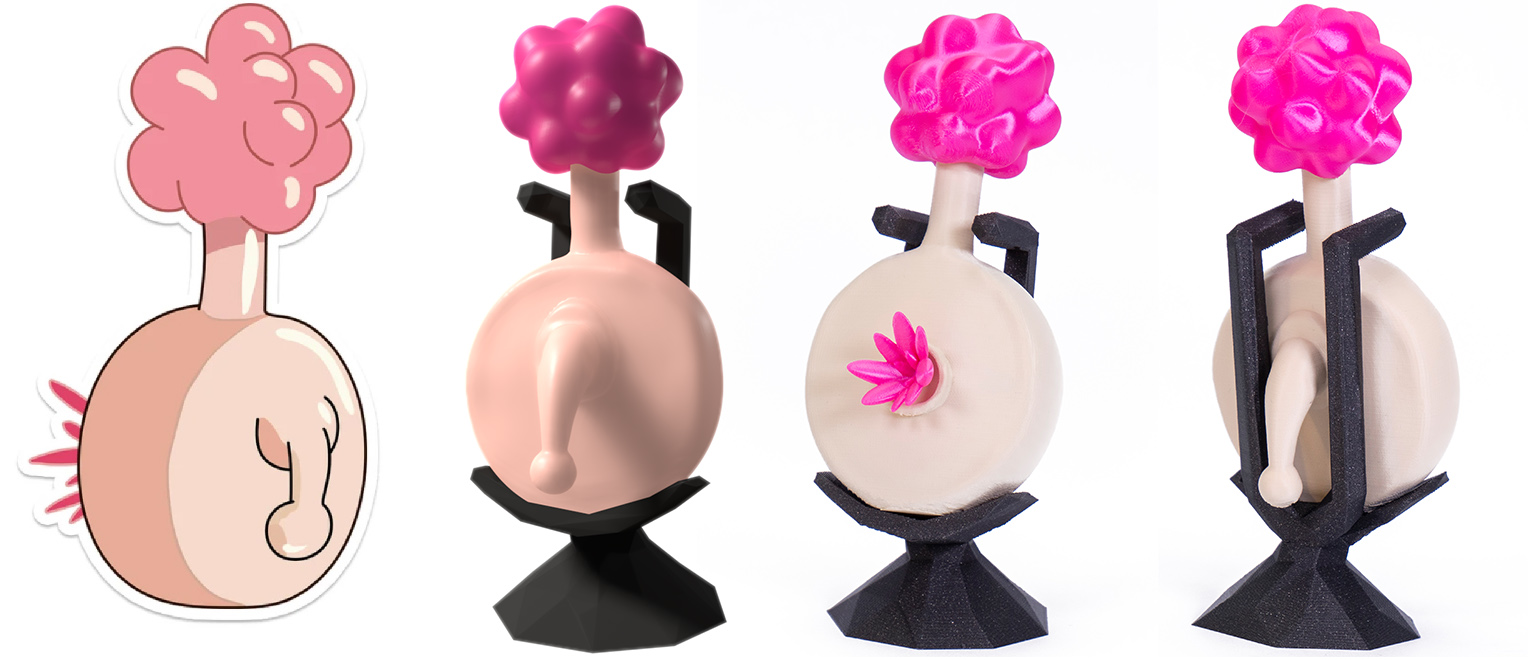 Reference image, sculpted 3D model and printed model
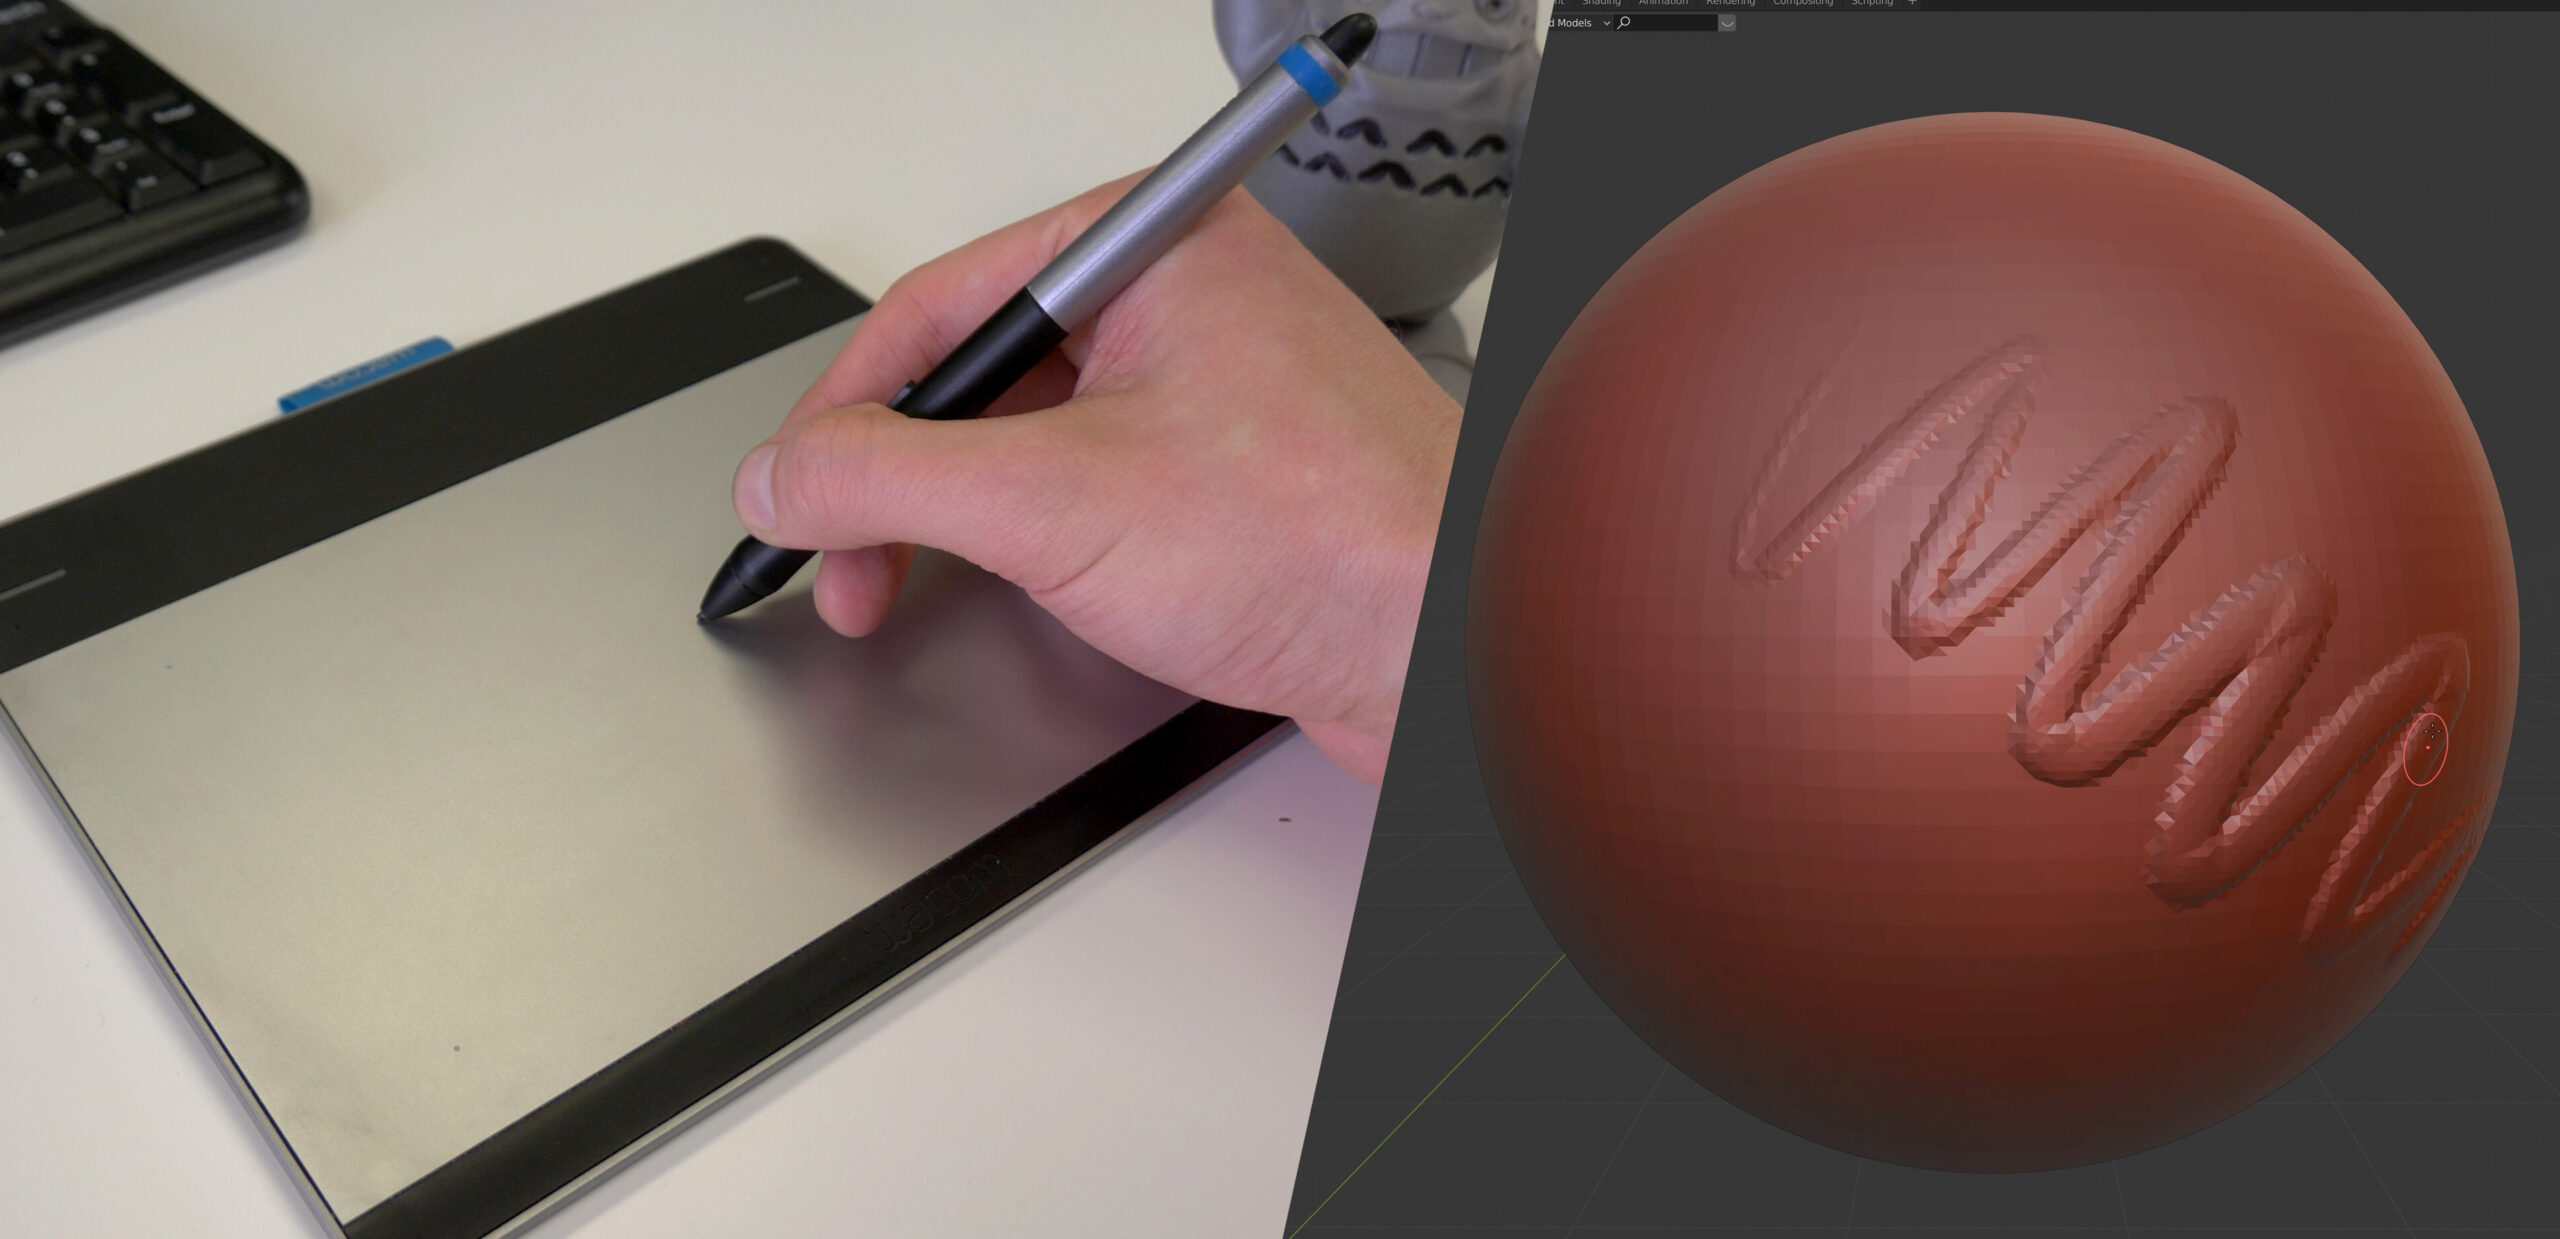
Using a graphical tablet
The second note is about using a graphical tablet. A mouse will be enough to try sculpting out, but getting even just a small tablet or a laptop that supports a stylus will give you a new level of control. You’ll be able to quickly change the intensity of a brush by applying more or less pressure. And in a way, it just feels different. As if you were touching the model.
Our favorite tutorials
If you want to learn more about sculpting, here are some of our favorite channels:
- Blender
- ZBrush
And also keep in mind that sometimes paid tutorials are well worth the money:
If you have your favorite tutorial or software, let us know in the comments!
Sculpting competition at PrusaPrinters.org – win the Original Prusa SL1!
If you give sculpting a go, you can enter our competition at prusaprinters.org and win the Original Prusa SL1.
Let us know if you’d be interested in more articles and videos about sculpting and don’t forget to tag us online if you give it a shot.
And as always,
Happy printing!
Another great sculpting tool, if you have an Oculus Rift, is Medium.
Thank you for providing this type of great article with us. It was so much informative. 3d model Vancouver, BC is a thing through that we could easily get a better version of a subject. It can help us to make a better thing.
awesome article, thanks for sharing! In the 3D world, drawig tablets is super useful for ZBrush. A must if you want to take full advantage of the sculpting.
Tablets are cheap these days. The 24inch XP-Pen Artist 24 Pro : https://www.xp-pen.com/product/602.html digital tablet monitor I have has programmable buttons and I can customize the behavior of the mouse, buttons, and pen in every program I use it with . I both sculpt and paint on my XP-Pen and I like big display .
For this you need a special software that will work perfectly. For example, we specifically hired a team that would make us similar software that would work steadily. We can’t do without it here, because 3d modeling is first of all an IT solution. Fortunately, we managed to quickly find the nearshore software development europe team and order help from them just for that. So far there are no complaints about the work and I am completely satisfied with everything. We also integrated several business solutions like Salesforce in order to automate and scale this process.
I’m about to order a Prusa i3 Mk3s kit and was wondering what the best software to use is.
P.s. I have a 2015 MacBook Pro about to start running MacOs Big Sur 11.0.1
Very cool. Thank you for your post. I would also like to see the convergence of 3D frameworks and external 2D-3D facilities with various third-party SaaS applications. I think it will be fascinating for all, just like you, to beautifully execute concepts, using your examples. Like the immersive education experience for beginners in Saas 3D. https://ardas-it.com/saas-development The Saas method is now being applied everywhere by many software development businesses. Have you ever tried anything like this?
thanks for info about business!
This is an amazing 3D sculpting that inspire me for study. On one of the recent classes, my teacherr showed his works and I decided to write an essay about people who create the new reality with the help of 3D printers. I have received the assistance from this fixer https://studyclerk.com/plagiarism-fixer because I had some problems with plagiarism
Fantastic examples! Check this https://computools.com/custom-software-development-for-small-businesses/ i think your solutions can help with it
Amazing examples! 3d sculpturing is my hobby, and it’s the only thing I do now in my free time because I want to improve my skills.