


You may have heard about the powder-coated sheets before – and no wonder! They are incredibly popular, we’ve sent over 18,000 of them to our customers and the demand is still huge. Today, we’ll take a close look at what makes these sheets unique and what are the differences compared to standard smooth sheets. Also, we’ll share information about how we test them and above all: we’ll share in-depth instructions on how to properly take care of your powder-coated sheet to ensure it stays in a good shape for a long time.
Stock availability
We have been regularly informing our customers about the status of powder-coated sheets for many months. The main problem was that we’ve run into issues with production quality – it was (and still is!) incredibly difficult to produce these sheets in good quality and high quantity. We decided to keep improving and adjusting the manufacturing process until we would get everything right. Everything seems to be on the right track now and the situation is finally looking stable. We’re adding small batches of powder-coated sheets in our e-shop’s stock every day. So in case, you saw an “Out of Stock” text, please try again in a couple of hours. We’re planning to enable MK3S/MK2.5S bundles with powder-coated sheets in the upcoming weeks. To see the sheets in the e-shop, you must log in with your e-mail account that was used to purchase your 3D printer.
UPDATE: From now on, we have a stable supply of powder-coated sheets and our warehouse is fully stocked. You can also order your Original Prusa i3 MK3S kit or the assembled printer with the powder-coated sheet.
Powder-coated sheet characteristics
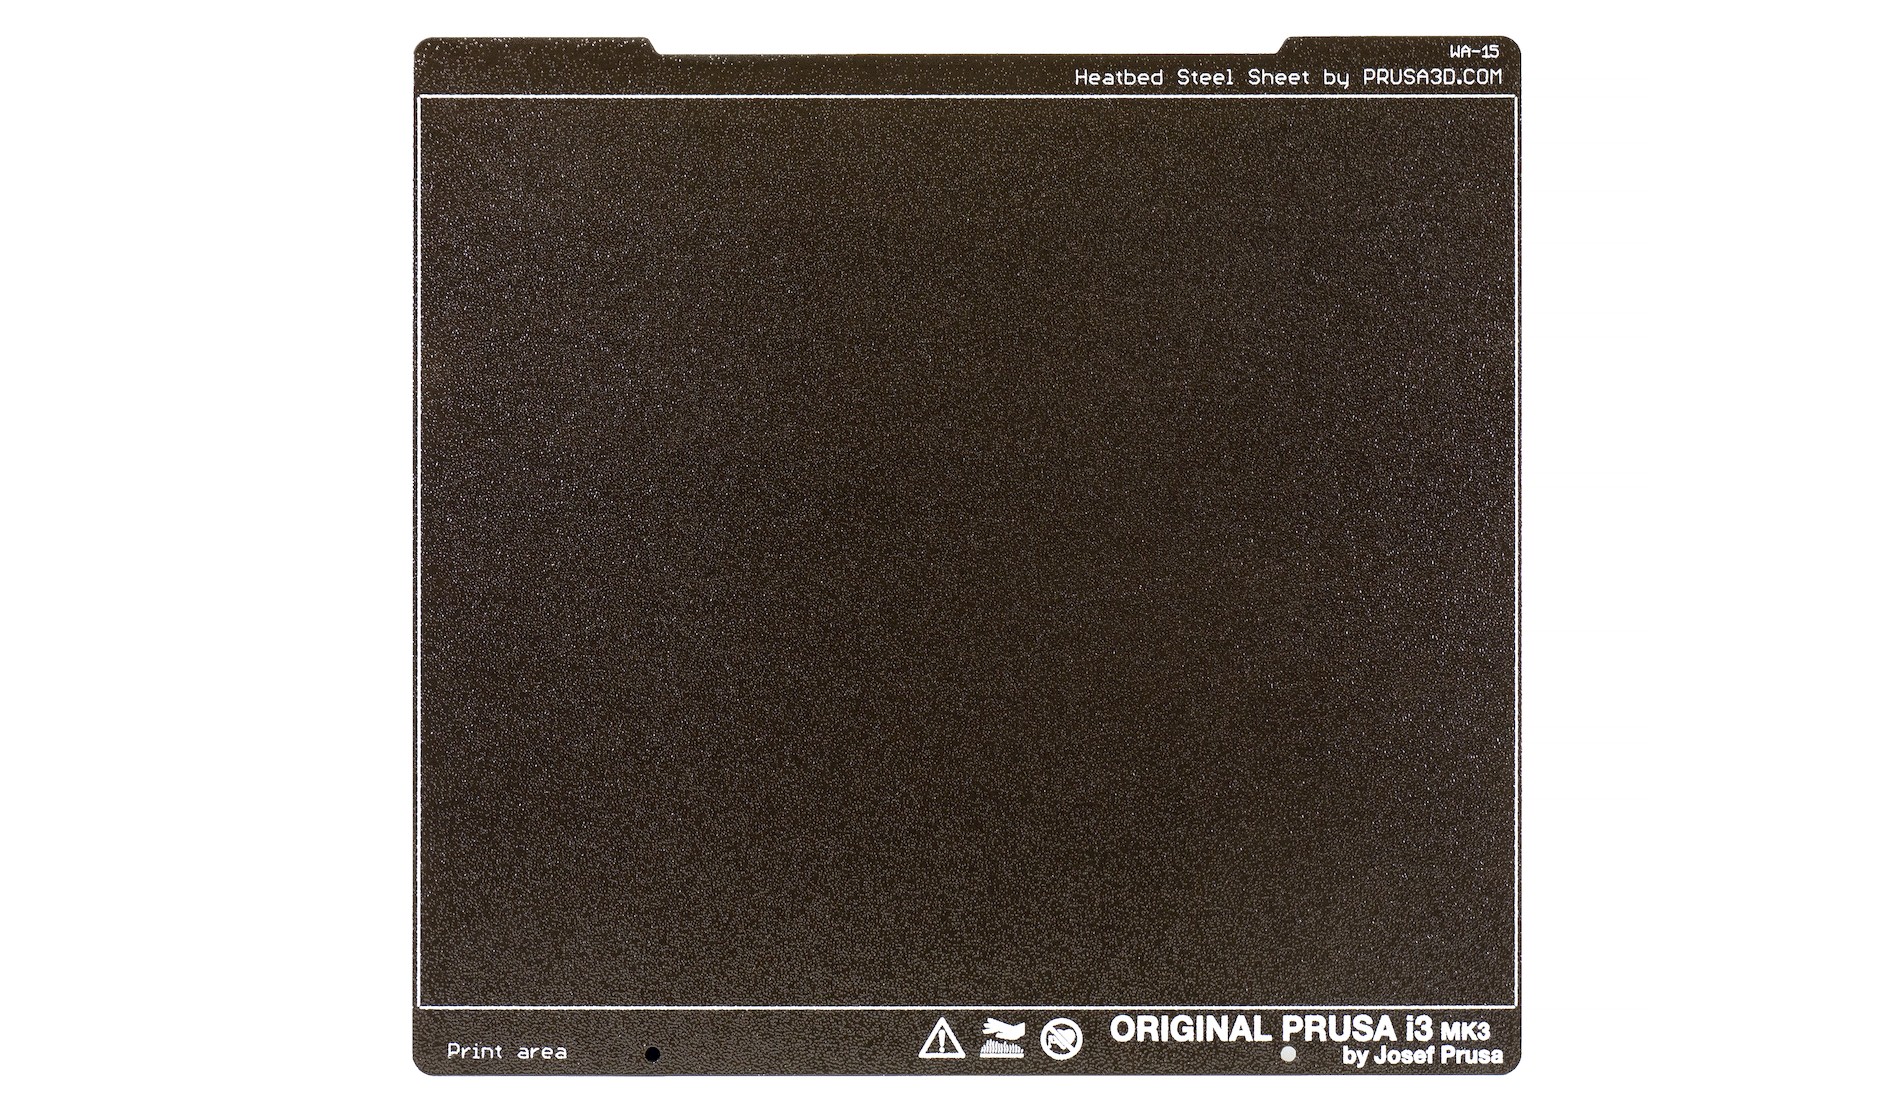
Our powder-coated sheets allow you to print with most of the commonly used types of filament (PLA, PETG, CPE, Flex, etc.) without applying adhesive/separation layers (see more at our filament table). The surface of the sheet is covered with a special polymer (Ultem), which enables all the previously mentioned materials to adhere to the print surface properly. Obviously, the biggest feature is the textured surface – the extruded plastic will fill the tiny gaps in the texture and the result will be a slightly rough first layer. This helps to hide the filament “tracks”, creating a nice uniform surface. You can inspect the printed parts of your Original Prusa i3 3D printer for reference. Another great thing is the fact that prints are easy to remove after the sheet has cooled down – keep that in mind and don’t try to forcefully remove the object when the sheet is still hot. Some models will separate from the sheet automatically, others can be removed by merely bending the sheet, without using a spatula or similar tools. It is also very difficult to create scratches on the surface thanks to its durability.
Quality guaranteed
We make sure that the manufactured sheets conform to our standards. All printer sheet deliveries undergo several inspections:
Every delivery from our supplier has several batches (one batch equals one furnace output of 200 units). We take one sheet from every batch for the initial inspection (see the spreadsheet). We compare our results with the supplier who makes the same check before shipping. Next, we take 2 sheets for testing. We run 15 prints with PETG, PLA, ABS, CPE, and FLEX to test them in a real scenario.
The whole process includes receiving the sheets without the printed markings (with phosphate and Ultem). We check them all visually, then we send them for silk-screen printing and after that, we visually check 100% of all the parts again. Therefore the visual check is performed twice. Just to be clear – we focus especially on the printing area of the sheet. If we find a minor defect outside the printing area, the sheet is fine and there is no reason to throw it out.

Print surface preparation
Do not apply any adhesive or separation layers on powder-coated sheets. All you need for a successful print is just a little bit of isopropyl alcohol (IPA) 90%+ as a degreaser (do not use Acetone! – see the explanation below). Apply IPA on a paper towel and clean the cold surface with it. If your print surface is hot, IPA will evaporate quickly and you won’t be able to clean the surface perfectly.
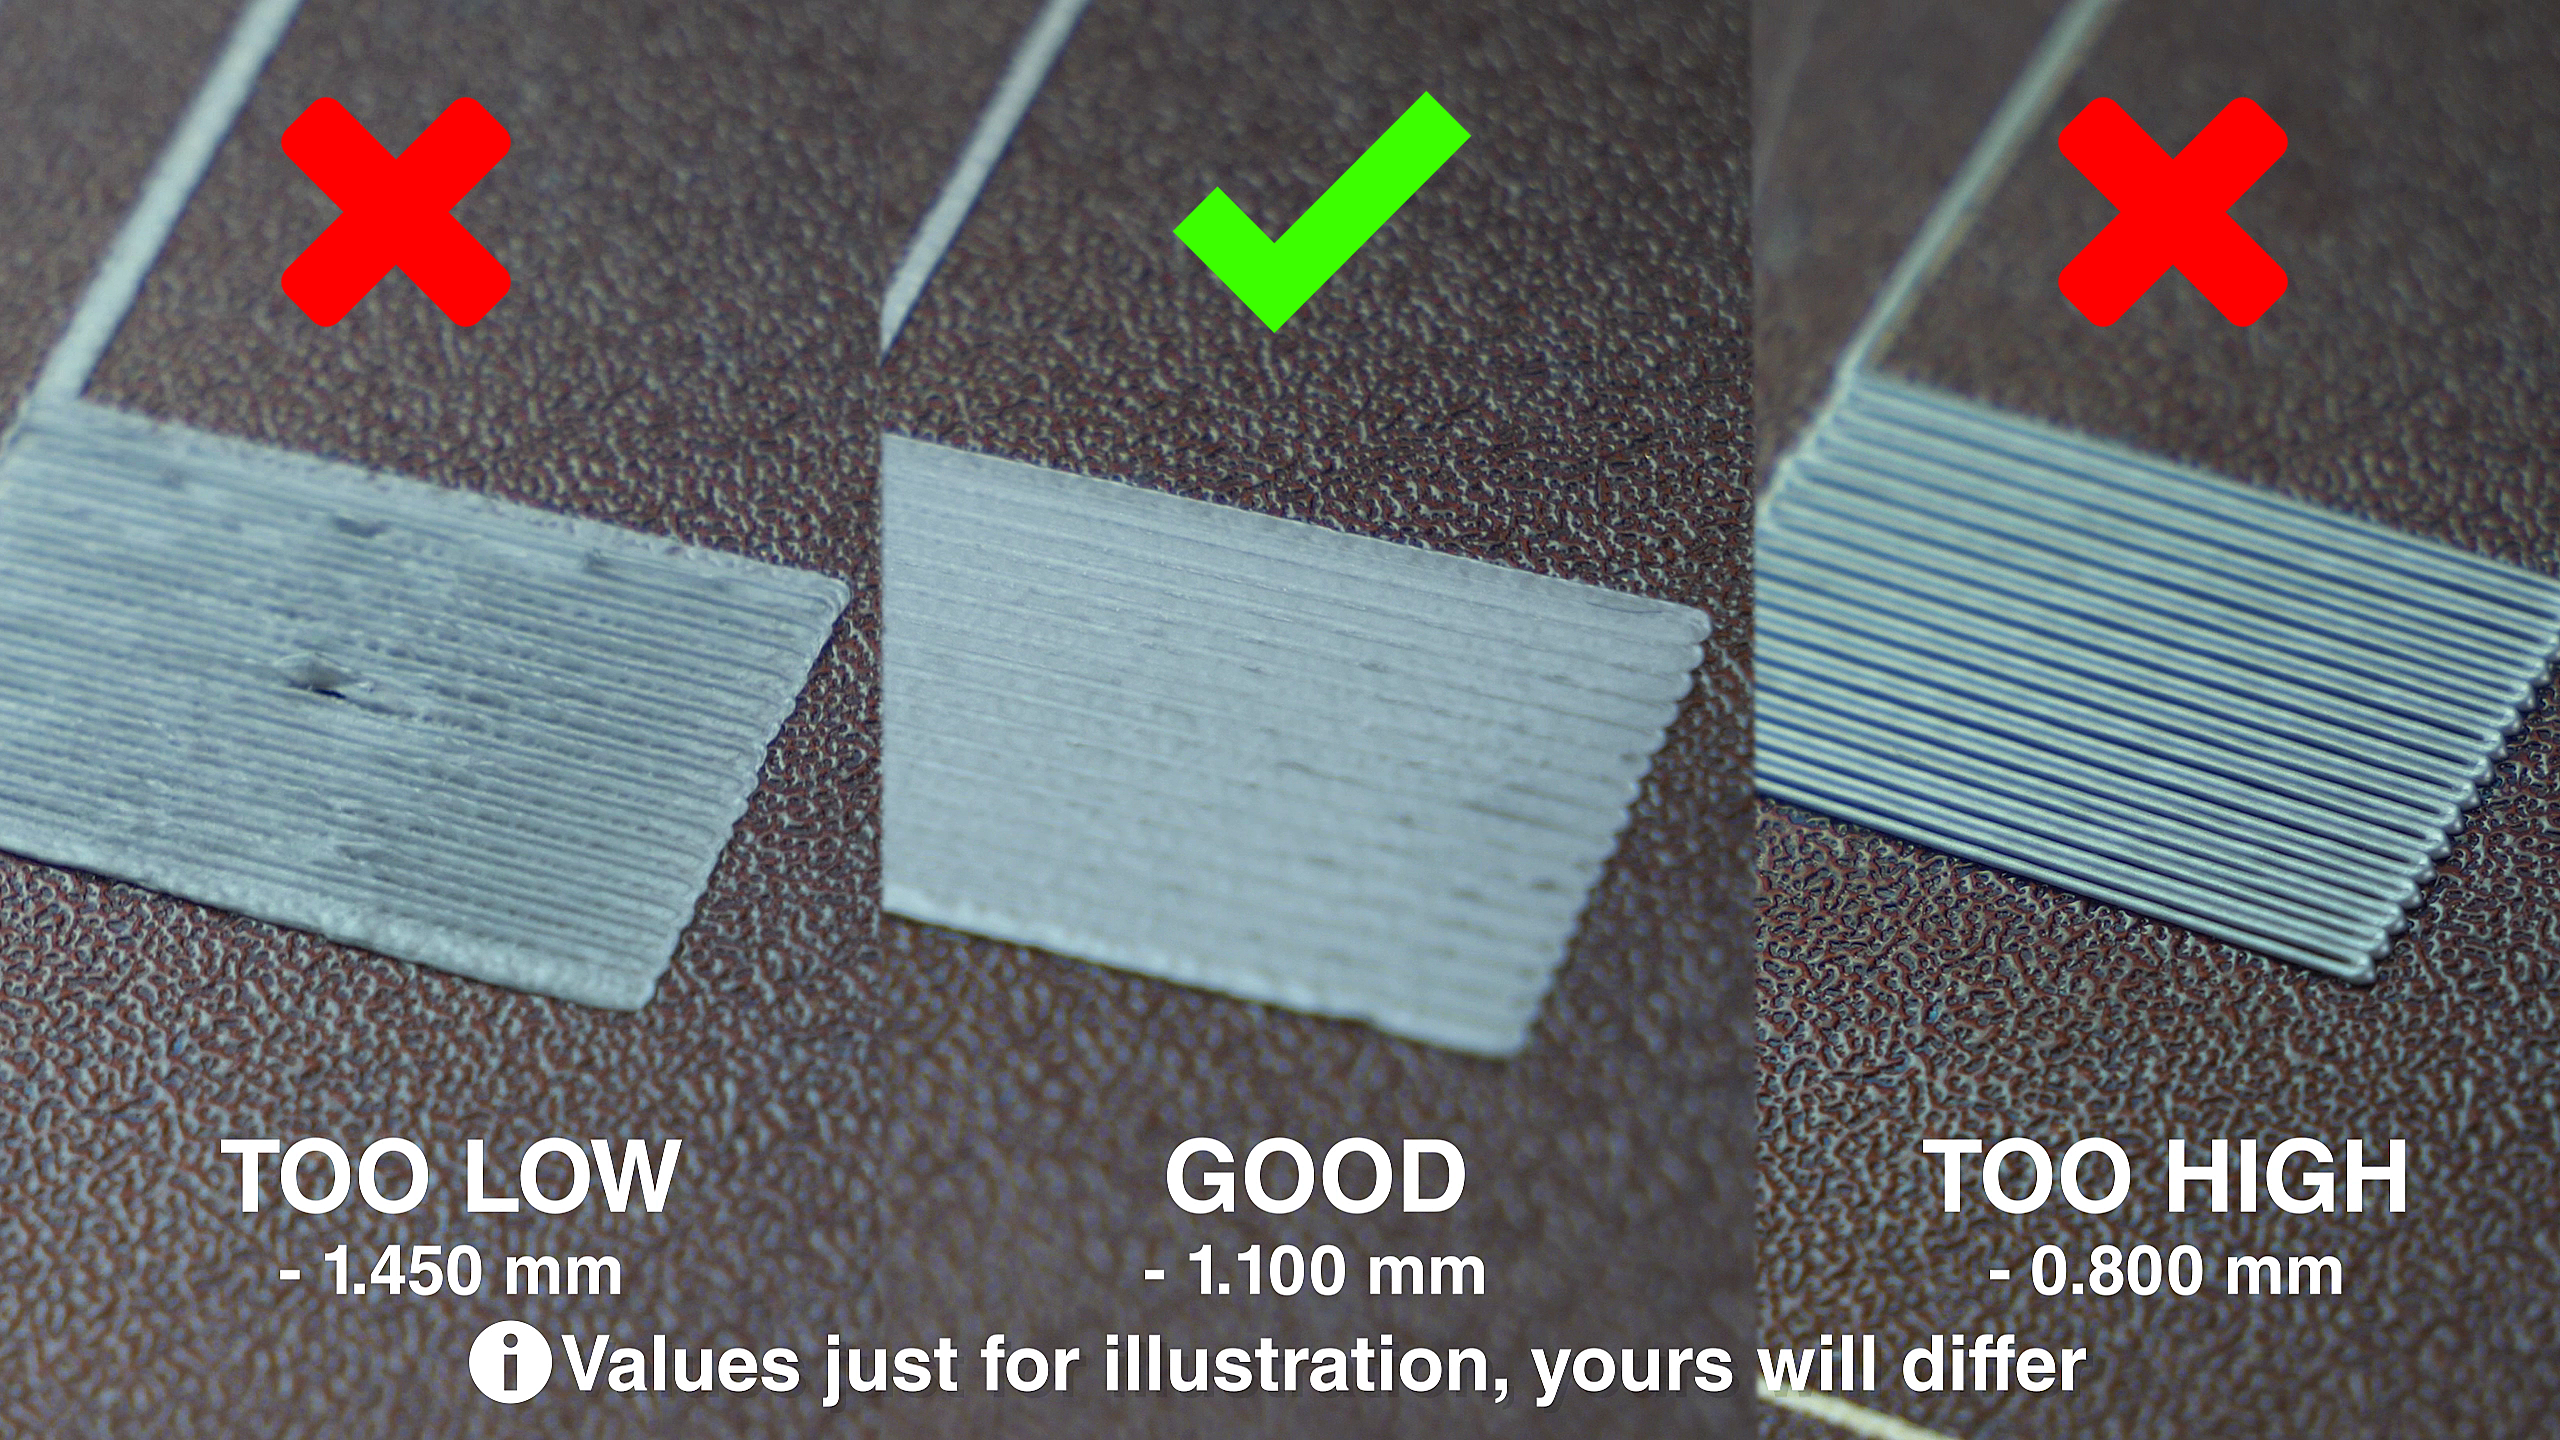
Calibration of the first layer
Do not forget that powder-coated sheets have a different thickness than smooth PEI sheets, therefore it is required to do the First layer calibration. Please note, that the improper adjustment of the first layer height can lead to damage of the sheet’s surface. This type of damage is not covered by your warranty!
While it’s true that it’s necessary to lower the nozzle more (compared to the smooth PEI sheet), it is important not to overdo it. The extruded filament should completely fill all gaps of the print surface while remaining smooth and flat on the top during the print of the first layer. If you set the nozzle too high, your object will not stick to the surface. If you set the nozzle too low, the extruded filament will either stick to the nozzle and peel off from the surface or (in the worst case scenario) you might damage your sheet.
My prints still don’t stick to the surface – what should I do?
If your print surface is perfectly clean, degreased with isopropyl alcohol and the first layer height is set up properly, your prints should (with only a few exceptions) stick to the plate very well. Small parts (especially printed from PLA) can detach due to a small contact area. In these cases, it’s better to use a smooth sheet that will ensure perfect adhesion. If you want to print small parts on a powder-coated sheet anyway, it is recommended to use a brim. The Brim function can be found in PrusaSlicer in the right panel, nex to infill density or under the tab Print settings – Skirt and Brim – Brim. Set the brim to at least 3 mm for better adhesion.
Do not use solvents other than IPA under any circumstances!
Acetone, in particular, must not be used on the powder-coated sheet! Using acetone makes the surface (Ultem) crack, and eventually, it peels off. Also, the powder-coated sheet is not waterproof. When exposed to high humidity, it corrodes and loses its properties. Therefore, do not clean the sheet with water. It is possible to do that only if you have truly tried everything mentioned and your objects still don’t stick to the surface. It could mean that you have sugar-based compounds on your sheet that can’t be dissolved with IPA.
Do:
Degrease the sheet with isopropyl alcohol (IPA) 90%+
Print without any adhesive or separation layers
Print supported materials (PETG, PLA, PC, CPE, PVA/BVOH, HIPS, Flex, nGen, Nylon)
Remove prints after the cooldown
Bend the sheet to remove printed objects
Don’t:
Use acetone and other agents
Print with adhesive or separation layers
Wash the sheet with water
Remove printed objects before cooldown
Use any instruments (spatula) to remove the printed object
Powder-coated sheets are a very good choice for printing all standard types of materials, without using additional adhesive layers. If you treat them properly, they will last for quite a long time. However, it is important to realize that it’s a consumable and the sheet can degrade through continuous use and lose some of its qualities.
Both these sheets have their own advantages – the powder-coated sheet will give your printed objects a really nice surface finish, while small parts printed from PLA might stick better to the smooth PEI sheet. Don’t forget that if you print with PETG on the smooth PEI sheet, you should clean it with Windex and not IPA, otherwise the print could stick too much to it. The best case scenario is, of course, if you own both sheets. Then you can simply switch between them depending on your current needs.
If you already have your powder-coated sheet, we’d love to hear your opinion and see your prints!
For those of us who couldn’t wait and ordered a MK3S with standard sheet, will there be a way to buy the powder coated sheet individually?
I’m a owner of an MK3 upgraded to MK3S since november of 2018 and I can confirm to your that as soon as you own an MK3/MK3S you’re eligible to buy a powder coated sheet as it is said on the blog as soon as you’re logged in with your prusa account while shopping. I’ve ordered mine on the 3rd of june and it’s about to arrive at home. Can’t wait to test it !
Any tips about how to swap between smooth pei and the powder coated pei?, thinking abou the thinkness/changing of Z.
And, not using water?, sometimes, the smooth pei looses all adhesion, neither ipa or acetone helps, then dishwashing soap will make it work again, seems like there is some residue that ipa or acetone can’t remove after a while.
But how will this be on the powder coated sheet since it cant be washed with water?
I’d just write them on a post it and stick it near the printer. So with live Z-adjust you can easily adjust it when the print starts.
Try a damp cloth with a little bit of dish wash. This might be enough.
The live-z for a given plate shouldn’t change once it is set to a good setting, right? I was thinking of writing with a black marker the z height outside the print area, per side so it’s always there and when I swap plates I can adjust accordingly with the number always available (post-it notes can easily be lost).
If the z adjustment number might change over time though this doesn’t work as well. I assume it’s different per plate and possibly per side?
This wasn’t available when you initially asked, but as of the 3.8.0 Firmware update (released on September 6th), the printer can now store multiple bed profiles for different sheets. See the release notes at https://github.com/prusa3d/Prusa-Firmware/releases/tag/v3.8.0 for more details.
What about nylon? Nylon has a hard time sticking unless I use purple glue stick. I’ve had similar issues with abs, tends to peel unless I use glue stick.
I find it weird that they are going into the shop when you still have not delivered all the sheets for the people that ordered a long time ago. I am still even waiting on the second voucher for my MK3 kit I ordered in 2017 !
What if isopropyl alcohol is not something you get freely in my country? Seems like there is some sanitary restriction to getting it, and you can’t just buy it on a drugstore. Could I just use windex or regular alcohol?
You can have a look for finger nail polish remover. Just search for some without Acetone and caring ingredients. Is also a lot cheaper than the one from the pharmacy.
no, please not!
acetone is exactly what you shoud not use on a powder coated sheet, so please no finger nail polish remover or anything else containing acetone. I guess regular alcohol is a better choice there.
Well, he did specify to look for one without acetone in it… But anti condensing fluid (the type you put in your gas tank) is 100%IPA, and that is usually really easy to get and is also really cheap.
I have about 150 Isopropyl Alcohol swabs left, 70%. I used them for my previous print surface. Super convenient to keep around the printer.
https://www.amazon.co.uk/Ezy-Aid-Isopropyl-Alcohol-Pre-Injection-Swabs/dp/B008ET7R2S
The article explicitly says 90%+, so I guess I can’t use them. But I’d be interested to learn why.
I can’t find 90%+ swabs. Maybe because they would dry up too quickly?
Go to your local pharmacy, or walmart, it’s pretty commun, buy by the bottle and use Scott towels. it’s about 5$. Ask them to order it if they don’t carry it.. seriously, it’s so commun..:)
No the reason swans aren’t 90+% is because they actually don’t disinfect as well. The optimum disinfectant is actually 70% which is what we use in the hospital. And since unless you are a real 3D printing enthusiast your skin is unlikely to be coated with PEI powder coat, it isn’t hurt by the extra water (which help carry away the bacteria and biofilm). You can get electronics and lab wipes that are 99% and lint free which I use to clean the inside of my laser cutter (not the optics but the case because the wipes are hand sized and very wet so can dissolve wood oil buildup mixed with acrylic)
Obviously swabs not swans
Some cheap brands of 91% IPA contain unlisted impurities that remain on your bed sheet after the IPA and water evaporate. When you try to print hot PLA over these impurities, they evaporate between the sheet and filament and cause your first layer to bubble and lift wreaking havoc on your first layer adhesion. I was convinced that my textured powder-coated sheet was causing my adhesion problems until I realized I had tainted IPA. Avoid Sam’s Club Member’s Mark 91% IPA.
Dale, thank you. I was struggling with adhesion on the textured sheet. I’d get test prints working great, clean the bed (with Sam’s Club Isopropyl), and have a complete failure on the actual print. I switched to Walgreens Brand Isopropyl and it is working great now. I would have abandoned this sheet if it wasn’t for your comment.
What about super sticky flexibles such as ninjaflex? I’ve been applying glue not to make it stick but to actually be able to remove it again. Without it, it would stick so hard to the smooth PEI that I couldn’t remove it. Will it separate just fine from the powder coated sheet or do I risk damaging its surface when trying to remove a flexible print?
The powder-coat sheet seems to have less adhesion overall than the smooth PEI sheet. It seems counterintuitive but the texture may actually make it easier to remove parts. I can’t say anything about ninjaflex but I’d say try a printing small part first, in a corner of the sheet, to test it. And be sure to let the sheet cool completely before removing the part. I know PLA isn’t Ninjaflex, but with PLA I find the part is hard to remove when the sheet is hot, but after it cools the part is already loose.
My first week after building the MK3S, I had no end of trouble getting my PLA parts to stick to the powder coated sheet, no matter how many times I cleaned it with 99% alcohol). Washing it with warm water and dish soap, drying it with paper towels without touching it with my skin, fixed the problem — temporarily. Eventually, after a week or so, the PLA stopped adhering to the sheet, so I had to wash it again. So far I have washed the sheet three times, and I am hoping this third time will be the last time needed.
I was tempted to take some fine sandpaper or steel wool to the surface to improve the adhesion, but so far I haven’t needed to do this.
I do have the same experience. On the shop the bottom for reviewing the MK3S powder coated print plate is BROKEN, what a pity.
Feel free to contact me on [email protected] I am in contact with Michele for a refund for the two sheets I paid for in advance.
Christian.
Same problem , very very disappointed. I’ve tried also sanding a little bit the surface, but after a few prints with good adhesion the PLA start to detach too easily again.
For my experience don’t waste money on this bed if you print PLA.
Dear Stefano,
i do have the low adhesion in every Material PLA and ABS so far, I am preparing data logging for temperature of heated print surface as well.
So far I reordered shiny PEI from Prusa an do have successful prints, with powder coated, no successful prints .
Christian.
OK Replying to myself:
I was supplied with a 3rd piece of powder coated spring sheet and it WORKS !!!
Two of three pieces are faulty on my orders of shop.prusa3d.com
.. but happy after all these years.
It is my belive the are some batches of powder pei that simply don’t work well, and I was unlucky enough to get one of this.
Followup to my earlier comment: In spite of Prusa’s admonishment about washing the powder-coated sheet with water and soap, I have had to do that about every half dozen prints. I must have washed that sheet 10 times by now. The prints stick better after washing, but occasionally one end of a print will separate right after a wash.
One thing that seems to help, at the risk of the “elephant foot” effect, is to raise the bed temperature from 60 to 65 degrees for PLA. That makes the first layer remain softer and stick better.
If I keep having problems, I’ll have no choice but to sacrifice one side of the sheet and abrade it with something to increase the surface area for adhesion.
I also have found that PLA sticks extremely poorly to the powder coated sheet, even after following all the suggestions. If you are planning on printing PLA, especially small parts don’t buy the powder coated sheet!
Another one having problems getting PLA to stick to the powder coated sheet (Prusament PLA). I tried almost everything I could think of until someone suggested I wash the sheet in hot water and dish soap and that seemed to work a lot better. I’ll try a few more prints and see if the adhesion lasts, but I’ve wasted half a spool trying to get stuff to stick. I still had some warping/curling at the edges, but at least the print stayed attached beyond the first layer.
I had the non-sticking issue too.
Don’t automatically assume it’s the sheet. Actually, in my case my nozzle was just worn out. After replacing with a new nozzle and calibrating it, it worked great again.
While doing my first print with the new nozzle i noticed that on some parts of the bed the nozzle touched the powdered sheet. I guess i calibrated it a bit too low (my supplier told me to do that for optimal powdered texture effect, but i guess i exaggerated it a bit). Maybe because things aren’t level 100% too.
I didn’t re-calibrate the XYZ, but did it recently. Which makes me wonder that the nozzle may got damaged from hitting the bed during prints at some parts before. But it could have also just been the HDglass (fibered PETG) filament I used with a not-so-strong brass nozzle.
Anyway, replacing with a new nozzle solved the sticking issues.
Although i did notice it lost sticking properties while using only IPA (i think I’m using quite premium stuff, but maybe it has impurities too). Using a little bit of hot water with dishwashing soap did improve the sticking properties. But that didn’t last long with my worn nozzle. Since Prusa doesn’t advice to use water I prefer not to do that, it may have negative effects on the longer term.
Denatured alcohol vs. Isopropyl Alcohol (IPA, rubbing alcohol, etc.)?
I am new to 3D printing, so I am trying to absorb knowledge. I have been using denatured alcohol (Home Depot, Lowe’s, Walmart, etc.) for over a decade as an electronics friendly cleaning solution. I have also used IPA for many decades as a disinfectant. I keep reading in the 3D printer forums about cleaning these 3D printer beds with IPA (and/or soap and water, Windex, etc.), but I don’t see any mention of denatured alcohol. I assume the goal is to clean the bed, not disinfect the bed.
Why isn’t denatured alcohol the preferred cleaning agent for these 3D printer beds?
I had the same question with Alcohol fuel I already have in my garden house. Did you finally found a response tho this?
I have had nothing but problems with my textured sheet. Neither PLA or PETG will stick to it. I have cleaned it several times and change the 1st layer height, temps for the nozzle and bed, slowed down the speed and adjusting the fan speed. I bought it because I wanted to print some matching components in Prusament PETG, but haven’t been able to print them due to the PETG not sticking to the textured sheet. What a waste of money.
Yup.. the worst bed event can’t get anything to stick no matter how I clean is it soap and rubbing or is it alcohol baths and rubbing.. nothing… and PEI sticks too much… I completely ruined my 2 PEI beds on both sides when some PETG stuck too much.. while I can’t get anything to stick to this power coated shit bed.
What temperature does everyone recommend the print bed to be with the powder coated sheet?
Is it possible to use Alcohol fuel in place of IPA to degrease the sheet? The one i have is 84% ethanol, <5% methanol.
Thanks
I’ve just spent the better part of two days trying to get PETG to stick to this sheet but nothing works! I’ve used IPA, warm soapy water, everything. I’ve done extensive calibration tests again and again but nothing makes any difference. Either the extrusion is too squashed and I get bubbles and tear ups or it simply peels up and gets caught on the nozzle. Very disappointedAnd super frustrating!!
Also being quite frustrated too, I’ve finally used paper glue stick, and it seems better now.
I have the same problem. Received mine last week and nothing seems to work to stick PLA to the sheet.. Maybe a bad batch Prusa??
Really annoying and frustrating.
I used brims for the same print and now it seems to stick to the bed. I had some small supports on the sheet and these were the problem. With small supports on the bed in combination with a brim it is working so far.
Maybe this could help someone.
I definitely had troubles getting anything to stick to the powder coated sheet at first. I redid first layer calibration many times, but I don’t think that was actually the issue. However, I got it working eventually and it has been awesome ever since. Basically zero surface maintenance required between prints. First thing is to clean really well, like use clean microfiber cloth and carefully spiral out from the middle. Then, never touch it! I mean like use a spatula (print one that’s bed safe) to be sure you don’t accidentally get a fingerprint on there–and clean again if you do. I did bump up the first layer temperature a smidge for PLA–but I don’t remember whether that for powder coat or matterhackers filament.
I went back and checked (as I should have done before my first post) and the PLA I’m using specs Bed Temp 0-55 but my setting that has been effortless on the powder coat is 65 first layer and 62 for the rest. So definitely running it a bit hot. And everything (well PLA and PETG is all I’ve tried) lifts right off the surface effortlessly as soon as it cools a bit.
Having printed > 40 objects perfectly in petg on my mk3 with smooth sheet, I thought I’d try a textured sheet. Cleaned with alcohol I spent a frustrating hour trying get the petg to stick during first layer calibration. No use. Cleaned the sheet with fairy liquid and a green scouring pad (for washing up) and then retried first layer calibration and successfully got a decent first layer. Tried three prints since all very successfully. My first layer needed about -400 adjustment to z axis on calibration.
Got my mk3s+ two weeks ago and printed various things with the pei sheet, so far so good. That said, I couldn’t get a complete print with the powder sheet. Anyone with more info to get this right? Thanks in advance.
I’m going to try cleaning my bed later this week, but I have started having the opposite effect with removing parts. I only print Prusament PETG on the powder coated sheet and recently I’ve been noticing that my parts aren’t removing when cooled and even with some light bending, they are firmly stuck on the bed.