


3D printing two-dimensional creations sound silly, and as a waste of 3D printer potential. Is that right? Well, we’ll try to change your mind. Using a 3D printer to print on fabric can have great results and also might save you some money. With this guide, you will be able to create cool original t-shirts for every day!
We’ve looked for similar articles and videos online, and found some, but there’s always a catch. Basically, every article is missing at least one of these three things: how to design a good model printable on fabric, what print settings should be used, or how to make the print stick to the fabric properly.
Interestingly, none of the available articles uses our Original Prusa printers to print directly on fabric. The reason is pretty obvious: the Original Prusa i3 MK3S+ and the Original Prusa MINI+ are so compact that it’s not possible to fold a t-shirt around the heatbed without it getting in the way of the printer movements. But that’s not a reason to give up! We’ll show you a special trick solving this problem.
Making a 3D model from an image
If you don’t have your own model and would like to use an image, there’s a lot to do. 3D model preparation is definitely the most difficult step of this guide.
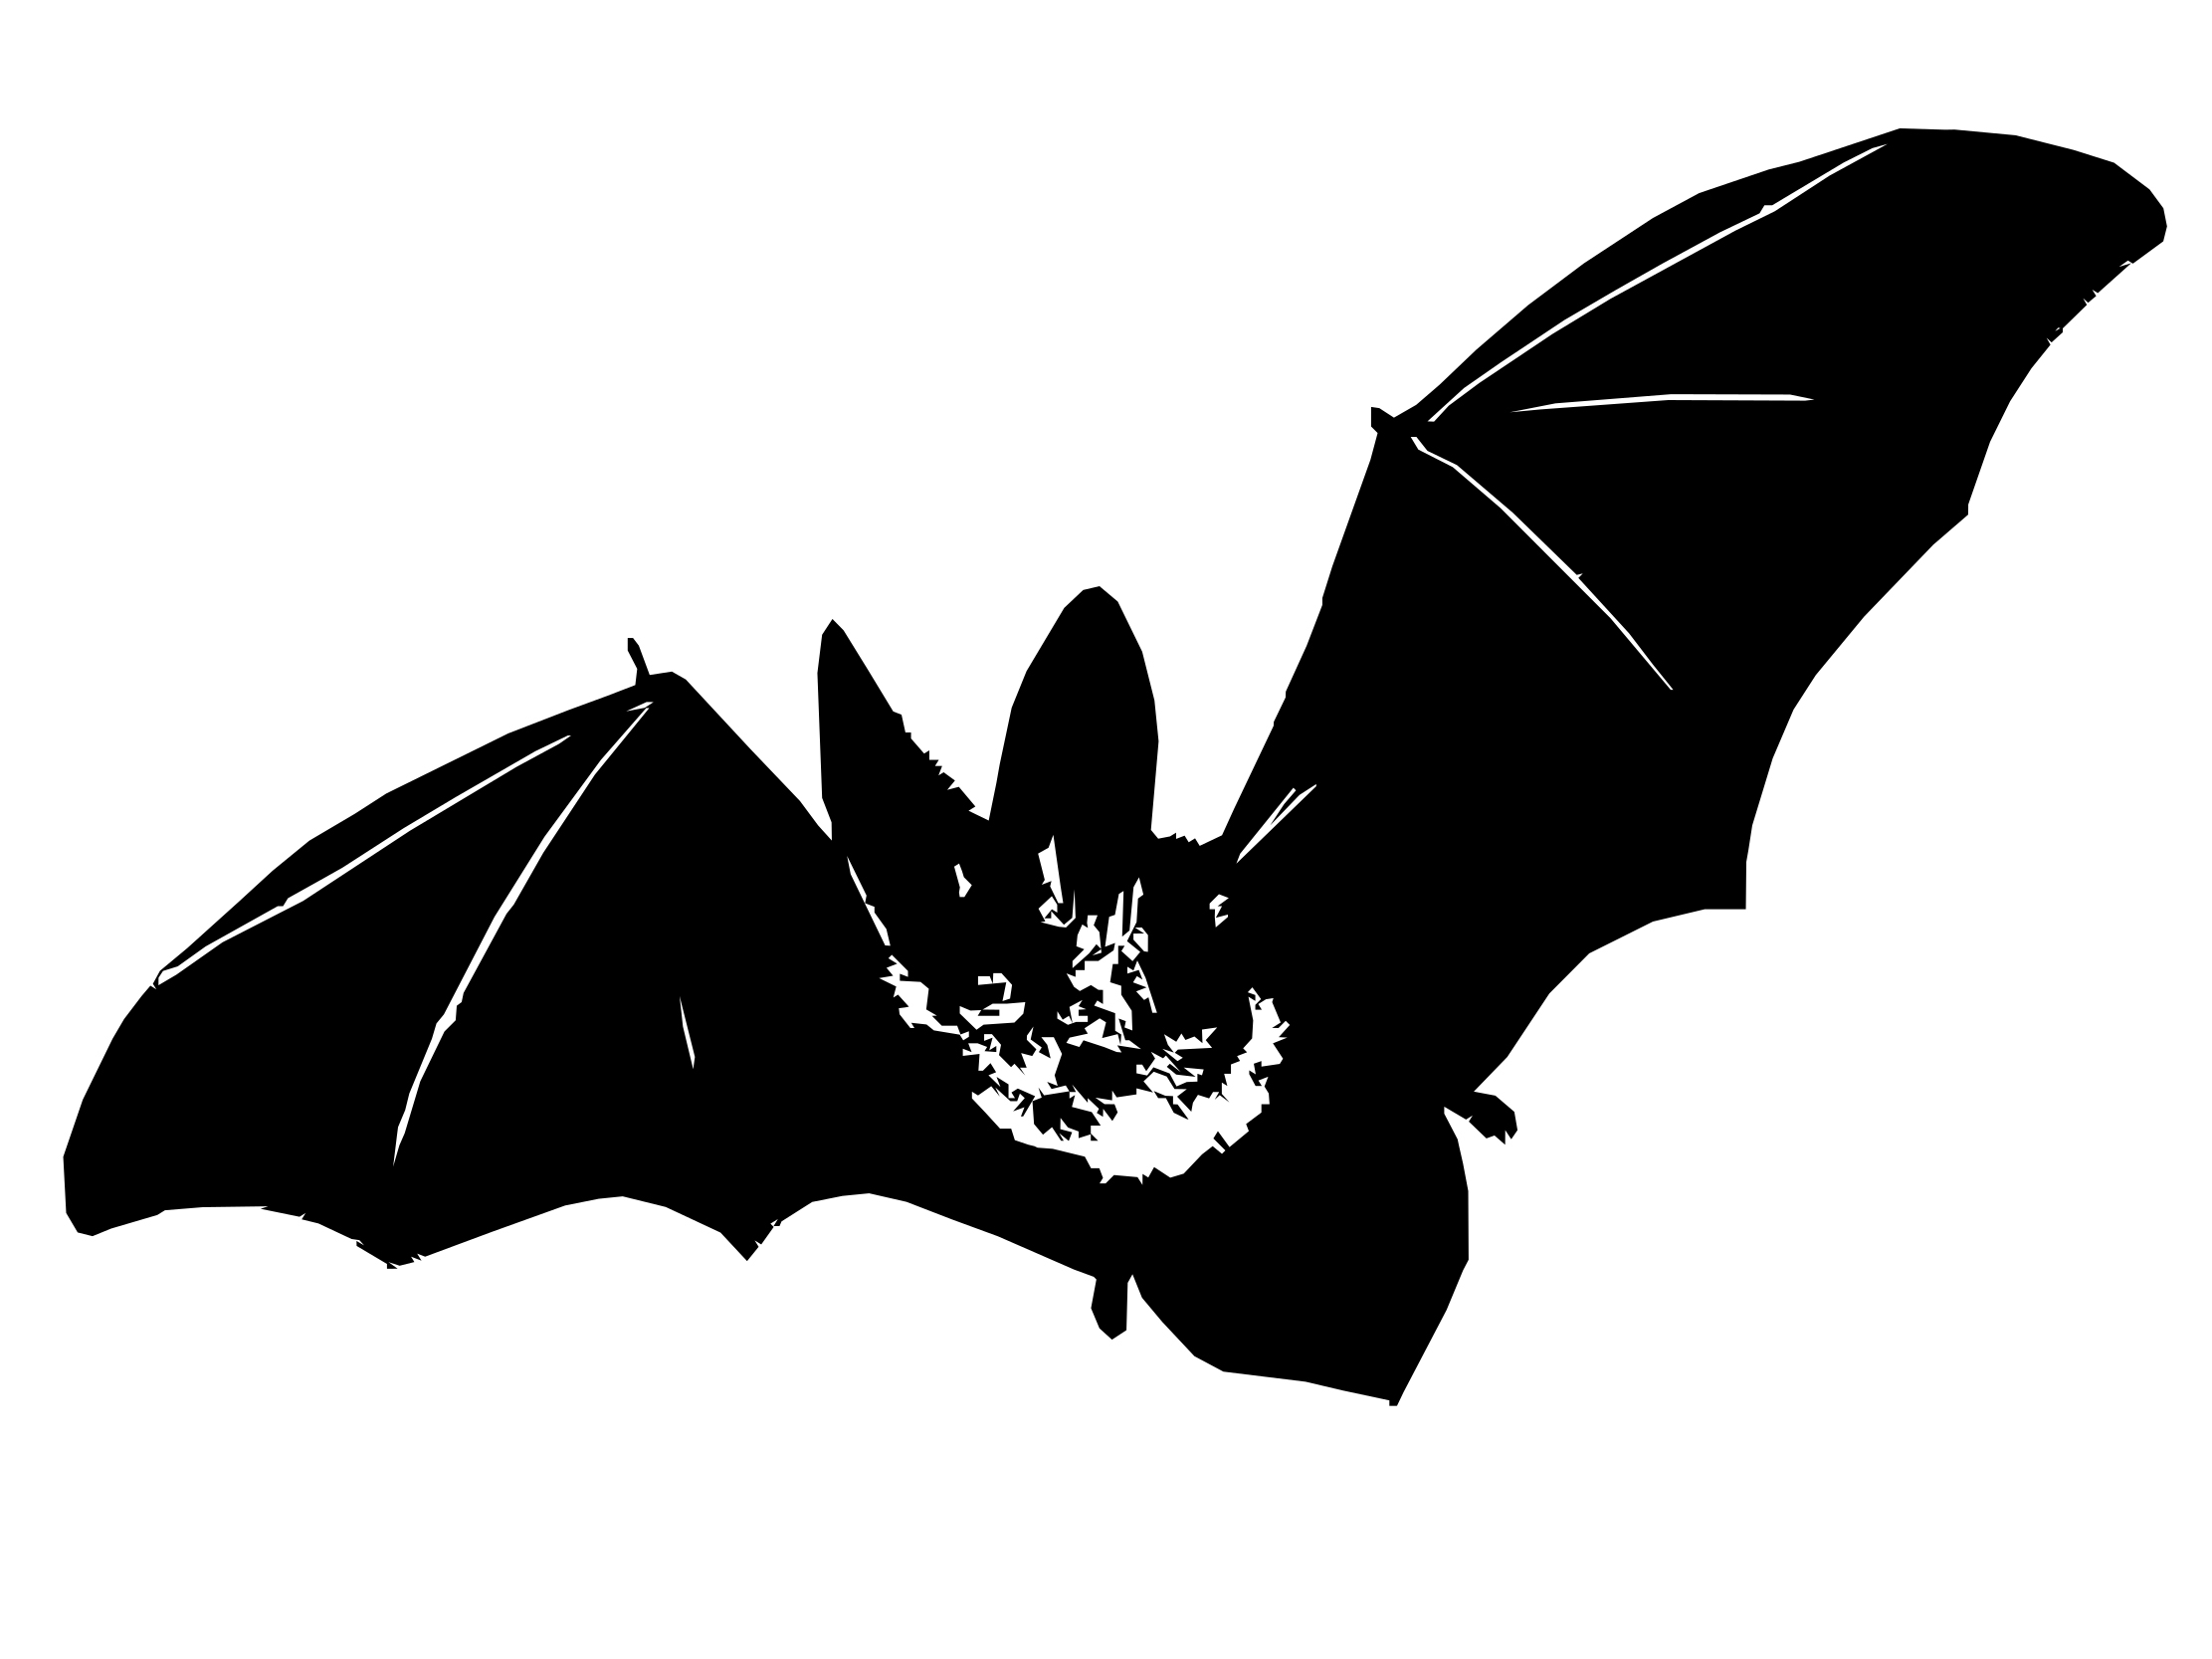
Lots of us don’t have the time nor the motivation to draw our own designs, therefore we’ll show you how to prepare a model from a .png image. Note that you’ll have to make a 3D model with a certain thickness, even though you’ll be basically printing a 2D image.
 |
 |
 |
 |
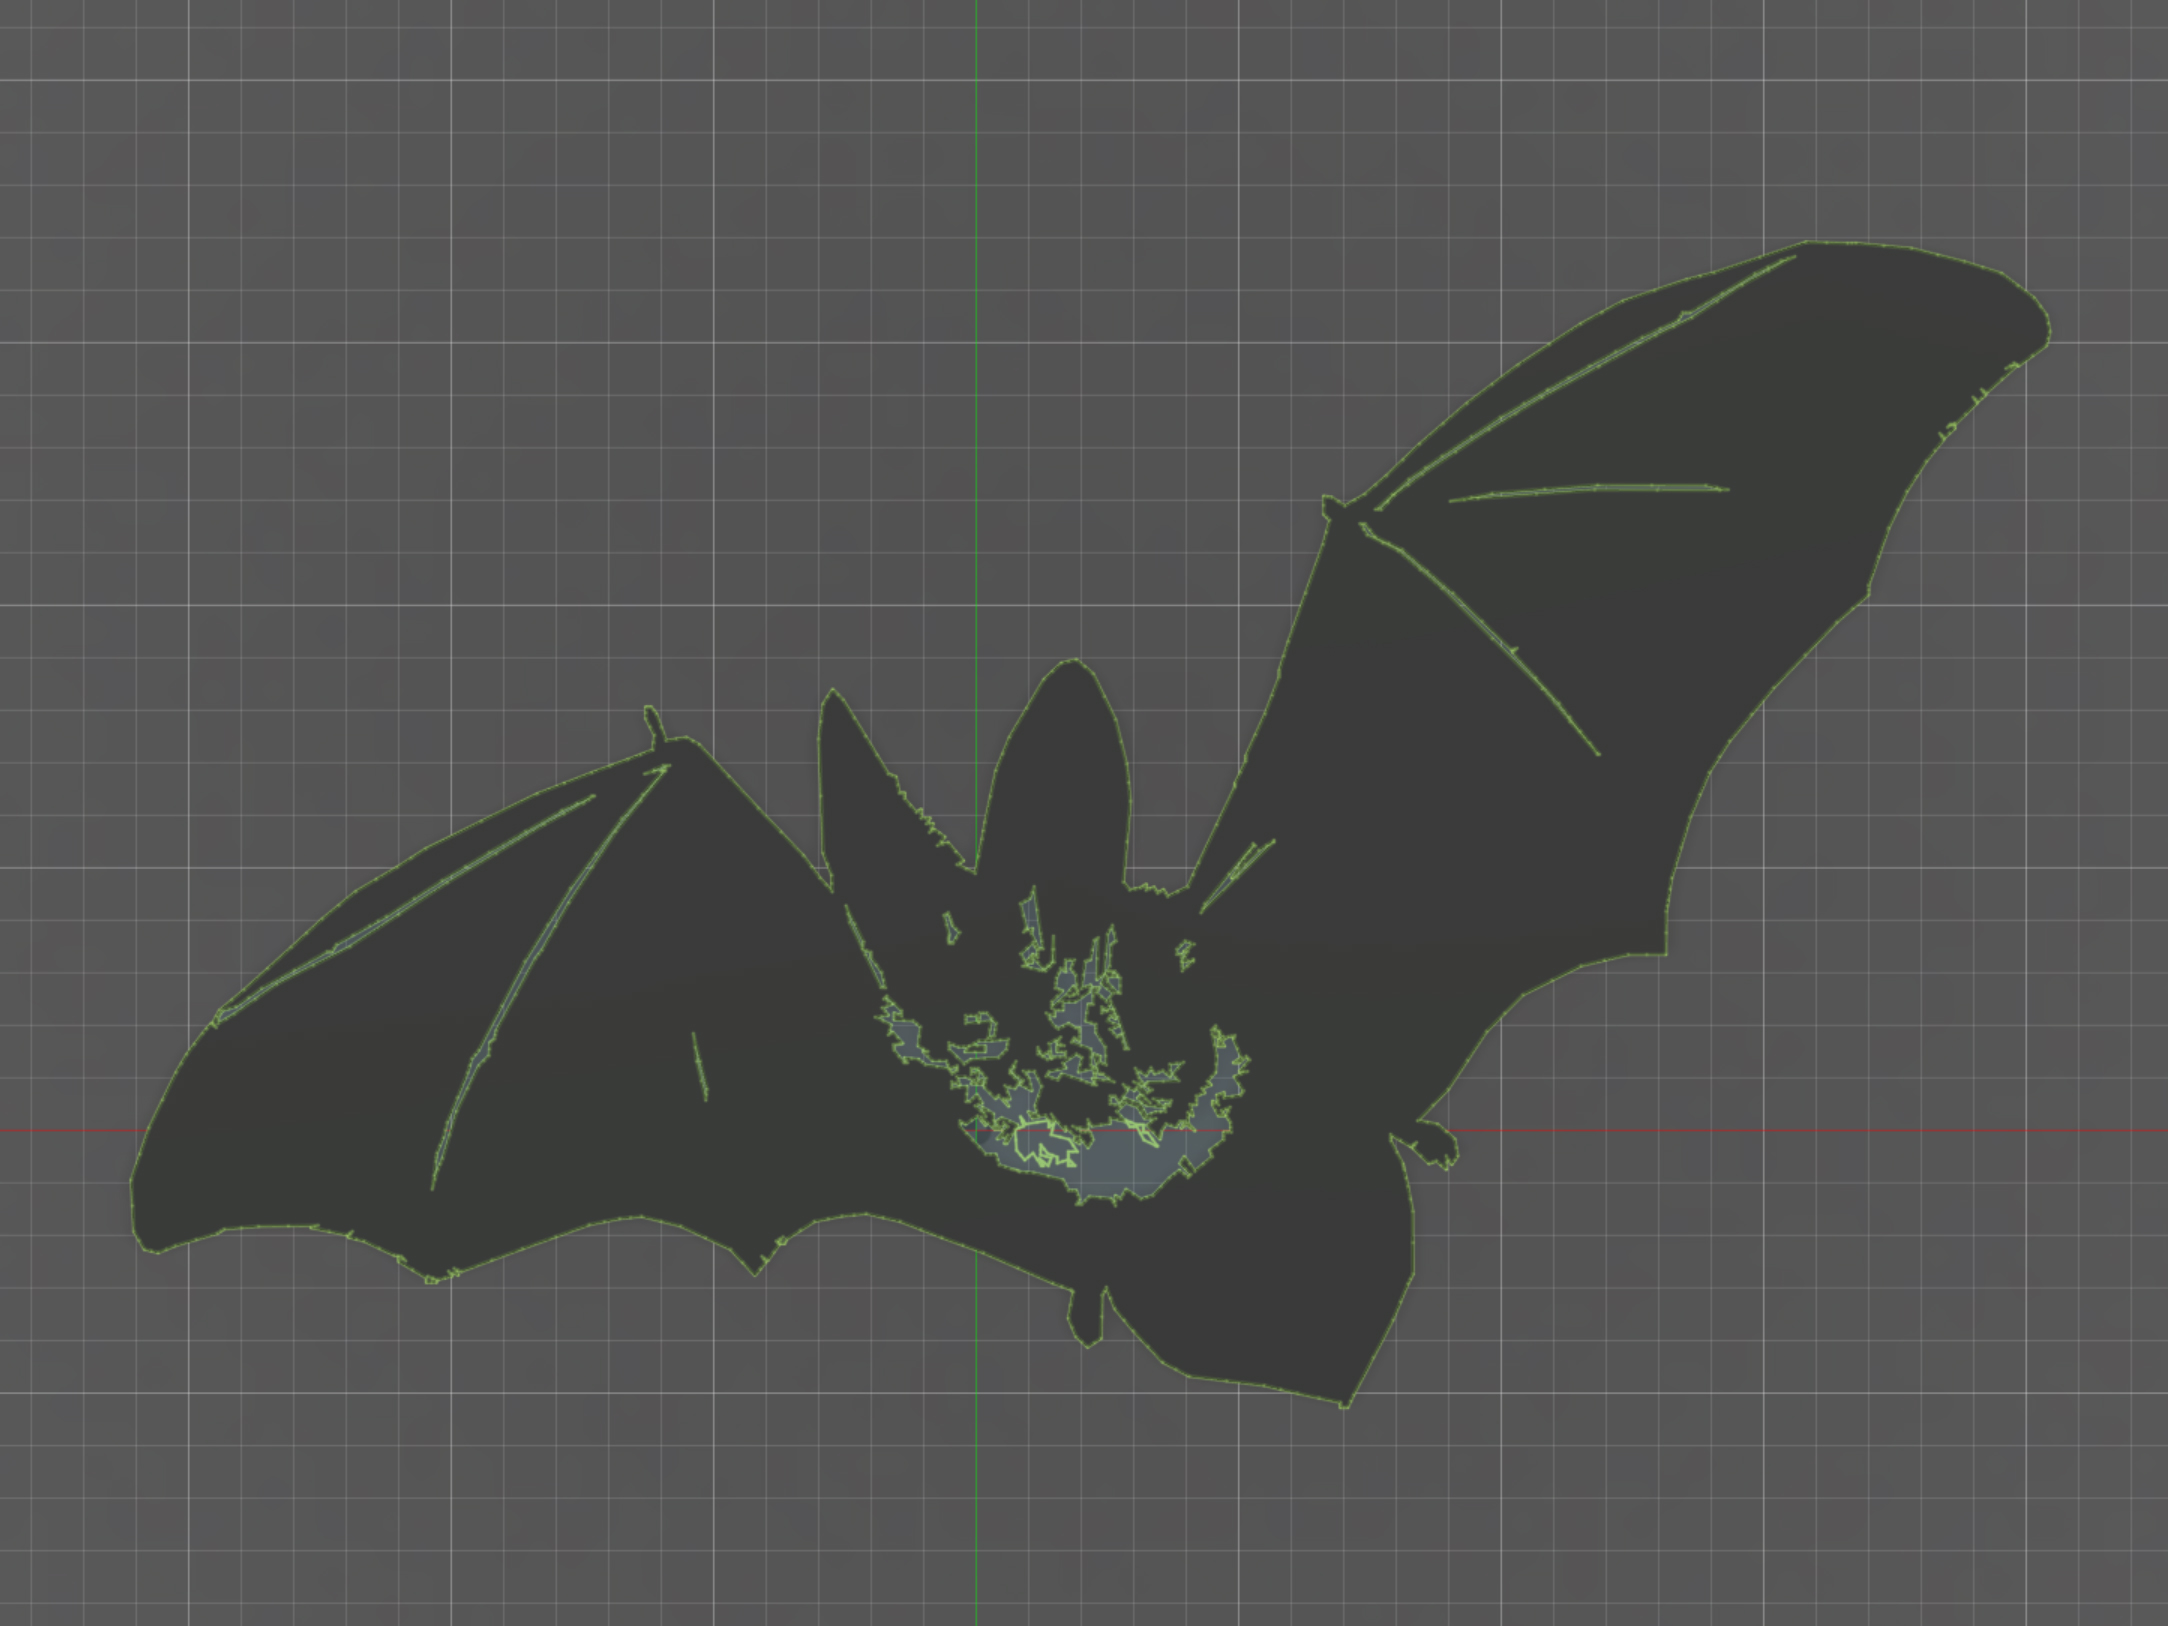
Model preparation from .png image to g-code
Okay, this might sound a bit off-putting: we are going to need 3 different programs. Inkscape, Autodesk Fusion 360, and PrusaSlicer. To be specific: you’ll have to transform the .png image into vectors (Inkscape), fix the vector sketch, extrude it into a 3D model (Fusion 360) and finally adjust model dimensions and prepare it for printing (PrusaSlicer).
Transforming image to vectors in Inkscape
The Inkscape program allows you to convert a normal bitmap graphic file into a vector graphic file in .svg format. This file can be later uploaded to an existing sketch in a 3D modeling program and edited. Converting a .png file to .svg can be done using some online tools (https://convertio.co), but it will most likely cause several problems in your .svg file, for example, leave stray lines, make the whole drawing messy, etc. It is much better to download Inkscape (free, with a bunch of video guides on youtube) where you can adjust settings and see the changes before exporting the .svg file. Simply go to File / Import, choose your .png file, then click on the Path tab / Trace bitmap. Here you have several parameters influencing the image. Take your time to try it out, just don’t forget to refresh the preview to see the changes. Finally, go to File / Save As and choose .svg format. The first step is done.
Fixing the sketch and extruding it to 3D in Autodesk Fusion 360 (or similar)
For this step, you can choose a variety of programs designed for 3D modeling. The most important is that the program lets you insert a .svg file into a sketch and edit it. Now is the time to fix various imperfections in your drawing, for example by connecting stray lines or deleting unwanted parts. Then, you’ll just extrude the sketch (make it for example 1 mm thick) and export it as a 3D model (.3mf, .stl, or .obj). This step can be done even with a program as simple as Autodesk Tinkercad.
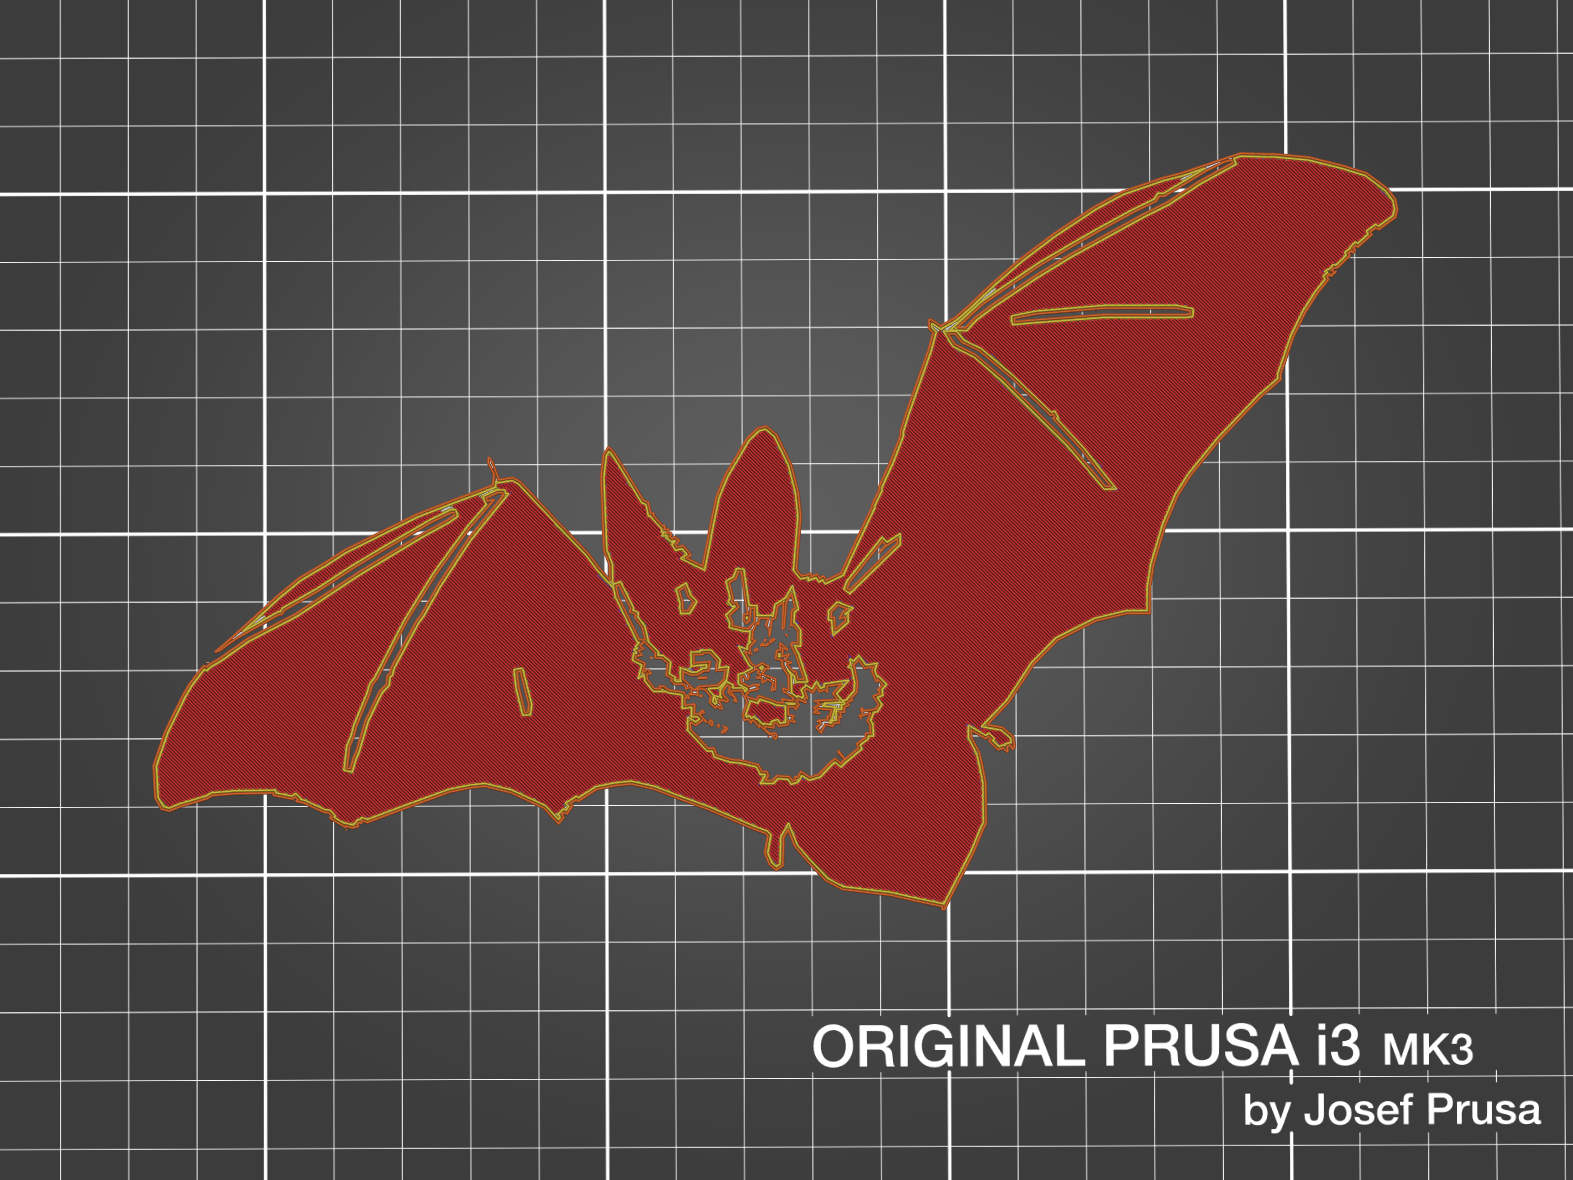
Print preparation (PrusaSlicer)
In PrusaSlicer you can adjust dimensions as you need. It is important to unlock scale values (lock icon) to be able to adjust each dimension separately. Then, type in Z value that is suitable for one layer (PLA or other hard, non-translucent materials) or two layers (flexible filaments). If you print with a 0.15 mm layer height and need two layers, don’t forget to set the model height to 0.35 mm. The default first layer height is 0.2 mm and the actual 0.15 mm value starts from the second layer.
Now, if you decide to print iron-on models, we suggest you use default print settings. But if you plan to print directly on the fabric, we recommend using several adjustments:
- Turn off the print cooling – Filament Settings / cooling.
- Decrease speed to 20% – The easiest way is to set it directly on the printer during the actual print job.
- Increase flow to 150% – This can be set in Filament settings / Filament / Extrusion multiplier or directly on the printer during printing.
- Increase the nozzle temperature by 10-20 °C for the first layer, the material will slightly soak into the fabric – This can be set in the Filament Settings / Filament.
- Turn off skirt and brim functions in Print Settings / Skirt and brim. These would be very hard to remove from the fabric.
- You may want to tweak retractions a little – go to Filament Settings / Filament Overrides / Lift Z and increase the value from 0 to 1 mm. Otherwise, the nozzle will draw unwanted lines on your t-shirt.
Let’s go printing
There are two ways how to print on a t-shirt (or basically any fabric). Both have several pros and cons and it’s just up to you which method is more convenient for you. If you are unsure of your 3D printing skills but don’t mind a little bit of postprocessing, we recommend you choose the first method.
Iron-on models
Printing iron-on models offers great freedom in changing the t-shirt design over and over. If you don’t heat the models enough, they will go off after one washing and the t-shirt can be reused again.
Before you start printing, don’t forget to mirror the model in PrusaSlicer!
There’s one great advantage in printing iron-on models: you don’t have to do any extra print (and printer) preparations, you can simply print two layers and iron it on the fabric using baking paper.
The main downside lies in manipulating the model and placing it properly on a fabric. Various models tend to warp after printing them and some tiny parts may stick to surfaces due to static electricity. This may cause difficulties in placing everything in the exact place before ironing.
Also, if you print with flexible filament, especially TPEE (Filaflex), don’t forget to put a layer of glue stick (PVA) on the print surface. Forgetting to do so will lead to inevitable model deformation.
Of course, there’s one simple solution moderating the two downsides and that is printing models directly on baking paper. To do it, you need to stretch the paper as much as you can on the print surface and secure it with clips, so it wouldn’t collide with printer movements. This may sound difficult but it’s doable, as long as you have proper clips. But keep in mind that baking paper has a smooth and slippery surface (may contain silicone) that prevents the filament from sticking to it (both sides are generally bad for printing). Spread a thin layer of glue stick on it before printing and it should be good to go. Print one or two layers, depending on the material type and your preferences, let it cool down, and carefully remove the baking paper with the finished print. Then, remove everything that is not supposed to be printed on your t-shirt (skirt, stringing, oozing, wipe lines, etc.). Everything on the paper will be ironed on the t-shirt!
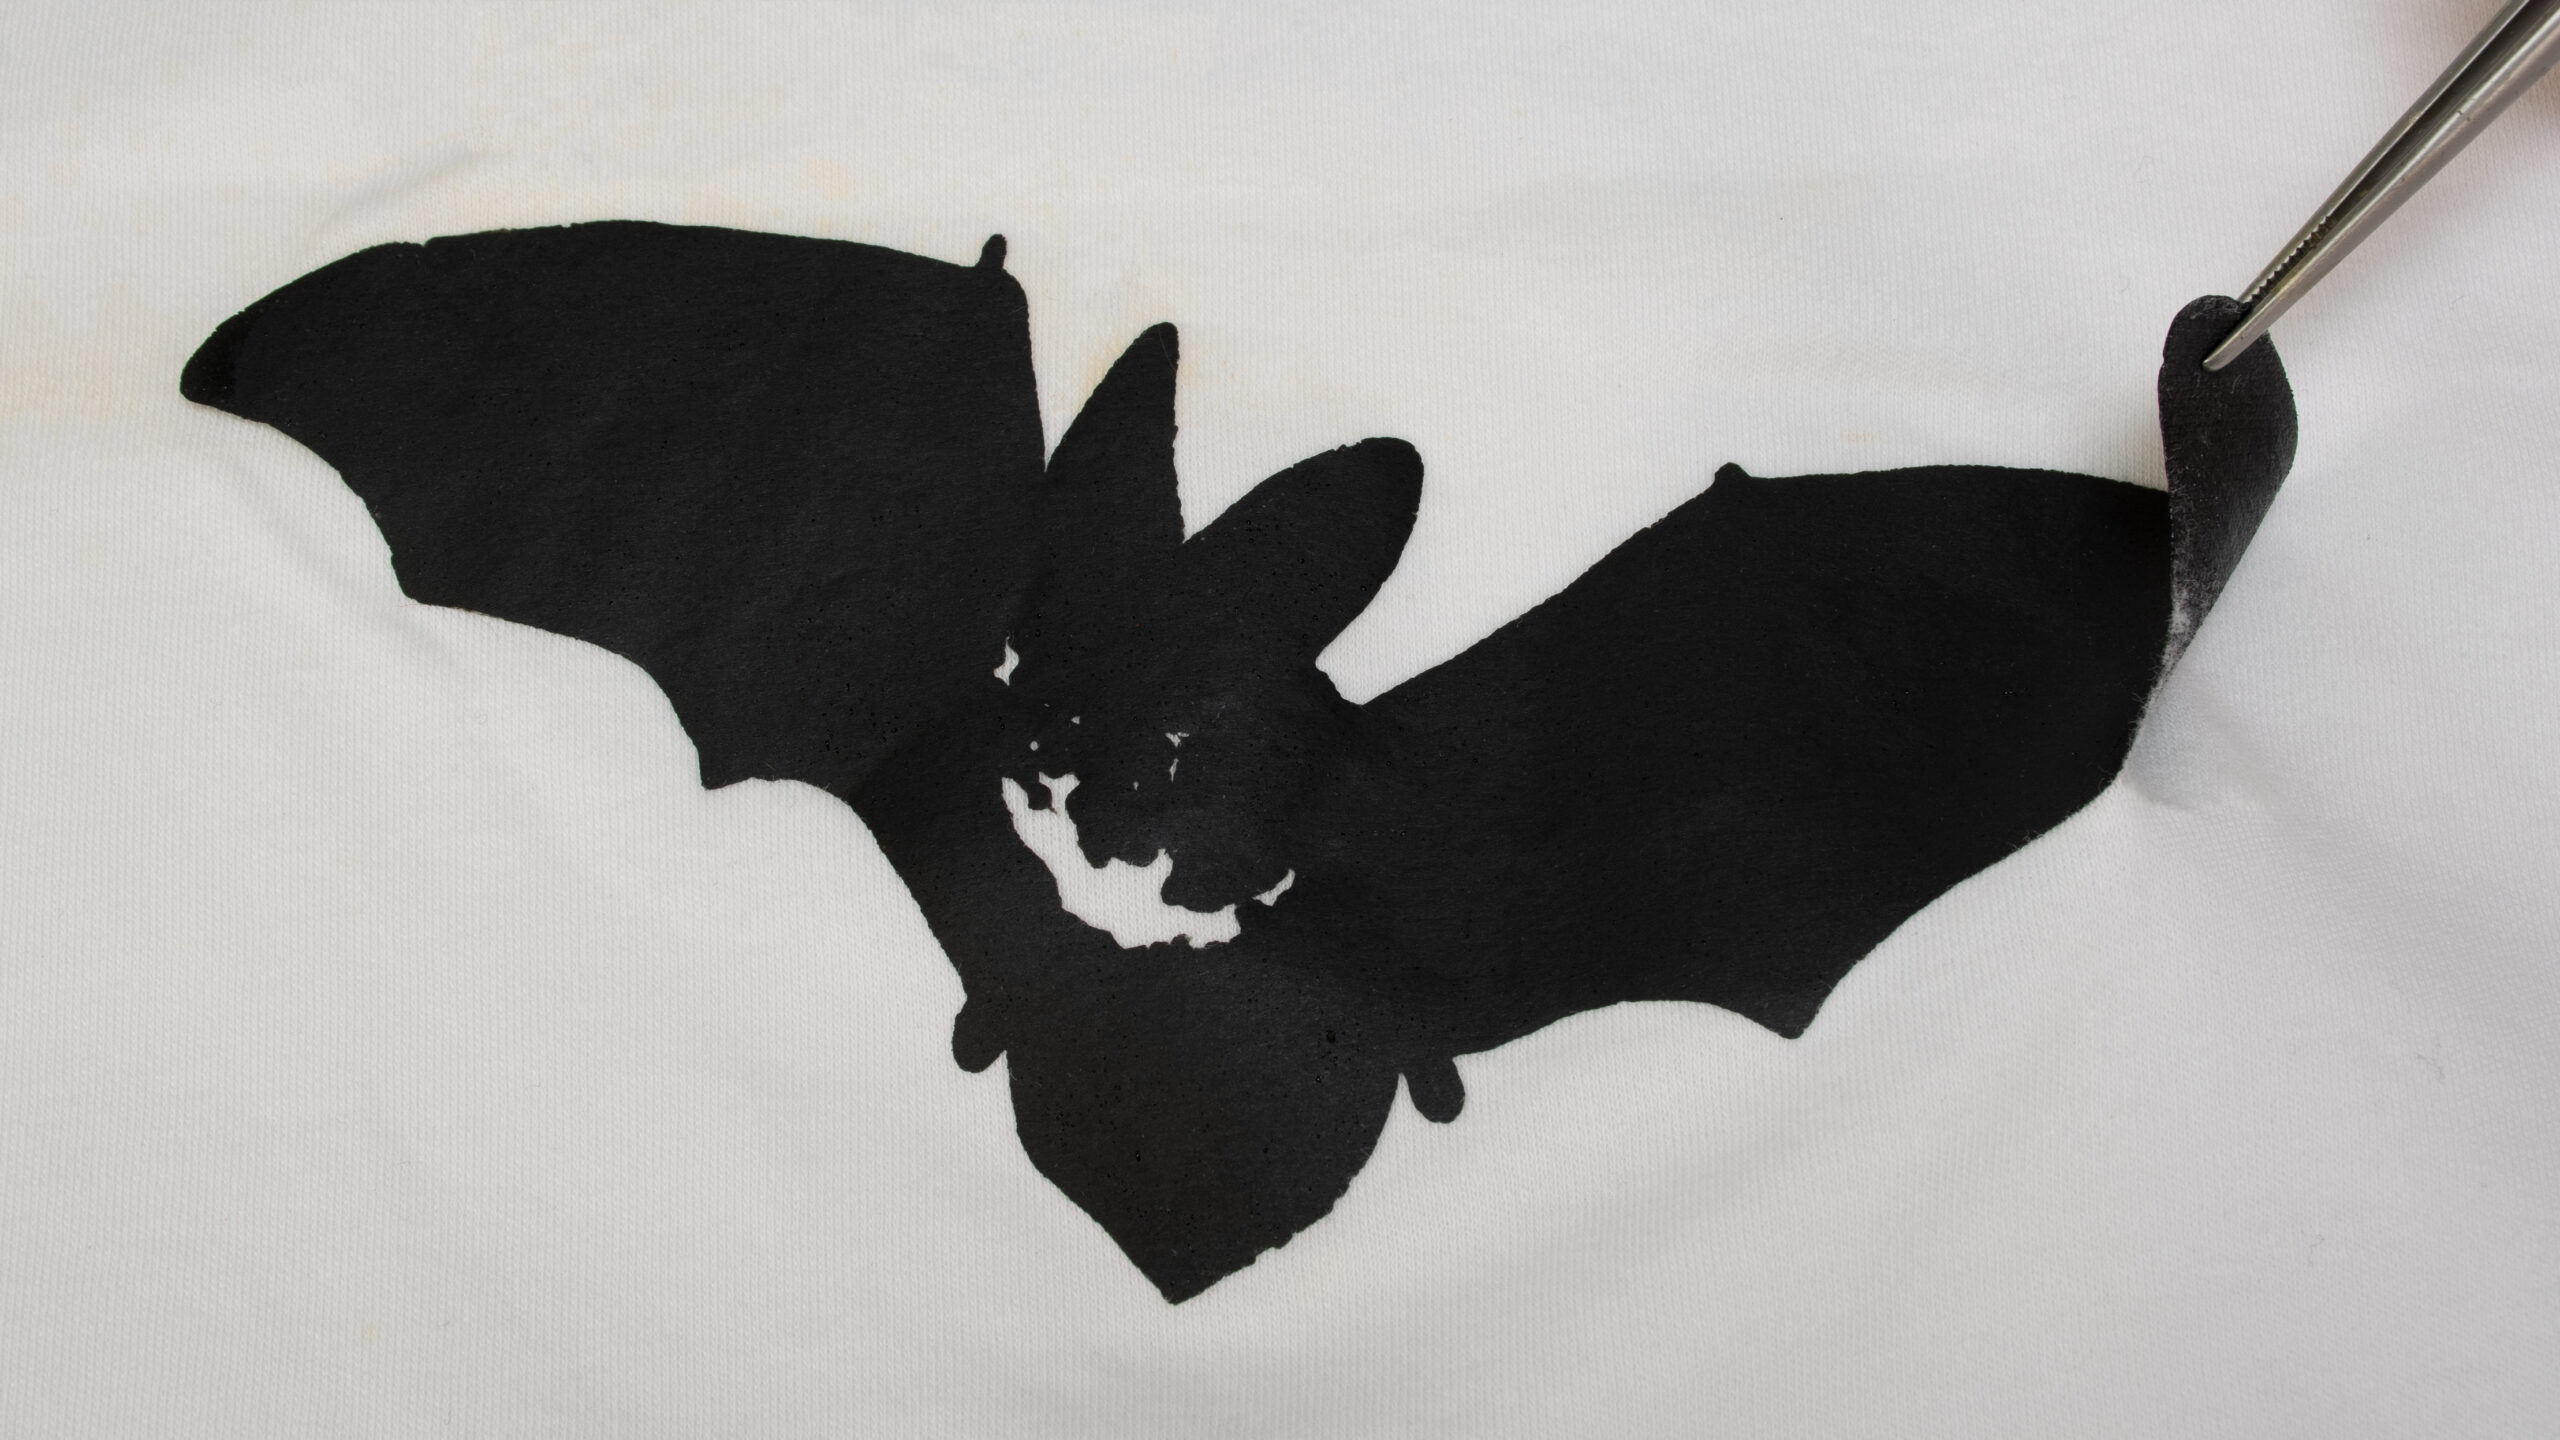
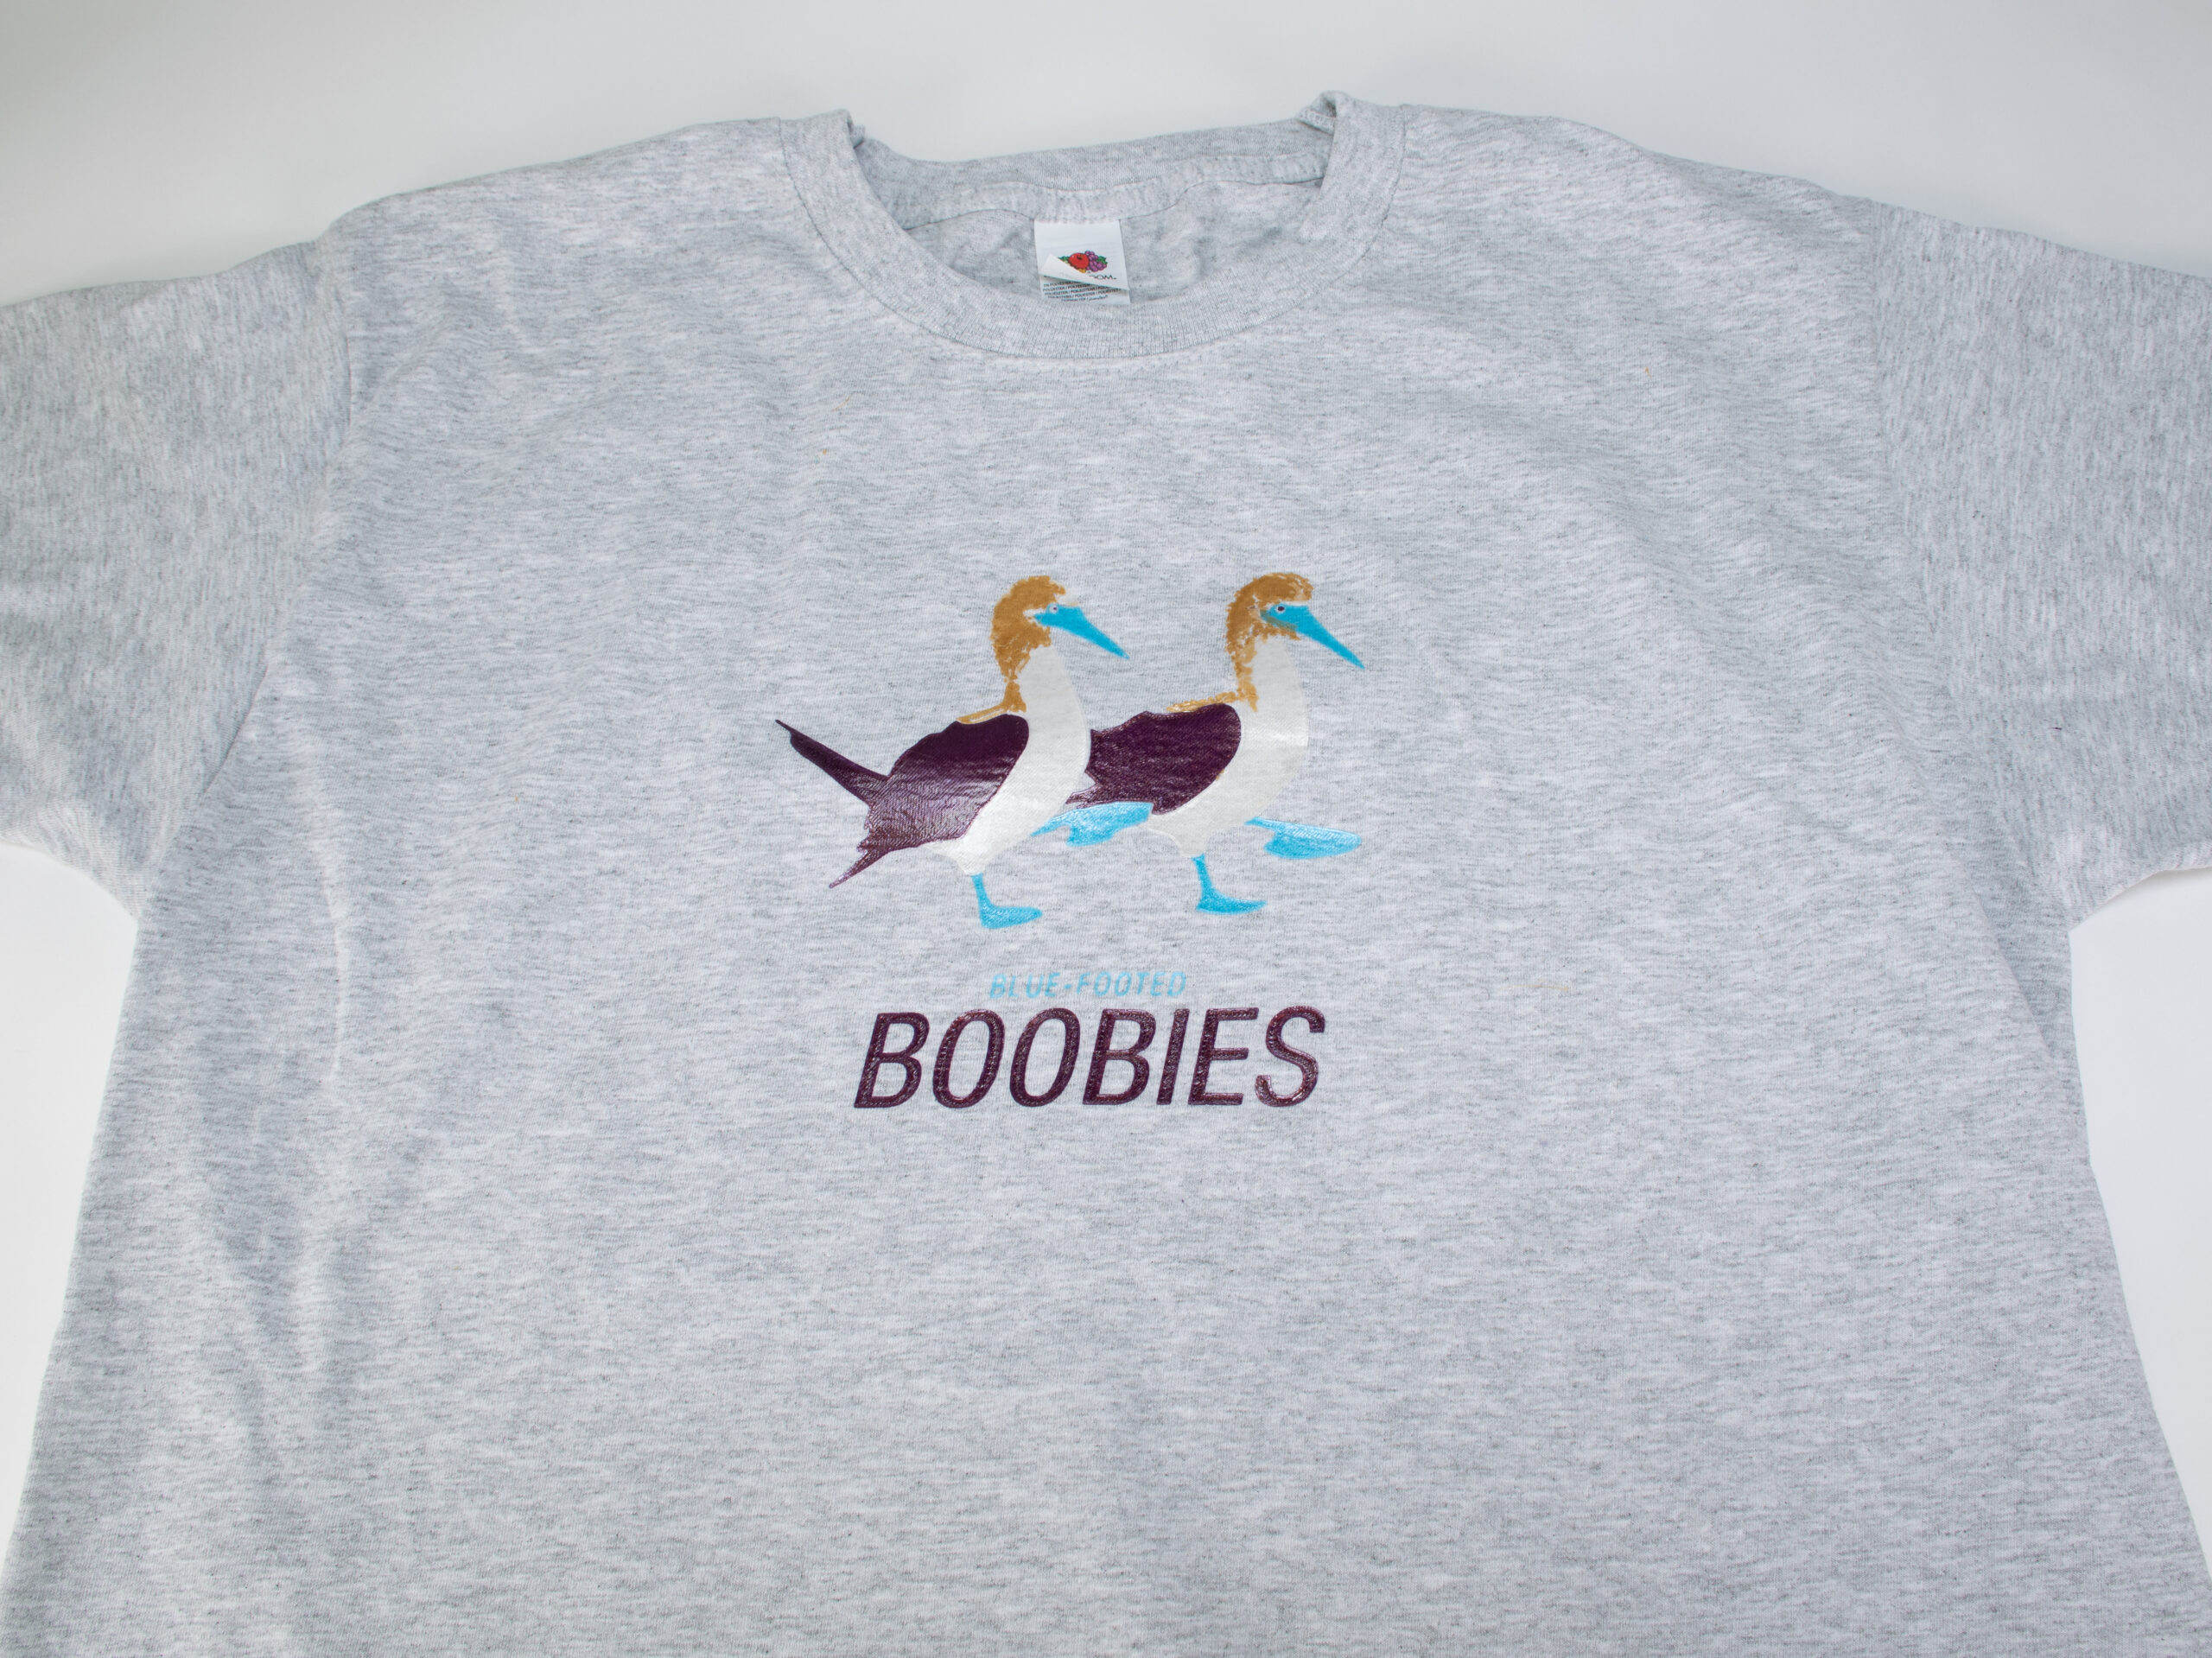
Now, take the paper with the print, place it on fabric (print facing down), and iron it. The best result with ironing can be achieved with one print layer of PLA. The iron should be as hot as possible to melt the material properly. Not heating enough leads to breaking and peeling during washing and wearing it. Interestingly, flexible filament (even in one layer) tends to blur to the sides instead of soaking in the fabric. Ironing TPU and TPEE are therefore not recommended and we suggest printing them directly on fabric instead.
Ironed TPEE print with blurred details and poorly attached edges
![]()
Two-layer PLA logo with blurred details
If you have any glue stick residue on your print or t-shirt itself, just wash them in warm water to dissolve the PVA glue. Successfully ironed PLA print should stick to the fabric enough to withstand the machine washing process (and even the drying machine). You may find some wrinkles and imperfections on your piece of clothing after washing it but don’t worry, these wrinkles will disappear after ironing it again. Just don’t forget to use baking paper, you don’t want to have a melted filament on your iron.

Well-ironed PLA print

Poorly ironed PLA print damaged after washing
Printing directly on fabric
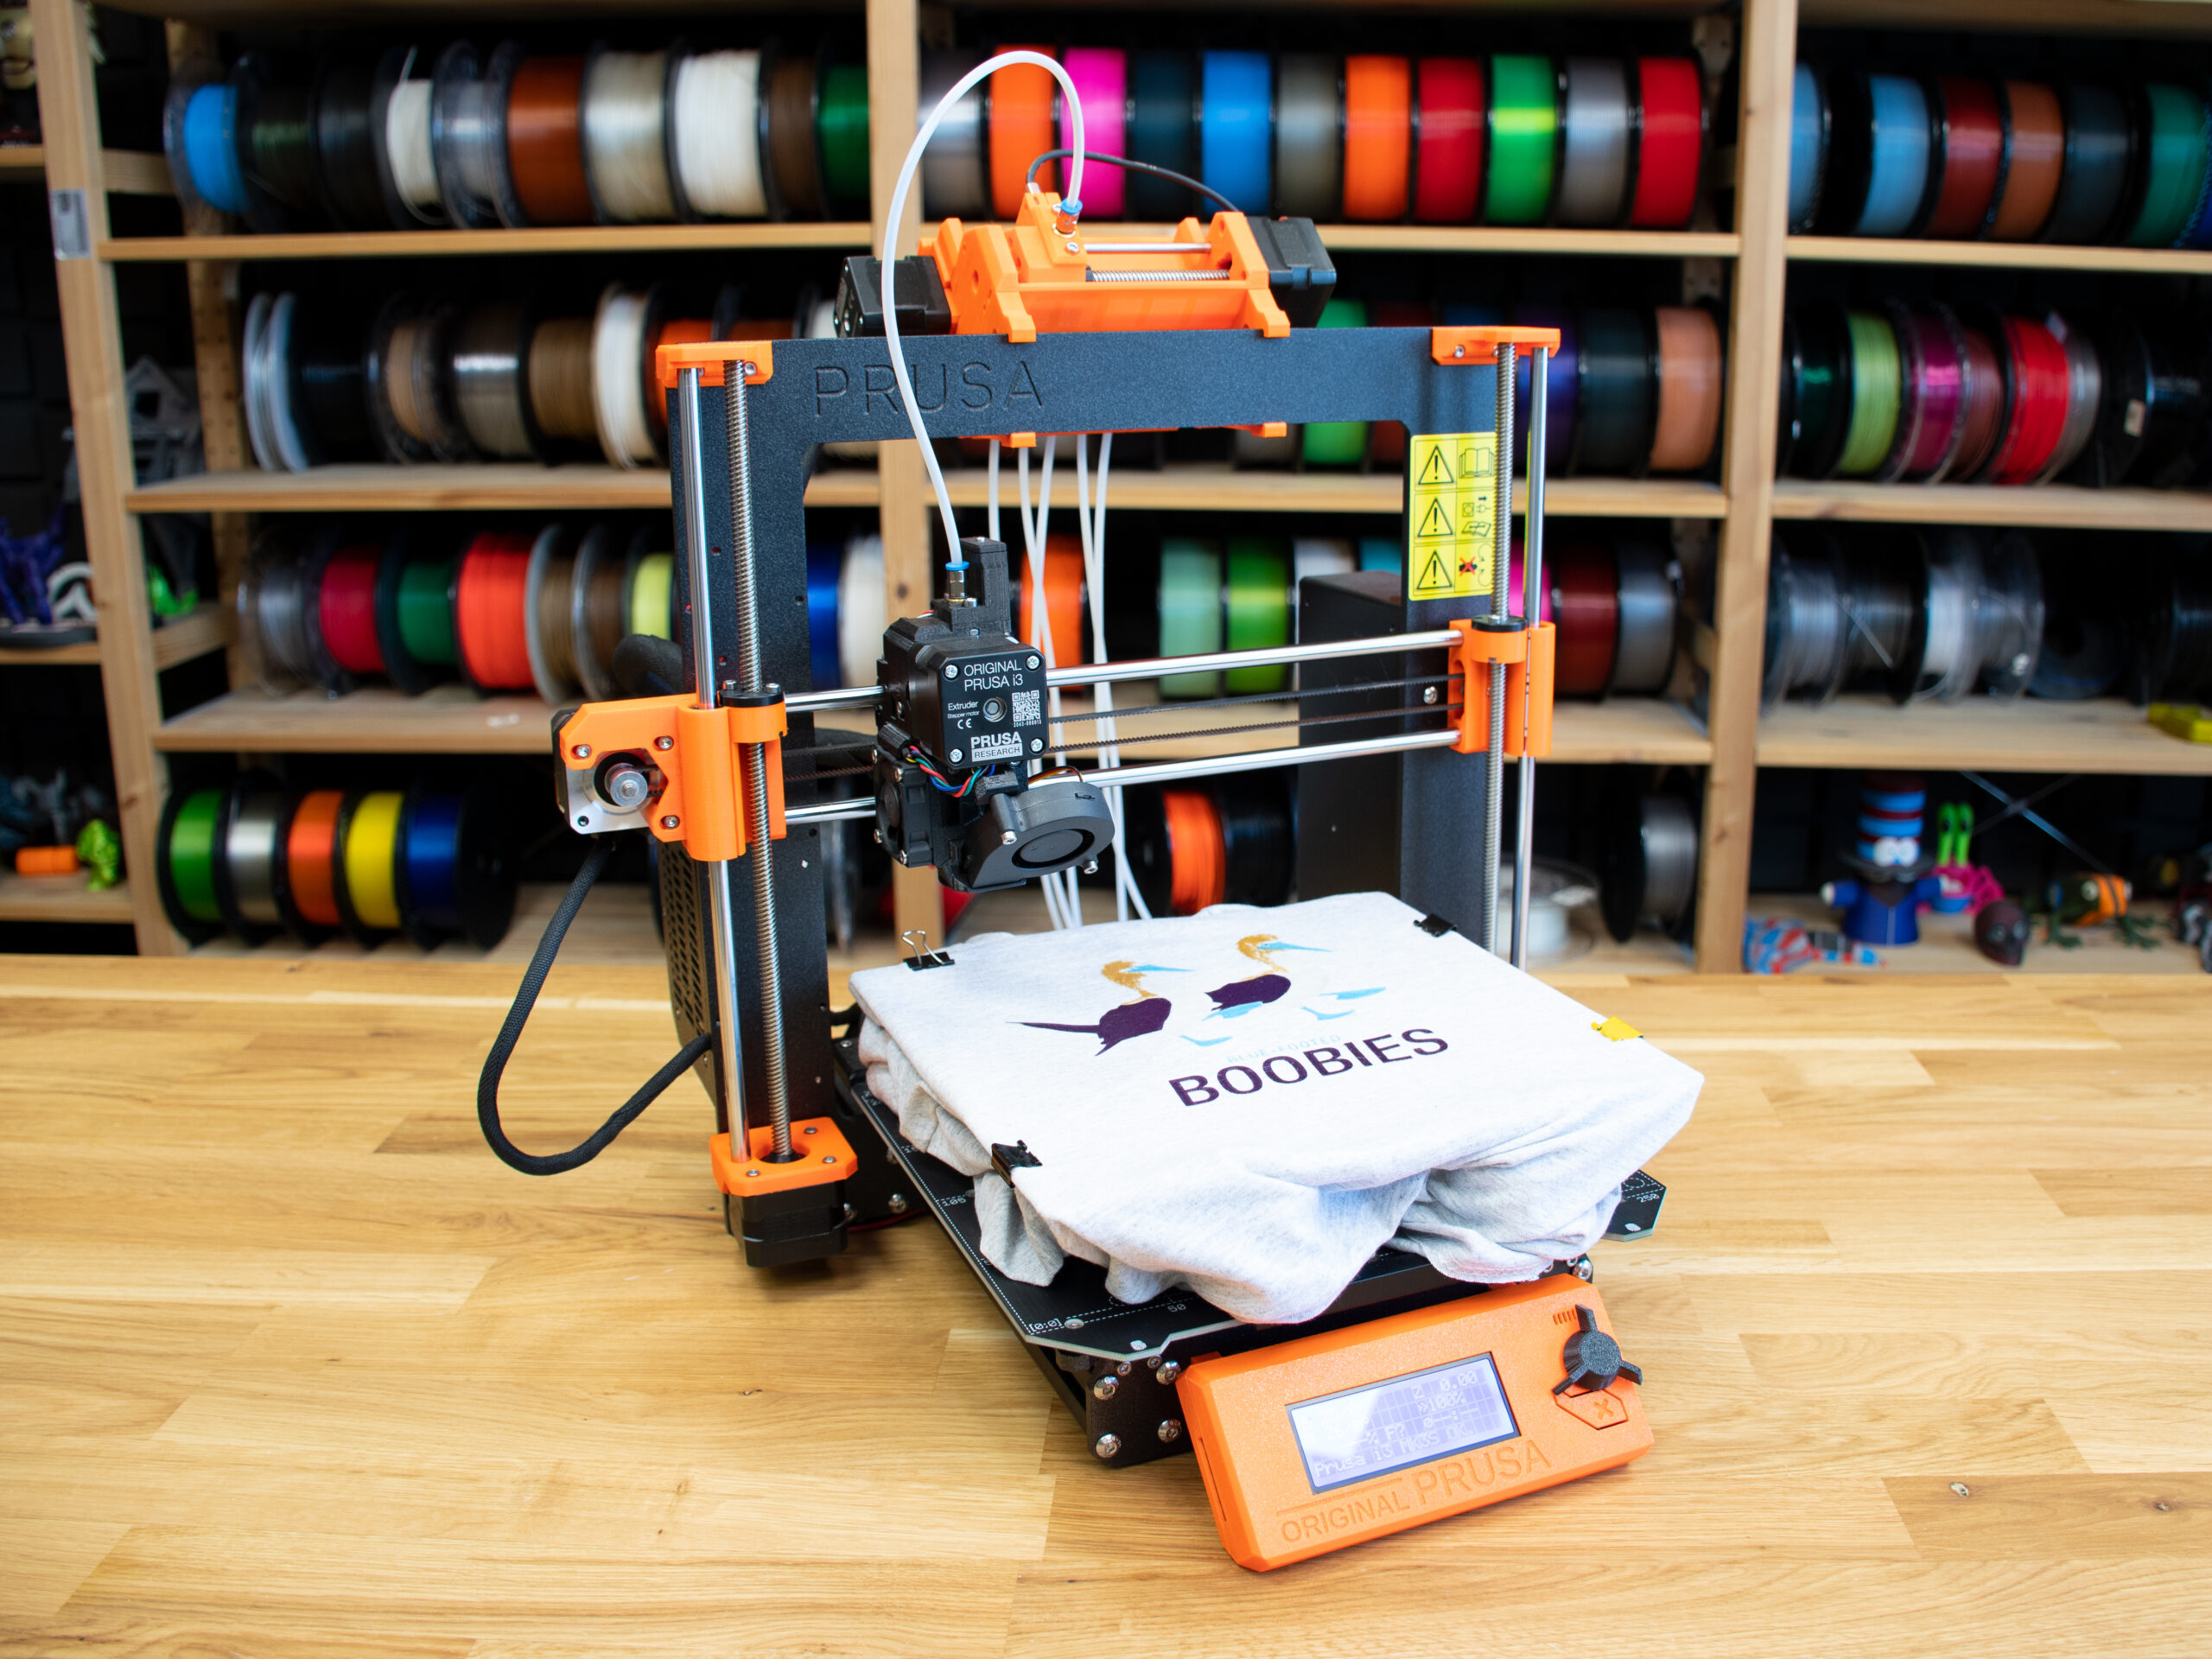
First, we have some bad news: printing directly on a t-shirt using the Original Prusa MK3S+ or the Original Prusa MINI+ is not possible without some extra steps. Thinking of all the advantages our printers have, we have found one disadvantage and that is a lack of space between the frame and heatbed. It is simply not possible to fold a t-shirt around the heatbed without impeding its movement.
The good news is that we have a simple hack for that. All you have to do is to print a special insert that goes between the heatbed and print sheet. This way, you should be able to fold any t-shirt between the heatbed and print sheet.
Print preparation itself isn’t that hard (the guide below is for the Original Prusa MK3S+):
- Move PINDA probe approximately 1 mm lower than usual, alternatively, do a first layer calibration and adjust Z as high as possible.Go to Menu / Settings / Move axis and move Z at least 100 mm high.
- Remove the print sheet, place the printed insert on the heatbed and place the print sheet on top of the insert. Keep in mind that everything should be as level as possible and sit in place well. Any imperfections might lead to print failure.
- Place the t-shirt on a steel sheet and stretch it slightly. Use small pins (pegs) to hold it in place but let the printer move smoothly.
- Stick a PP tape to a place where the purge line (or wipe tower on MMU2s) is printed, otherwise, the filament might stick to your t-shirt and damage it. Apply a layer of glue stick on the tape to increase filament adhesion.
- Reboot the printer. It must be unaware of where the Z position is right now.
- Insert PLA filament and print a test print or do the first layer calibration.
- Adjust the live Z. The nozzle should be low enough to pour filament onto the fabric but also high enough in order not to plow the fabric while moving.
- After finding the right Z height, stop the print, carefully remove any filament leftovers, change filament if needed, and print.
- Slightly increase the temperature (10-20 °C), increase the flow (up to 120-150%) and decrease the speed (the most optimal is approx. 20%).
- It might be useful to iron the t-shirt after printing to let the print stick better to the fabric. Just don’t forget to use baking paper – you don’t want to have melted plastic on your iron.
Tip: Don’t forget to double-check PrusaSlicer settings. The skirt and brim functions should be turned off, retractions and Lift Z function should be higher to prevent leaving specks and strings behind. Filament might stick to the fabric so well it might damage your clothes when trying to remove it.
Few extra tips
We chose two types of materials for 3D printing on t-shirts: PLA and flexible filaments. The reason for this choice is good printability and a nice looks of PLA and high resistance and flexibility of TPU/TPEE based filaments.
Should you plan to change prints on your t-shirt regularly, we suggest using either iron-on models from flexible filaments or printing PLA directly on your t-shirt but with regular temperature (215 °C).
If you want the print to be permanent, try printing flexible filament directly on the fabric. Increasing temperature by 15 °C and flow to 120% will lead to great adhesion. If you do it properly, you will probably be unable to remove the print without damaging the clothes. Don’t forget that you need a properly working 3D printer and everything dialed in PrusaSlicer. Any mistake will be printed on the fabric! Another, less permanent variant, is an iron-on print from PLA (single layer) which should soak into the fabric when heated properly.
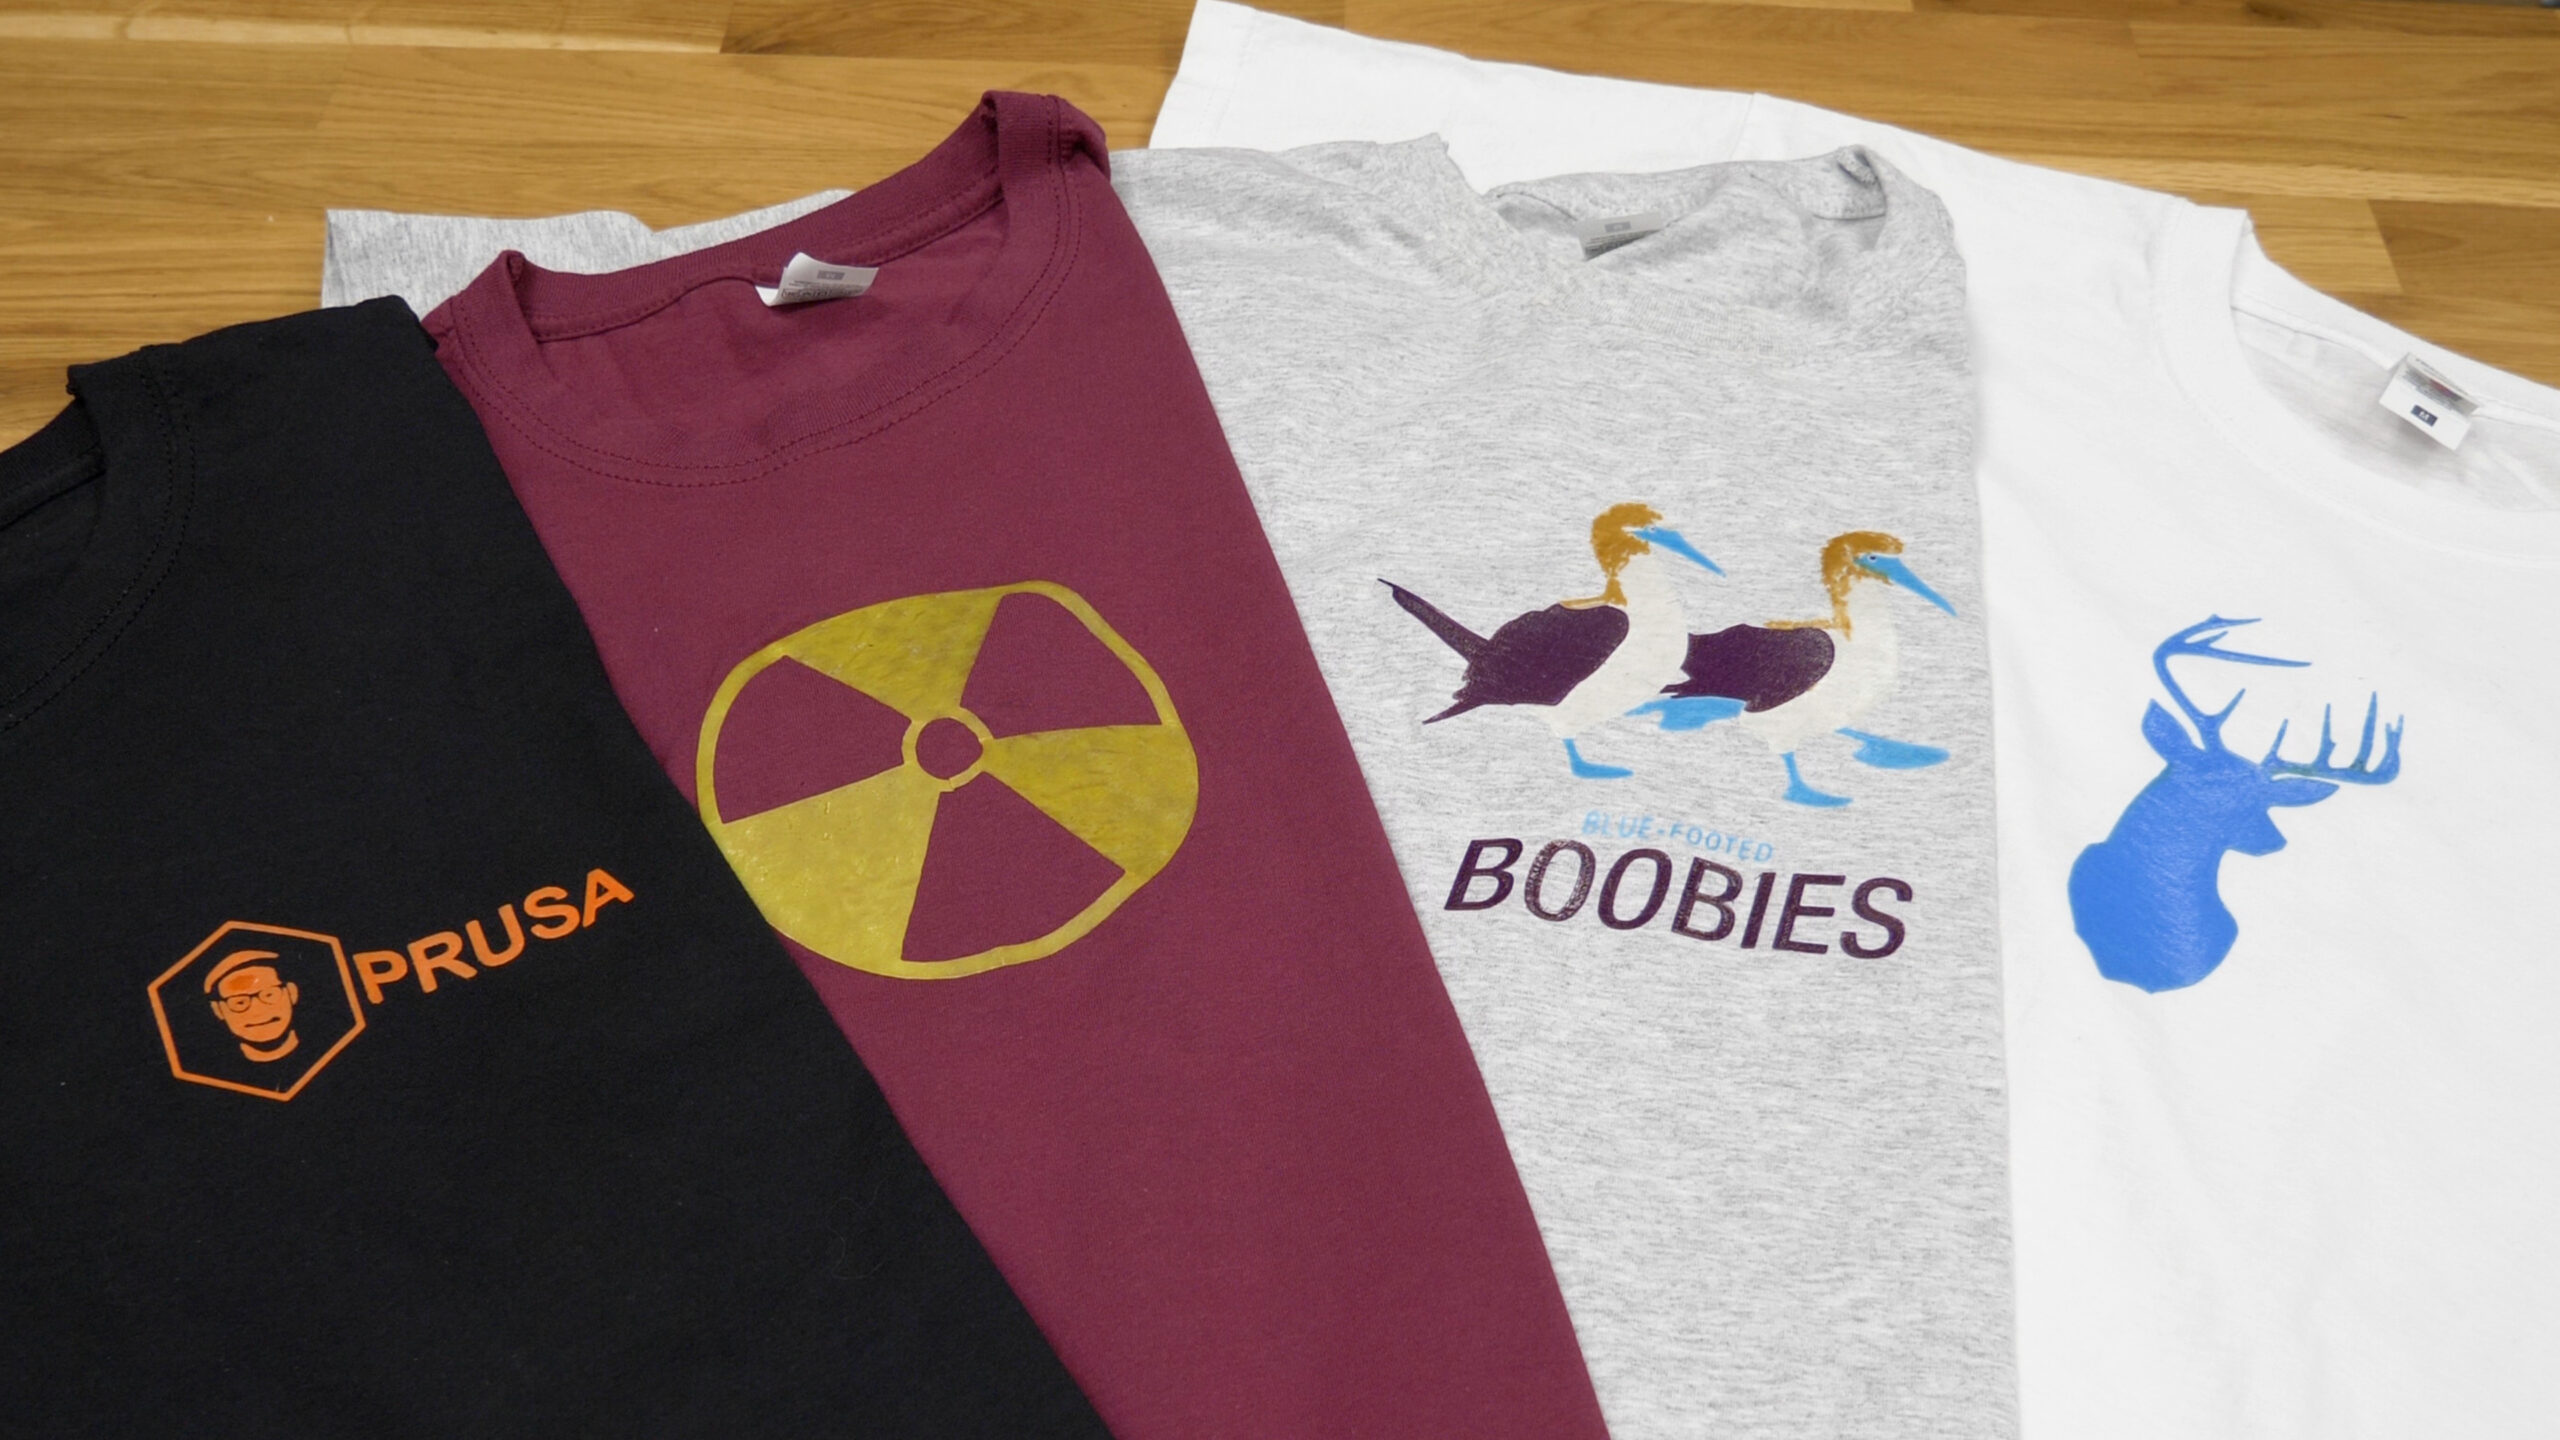
And don’t forget that you can download the used designs at prusaprinters.org.
So, how did it go? Don’t forget to share your results online! There’s a huge space for being creative. We are looking forward to seeing your results.
Happy printing!
There’s a plugin to export STL files directly from Inkscape, which is very convenient for flat/2.5D designs.
https://github.com/fablabnbg/inkscape-paths2openscad
Why not “simply” change the head of the gcode by starting with a head move up then an pause; putting the t-shirt, continue the print.
eventually with a bed leveling skip ( G28 W )
G28 ; or G28 W Go init place (W wihtou pre bed leveling)
G90 ; Absolute positioning
M82 ; Extruder in absolute mode
G92 E0 ; Reset extruder position
G1 Z60 X0 Y0 ; head up 60
M601 ; pause to allow placement of tshirt
G1 Z05 X0 Y0 ; head down
your print gcode here after
Not much of a support for 3MF in reality. You boast about it here, but do not even implment it properly, and no supoprt for extensions like beam-lattice in 3mf in sight.
i was wondering if it would be possible to do this on a mini+
Love this! I assume heatbed must be disabled or it will melt the special insert, correct?
You cant melt at those temperatures so you will be fine regardless
I was pretty pumped to try this out- specifically the flexible prints directly onto the T-shirt. Now I’ve printed the insert twice (in PETG) with consistent defects at a certain Z height. These defects don’t allow the sheet to sit level, or so is my theory, as I keep getting the “Some problem encountered z leveling enforced” error, which doesn’t allow me to get past the 9-point leveling procedure to start printing. Now I’m pretty bummed and disappointed any thoughts or possible solutions would be greatly appreciated! I posted some pics of my prints over at the insert print page:(https://www.prusaprinters.org/prints/76752-sheet-insert-for-printing-t-shirts/comments)
Creating custom tees? Check out options at https://kbmediacorp.ca/promotional-items-apparel/ for promotional apparel ideas.
I’d love to see an update to this article now that the MK4 and XL have been released. The nextruder’s load cell sensor seem like a good way to probe the surface of the cloth without messing with the z-height. Would printing on fabric be an easier process because of the new extruder capabilities?