


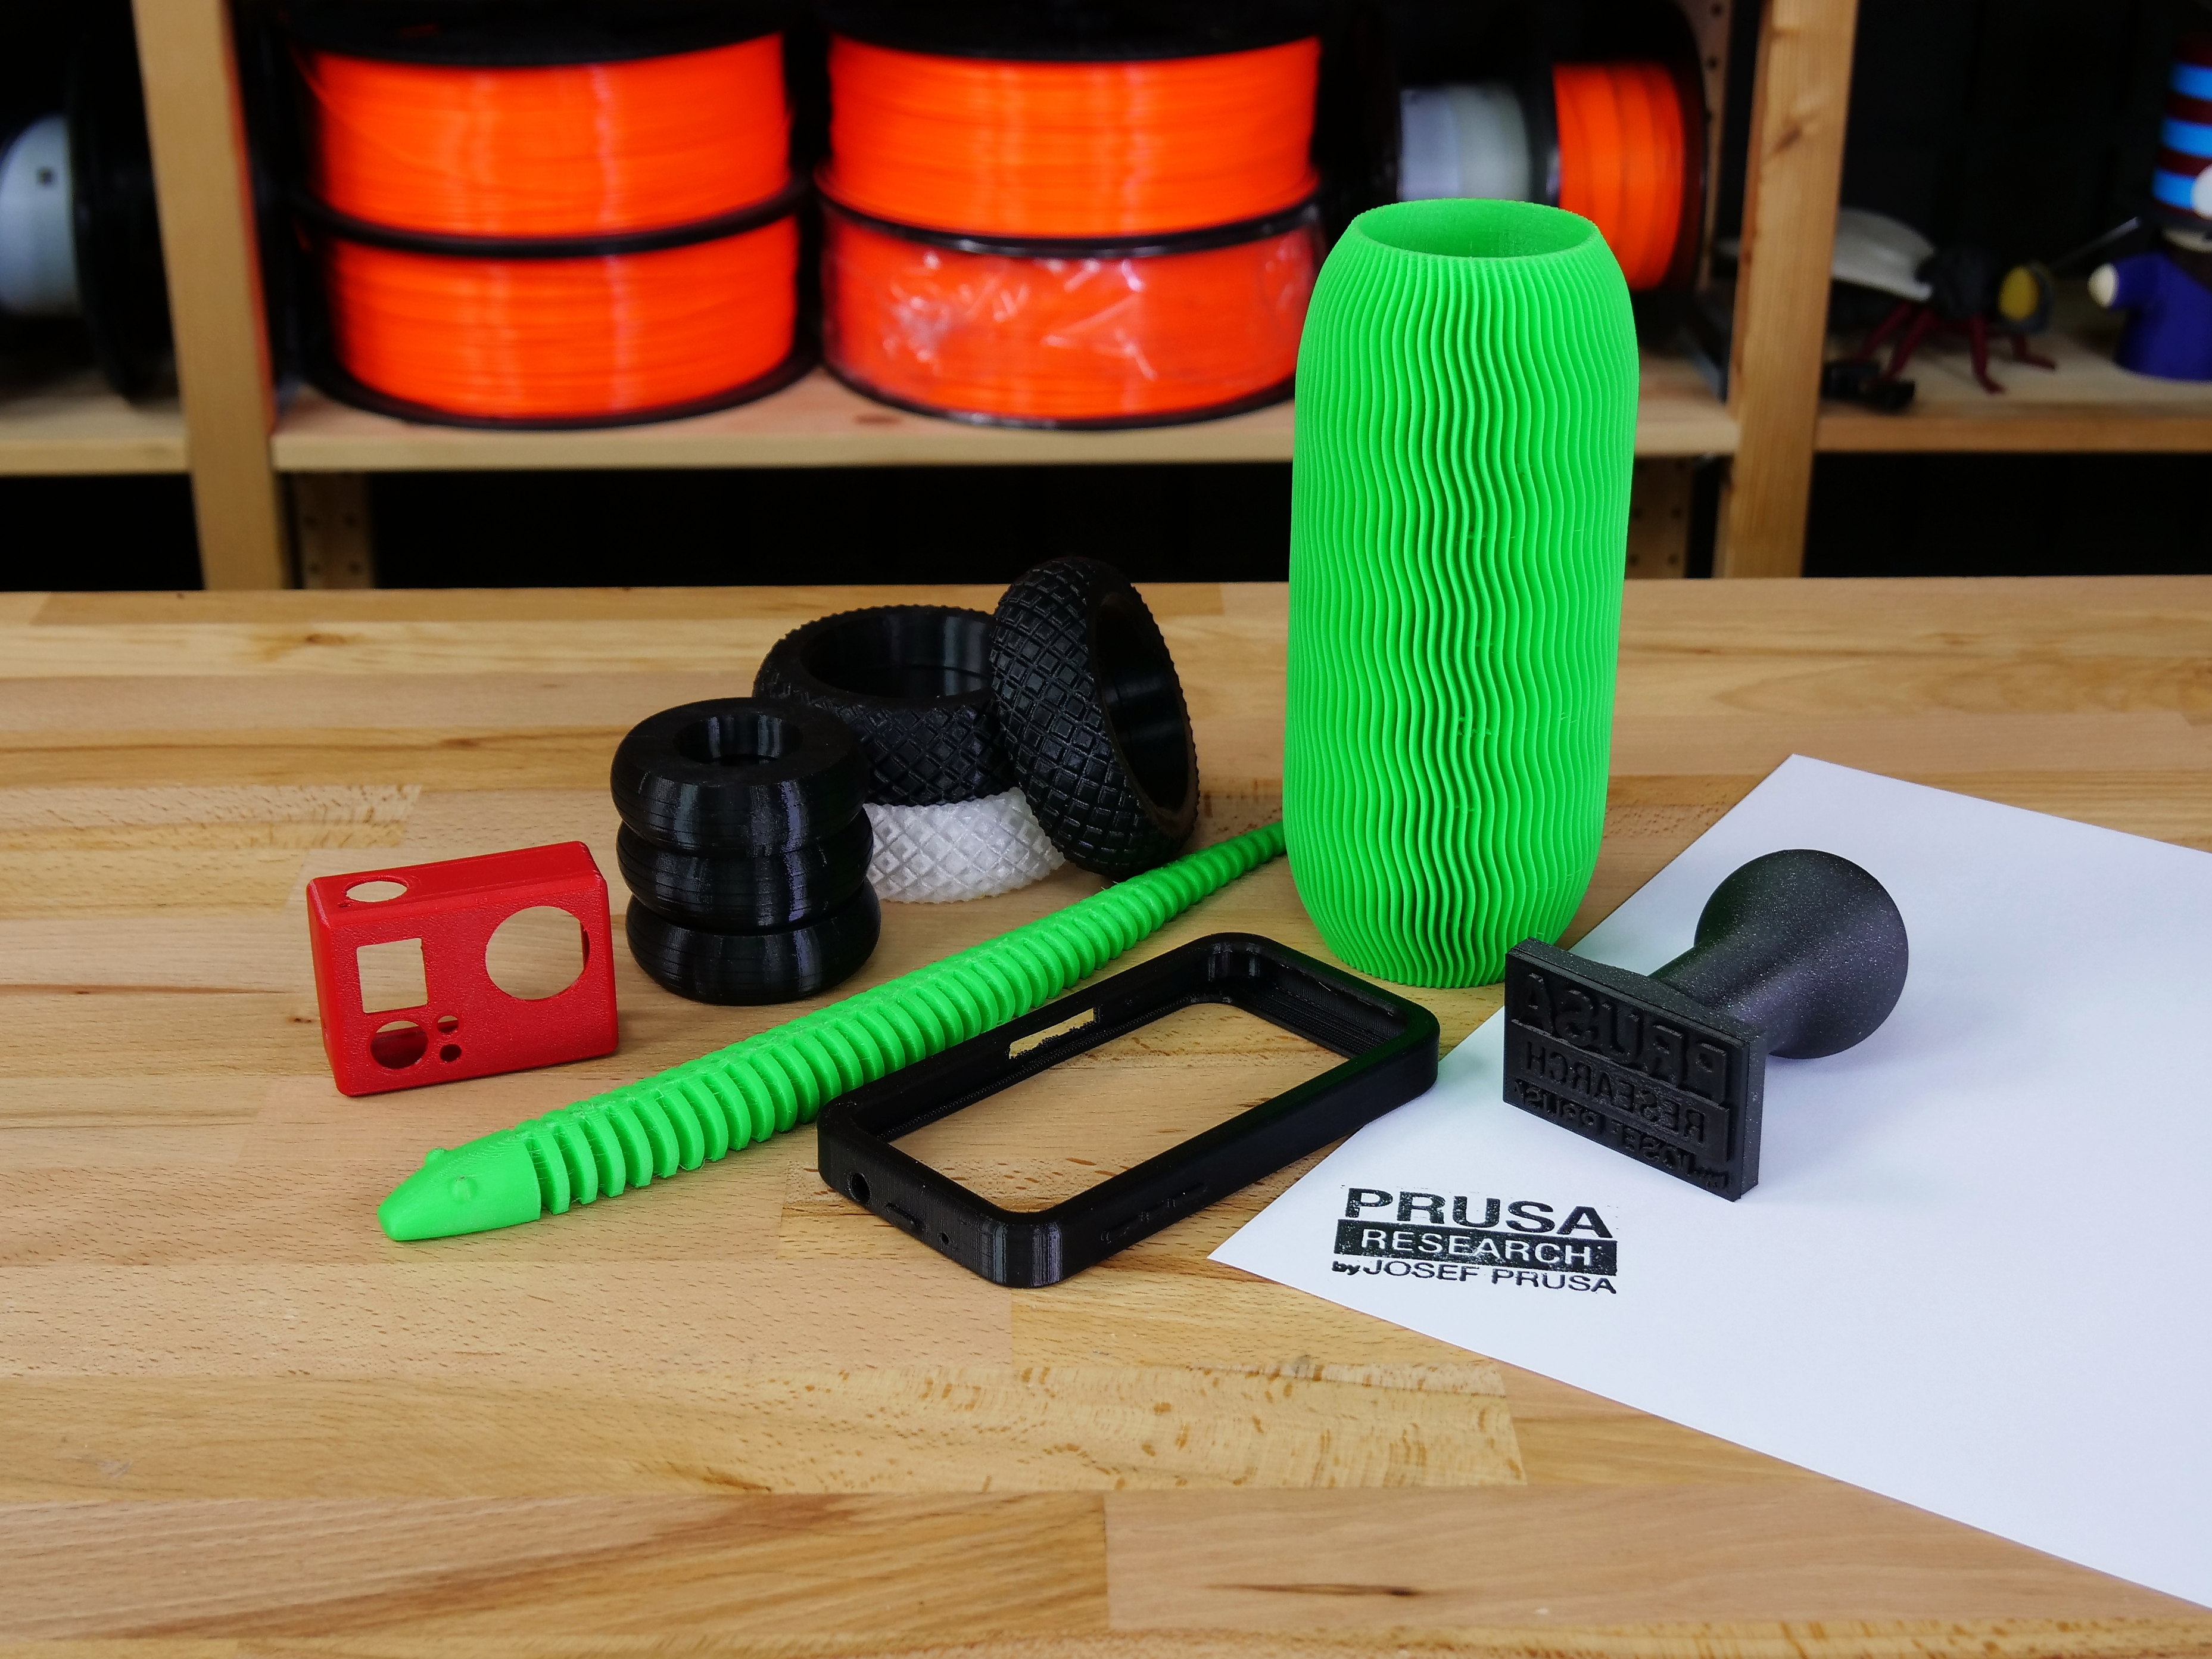
RC airplane wheels, flexible phone covers or durable GoPro cases – there are some things you can’t (or shouldn’t) print with regular filaments such as PLA or PET-G. However, there’s a group of special filaments that are perfect for this job – flexible filaments! They can be a bit tricky to use, so we decided to bring you this article that will help you get started with these wonderful materials!
Printing with flexible filaments is yet another way to expand your 3D printer capabilities. Unlike most common materials (such as PLA or PET-G), these filaments offer flexibility, great adhesion between the layers and often also elasticity. Printed objects can be not only flexible but extremely resistant to mechanical wear or damage as well. However, there are some downsides, too. Printing these filaments requires a more thorough pre-printing preparation, plus some tweaking and tinkering – in layman’s terms: having some experience with 3D printing is a huge plus.
Our Original Prusa i3 MK3 printer is designed to print various materials, including flexible filaments. However, to help you print these materials, we have rebuilt the extruder to MK3S version so it would be even more flex-printing friendly. You should also download the latest version of PrusaSlicer that will automatically update every profile change when it comes out (you can read more here). So let’s take a look at basic qualities and optimal settings for flexible filaments.
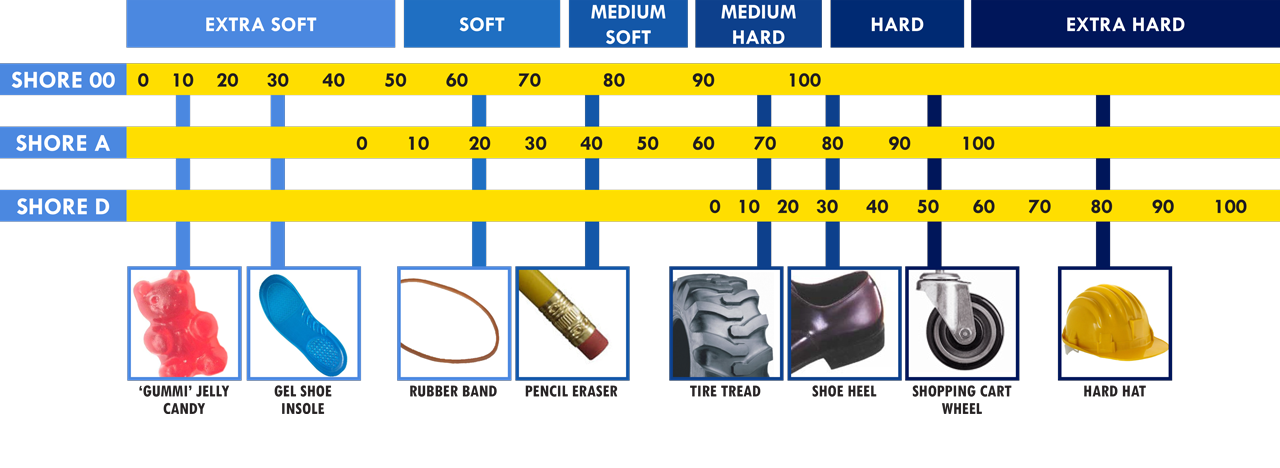
There are two types of materials being used for 3D printing: TPE (Thermoplastic Elastomer) and TPU (Thermoplastic Polyurethan). Although having two different names, TPU is actually a type of TPE material; the main difference between them is mainly in shore hardness. Plastics called as TPU are usually tougher, their hardness is somewhere around 60A-90A on the shore hardness scale (see below).
Shore hardness scale, source: smooth-on.com
As we have already mentioned, the main advantages of these materials are flexibility, solidity, and elasticity. A great solidity is caused by excellent adhesion between layers. Printed products can withstand a lot of mechanical stress without breaking, which means that flex filaments can be used e.g. for printing spacers or other highly-stressed parts.
Among the main disadvantages are things like very slow printing, poor bridging and stringing. Also, you need to keep in mind that not every model is suitable for printing with flexible filaments and it is necessary to choose carefully what to print. Generally speaking, printing with softer filaments is more difficult. For example, soft TPE filaments tend to detach on the sides from the heatbed. We have the best experience with TPU filaments with shore hardness 92A and 98A (available on our e-shop).
Tips for useful flexible prints
So what exactly can be made with flexibles? We have tried to print several simple models that can be used in everyday life or just for fun. We have also asked our fans on Twitter for some inspiration and we got dozens of cool photos – so check out that link to see more!
At first, we thought it would be a great idea to print RC model tires. They look really good when printed from 92A flexfill, however, they don’t have good adhesion due to filament hardness. Therefore they are more suitable for RC plane landing gears rather than for cars. You can modify the tire softness by changing infill parameters and number of perimeters. When you set it too high, the tires will be too hard and you might lose the key feature of flexible filaments.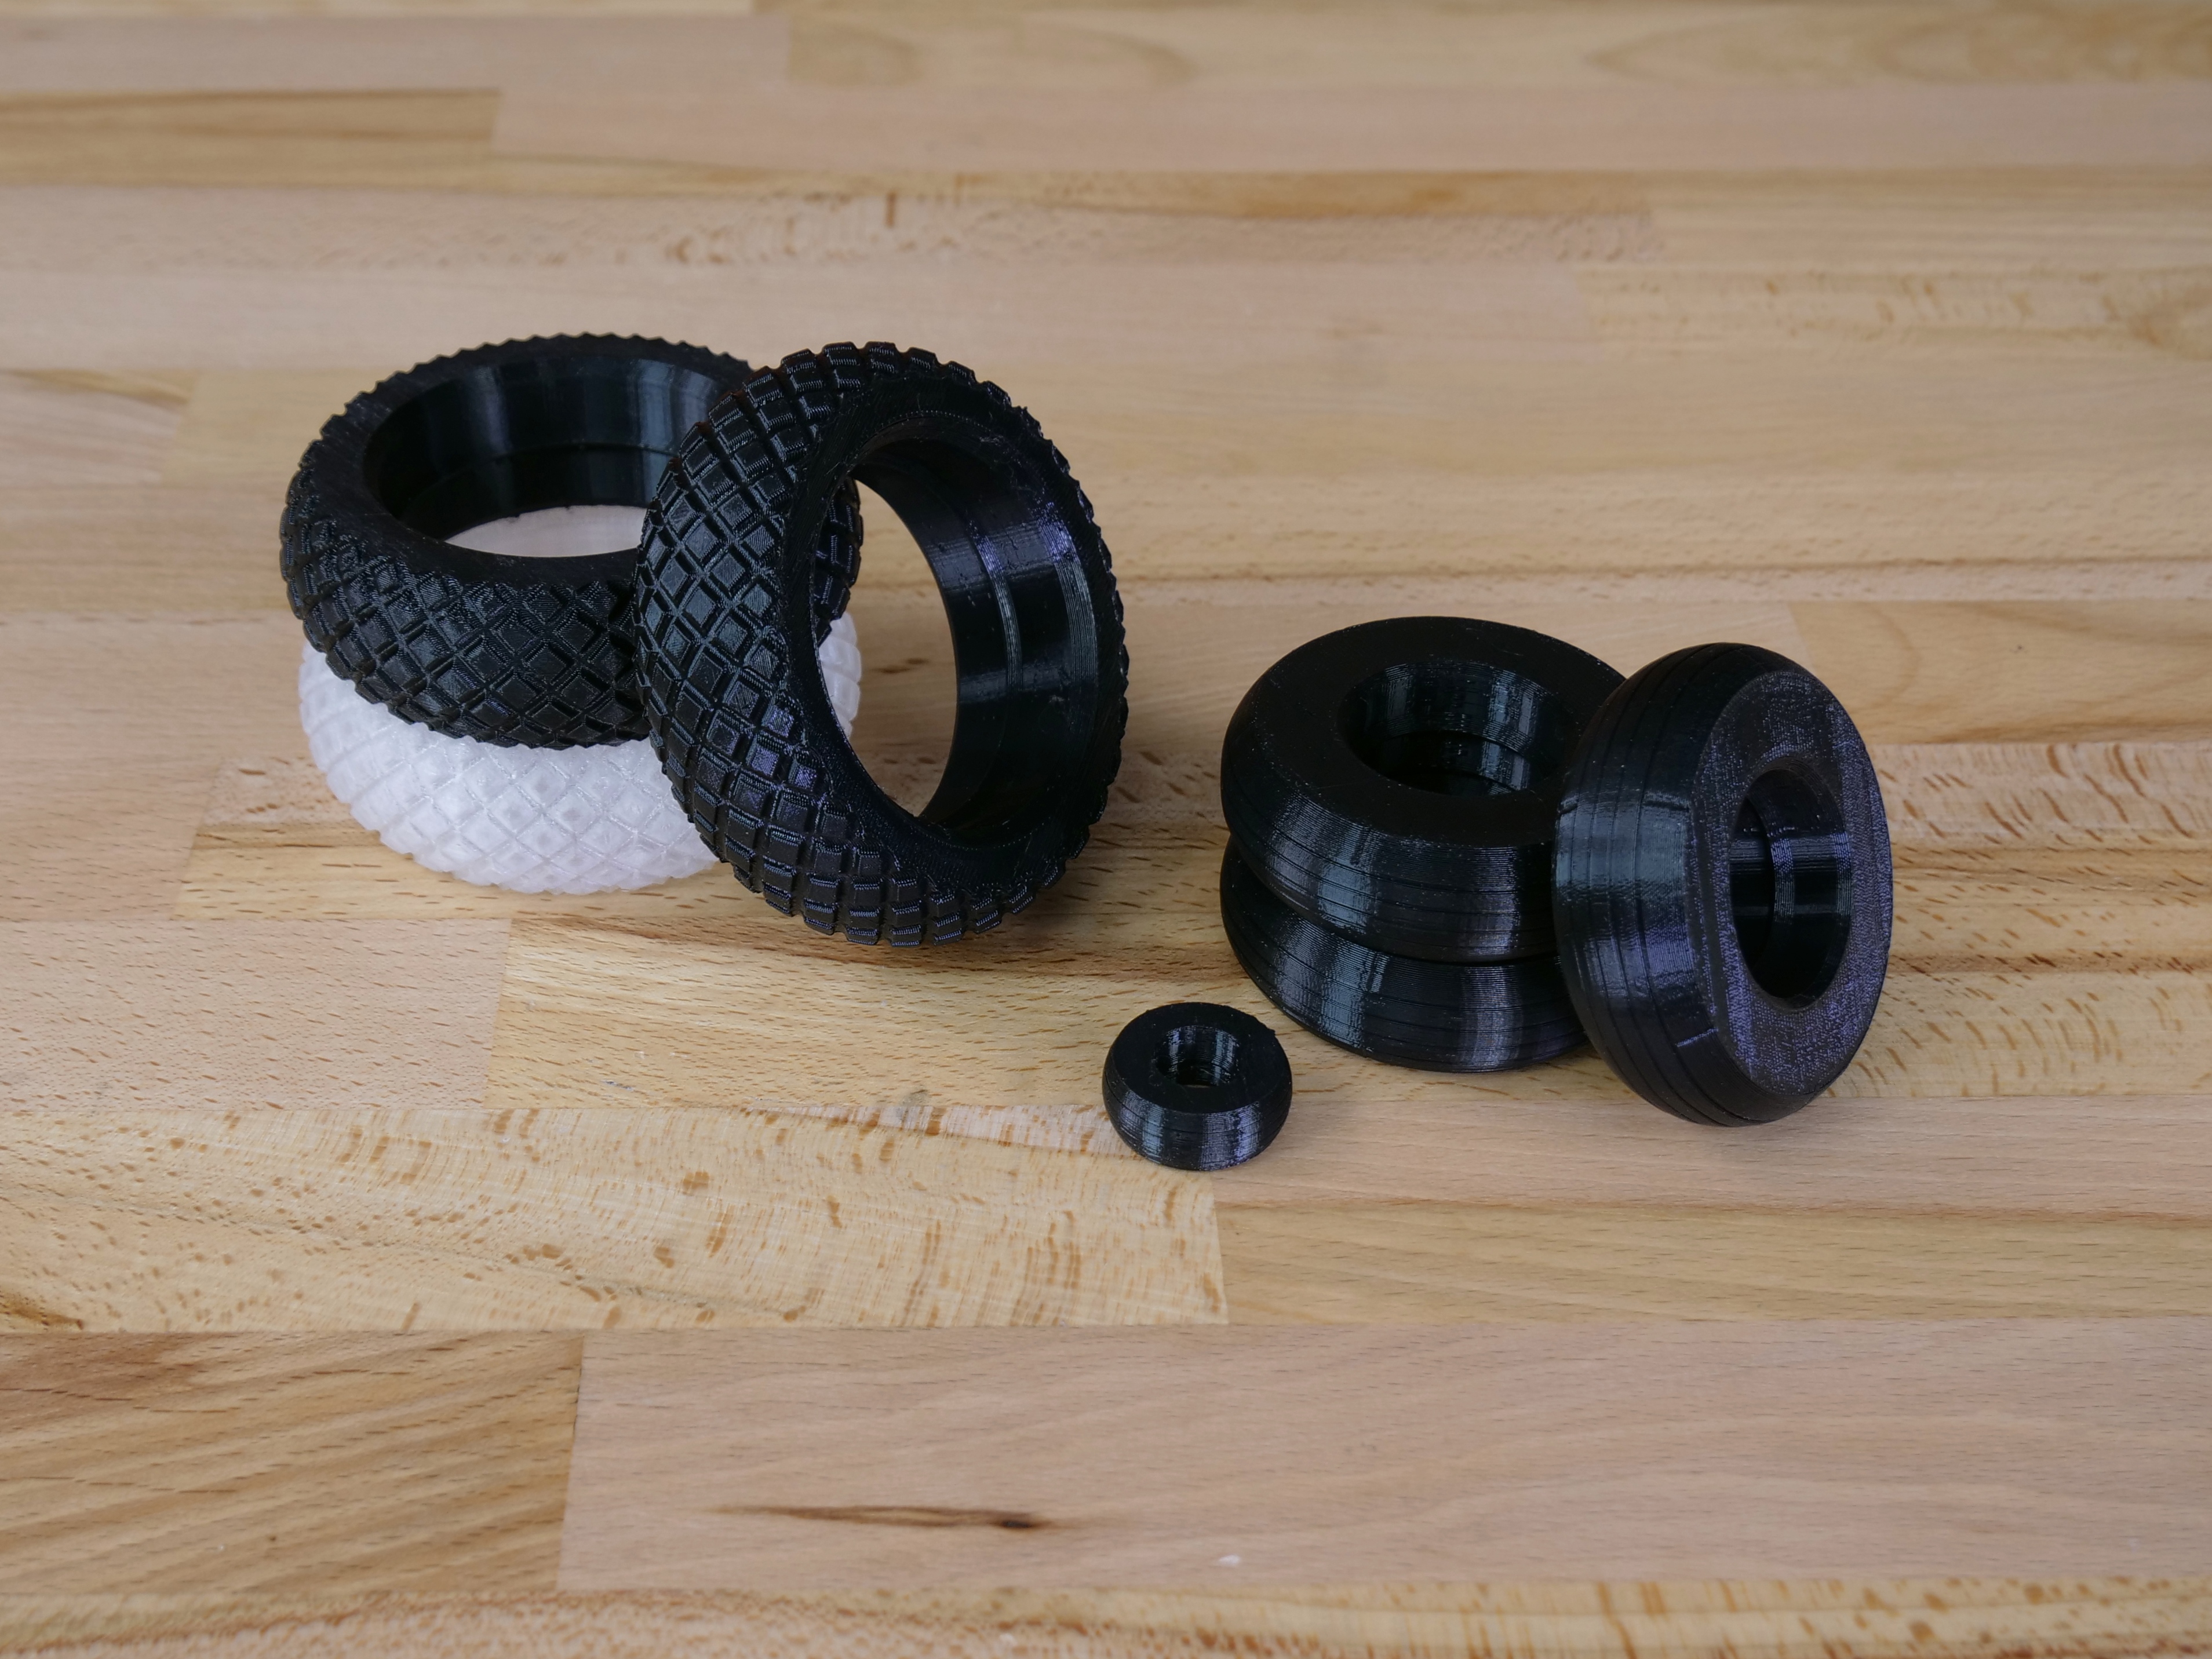
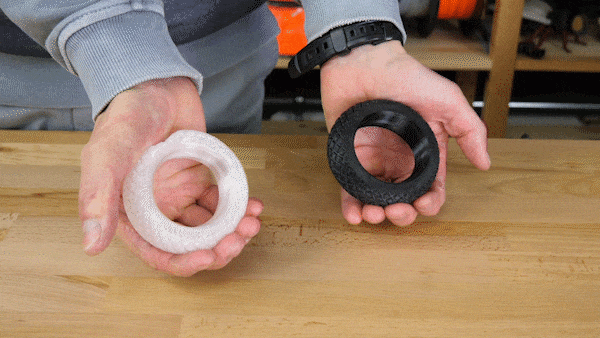
Left: Flexfill 98A with 2 perimeters and 8% infill. Right: Flexfill 92A with 1 perimeter and 8% infill.
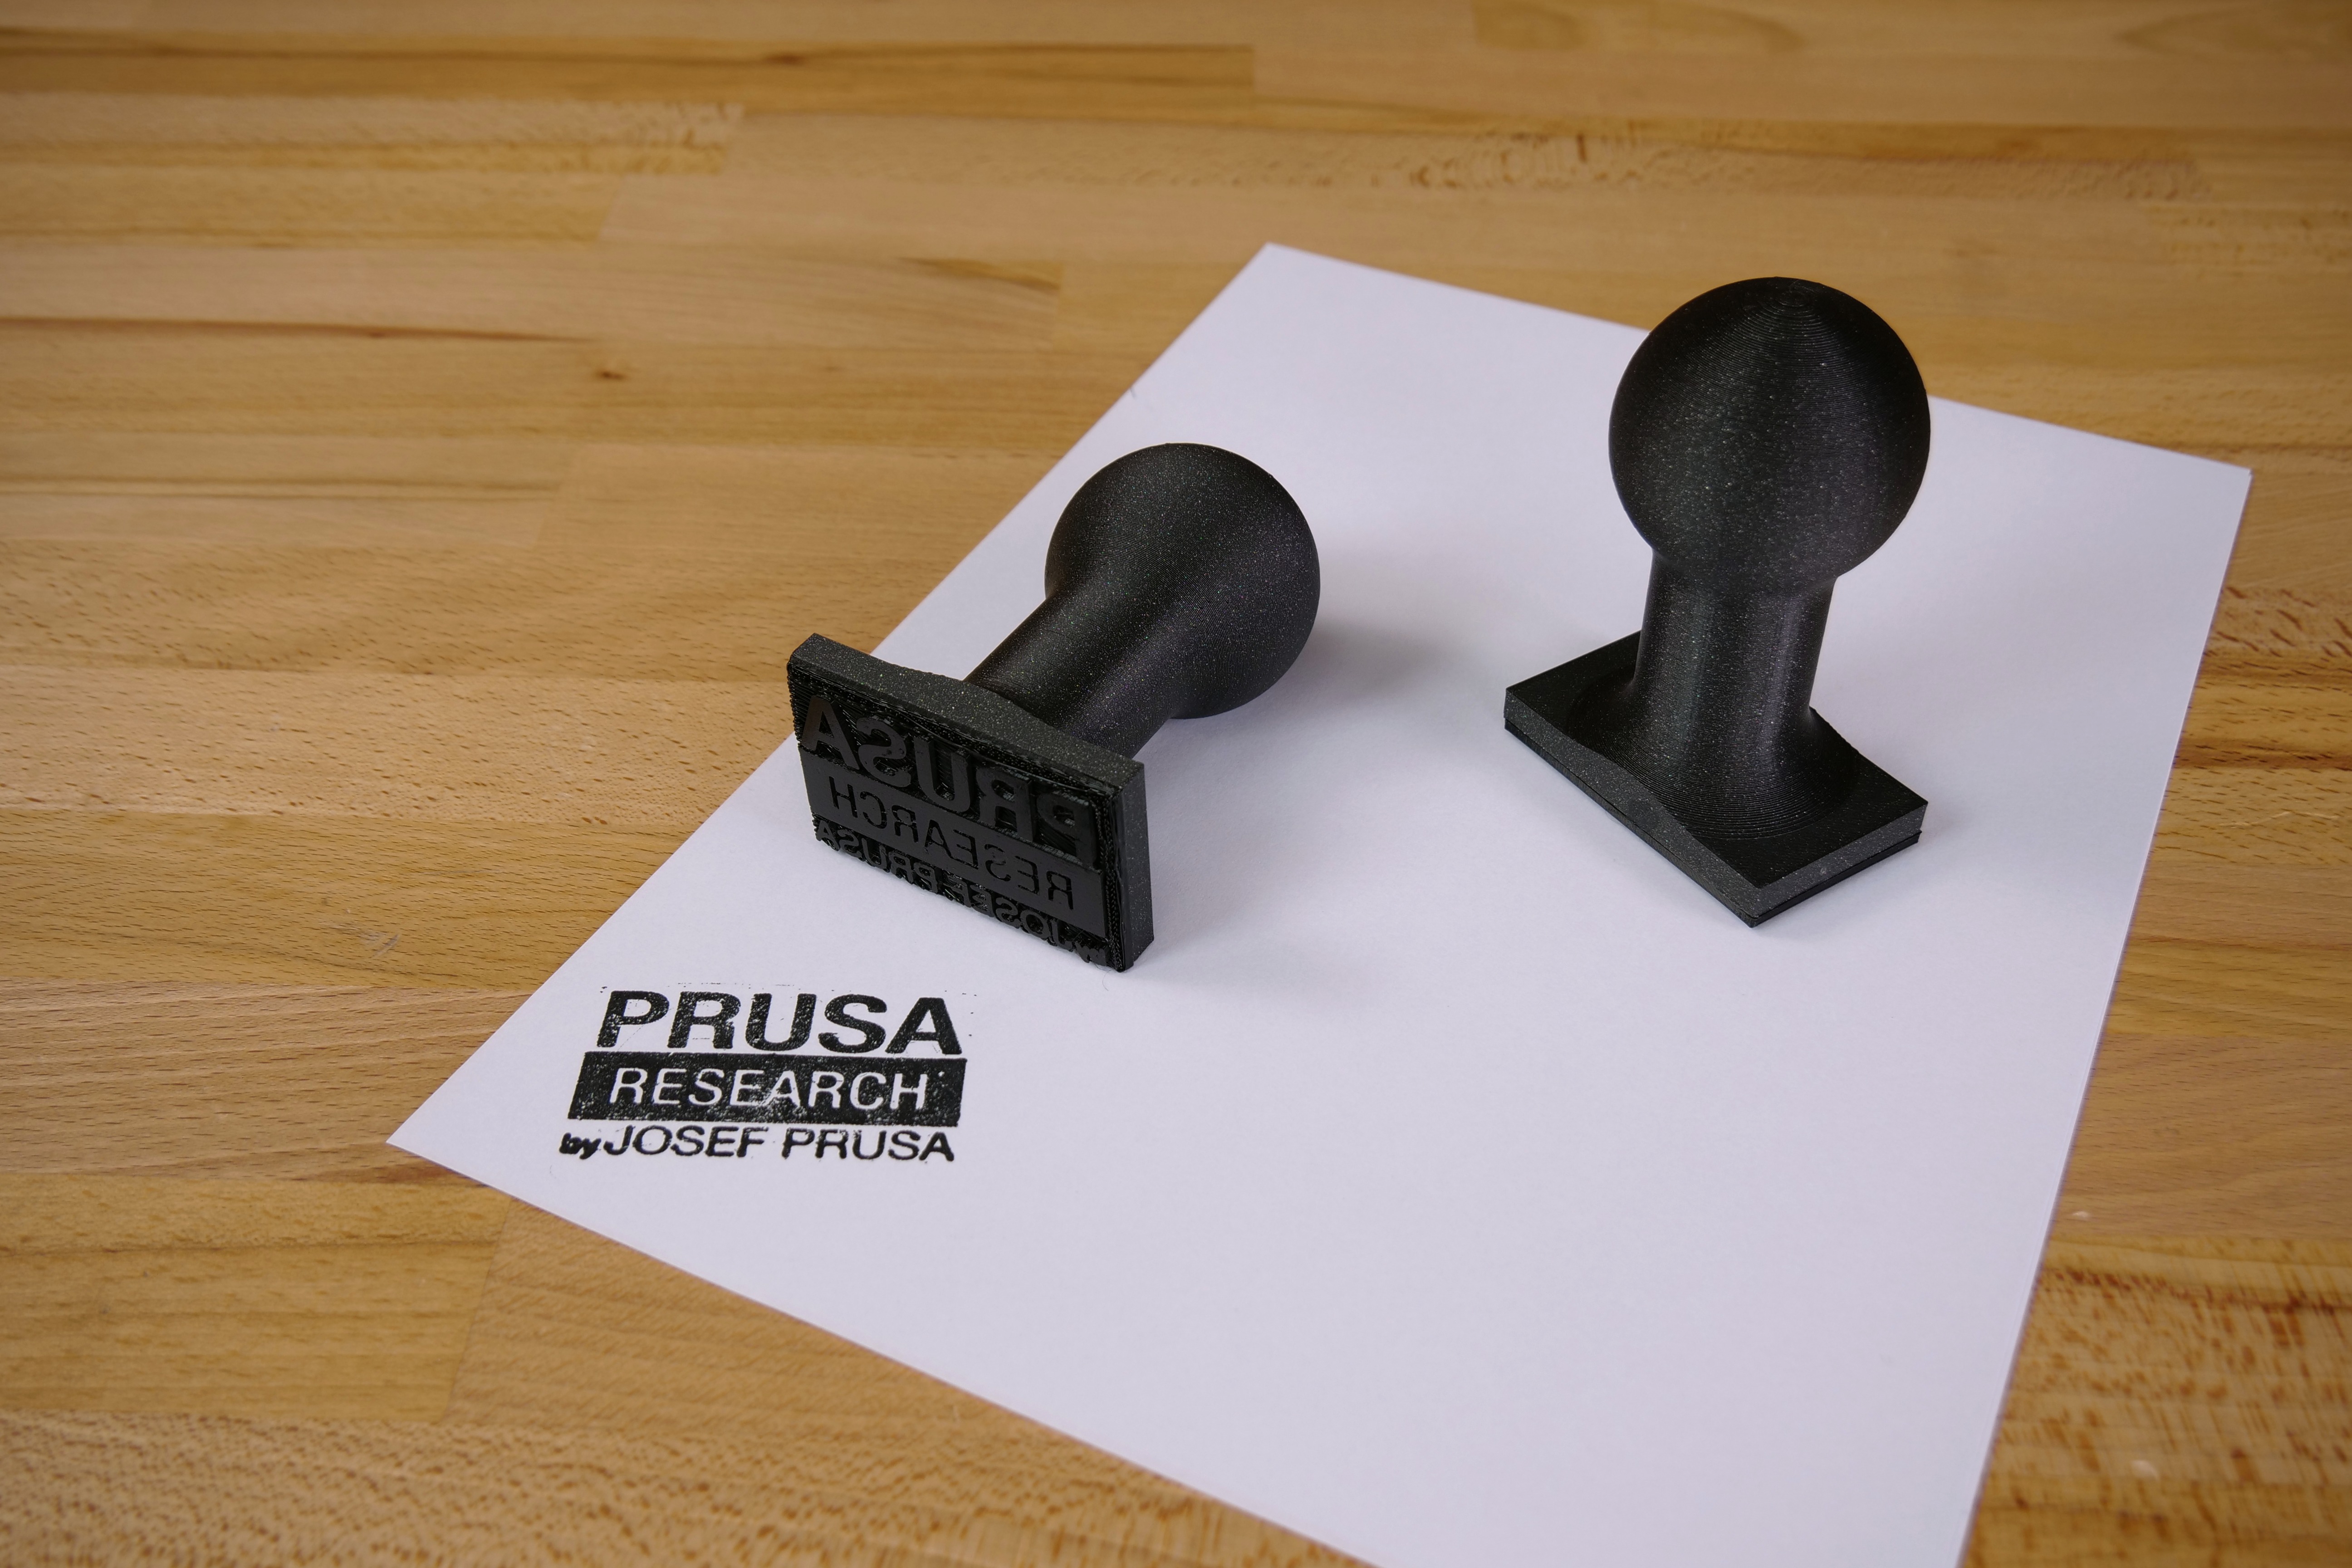
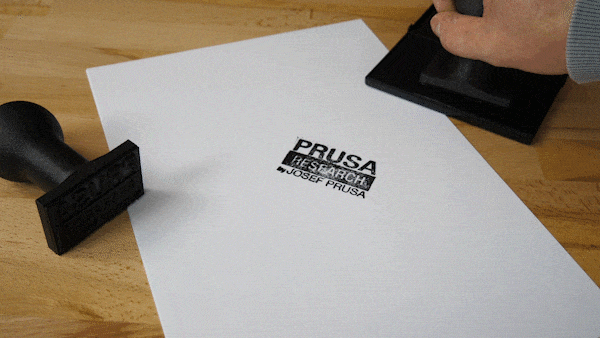
Next, we tried to print our own stamp. The result can be quite good if you use a soft filament. The stamp must have a very smooth surface to work properly. Therefore it is important to sand it after printing, or print with contact surface heading down to a smooth sheet.
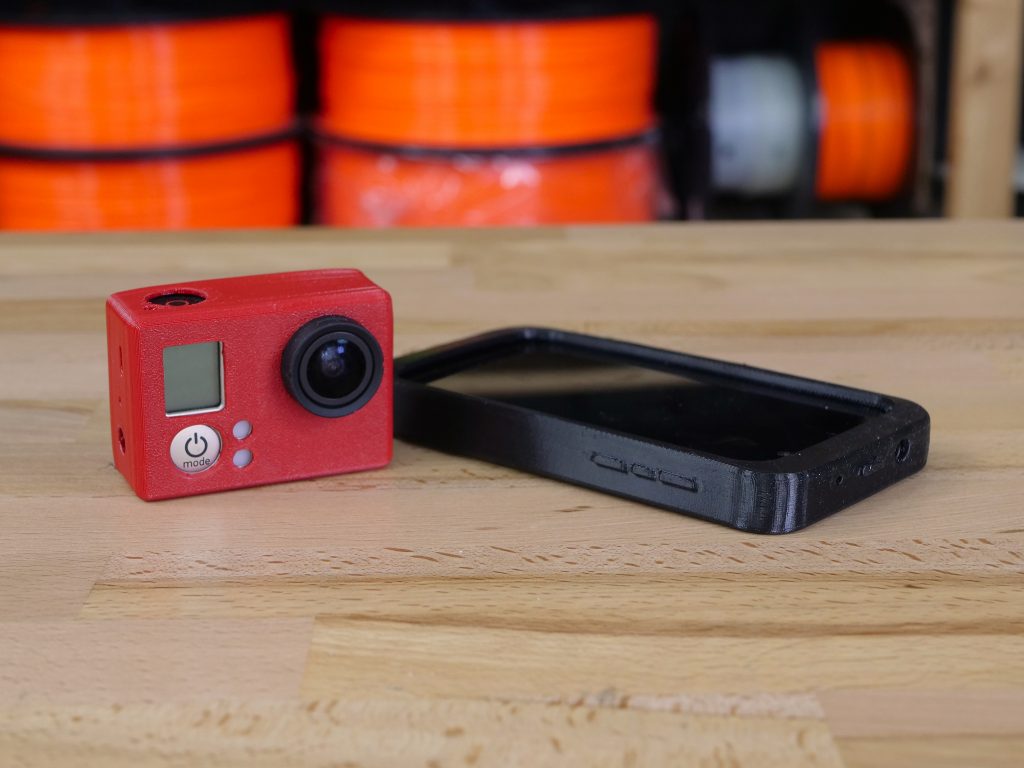
Many people will appreciate the possibility of printing a protection case for their cellphone or GoPro camera. We tried to use harder and softer filament and found out that both variants work pretty well. Some of the protective cases can’t be printed well without using support material. You’ll have to adjust printer settings or accept the fact that bridging areas won’t be as nice as with PLA or other standard materials.
Print preparation and settings
1) Loosen your idler as much as possible before you start loading the filament/printing. There is a high risk that the filament will tangle around the bondtech if there’s too much pressure on the string.
2) Spread a thin layer of glue on your print surface (regular paper glue stick should work fine). This step is necessary when using the smooth or satin PEI sheet. You don’t need to use glue on textured sheets. Without glue, the printed object will be hard to remove from the surface because of a good TPU adhesion and you could actually damage your sheet. Alternatively (for TPE filament), you can print on a regular sticky tape as seen in this video. In PrusaSlicer, we have heatbed temperature set to 50°C. That is the optimal temperature for Flexfill 92A and 98A, however, it might differ for other types of filament, for example, TPE doesn’t stick to the heatbed with this temperature.
3) You have to print very slowly, typical safe speed is 20mm/s. Generally, a maximum recommended speed for flexible filaments is 30-40mm/s, because you would risk clogging the nozzle if you set the speed too high. In PrusaSlicer we recommend using the „Flexfill 98A or Filatech FilaFlex40“ profile. It has an optimal speed set through the maximum volumetric speed (It is set to 1.5mm3/s, that’s approximately 17mm/s when using 0.2mm layer).
4) Keep your filament dry. Flexible filaments absorb a lot of moisture and are more difficult to print with when stored improperly.
How to achieve better-looking prints
1) We suggest setting a less dense infill if you want your object to be more flexible. However, you should add more top solid layers (Print settings – Layers and perimeters – Horizontal shells). As mentioned above, bridging is usually very poor and your model might have holes in it.
2) Set retractions as low as possible. If you struggle to find an optimal value, try to turn them off completely, then raise them little by little. If you set the retractions too high, you risk clogging the nozzle or getting the filament entangled in the extruder. Our PrusaSlicer profiles include tested and optimized values, so in most cases, you should keep them that way. It is also important to note that the combination of flexible filament and small retractions causes a lot of stringing which is inevitable. If the printed object is “hairy” or has some leftover strings, you can remove them by heating up those parts very carefully with a flame or a heat gun – be extremely careful so you don’t damage the model or hurt yourself!
3) Raise the recommended hotend temperature to 5°C higher. The nozzle might put up too much of resistance and the printed object could be under-extruded or completely messed up. Keep the print fan turned off.
4) If you need to print supports, set the gap between the layers in Z-axis to at least 0,3mm (in PrusaSlicer under Print settings – Support material – Contact Z distance). Otherwise, it’s very difficult to remove all of the support material due to high adhesion between layers.
To summarize the possibilities of flexible filament: objects printed from flex are a better fit for practical use rather than for printing beautiful models. However, flexible materials can open completely new possibilities for your 3D printer. We hope that our tips and tricks will help you overcome possible issues and you’ll print something awesome. If you do, don’t forget to share your prints with us – either in the comments section or via social media channels. You can also find inspiration on Twitter thanks to the work of our followers.
Hi!
Instead of glue stick, I put Kapton tape (0.05mm thick) onto the PEI sheet in the area of the print and the prime area.
I also use a higher value for the first layer (0.3mm to 0.4 mm).
Stupid question probably, but how do you clean the flexible PEI once you remove the kapton tape ?
The flexible PEI plate works like a charm for PLA in my case, I’m wondering if I should buy another one for PLA, and use my old one for sticking kapton ?
Either 99% Alcohol or Acetone to clean your PEI sheets. It honestly depends on what you’re printing. PLA is fine with cleaning the bed with alcohol but some materials (Like PETG) will wreak your PEI sheet if you use alcohol. In those cases use acetone. The hand book that cam with your printer has a nice section in the back with guidelines for different materials and what you should do to prep for that material
Everybody is talking about how well TPU/TPE sticks to PEI but I can’t get TPE from Filament PM to stick past the third layer.
It has a shore hardness of 32D.
I tried printing it with 240-250°C and a cold and a heated (60°) bed. My PEI bed is degreased. Print speed is down to ~20-30 mm/s. The layers are looking perfect, means there are no gabs and the first layer is so squished down that I nearly cant see the single lines. But on the third layer when the solid infill is layed down, the part comes completely loose. (the part is round and has a footprint of 20 mm in diameter).
I’m out of ideas at the moment… maybe a super wide brim?
After some testing …
clear packaging tape on the printbed as a printing surface is what worked best for Filament PM TPE32. With this, the bed didn’t even need to be heated.
I print it now successfully with (Slic3r-PE settings):
Extrusion multiplier: 1.1
Extruder: 240 °C
Bed: 40 °C
Enable auto cooling: on
Fan speed: 30-40%
Fan disabled for first 2 layers
Enable fan if layer print time is below: 100
slow down if layer print time is below: 20
min print speed: 10mm/s
max volumetric speed: 3 mm³/s
Had a similar experience with FormFutura Flexifil. Doesn’t stick well on PEI. Glue stick helps a little but the corners eventually lift. Will give the clear packing tape a try! On the other hand MCPP’s 98A TPU sticks very very well.
Hi,
I’ve found TPE sticks very well (a bit too well 😀 ) to packing tape, I used the standard brown one on the PEI sheet at 40 degrees C.
Slow print settings, maximum 30 mm/s first layer 15 mm/s, layer height 0.2, don’t squish the first layer.
Hope this helps,
-R
Do you all mean the packing tape is the solution? TPE will be printet on the non-sticky side? How come?
Will try indeed. Thanks for posting personal experiences.
It would be nice to keep your guides as a pdf-document. Can you please enable such an option.
Hi, you can download CUT PDF Writter this will install a virtual PDF Printer and then you can go a print to PDF and save the guide 😉
Jesus loves you!
Hi. Quite new to 3d printing but I need to print few things with flex. I’m using Innoflex 45 with the settings from Slice PE and although the print starts well, after some time is dislodging from the PEI bed. Any help is well appreciated.
Hi, try raising the z-height live while printing – until you get a nice oval line of filament on the bed – not round – not flat.
Do the ‘test first layer’ print ( from the included card ) a few times until it looks nice and juicy – nice and even, no gaps, shiny first layer, and then you should be ok.
Degrease your bed with soap and warm water – not Alcohol. Dry it.
Use some stick glue and wipe it flat ( don’t remove it all ) with a damp cloth.
( I print at 15mm/s ).
“first layer is so squished down that I nearly cant see the single lines” – it’s z-height is too close to the bed.
( PS – I am happy to be corrected – if I am wrong with anything here )
Hi, the squished first layer is intentional. I like it when no lines are visible.
Raising the z height makes the adhesion worse with every filament.
What really helped for the Filament PM TPE32, was putting some clear packaging tape on the printbed and using this as the printing surface. With this, the bed didn’t even need to be heated.
Jesus loves you!
@dabijja, I use to use brims on flexibles filament that don’t stick well to the bed. The only think I found working.
@ron, Thank you very much for your reply. I have already tried brims but without much success (better than not using brims). The filament that I’m using is a TPC for which I’m still searching for the best printing settings.
What would be the best way to print Flexible filament on top of a (flat) PETG or ABS print? e.g.: First print PETG structure with a flat top, then print Flexible filament on top of that. Any tips appreciated.
Yea, I am experiecncing same issue. I cannot even print single layer on top of PETG. Speed is 15mm/s, temps are ok. If you have any solutions or suggestions please let me know.
The first time I printed Flexfill98A I didn’t use glue stick or anything, a piece of the PEI sheet came off with the printed part. I have since used hairspray successfully.
Loosen the idler is key!
Thanks heaps, now it works flawless!
cheers
fischi.tools
God bless!
I’ve had a couple of really good prints with ninjaflex, but keep seeing “thermal runaway” errors. I have zero issue printing PLA/PETG. Great bed adhesion, and I’ve tried moving the print around just in case it was a bed sensor issue (and checked the bed thermistor). I’m wondering if I have an extruder thermal runaway issue?
Thanks guys
Hi Everyone
I’m trying to overcome printing issues using the ninja flex.
In particular co-moulded part where I’m using the PLA material as a lid and trying to multiprint with ninjaflex a gasket within the pla part.
Problem I’m encountering is the ninjaflex is having trouble purging out the PLA within print head.
Has anyone encountered and overcome this issue ??
Assistance would be greatly appreciated 🙂
cheers
mate, I would guess that it is impossible. As the ninjaflex is too soft. The best advice is to simplify and print the gasket separate and install manually.
somewhere here they even suggest to do cold pull before loading flex after PLA etc. to get rid off all of the rigid filament as flex would not be able to do it when loading the filament.
Some feedback on this article:
1) Re: “Loosen your idler as much as possible”: for a newbie like myself, it would be helpful to:
a) Link to an article on how to do this.
b) What does “as much as possible” mean and how would I be able to tell?
2) Re: Max Volumetric Speed, a correction is needed. This article says:
— Begin —
In Slic3r PE we recommend using the „Semiflex or flexfill 98A“ profile. It has an optimal speed set through the maximum volumetric speed (It is set to 1.5mm3/s, that’s approximately 17mm/s when using 0.2mm layer).
— End —
I am using PrusaSlicer-2.2.0+-202003211132 and I added the filament “SemiFlex or Flexfill 98A”. The Max volumetric speed is set to a different value: 1.35 mm3/s
The idler screw is connected to a nut on the other side.
So while you loosen the screw on the left side keep an eye on the nut on the right side.
Losen the screw so it barely hang on to the nut.
Maybe Prusa should consider adding this part as a standard to be able to better control the temperature of Flex filament?
https://www.thingiverse.com/thing:3933882
I read several people that got much better results with this.
TPE doesn’t stick to the heat bed with this temperature (50°C). What is the temp do you recommend for bed using TPE?
I guess you gave up or found out. But the answer is: different print surface. Try packing tape, clear ow brown does not matter, no heating
Hi!
Which filament did you take for the stamp?
I would like to make one…
Please, could you give detailed instructions for a stamp?
Thanks!
Kind Regards
Peter, Bern, Switzerland
i can’t Load TPE filament in prusa i3 MK3
Tried a first ever Flexfill98 print on i3 MK3s+. Used latest Slicer settings on default for Flexfill98. I am printing on a powder coated Prusa sheet.
I tried to print this nice phone case:
https://www.thingiverse.com/thing:3125960
No messing with idler or anything else. I started printing and boom! works fine. I got several layers in, and then, oh sigh, the print detached from the bed – it seems that the flat bottom just warped upwards enough to cause friction…
Before I mess around with bed temp too much, are there known tweaks to avoid this? Prior to the detachment, the print was going perfectly.
Printing flexible filament: possible on a Prusa Mini+ as well..?
I suppose the Bowden setup will not be compatible.
Thanks for some feedback.
Should be the retraction settings be the same in the Filament Settings menu as in the Printer settings menu? What can happen if the settings are different in the 2 mentioned menus? Thank you!
Anyone know where I could get that flexible snake model?
The snake model: https://www.thingiverse.com/thing:6868
I used the MK3S+ with “FilaFlex 60A Pro” from Recruse and used the setup delivered from Recruse. But unfortunately i got a lot of bad results i.e. clogged nozzle during print.
I finally used the suggestions from above:
– speed limited to 20%
– increased the nozzle temperature by 5°C (i.e. 230°C)
– Retraction Length=0 (no retraction)
– disable fan
After doing so the 1st print after the setup change was sucessful. I will keep an eye on it.
Note:
Before loading the FilaFlex I always load PLA and perform a “cold pull”.
To load the Filaflex I used the FLEX setting and start immediately with the print. Do not wait to long, because the 240°C from the FLEX setting seems a little high for the FilaFlex.
After printing I immediately remove the FilaFlex and replace it with a piece of PLA .
I hope that this settings also helps mit for future prints.
IMHO the Fill-Pattern “Gyroid” ist not a good choice in combination with the “FilaFlex 60A Pro”, because of the “retractions”. It looks to me, that this may clogg the nozzle and/or leads to a filament jam in the extruder.
Hey all
Did my first ever TPU on the Prusa i3 MK3S, put stick glue down on the plate, modified the PLA settings and used the settings from KLab, and loosened the idler screw back one full turn.
Worked the very first time on the articulated slug. The only thing is is i forgot to change the Nozzle and bed temp so it was set at Nozzle 210 and Bed 50.
I had zero problems.
Best of luck
Frans,
do NOT use the smooth sheet, I have and the TPU wouldn’t come off (ruined a sheet)
I’d use the textured plate or the packing tape trick works fantastically! (believe it or not)
I use Ext Multiplier of 1.1, 230 degrees, 50 degreed on the bed…and things turn out well!
I do/can get a bit more stringing than any other kind of filament,
or use MAGIGOO! –
This works well!
John