


Looking back at our blog articles, we’ve noticed one thing: we tend to move further and make more complex projects. These require long testing, thorough planning and usually consume a lot of time. The results are great but we have to ask – Isn’t it too hard for beginners? When someone buys a brand new 3D printer and thinks about what to do with it, isn’t it simply just too much to comprehend?
In this article, we’ll return back to the basics. We’ll show you everything you might want to know about the color change / pause print function in PrusaSlicer. And who knows? Maybe even experienced users might find some good advice they didn’t know about.
What is Color change and pause print?
Let’s start with a short explanation of color change. It is a useful tool that can be used in PrusaSlicer after you slice the model. By enabling the color change / pause print, you basically tell the printer to pause after finishing a certain layer. This lets you change the filament, insert something inside the model, and so on.
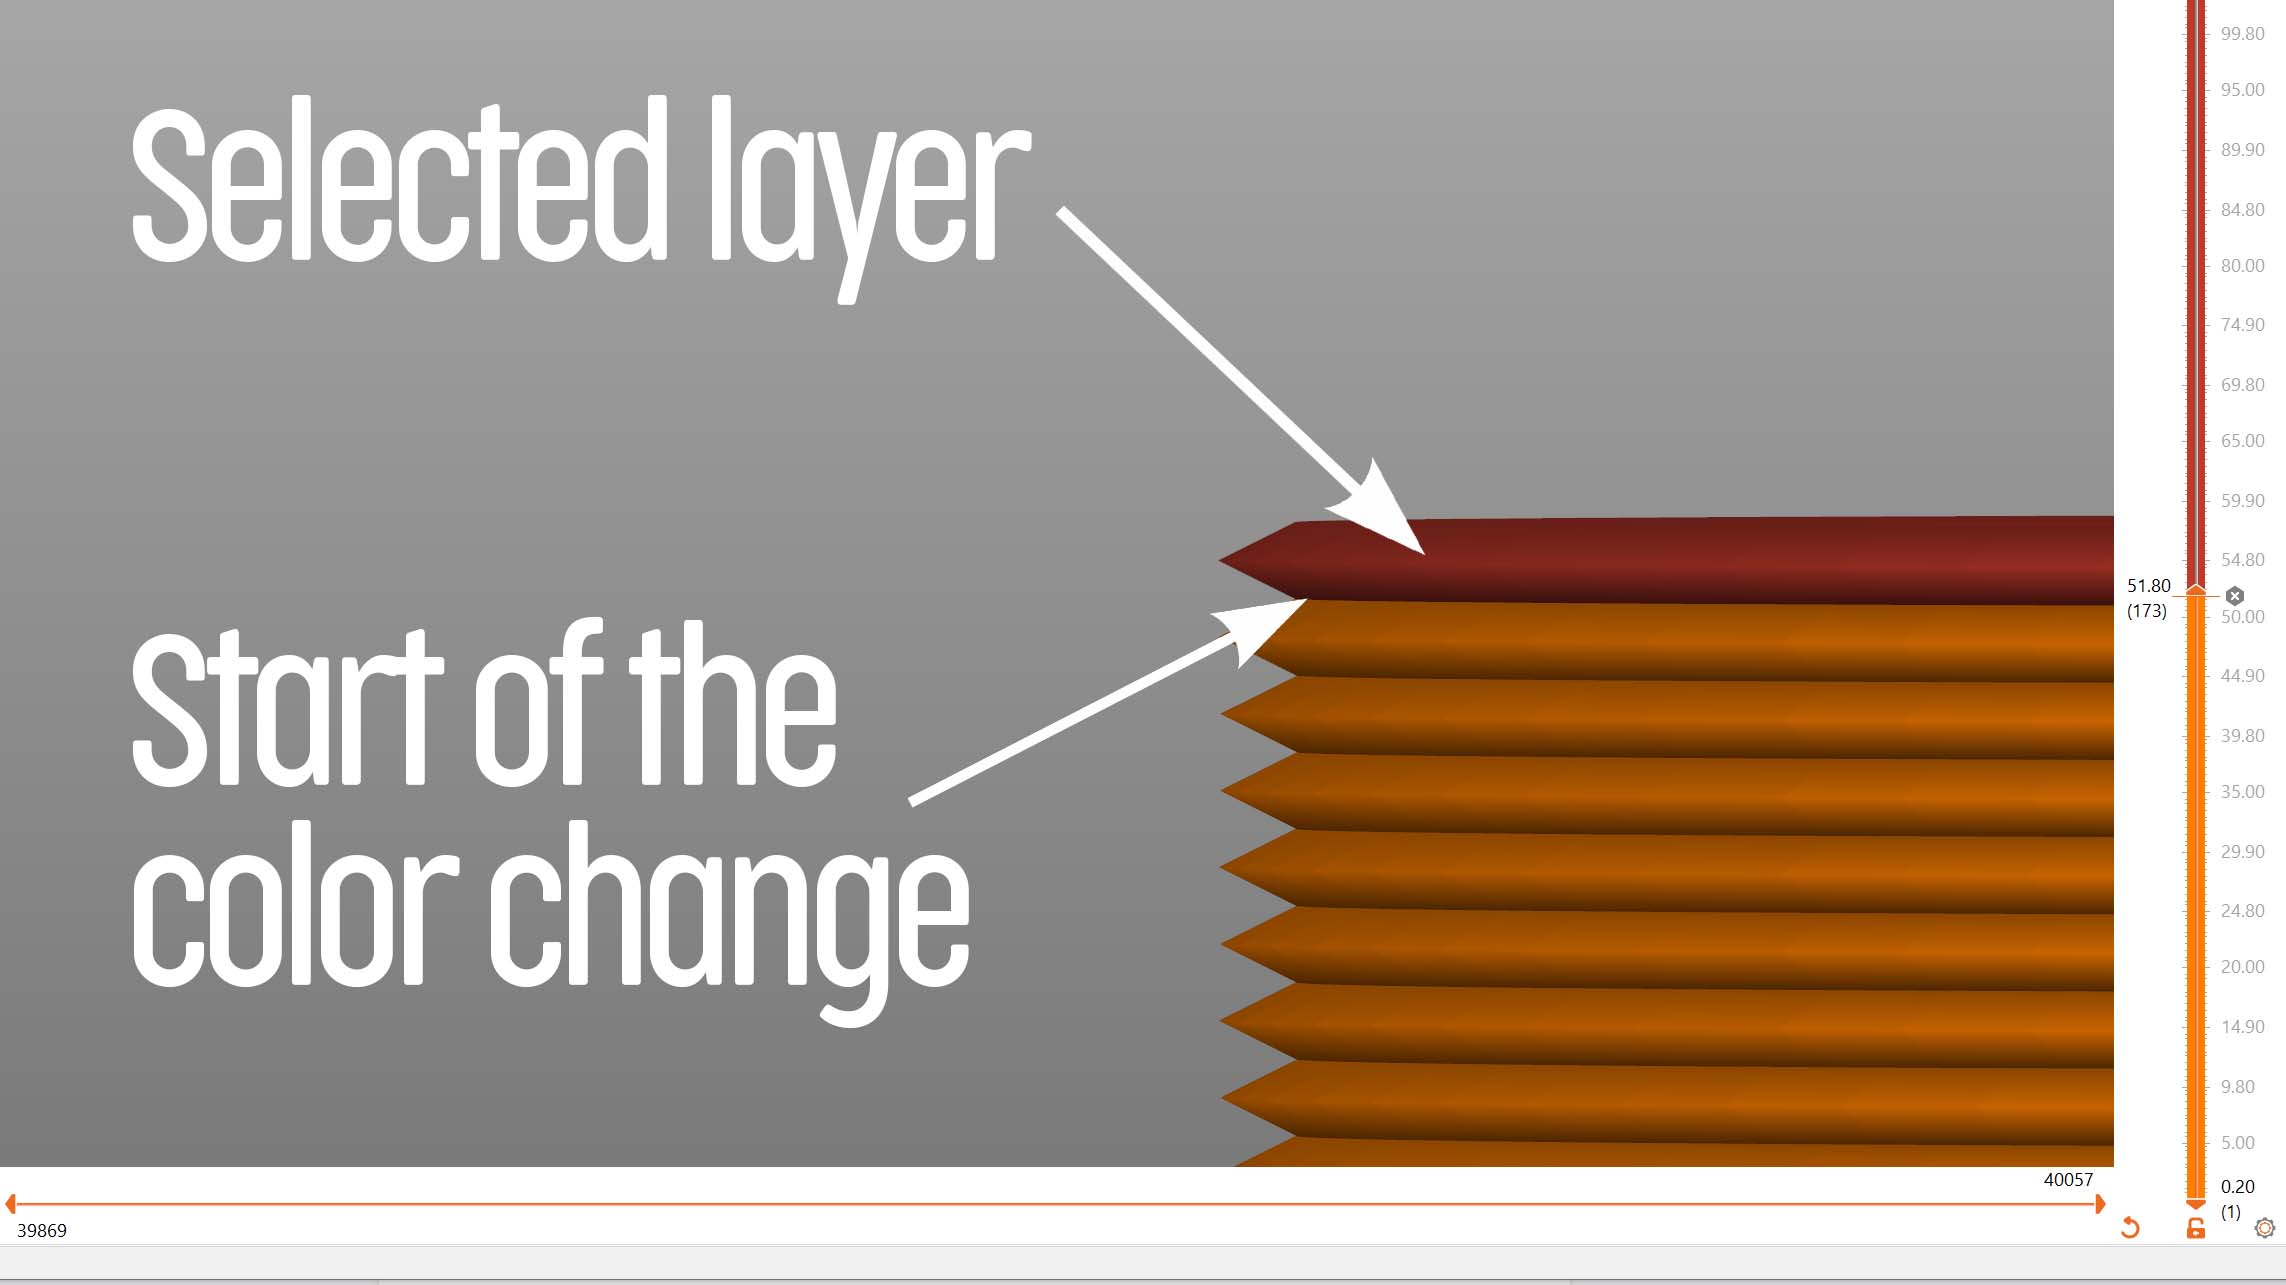
This pause is easy to configure: On the Z-axis (right side of slicing preview), choose the layer where you want to change the color by dragging the slider and click on the (+) icon to add a color change. If you click on it with a right mouse button, PrusaSlicer will let you choose between color change, pause print, or inserting custom G-code functions. This can be done for any layer, even for every single one, if you wish. You can visit our Knowledge Base to learn more about the simplest basics.
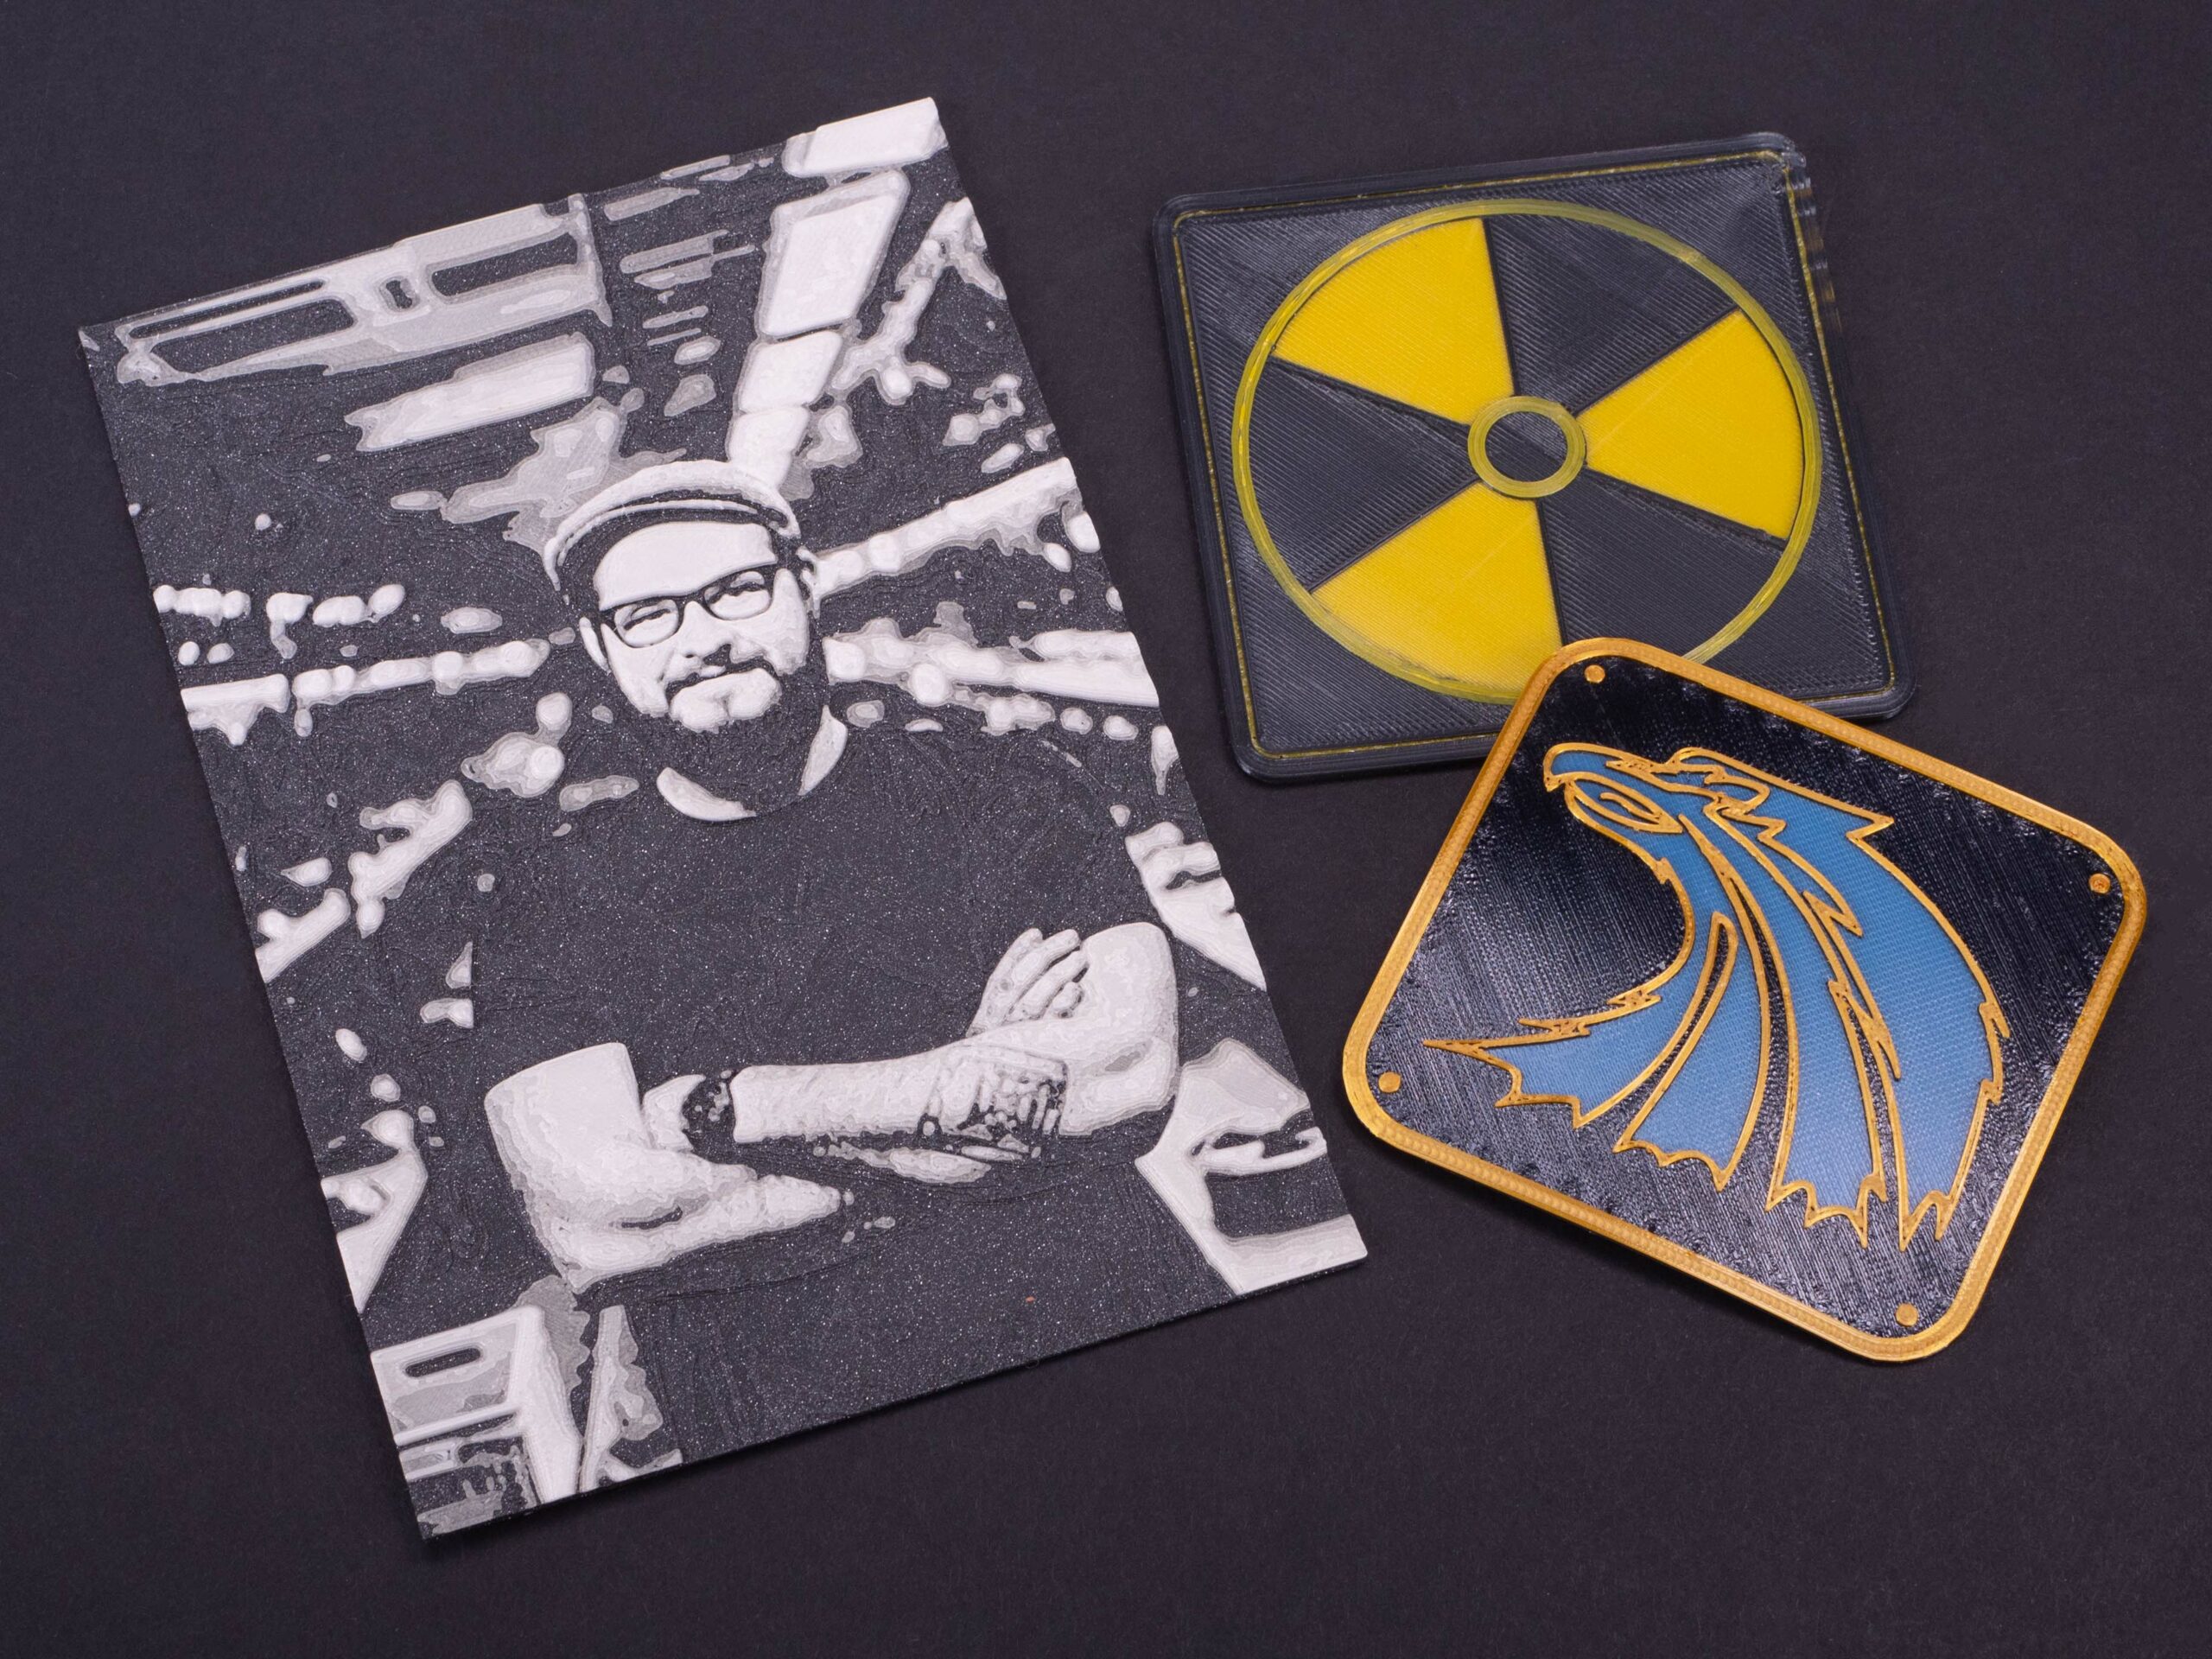
Lithophane and colored models
If you have a flat model where you need to separate a colored logo (or something similar) from the base, there’s no need to install MMU2s, prepare painting brushes, or glue the model with multiple parts. All you need to do is to emboss the logo, make it 0,3mm (two print layers) higher or lower than the rest of the model, set color change and you’ll get an amazing colorful print. This can be used for printing lithophane prints, rubber patches (see our article about flexible filaments), printing on t-shirts, making various warning signs and a lot of other cool models. It is good to keep in mind to give every color at least two layers. Some filaments may be translucent and affected by previous colors.
Embossed patterns can be easily made from good images using a vector editor (Inkscape) and a 3D modeling program (Autodesk Fusion 360). You can find more about this method in our article about 3D printing on t-shirts.
Using color change / pause print to make things embedded
Color change / pause print is not only useful to make the model colorful but it also serves as a very useful gadget for embedding nuts, magnets and other objects. One of the things worth mentioning is printing embedded nuts that hold in position and don’t fall out. Embedding technical parts makes the model look better, considering that you won’t see any hole, shiny part of a nut, or other parts that would break the overall look of the model. With proper model preparation, nuts can have higher resistance against being torn out (see more results at CNC kitchen).
How to do it and tips & tricks
While designing a model, you need to consider where and why you need to insert something into the object. Is a nice design the primary concern? Or do you want to make the model more functional? If it’s only about appearance, all you need to do is to design a hole just deep enough to hold the inserted part and cover it with only a few layers of filament (2-3 should work just fine). However, if you need a mechanical resistance, you’ll have to place the hole much deeper into the model.
It is always necessary to design enough spacing around the inserted part. If you make the hole too tight, you won’t be able to insert the part. Basically, as the nozzle of the 3D printer pushes out melted plastic, the material has a tendency to slightly expand to the sides – this is why you need to apply a certain tolerance to your prints. So it’s always good to plan ahead and take this into account. Considering the fact that you will try to embed an object in the middle of your print, you may find that the space is too tight way too late and you’ll have to scrap the print. On the other hand, too much space between the inserted object and printed walls may cause unwanted effects: e.g. nuts might slip when tightening, cause annoying rattle, etc. The most suitable spacing is 0,15mm in all directions (applies for MK3S profiles with 0,4mm nozzle and 0,15mm layer height).
And another important thing to keep in mind: embedding large metal parts requires spreading a thin layer of glue stick on them. Otherwise, the filament might not stick to the surface and your print may fail. Magnets are another tricky area. We suggest securing inserted magnets with a drop of superglue. Otherwise, the magnets may jump out and stick to metal parts of the printer.
A common problem is to select the right layer where color change or pause print should happen. Users often tend to set the change one layer above or below the desired point. You should always check the visualization in the PrusaSlicer preview that shows layers in different colors. Use the slider and inspect the result thoroughly (even multiple times) to make sure that you’ve done everything right. Don’t forget that the starting point of the color change is at the beginning of the selected layer.
Try to avoid using combinations of various materials (flexible filaments + PLA, for example) for printing various colors. Different filaments usually stick to each other poorly and tend to peel off. If you need more colors and you have only a limited amount of filaments, try to take advantage of their translucency instead of using other materials. For example, in certain cases, you can create a violet color using one layer of red filament and one layer of blue filament.
Practical applications
The theory is quite simple but what about real practical usage of color change and pause print functions? There is a ton of possibilities, and we can hardly describe all of them in detail. So here’s a couple of the most useful tips and tricks – and we’ll the rest to your imagination and experiments. 🙂
Embedding nuts – We’ll start with the most basic and simple usage. Everyone who prints technical parts probably needs to embed nuts and bolts at some point. Pausing the print might actually help you with that and even more – this way you’ll be able to make nuts completely invisible. All you need is to plan ahead during the designing phase and make proper holes for them (with 0.15 mm spacings in all directions).
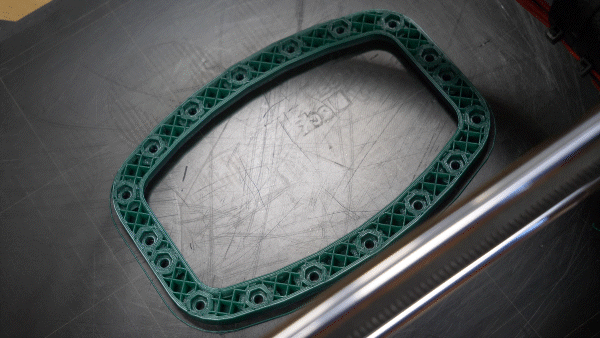
Embedding magnets – If you like to play tabletop games, you’re probably familiar with the dreadful moment when you accidentally nudge a complex set of tiles and figures and scatter them all around. Well, luckily, 3D printing can help you with damage prevention. And with making the pieces much more complex and nice, by the way. You just need to insert magnets inside the tiles to make the game plan more compact. It is necessary to make proper holes and carefully check the magnet orientation (polarity). Drawing signs on them with a permanent marker might help. And one more thing – don’t forget to secure the magnets with a drop of superglue, otherwise, they might jump out and stick to metal parts of the printer.
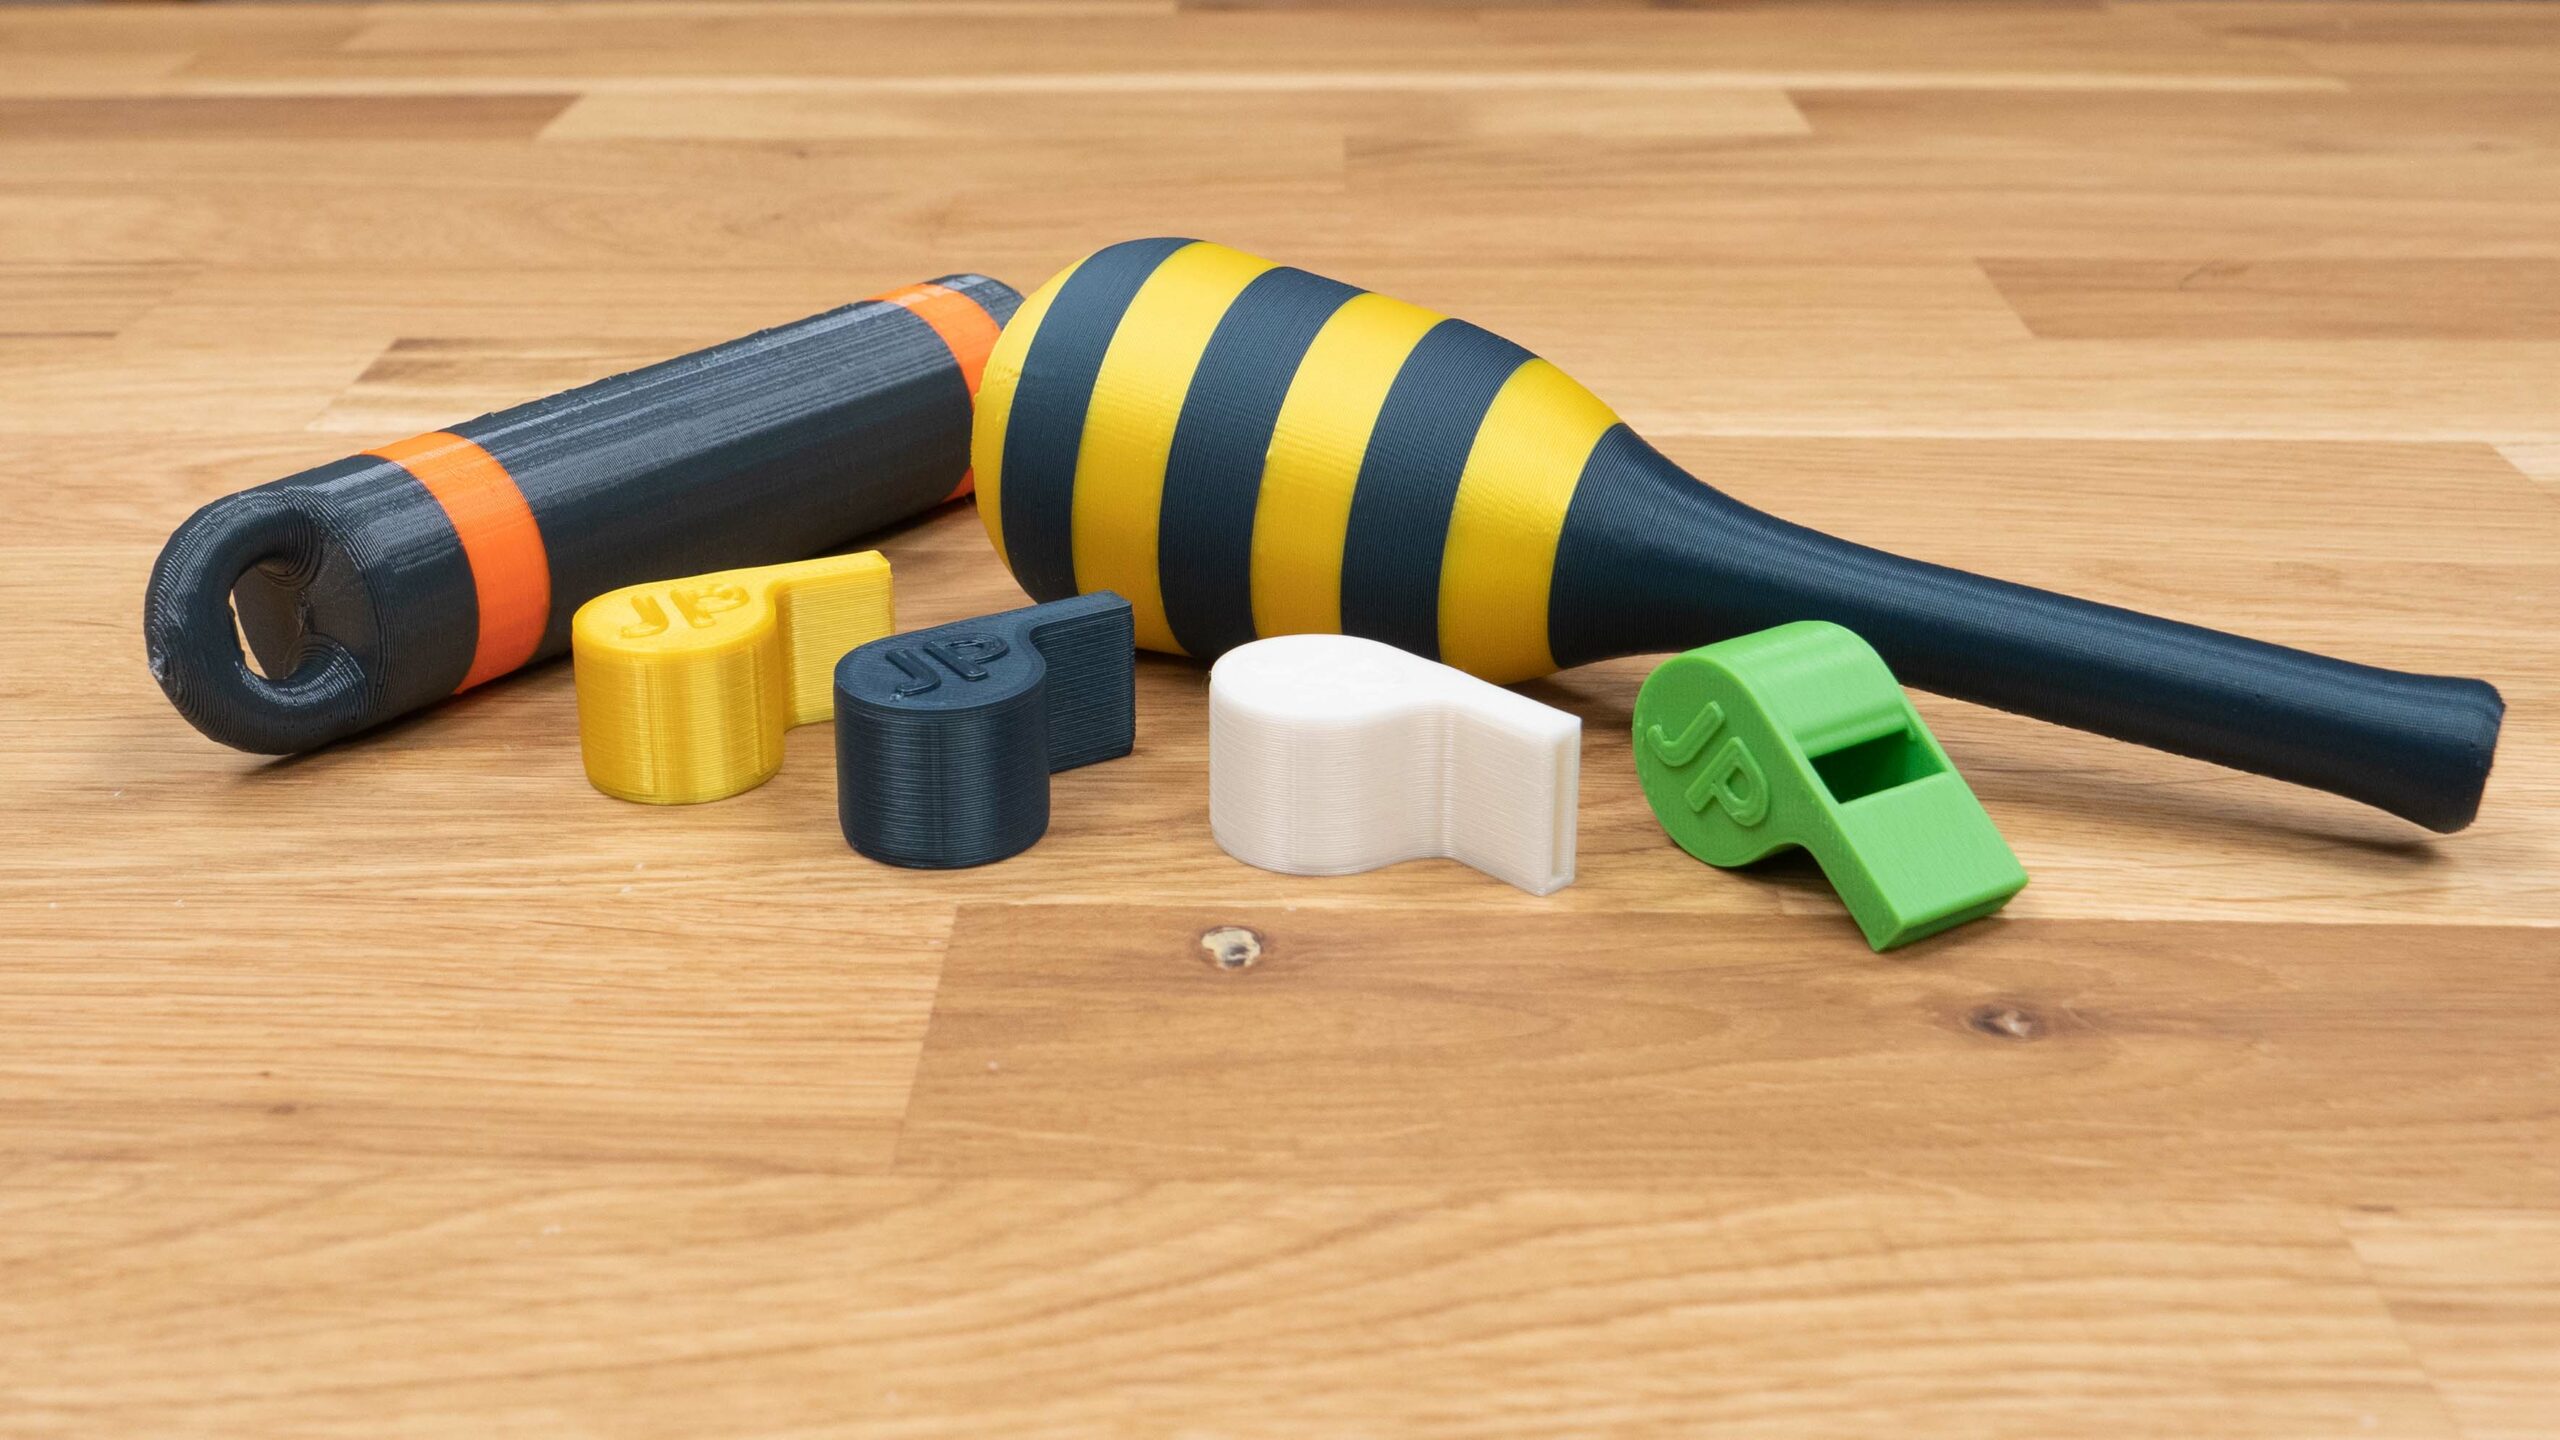
Whistles, maracas, scuba rattles, etc. – For easy prints like this you can pause print manually on the machine but with the pause print function in PrusaSlicer you can be sure you won’t forget to do so. By inserting a loose metal object inside a larger cavity, you can make a scuba rattle that will help you to communicate with your diving buddy underwater. Find out more in our articles about diving gadgets and watertight prints.
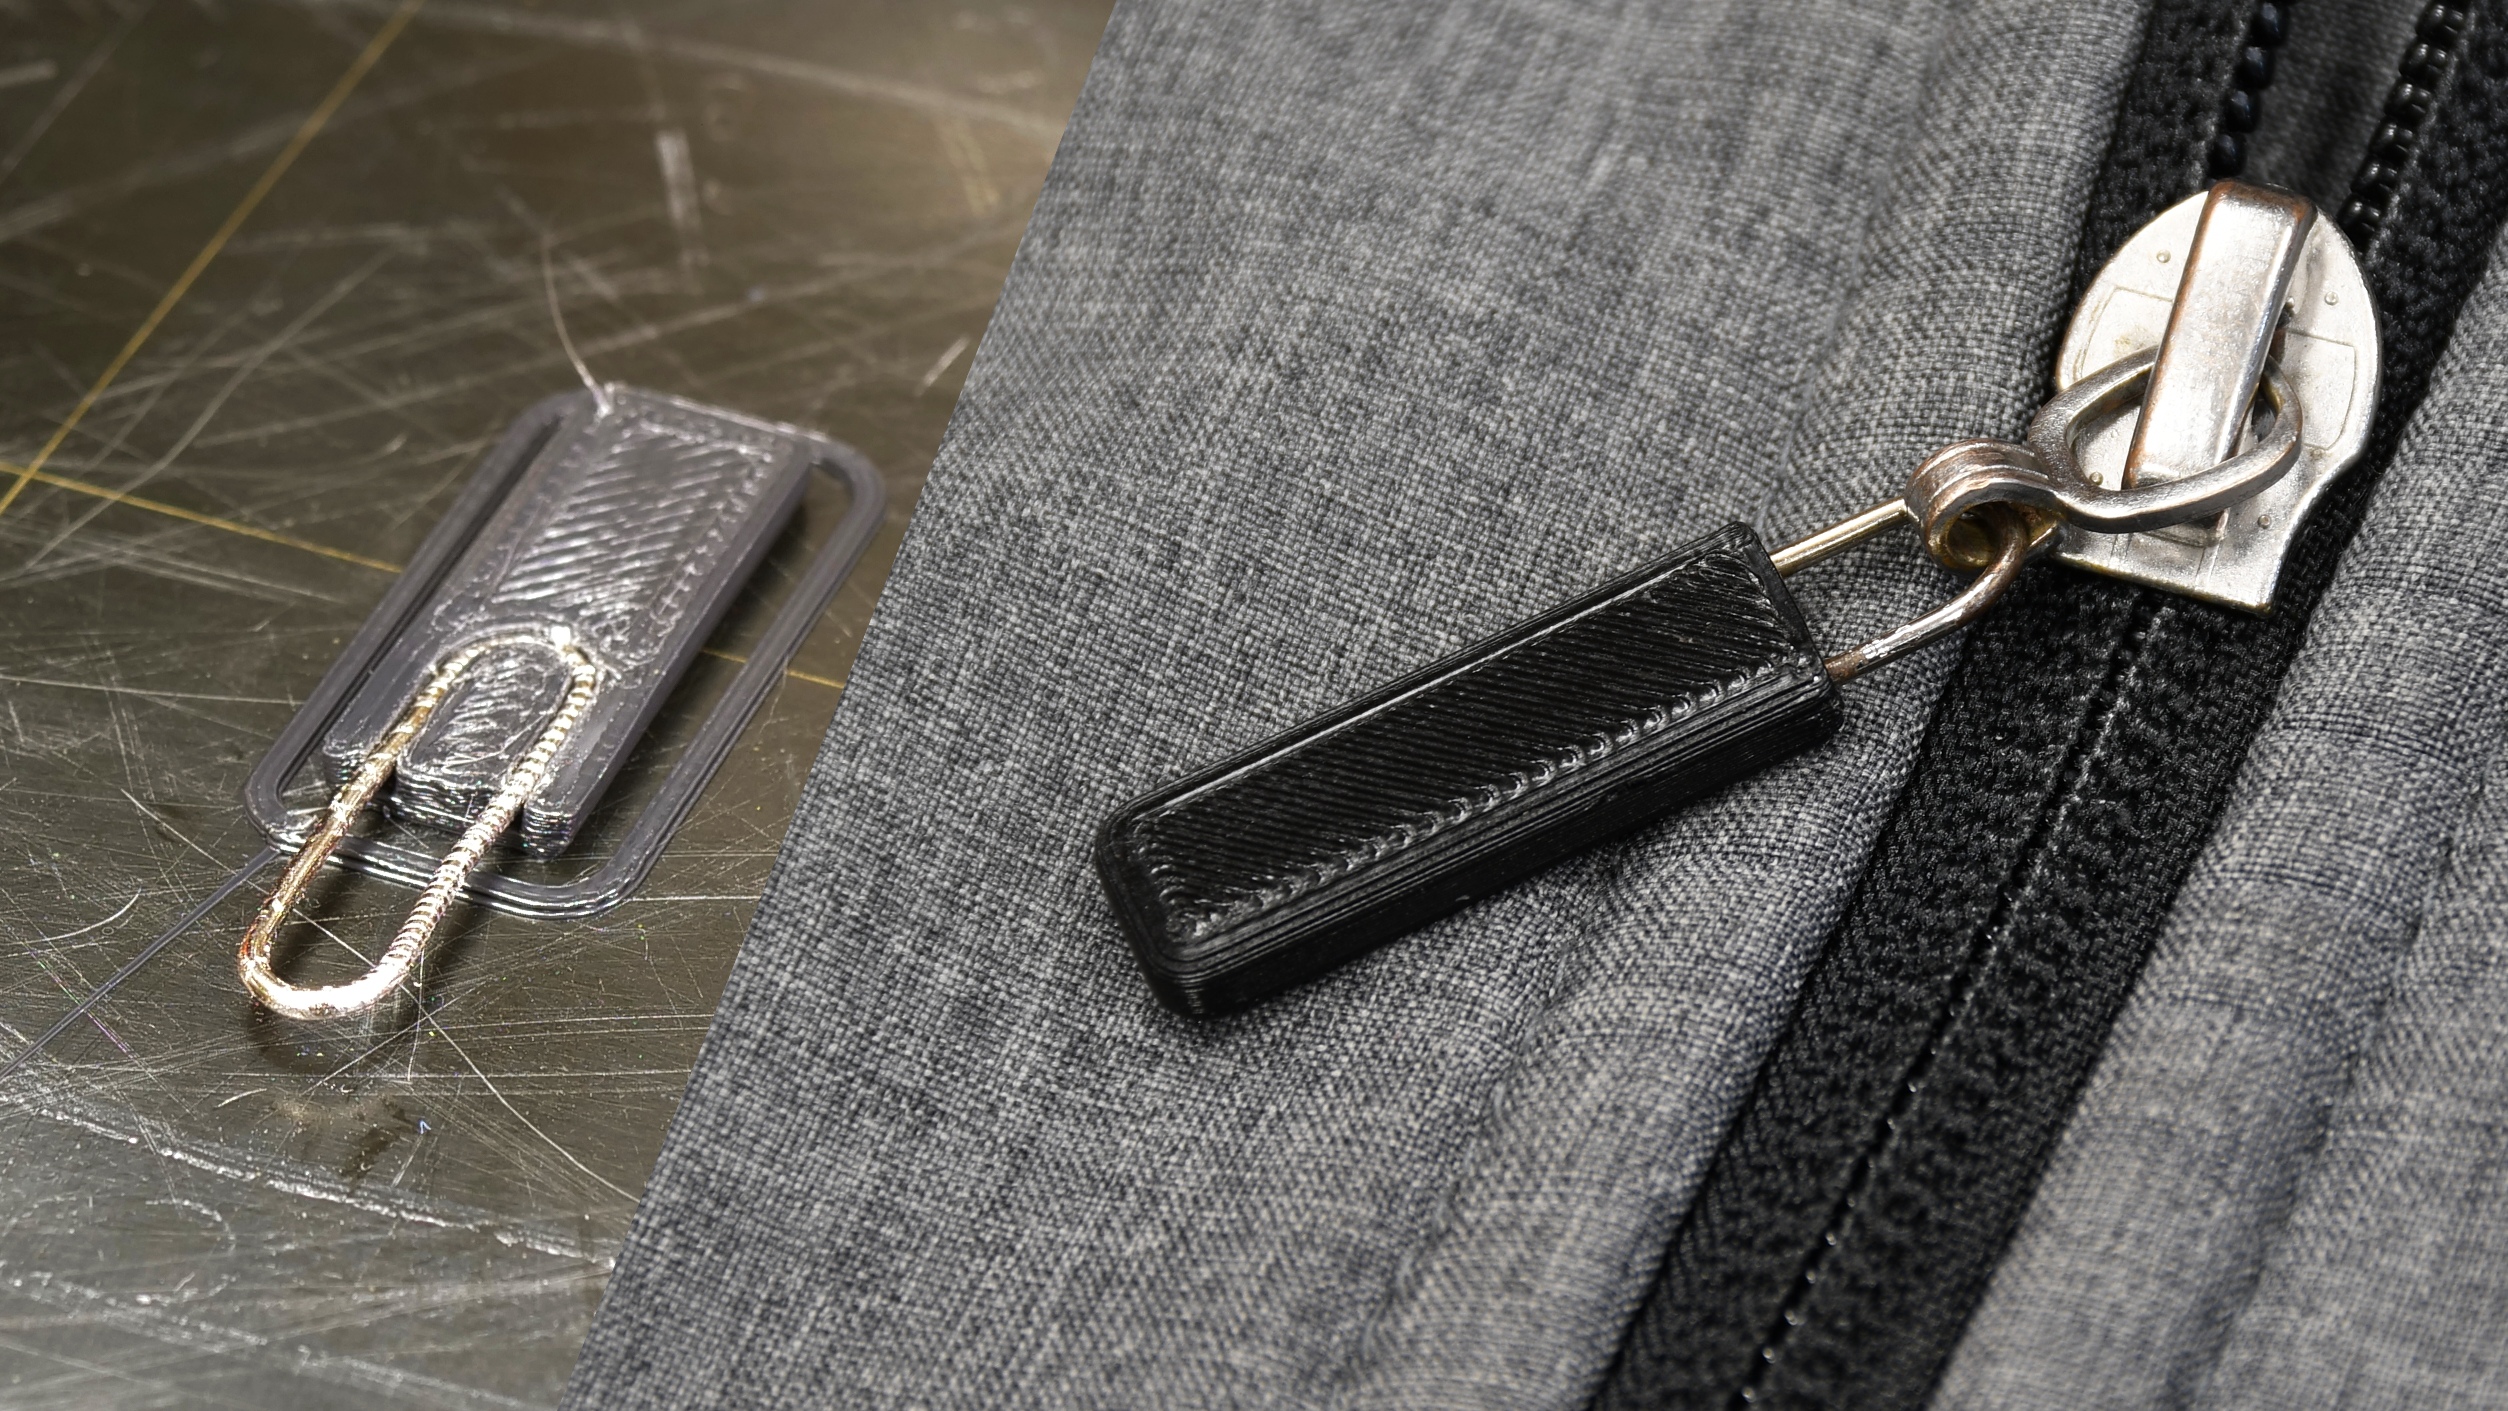
Various repairs and improvements with metal and non-metal parts – This sounds simple (and it is) but you can effectively repair various parts with pause print. This zipper repair is a great example: After three attempts that included gluing two parts it turned out that embedding a wire is the best method. After 6 months of regular use, it works perfectly!
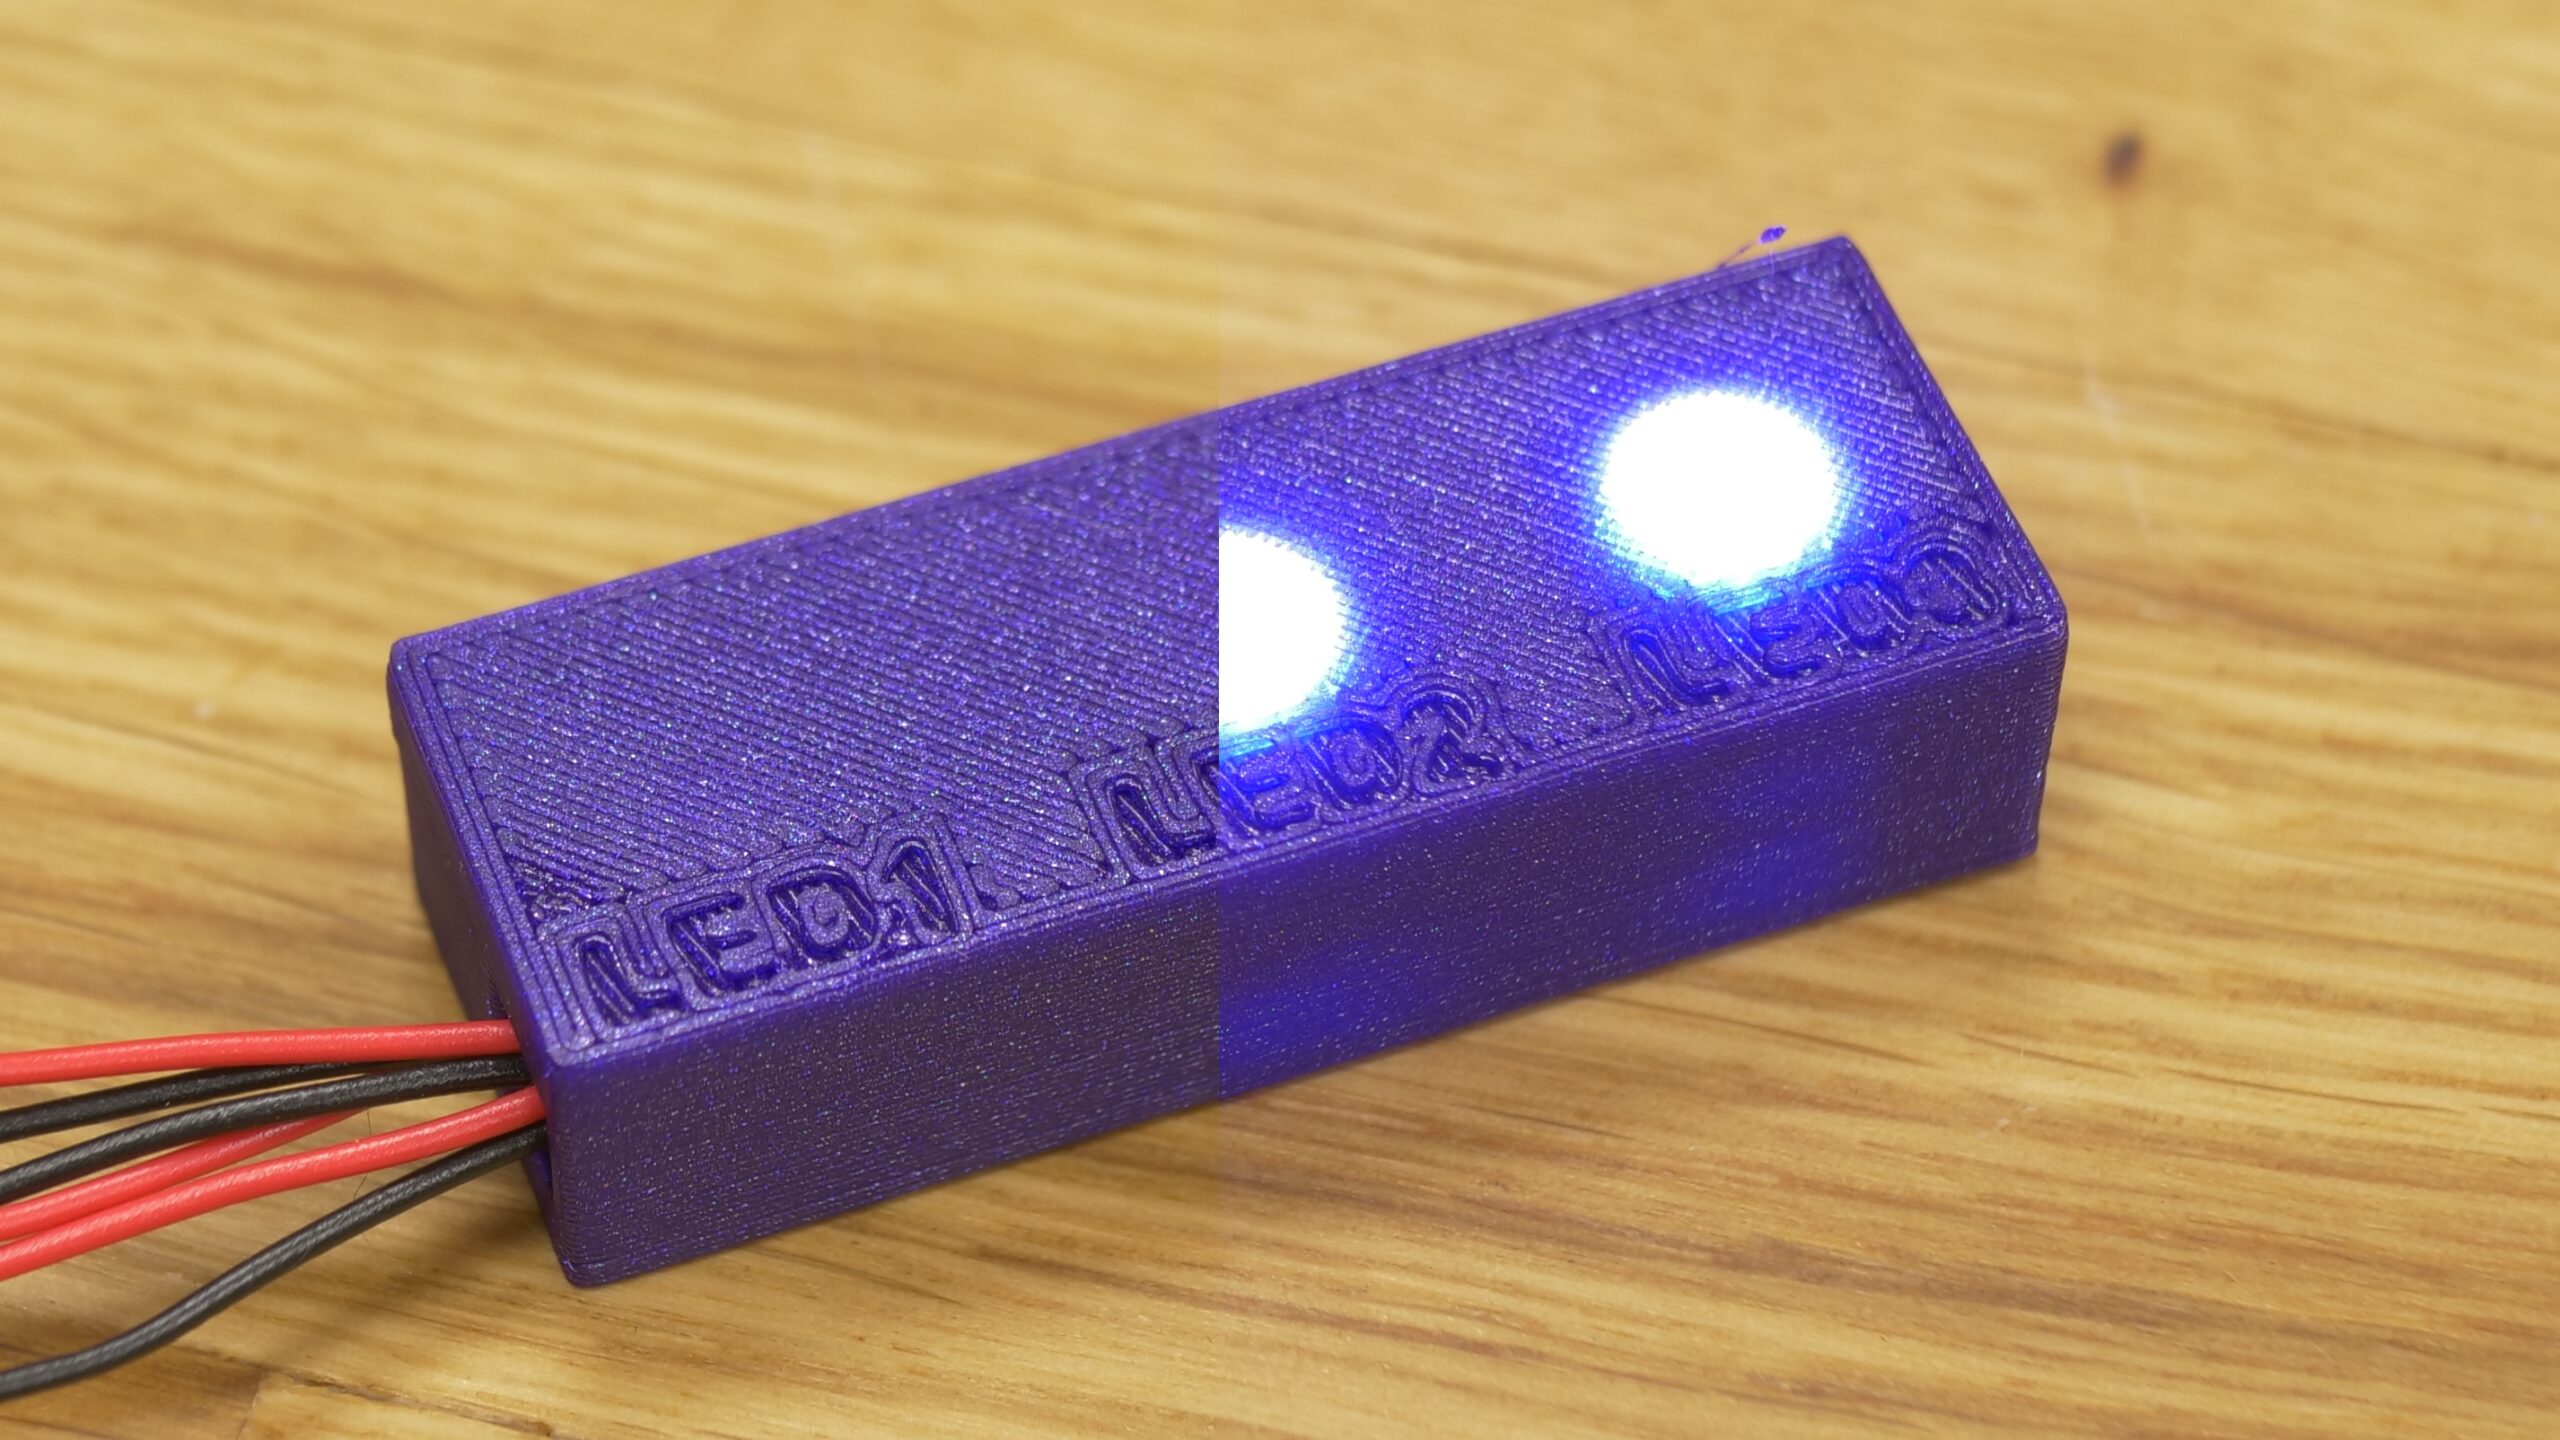
Illuminating models from the inside – Most common filaments are slightly translucent, at least in thin layers. This can be used to do some really neat tricks with LED lights. Try to make space for inserting LEDs and illuminate the model from inside.
Making heavy models – If you want to make a stylish paperweight or something that should sink fast, fill the model with plaster or epoxy resin. You may even use sand or gravel for simple parts without infill. But be careful! Any mistake may lead to a lot of mess or even breaking the printer!

Inserting supports for flexible filaments – If you’ve ever printed with flexible materials, you probably know that supports and overhangs tend to look ugly and are difficult to remove. But with certain models, it can be helpful to print a support structure with another filament (PLA, PVB, PVA, BVOH…). Simply print the insert, set the pause print function right before printing an overhang and place the insert in position. This way you can make your own soluble supports without the need for an MMU2S upgrade.
Making objects harder to break – You can pause the print and insert a large metal profile into your print. This way, even a thin and tall part can become really strong.

And this sums up our short tutorial. Did you find it helpful? Got any ideas to make something new using color change/pause print? Don’t forget to share the results!
Happy printing!
Great tips! Thanks!
Very helpful, thank you.
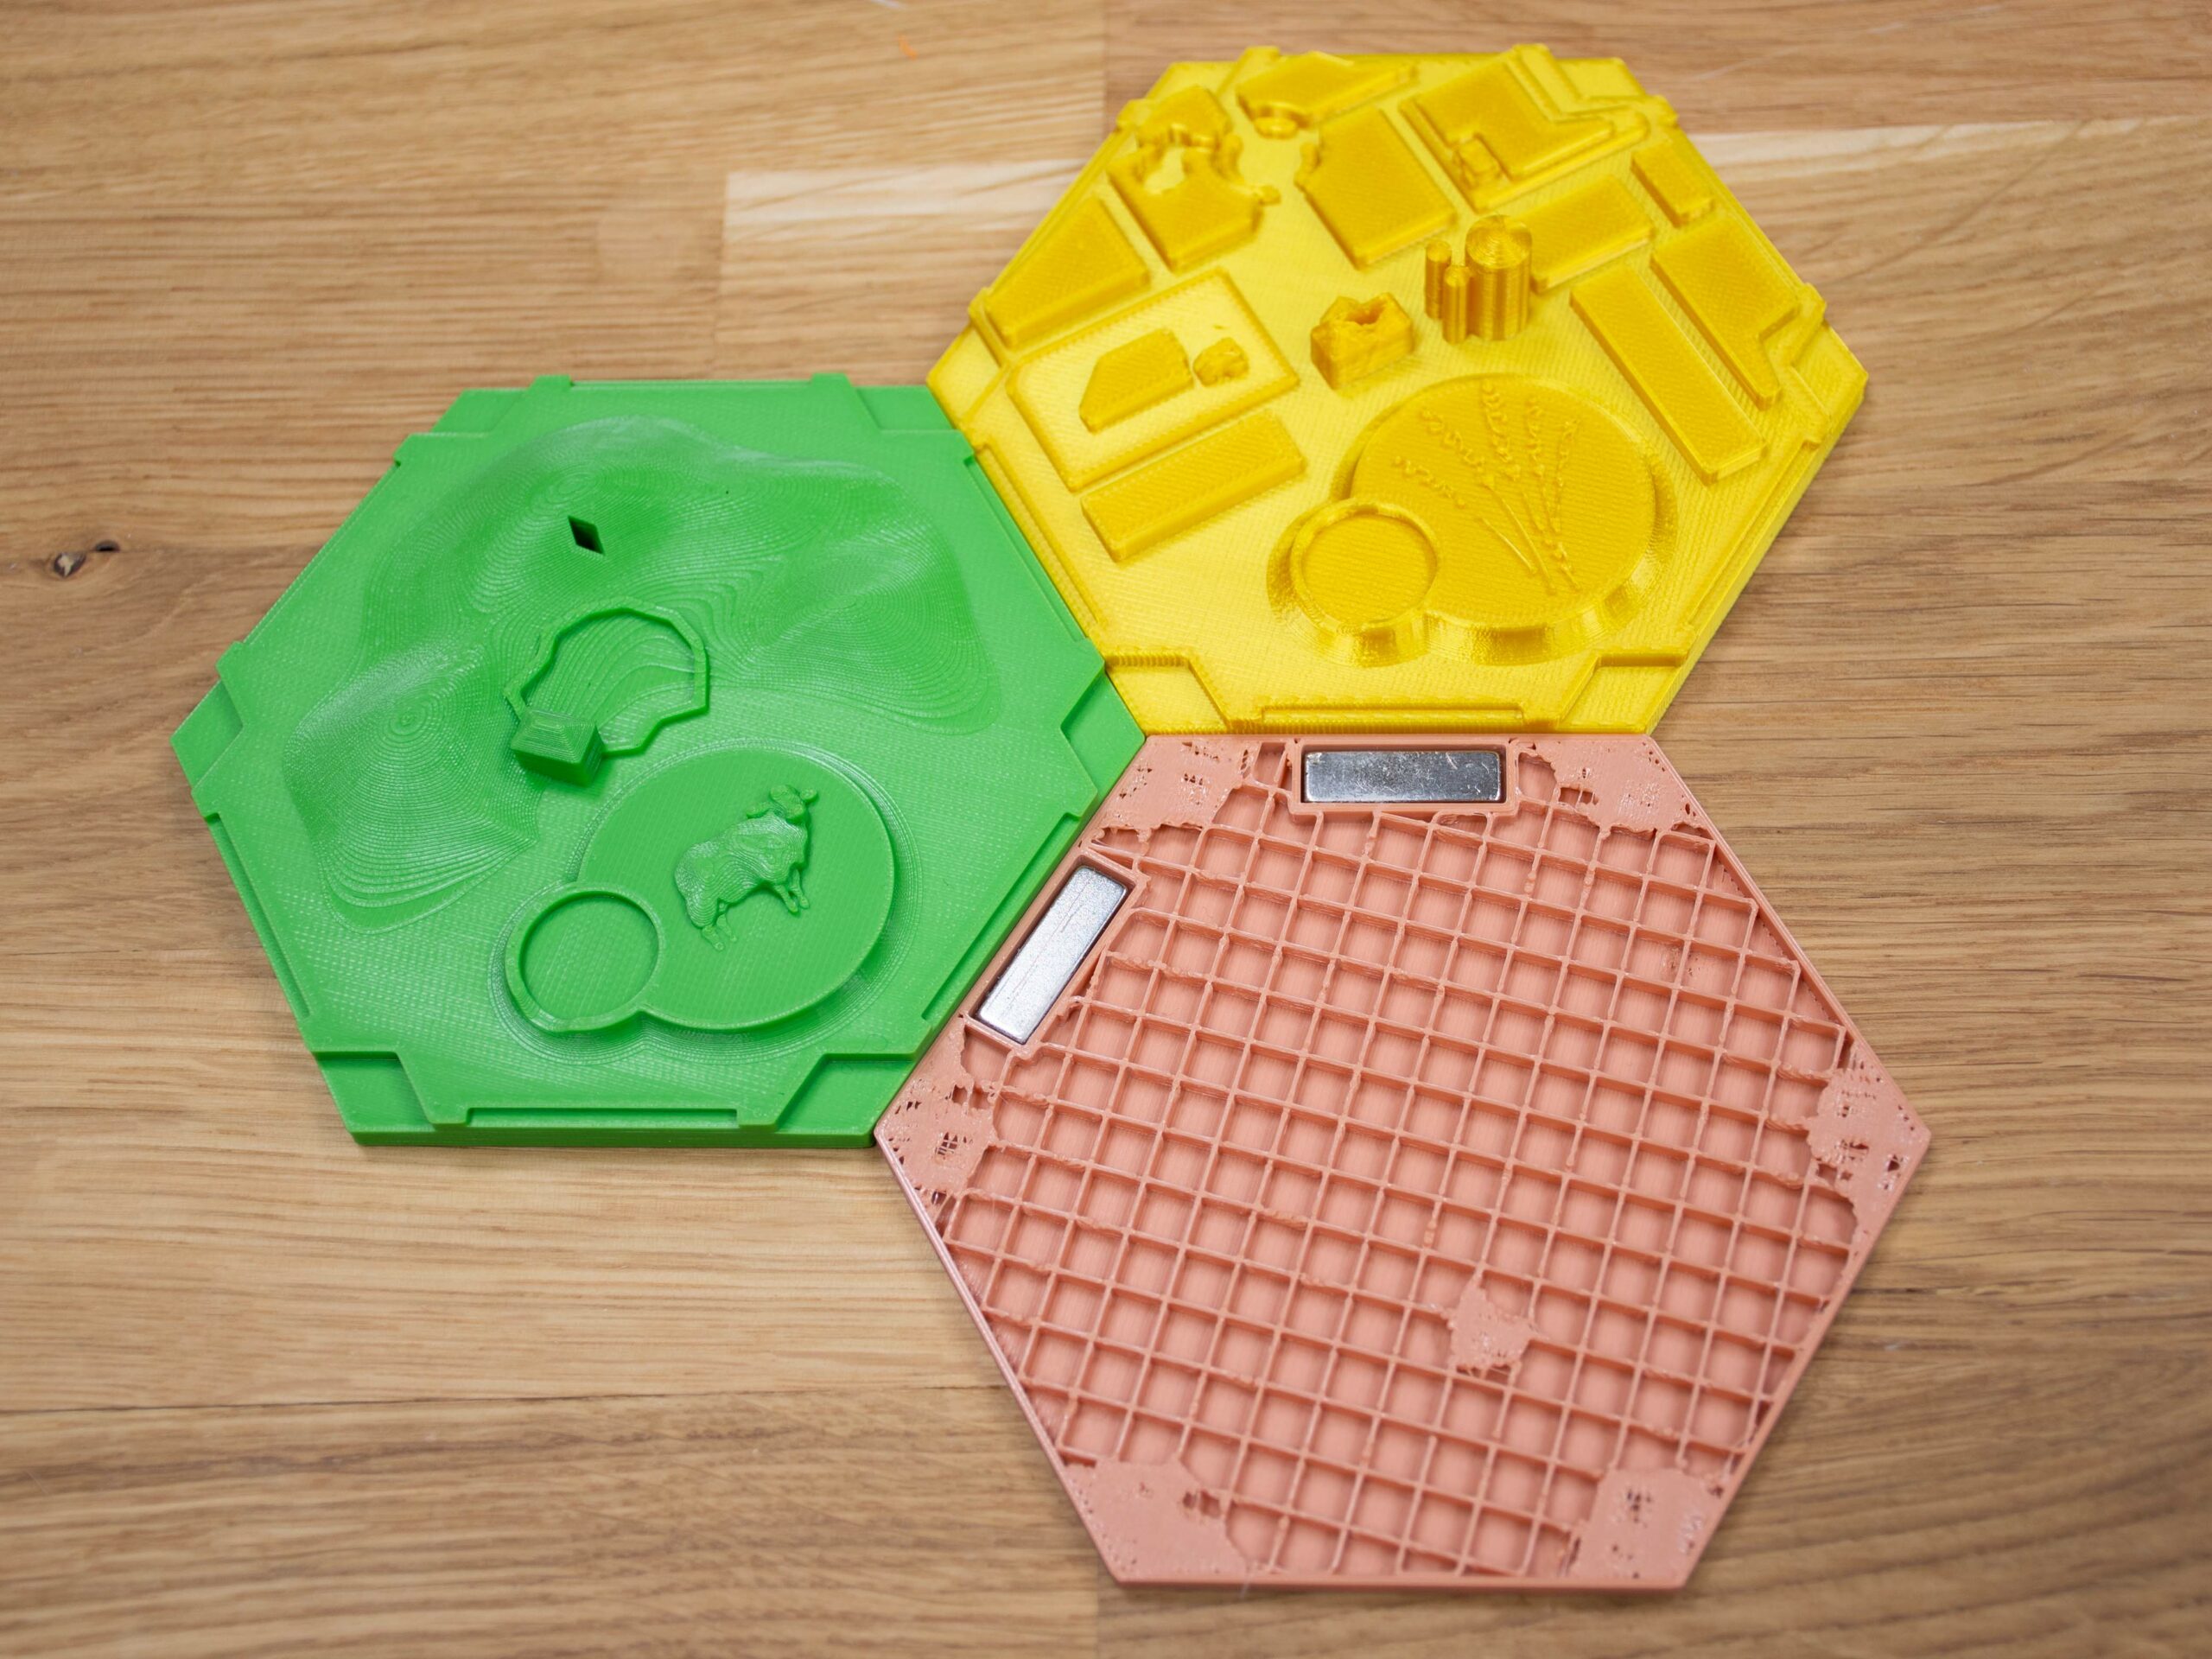
I’ve tried finding the Catan models shown, but no luck.
It looks like a remix of – https://www.prusaprinters.org/prints/72383-magnetic-catan-board/ with larger magnets.
Does anyone have a link?
Hello, I’m afraid there is no link for this. I made it in PrusaSlicer using modifiers and only for this article…
Ahh, I’ll do the same 🙂
Hallo, ich habe versucht einen Farbwechsel wie beschrieben durchzuführen. Der Slicer hat ein Logo erkannt und hat einen automatischen Farbwechsel vorgeschlagen. Der Drucker hat leider nicht darauf regiert. Ich habe einen Anycubic i3 mega s
Thanks
Thanks for this post Google