
Portable speakers have become one of the modern trends in the field of electronic devices. Their main advantages are compactness, high power and often also being waterproof. However, their main disadvantage is a high price and sometimes also lower sound quality. So why don’t we make our own loudspeaker by own standards and at a lower price? We made an easy tutorial for assembly of two versions of portable boomboxes that can be constructed by almost everyone. A 3D-printed boombox sounds surprisingly well, plus it can be cheaper than commercially available models. You just need to choose the right parts for it.
What do we need?
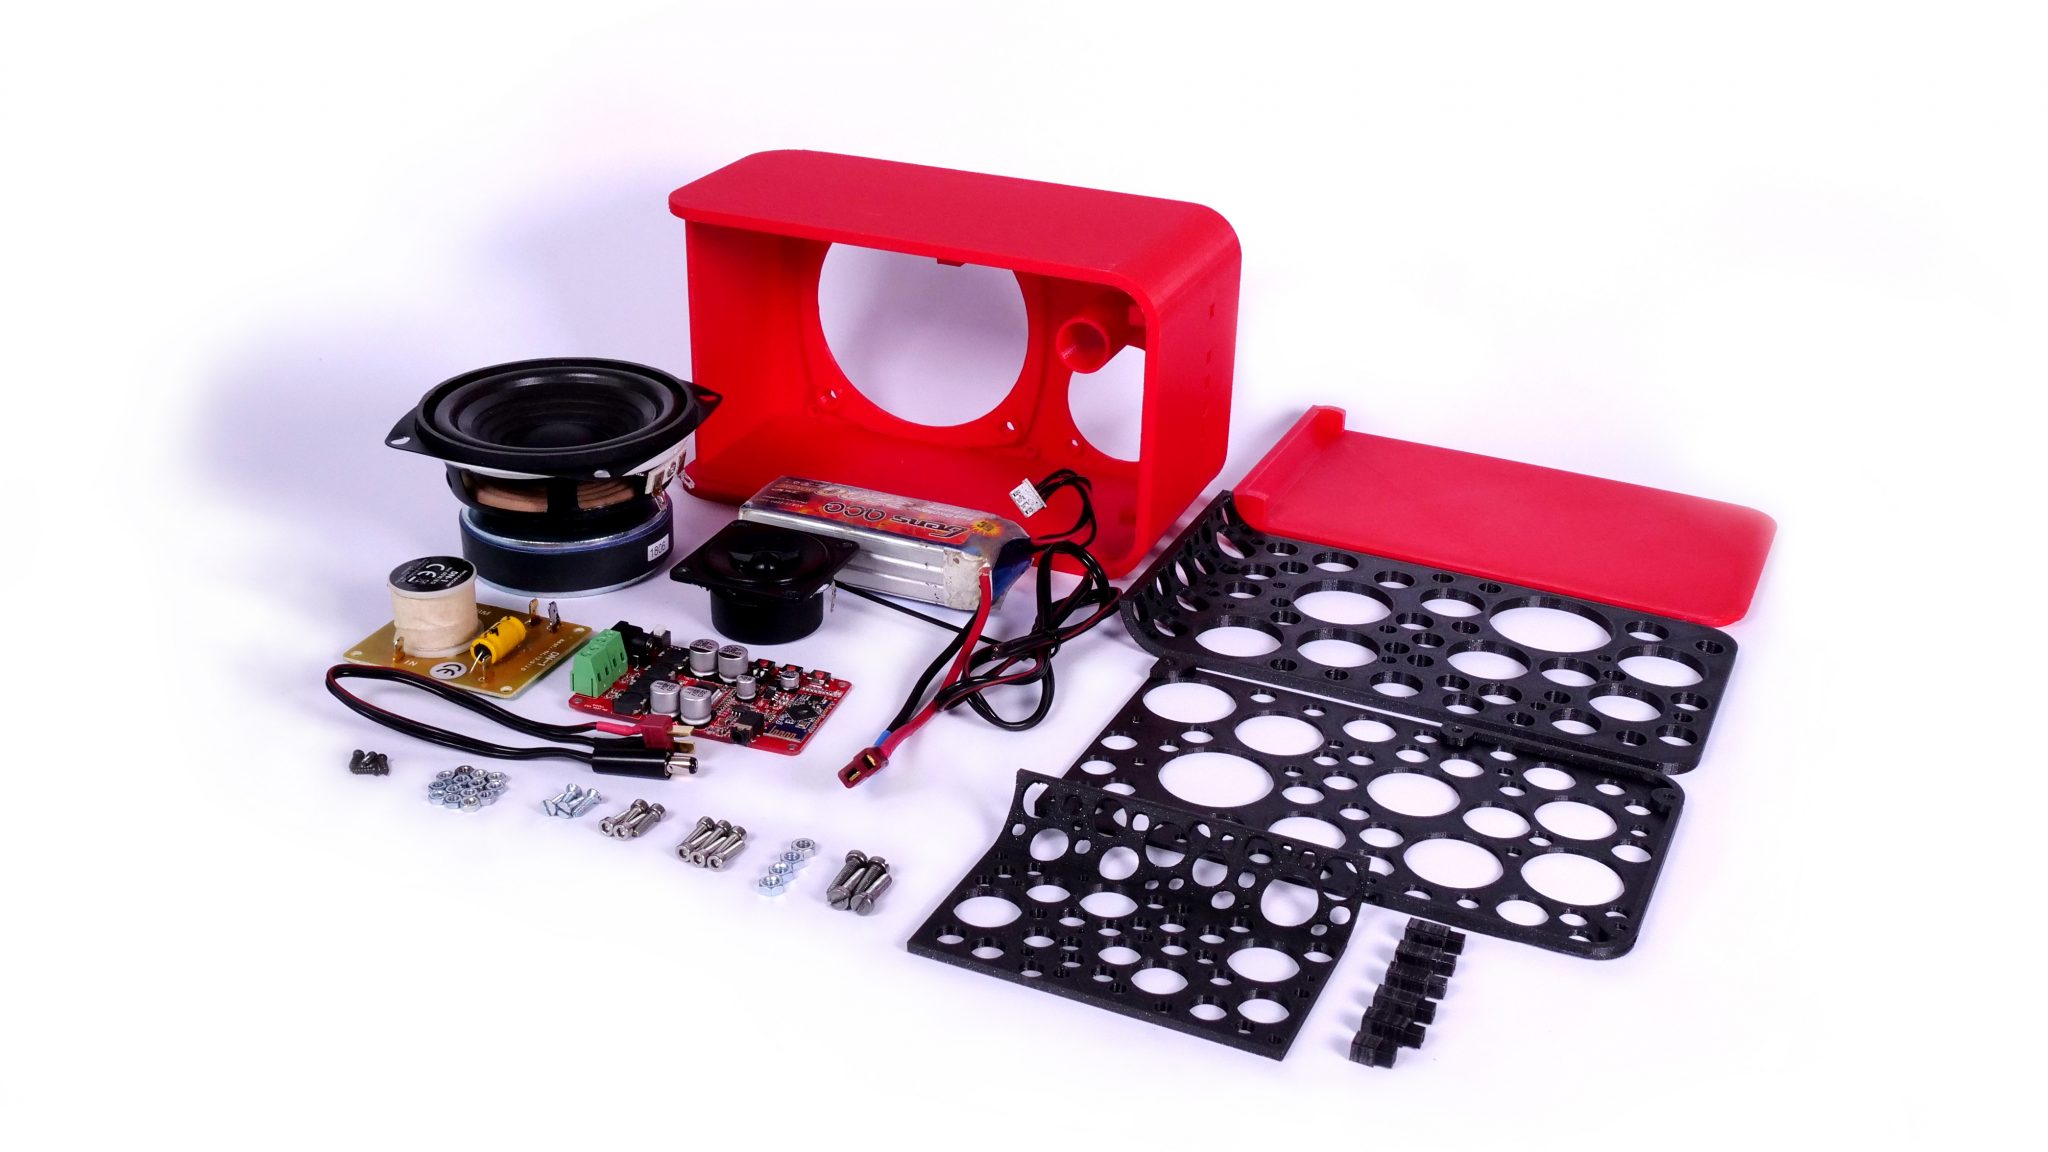
First, you need to decide what electronic parts will be used. It is advised to use branded speakers with complete technical specification. Buying no-name Chinese speakers can be risky because the specifications are often missing, so you might not be able to calculate the correct speaker volume and bass-reflex dimensions. For a better sound, we used two tweeters and two mid-range speakers connected with crossovers. Next, you need to choose the power source for your speaker. Our setup requires 12V (max 3A) – the ideal solution is a 3s Li-Po battery used in RC models. However, if you’re not experienced with this type of batteries, you should use something else, for example, 3×3,7V Li-ion batteries. We printed the speaker box on Original Prusa i3 MK3 printers with PLA Prusament. The complete list of required components and prices is below:
Version 1 (6-liter boombox)
| Part name | Quantity | Price |
|---|---|---|
| Monacor DN-1 (8Ohm crossover) | 2× | $15.5 |
| Visaton SC 5 (8Ohm tweeter) | 2× | $11.74 |
| Monacor SP-60/8 (8Ohm midrange speaker) | 2× | $44.50 |
| TDA7492P (8Ohm bluetooth audio receiver/amplifier) | 1× | $10 |
| 11.1V 2200mAh Li-Po battery | 1× | $18.79 |
| (Li-Po charger) | 1× | $13.99 |
| (Li-Po battery voltage tester) | 1× | $1.02 |
| (Li-ion battery with a charger) | 1× | $8.17 |
| Double line copper wire 2m (2×1.5mm2) | 1× | $5 |
| 1015B T-Dean connector male+female | 1× | $1.2 |
| DC power jack 5.5-2.5mm (HS2514) | 1× | $1.2 |
| 7.9mm heat shrink tube KSS F0927F-7 (1m) | 1× | $2 |
| M3x10 screw DIN 7991 A2* | 8× | $0.2 |
| M3x6 screw DIN 912* | 16× | $0.2 |
| M3x30 screw DIN 912 12.9 ZB* | 2× | $0.2 |
| M4x12 screw* | 8× | $0.2 |
| 2,5×10 self-tapping screw* | 4× | $0.1 |
| M3 nut DIN 934* | 24× | $1 |
| M4 nut DIN 934* | 8× | $1 |
| Isolation foam tape* | 1× | $5 |
| Cotton wool* | 1× | $3 |
| Total | $140 |
* Buy these items in any local store
Version 2 (2-liter portable speaker)
| Part name | Quantity | Price |
|---|---|---|
| Monacor DN-1 (8Ohm crossover) | 1× | $7.75 |
| Visaton SC 5 (8Ohm tweeter) | 1× | $5.87 |
| Monacor SP-60/8 (8Ohm midrange speaker) | 1× | $22.25 |
| TDA7492P (8Ohm bluetooth audio receiver/amplifier) | 1× | $10 |
| 11.1V 2200mAh Li-Po battery | 1× | $18.79 |
| (Li-Po charger) | 1× | $13.99 |
| (Li-Po battery voltage tester) | 1× | $1.02 |
| (Li-ion battery with a charger) | 1× | $8.17 |
| Double line copper wire 2m (2×1.5mm2) | 1× | $5 |
| 1015B T-Dean connector male+female | 1× | $1.2 |
| DC power jack 5.5-2.5mm (HS2514) | 1× | $1.2 |
| 7.9mm heat shrink tube KSS F0927F-7 (1m) | 1× | $2 |
| M3x10 screw DIN 7991 A2* | 4× | $0.2 |
| M3x6 screw DIN 912* | 4× | $0.2 |
| M3x10 screw DIN 912* | 6× | $0.2 |
| M4x12 screw* | 4× | $0.2 |
| 2,5×10 self-tapping screw* | 4× | $0.1 |
| M3 nut DIN 934* | 14× | $1 |
| M4 nut DIN 934* | 4× | $1 |
| Isolation foam tape* | 1× | $5 |
| Cotton wool* | 1× | $3 |
| Total | $100 |
* Buy these items in any local store
Right before you start building your loudspeaker, it is important to realize that it is made of large parts that will take tens of hours to print, and will consume a lot of material. Also, you need to print supports and set high infill (60-80%) to achieve the best possible sound of the speaker box. Therefore, you should prepare a lot of filament (we prepared 2 kg of Prusament for version one and 1 kg for the second) and have enough time for printing. The boombox took us approximately 130 hours with a 0.4mm nozzle and a 0.3mm layer height. The smaller speaker took us something about 36 hours of printing. We used Prusament PLA Mystic brown, Lipstick red, and Galaxy black. If you want to use the speaker outdoors, we recommend using a stronger material, for example, PETG. Both models have been sliced in Slic3r PE.
Boombox assembly (2x25W)

1) If you have all parts prepared and support material removed, you can start with the assembly. It’s recommended to place all nuts in position first. There are 16 holes for M3 nuts and 8 holes for M4 nuts.
2) Complete the locks as depicted in the picture below. You will need 2 springs (simply take them from a pen) and 8 M3x6 screws. Make sure that the lock mechanism can move nice and easy. If not, sand it a little.

3) Now it’s necessary to try whether all the parts fit together. Prepare all six buttons, remove support material and try to fit them inside prepared holes, one by one. If you find them hard to move, sand them a little. Next, put both halves of the speaker box together with the back door and handle. If the parts do not fit together, sand them again. Everything should fit perfectly and the door mechanism with the handle should be able to close and open easily. Do not glue the parts together and do not use brute force!
4) Disassemble the speaker box again, you won’t need it for now. Prepare the electronic parts: Cut the wires long enough, so they reach all the way from the crossovers to the speakers. Solder all connectors to the battery, powering cable and crossovers according to the attached schematic. The amplifier and speakers can be left unused for now. The instruction manual with the wiring diagram for the crossover can be downloaded here.

5) Check the crossover wiring and screw the crossovers in position.
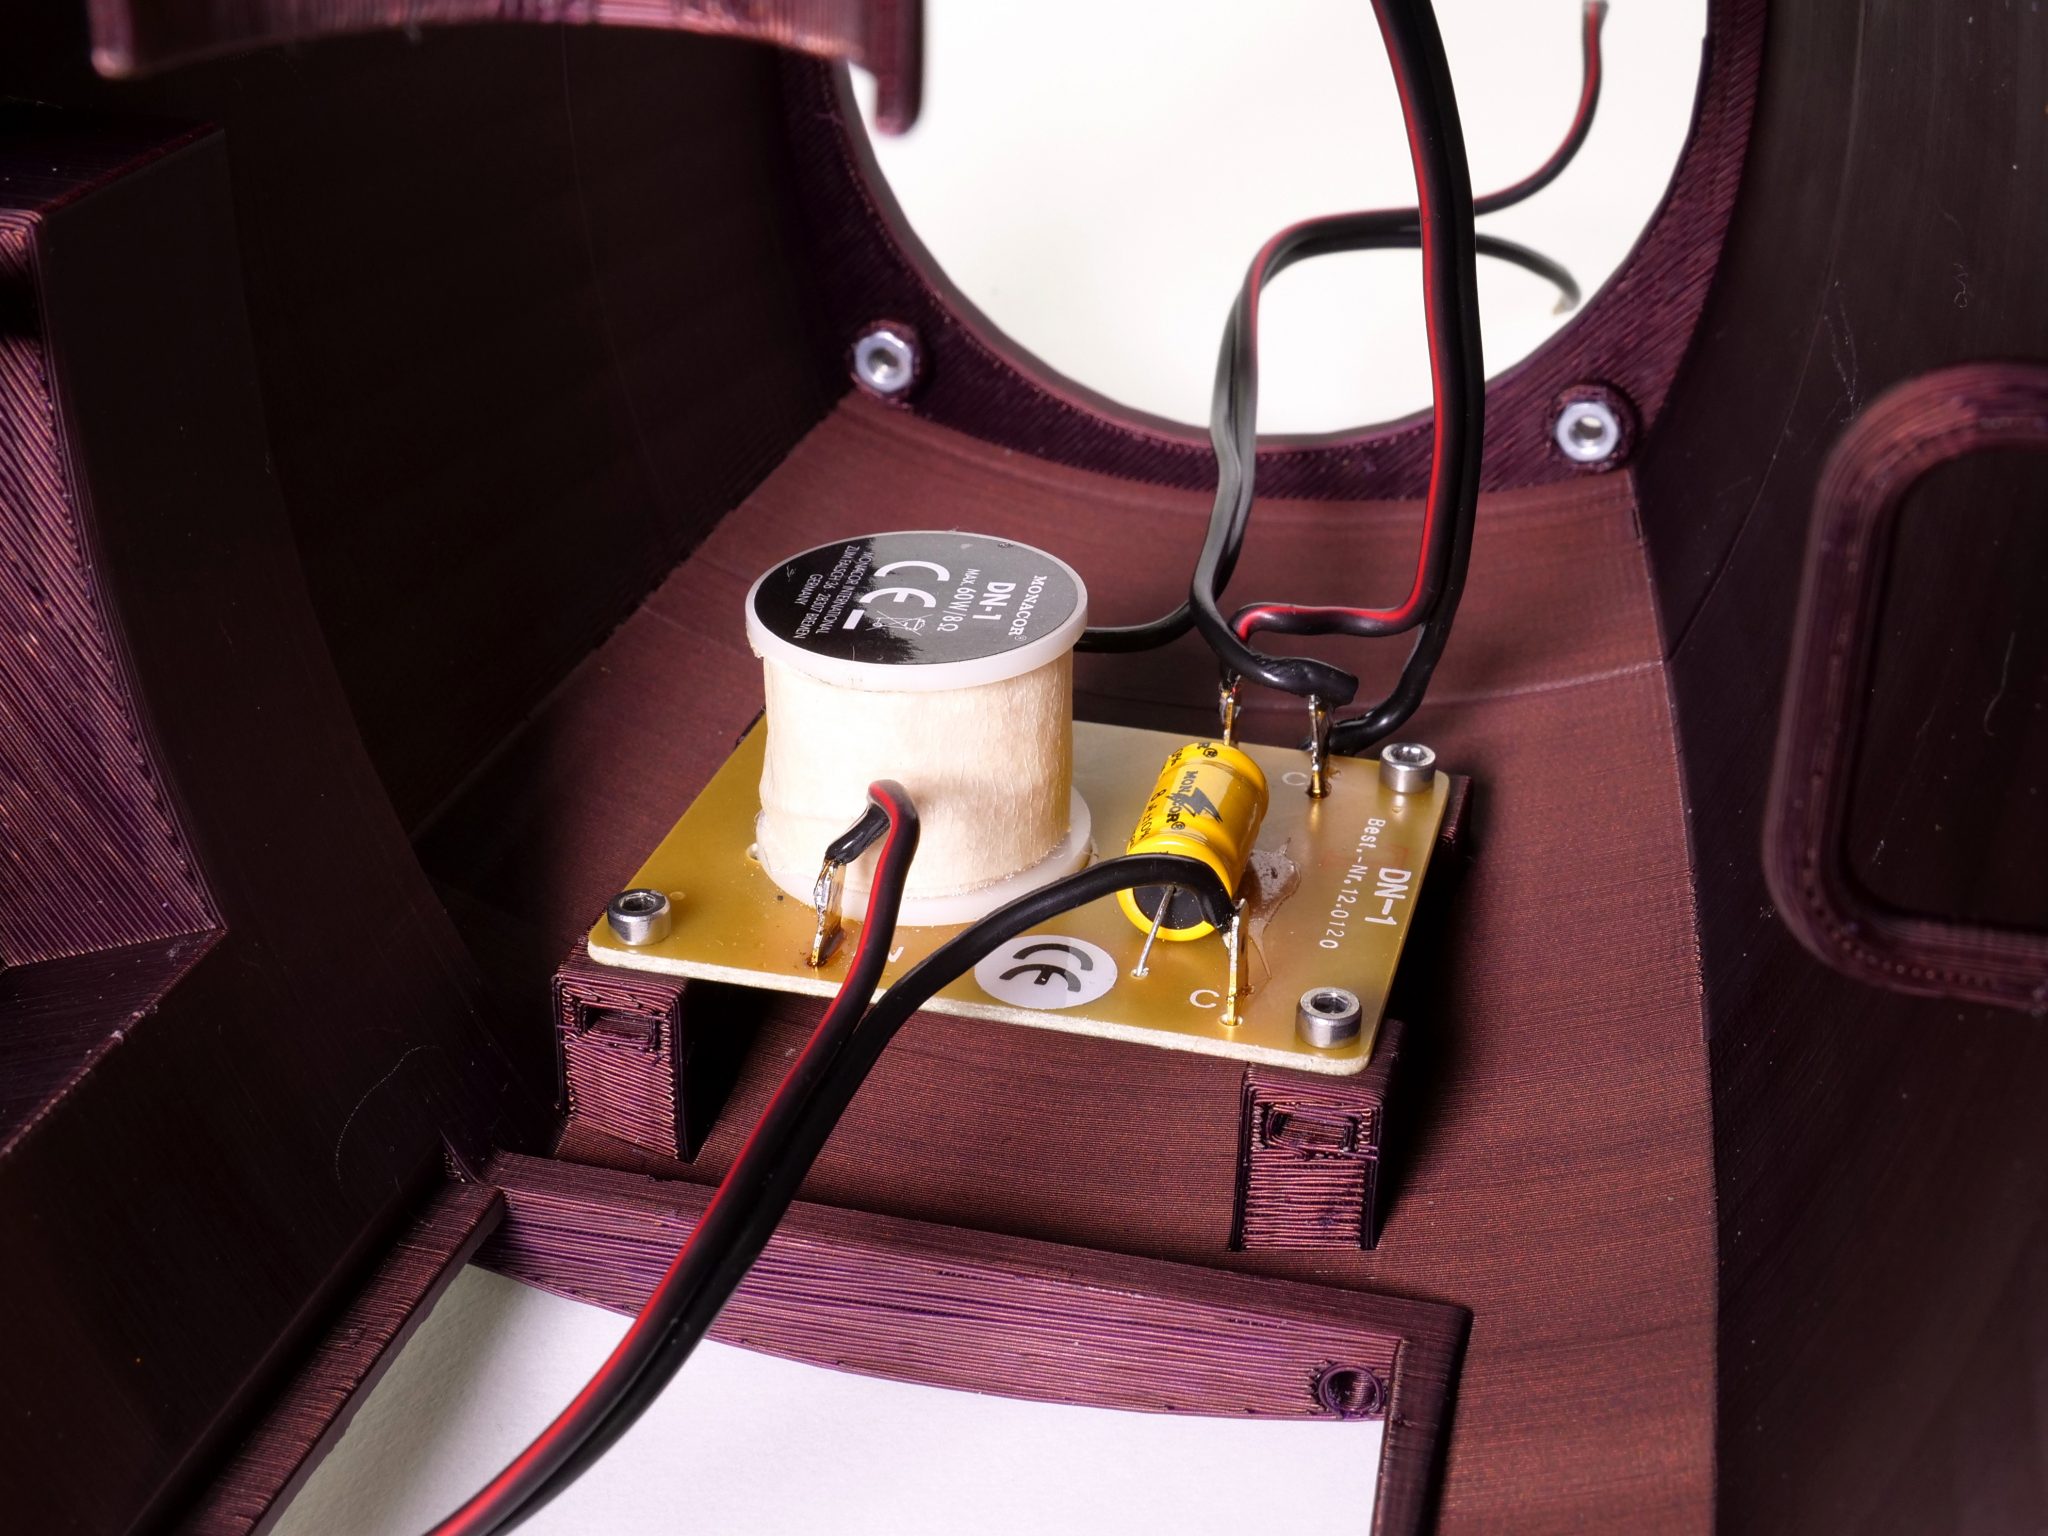
6) Assemble the speaker box once again. If you are sure that everything fits fine, glue the large parts together. Do not forget to place the door in the correct position! Now use M3x30 screws to attach the handle. Connect crossovers to your amplifier according to the schematic and attach the amplifier to the box using self-tapping screws. Do not forget to place the buttons!
7) Solder all speakers to crossovers. Check the wiring again. Now you can screw all speakers to the box. However, if you have a foam isolation tape, it is good to place it between speakers and the box.
8) Plug the electronic parts in, and check whether they work properly. If they do, you can secure all nuts and screws with glue (vibrations can loosen the screws and make unwanted sounds), then stuff the inside with cotton wool for a better sound (but not too close to bass-reflex). Attach a battery to the box and the boombox is ready.

Building a smaller speaker (1x25W)
Assembly of this smaller version is much easier. Printing and assembly do not require as much time as the bigger version. However, the main disadvantage of a smaller speaker volume is a weaker bass sound, and it is necessary to boost it through software settings on your cellphone or computer.
1) First, you need to remove support material and place all nuts to correct positions (14× M3 and 4× M4).
2) Make sure that everything fits together. If not, you can sand the printed parts. The door mechanism should slide in the railings with no resistance and the lock on its end should stop them from unwanted opening. Remove support material from buttons and make sure they can move easily inside prepared holes. If everything fits, glue carefully a small grid on the short side of your speaker and second grit on your sliding door. The front cover will be screwed later.
3) Prepare your electronic parts: Cut the cables, so they reach all the way from the crossover to the speakers/amplifier (it is better to prepare the wires a little bit longer for better manipulation). Solder all cables to the crossover according to the schematic. Solder 1015B connectors to the battery and powering cable. Solder an HS2514 plug to the other end of the power cable. Use heat shrink tubes instead of using the plastic cover of the plug. Otherwise, you won’t be able to place the amplifier in its right position.
4) Connect the power cable and crossover to the amplifier. Insert buttons into prepared openings and secure the amplifier in position using 2.5mm self-tapping screws. Screw the crossover right after it.
5) Solder the speakers to wires leading from the crossover. Check if your wiring is correct, then put the speakers in position. Seal the speakers with foam tape before you secure them with screws.

6) Attach the front cover using six M3x10 screws. Check the polarity of wires and insert the battery between the mid-range speaker and the side of the speaker box. Stuff the inside of the speaker box with cotton wool to prevent unwanted vibrations (do not place the wool too close to the bass-reflex).
A little bit of theory behind building your own speakers
Some of you might want to design your own speaker to fit exactly your individual ideas. Perhaps you will choose to build transmission line speakers that are very difficult to build with wood but might work very well thanks to the 3D printing technology. However, it’s necessary to study a little bit of theory before you begin to build your own speakers. We recommend especially these two websites: www.loudspeakerbuilding.com and www.diyaudioandvideo.com – they offer great instructions, calculations and explain the theory of building speakers really well.
To summarize what you should expect if you want a clear sound with strong bass: First, it’s important to choose proper electronic parts. Cheap nameless speakers bought on eBay or Aliexpress aren’t a good choice due to lack of needed technical specifications (for example the fs parameter – resonance frequency). You will hardly calculate dimensions of a speaker box without proper values and as a result, the sound will be distorted.
Next, you need to decide how many lines do you want in your speakers (two-line, three-line etc.). If we use a full range speaker connected directly to the amplifier, the speaker will play but it will also have distorted sound. Therefore it’s better to choose more lines with different speakers connected through crossovers (our speaker set is a two-line, built using a tweeter and a mid-range speaker). It is also important to choose parts with the same impedance and speakers with the same or higher power than the amplifier (our amplifier has the output of 2x25W and the mid-range speakers have a peak power of 60W).
It’s good to follow calculation results during the construction of a speaker box. If the results say that your bass speaker should be in at least 6l enclosure, it is not recommended to make it smaller. As a result, the speaker would have weaker bass and you would have to enhance sound in your equalizer or even be stuck with worse sound quality than you would wish. You can also enhance the bass of a small speaker with a so-called bass-reflex or passive membrane.
Conclusion
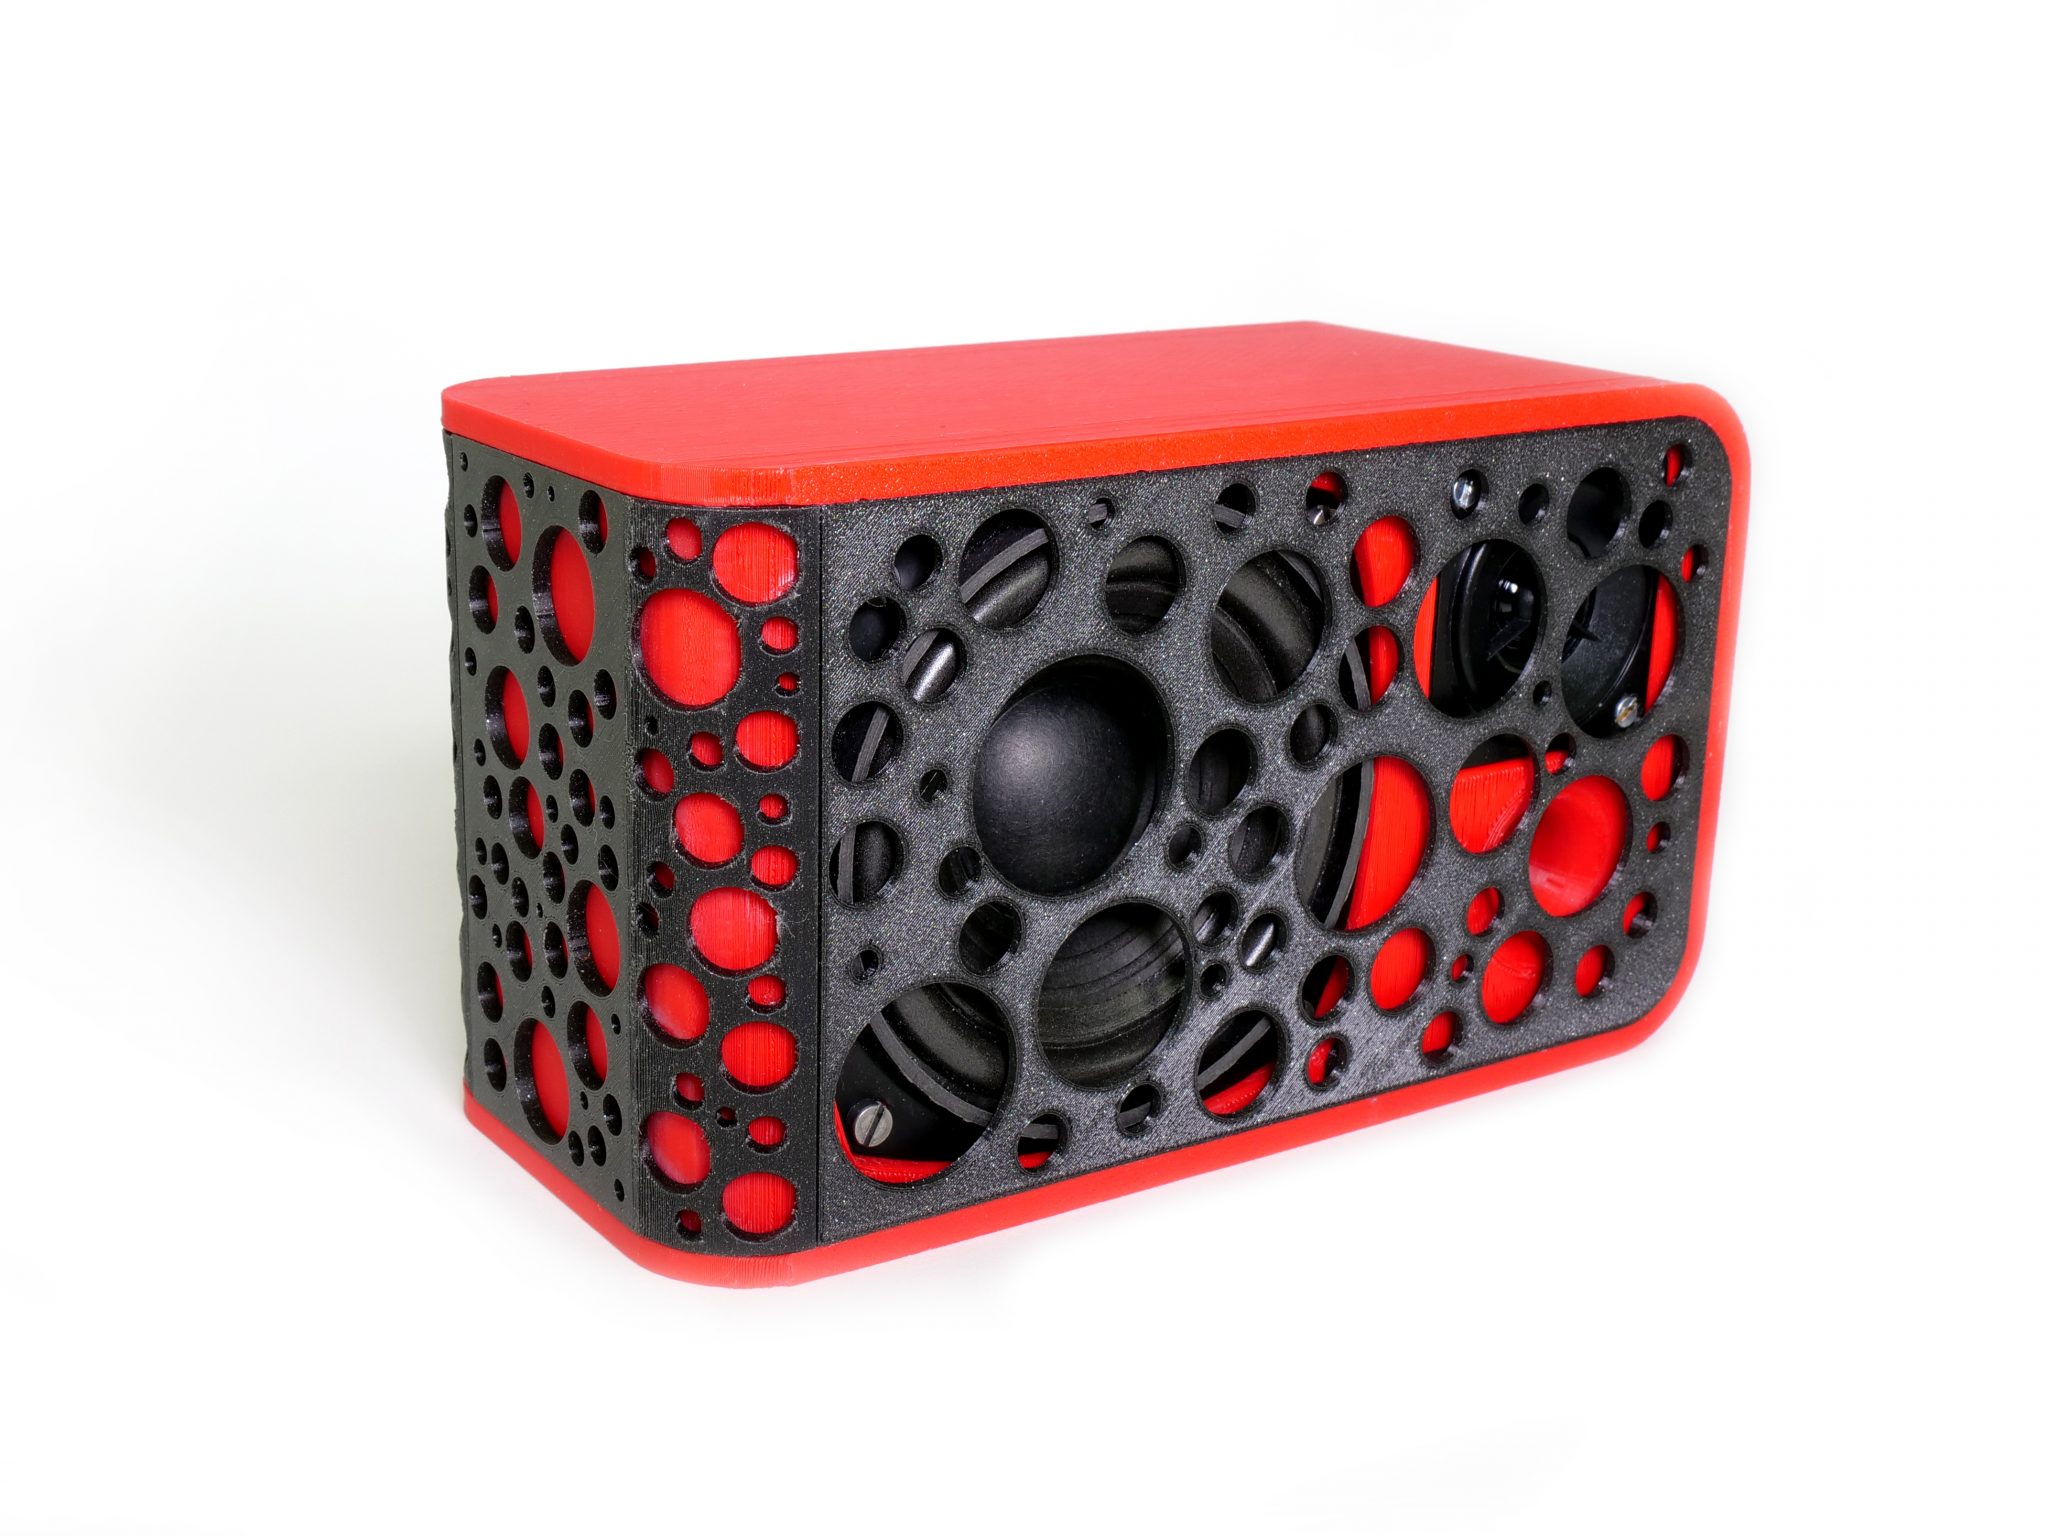
You can, of course, play around with the design and come up with your own version of a portable speaker that fits all your needs. The larger boombox we made is a bit heavy for regular carrying around and the small one needs a bit of software equalizer tweaking to deliver proper bass. Hopefully, you found this article useful and it will help you in the first steps towards 3D printing your own boombox. Feel free to share your own designs or improvements in the comments!
I don’t see the battery discharge protection. Discharging a Lipo below 3.00V/Cell is fatal for the battery. If you forget to switch off this thing the battery will be drained until damaged. You need a batery protector circuit. The minimum is an undervoltage indicator buzzer. There are LiPo batteries with built in undervoltage protection but rare and expensive. Without undervoltage protection NiMh cells in a printed tray could be a better solution.
Are there somewhere the sources of the design? I would like to adjust some of the components and don’t like to change the STL files.
Ahoj,
Protože na Youtube nikdo moc komentáře asi nečte, zkopíruju ho sem….
Chtěl bych tímto poděkovat za zajímavý návrh. Dal by se zveřejnit model většího boomboxu rozdělený třeba na 3 ks. Bohužel ne všechny tiskárny mají 200mm a více na výšku. Chápu, že je tento model šitý na míru pro Pruša tiskárny, já mám Profi 3D maker a tam mám jen 190mm na výšku. Myslím, že kdyby to bylo na více částí, tak by tisklo i více lidí – neměli by třeba obavu, že jim tak velký a časově náročný tisk nevyjde? Klidně bych si model přepracoval, pokud by byl k dispozici v editovatelném formátu (ne STL) a nenarazím samozřejmě na autorská práva. Druhá věc je rozlišení (plošky po obvodu) pokud to není designový záměr 🙂 . Díky