
Although the perimeters setting is easy, many people still struggle with it. Even some of them do not know why they should use it. So what about you? Are you familiar with PERIMETERS?
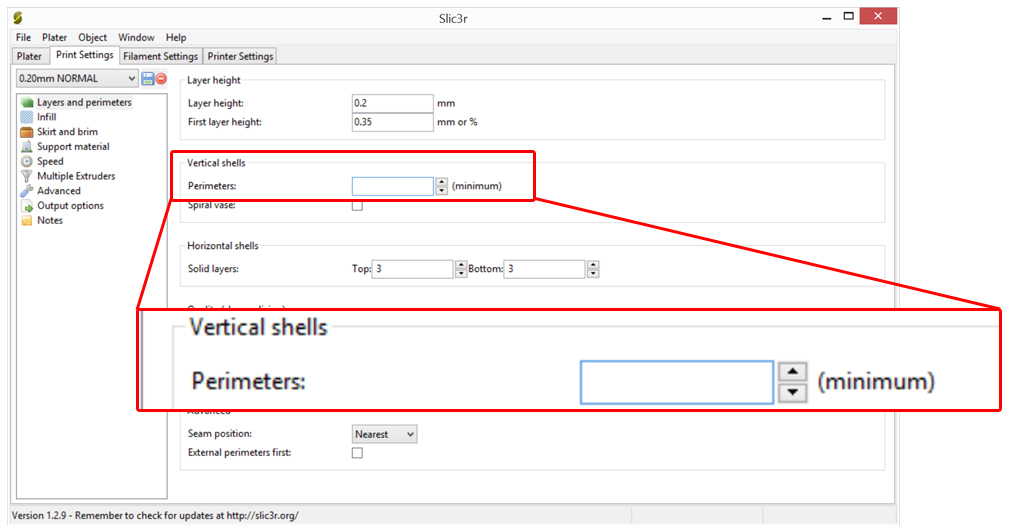
Perimeters setting is located in Slic3r program under Print setting tab in section Vertical shells.
Slic3r
The given number basically indicates how many threads will form the printed wall. The higher number the thicker wall. For the thicker wall you need more material and printing spends more time. So why would anyone wanted to use higher perimeters number?
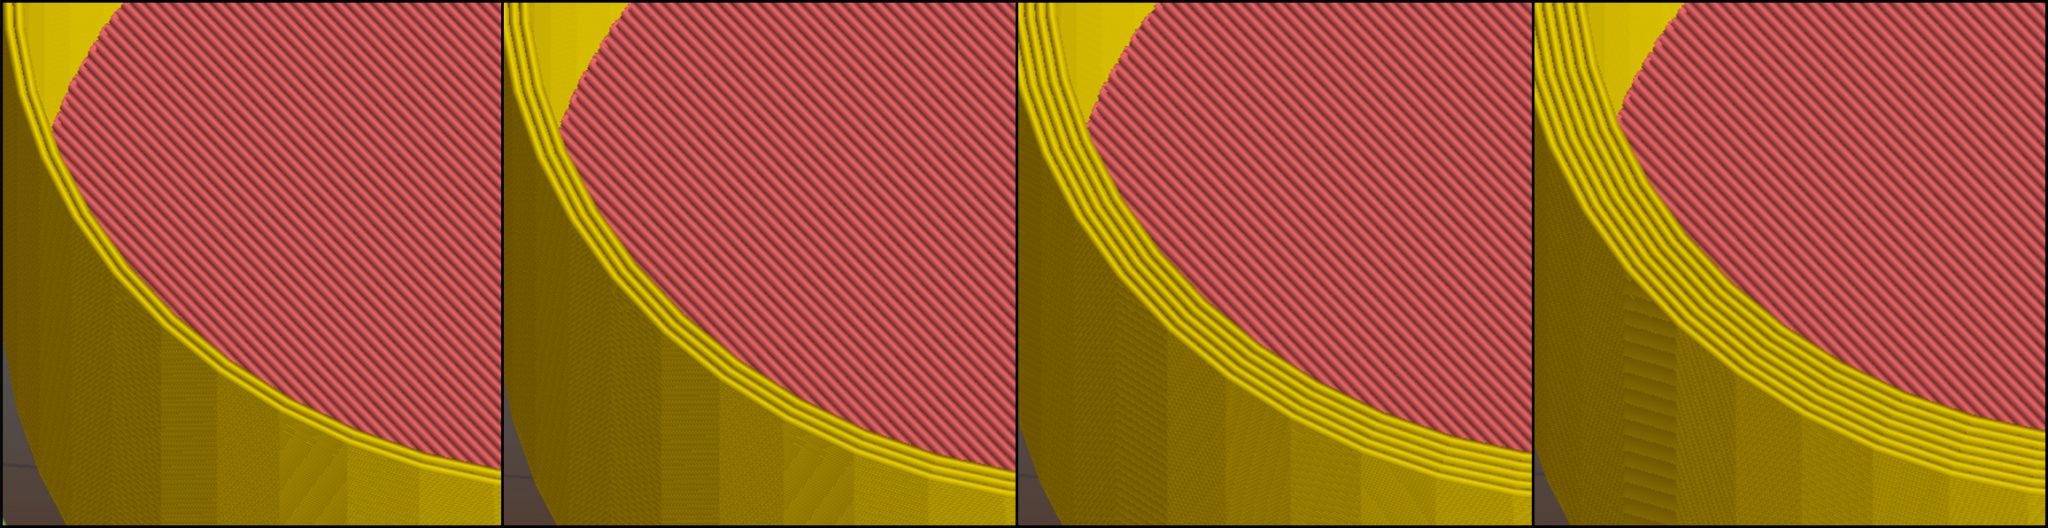
Slic3r / Plater / Print preview – PERIMETERS: 2; 3; 5; 7
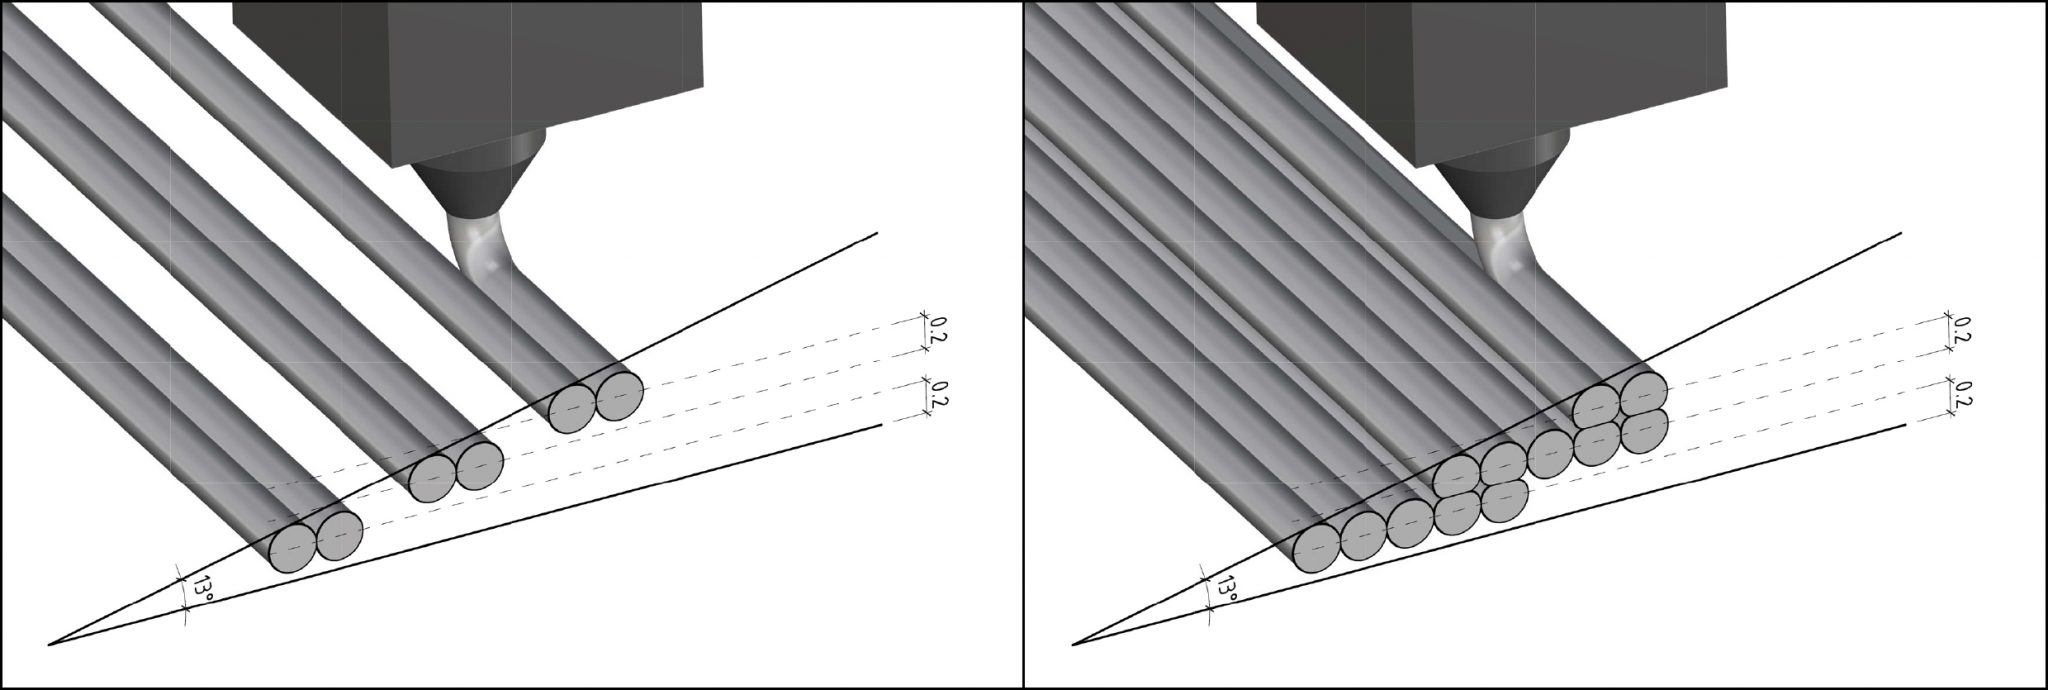
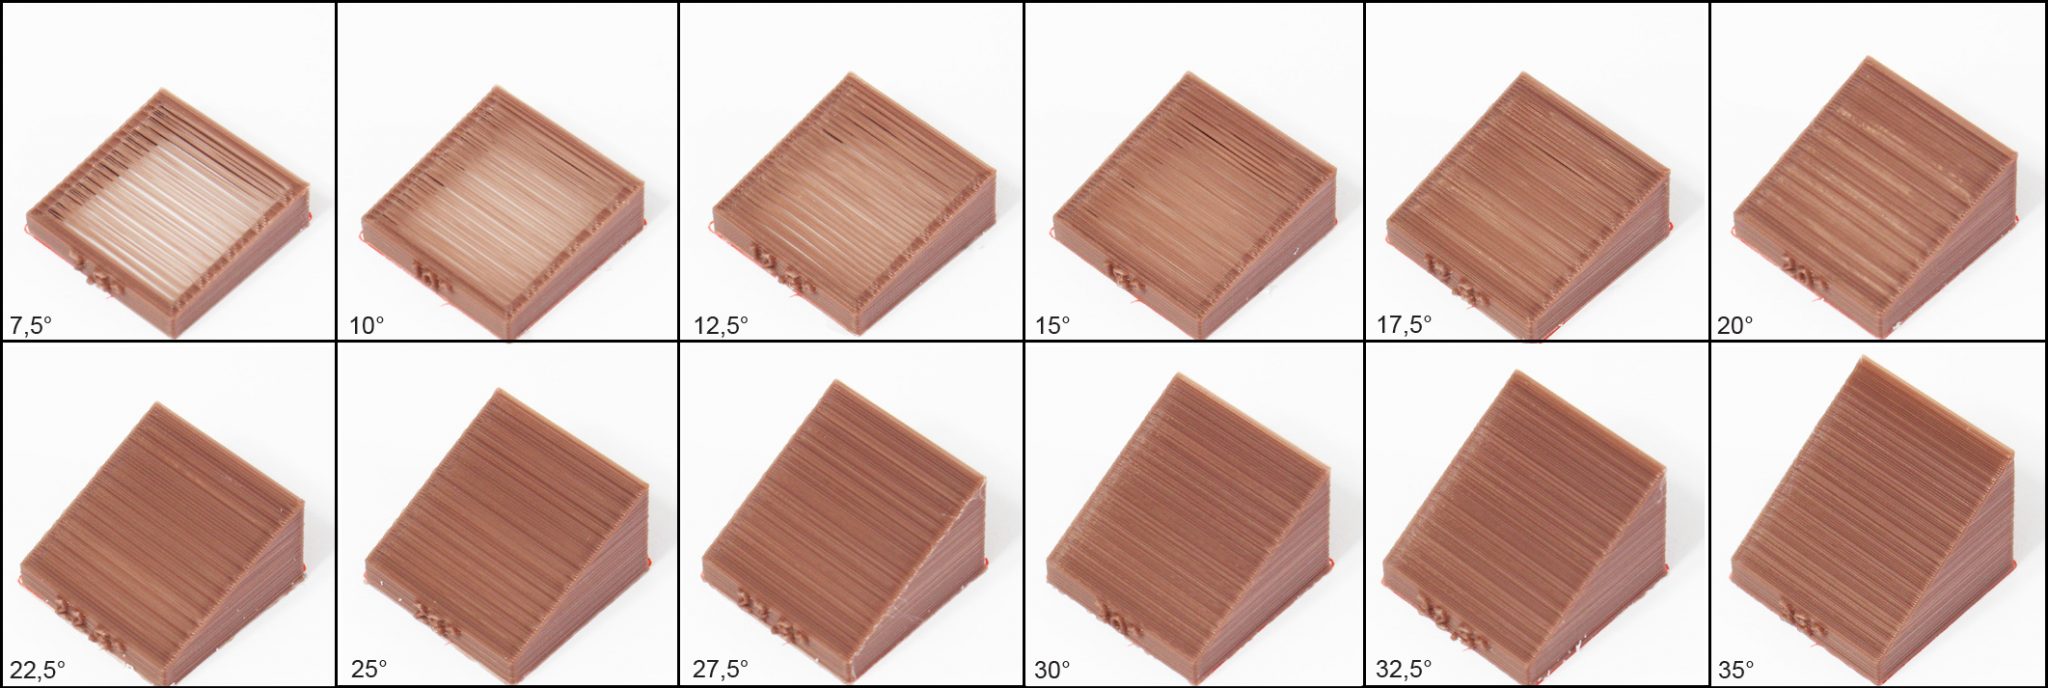
Imagine you need to print very slanting surface rising at a slight angle and you do not want you use any infill or support because the final product is supposed to be hollow. In this case an error usually occurs. The defect consists in horizontal contours that are elapsing by a larger distance than the layers are printed in vertical direction (thread diameter / slice thinness). Because of that the nozzle is forced to lay single fibres into the void and inaccuracies will happen. But the thicker wall the bigger chance to catch the fibres to the previous layer.
PERIMETERS: 2 vs. PERIMETERS:5
Rising angle: 13°; Layer height: 0.2 mm
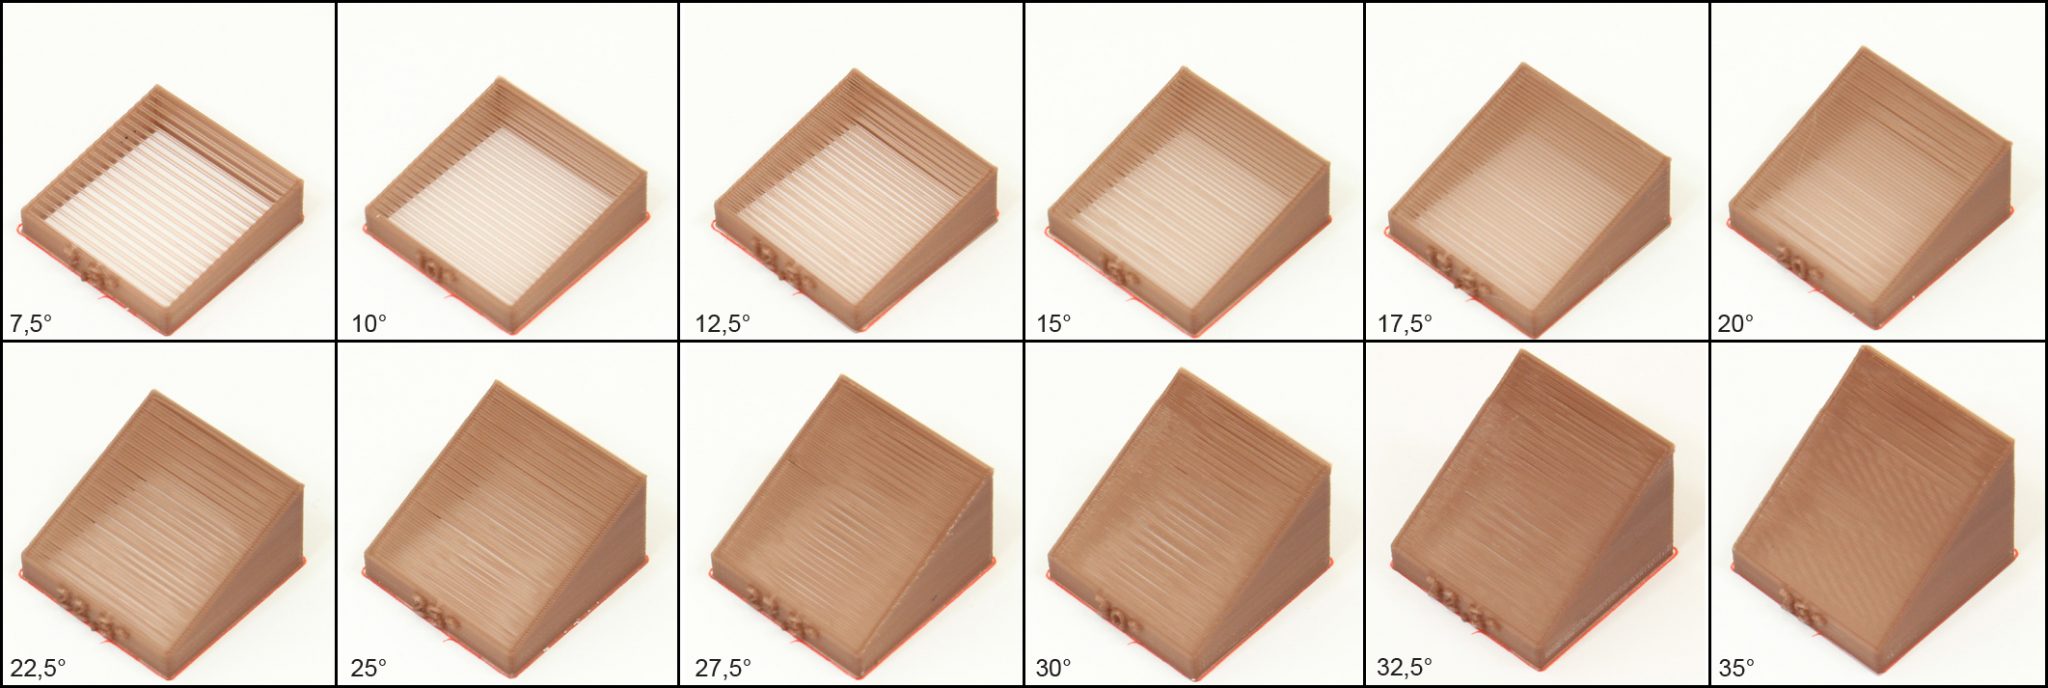
It is important to do several printing tests of critical spots to develop optimal setting. The image below shows comparison between PERIMETERS: 2 and PERIMETERS: 5 using the same set of inclined surfaces. In this case (Material: PLA-D 1,75mm; Layer height: 0.20 mm; Model size: 30 x 30 mm) is shown that PERIMETERS: 2 work fine from angle 35° and PERIMETERS: 5 can be happily used even from angle 20°. Keep in mind this model has straight applying way, for curved surfaced the PERIMETERS setting would work differently.
PERIMETERS: 2
PERIMETERS: 5
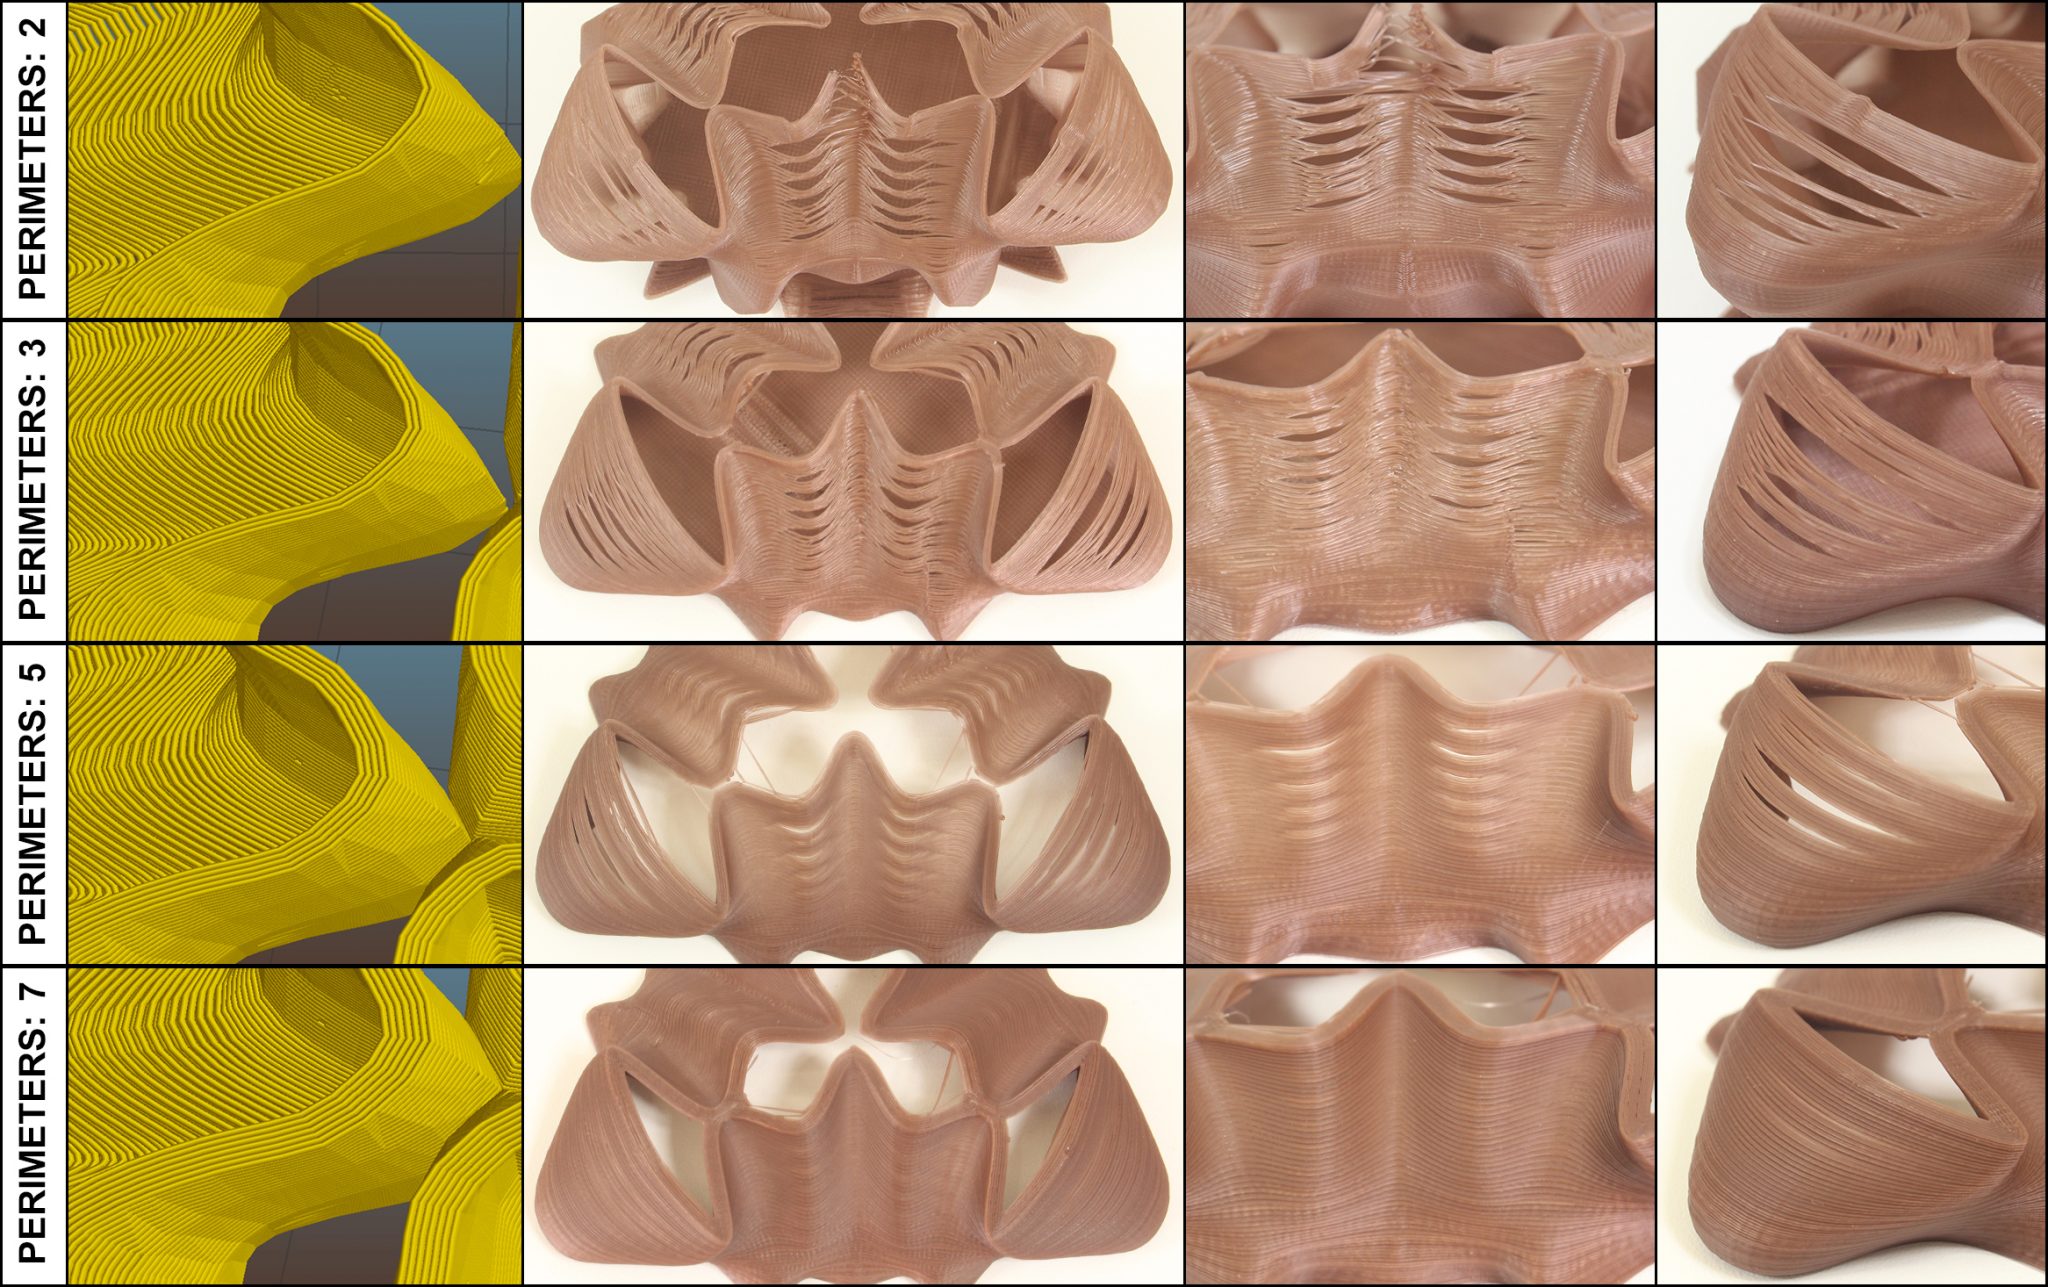
Printing defects shown on curved surfaces.
WHAT WE USE
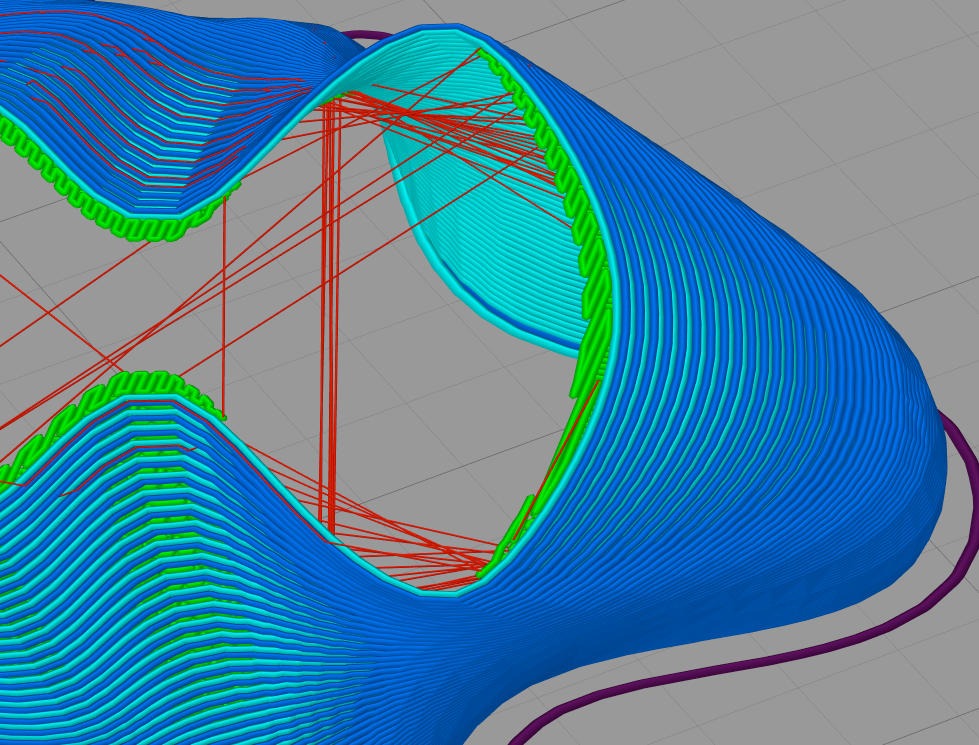
In our Prusa3D driver package we have preconfigured Slic3r to use 2 perimeters for 0.2mm layer height and more for smaller layer heights. It provides great speed to quality ratio for most parts. We set the Slic3r to print from inside out to have invisible seam from layer change, but with increasing the perimeter count, the accuracy errors can stack up with each added perimeter.
OTHER PROGRAMS
This manual shows only perimeters setting in program Slic3r. Every single program exporitng .gcode files is solving perimeters setting differently. Following printscreen shows perimeters setting in program Simplify, which computes thicker wall in critical spots. Same applies to Cura from Ultimaker. Unfortunately Cura lacks a lot of features and has really bad user interface compared to our preferred Slic3r.
Simplify
Visit here and download the full solutions of class 6th Science NCERT in free.
https://fullncertsolutions.in/category/class-6-science/